Item's Home Institution: Reporting on Lost Items
This workflow explains how to:
- Search for items in Alma that are currently marked as <Lost>
- Review the Found Lost Items Report to identify items that have been returned and had their associated fees automatically adjusted
Use this workflow when:
- Monitoring lost materials in your local collection
- Supporting billing, reconciliation, or audit processes
- Identifying items that have been returned after being declared lost
- Coordinating with bursar or financial systems to ensure accurate fee removal
Required Roles
-
Fulfillment Operator
-
Circulation Desk Manager
-
Access Services Manager
PART A: Searching for Items Marked as <Lost>
1: Open Advanced Search Select the <Advanced Search> link in Alma

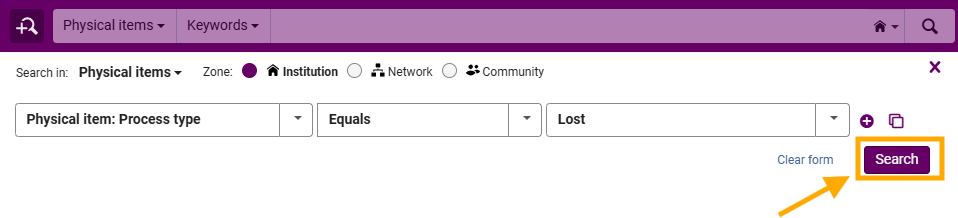
3: Apply Process Type Filter
- In the search criteria:
- Select <Physical Item: Process Type>
- Set the operator to <Equals>
- Select <Lost>
4: Run the Search Click <Search>
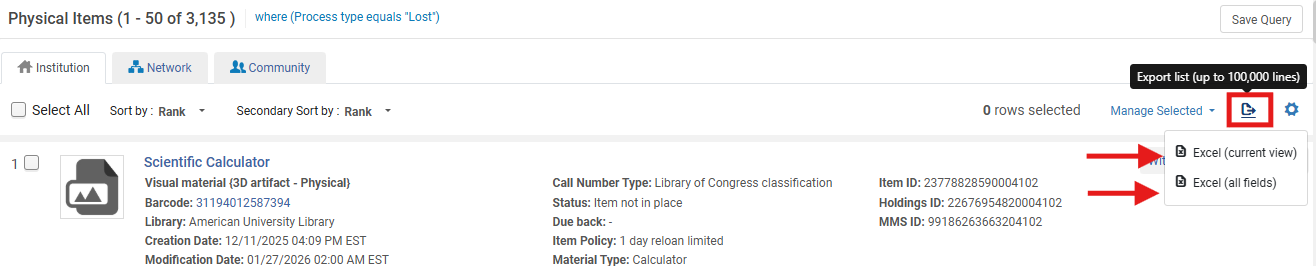
5: Review Results The results list will display all items currently marked as Lost
- Review item details as needed, including:
- Location
- Barcode
- Associated patron (via loan record)
- You can also use the Export icon drop-down menu to download an Excel spreadsheet of the report; Alma provides two options when exporting results to Excel. These options determine how much data is included and how it is structured in the exported file:
- <Excel Current View> Exports only the fields that are currently visible on the screen.
- What this includes:
- Columns displayed in your current results view
- Any column customizations you have applied (for example, reordered or hidden fields)
- A simplified dataset focused on what staff are actively viewing
- When to use this option:
- Quick review or sharing of visible results
- Basic reporting or troubleshooting
- Situations where only key fields are needed
- What this includes:
- <Excel All Fields> Exports a complete dataset for each record, including fields that are not visible in the current view.
- What this includes:
- All available metadata for the record
- Additional system fields not displayed in the UI
- More detailed and comprehensive information
- When to use this option:
- Detailed analysis or auditing
- Situations where hidden or backend data may be needed
- Detailed analysis or auditing
- What this includes:
- <Excel Current View> Exports only the fields that are currently visible on the screen.
What Happens Automatically in Alma: When a Lost item is returned:
-
Alma removes or adjusts the lost item fee (based on configuration)
-
The loan is updated or closed
-
The item is no longer in Lost status
-
The transaction is recorded in the Found Lost Items Report
Frequently Asked Questions
-
Why should I search for lost items regularly?
-
To monitor outstanding materials and support reconciliation, billing, and collection management.
-
-
Do I need to remove fees manually in Alma?
-
Usually no. Alma handles this automatically based on configuration, but external systems may still require action.
-
-
What if an item still appears as lost after being returned?
-
Verify that the item was properly discharged and that the loan status updated correctly.
-
-
How often should the report be reviewed?
-
Follow your library's in-house policies for guidance
-
- Does this report include CLS Lost items?
- No. CLS Lost items can only be provided from the Network Zone. However, you can always submit a WRLC Service Desk ticket to make a request for a CLS NZ Loan Report of your library's patrons.
No comments to display
No comments to display