How to Manage Fines and Fees
This workflow describes how library staff can view, pay, apply, waive, dispute, and restore fines and fees. It also covers how to view patron-visible notifications related to fines and fees.
When to Reference This Document:
-
When patrons pay outstanding fines or fees at a service desk.
-
When Access Services staff apply new fines or administrative charges.
-
When staff waive, dispute, or restore disputed charges based on institutional policy.
-
When reviewing what notices Alma sent to patrons concerning fines and fees.
Required Roles
- Fulfillment Operator
- Circulation Desk Manager
Part I: Viewing and Paying Fines from the Patron Services Screen
1: Access the Patron Record Navigate to Fulfillment > Checkout/Checkin> Manage Patron Services> look up the patron’s record as though checking out items.
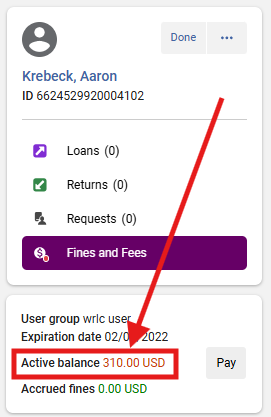
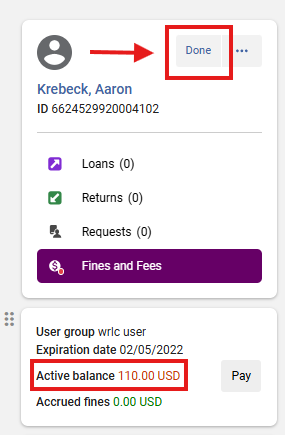
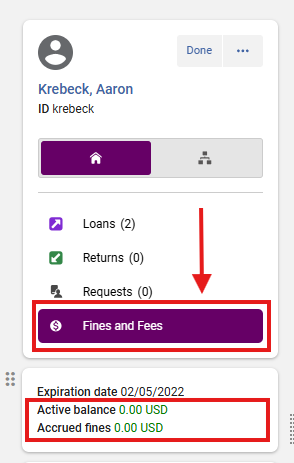
2: Review the Patron’s Active Balance The patron’s Active balance appears under their name.
3: Send an Activity Report (Optional) From the patron’s summary area, open the row action menu (⋯); Select <Send Activity Report> to email the patron a circulation summary, including fines and fees.
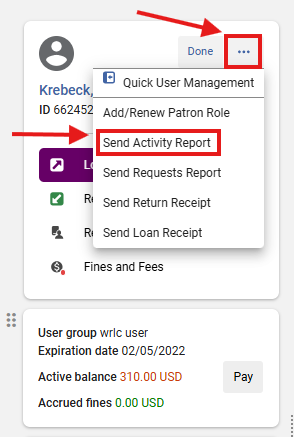
Why This Matters: Activity Reports provide patrons with documentation of charges, payments, and circulation activity. Library staff may consider adding this step for transparency and dispute resolution.
4: Pay Fines/Fees Select the <Fines and Fees> tab.
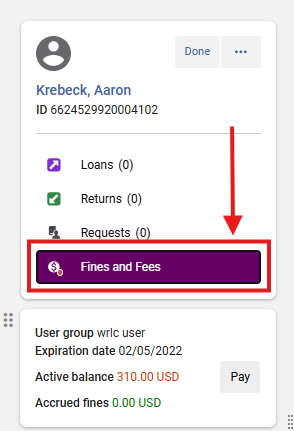
- To pay all selected fines, click <Pay> in the upper right.
- To pay a single fine, click <Pay> next to the specific charge.

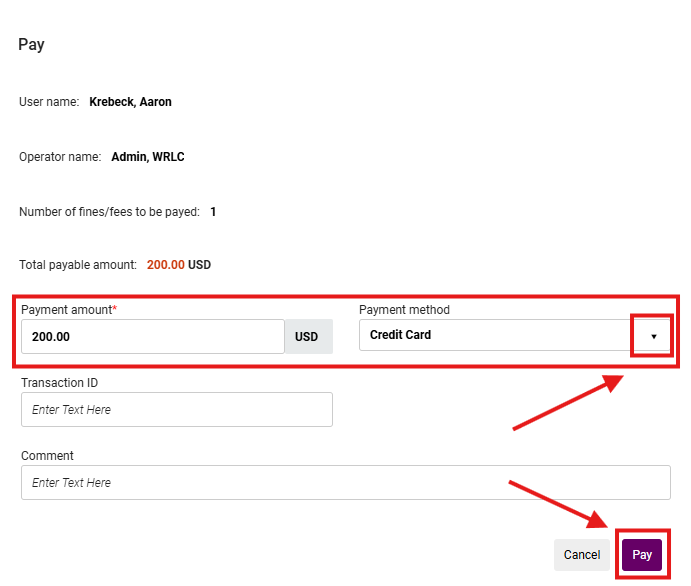
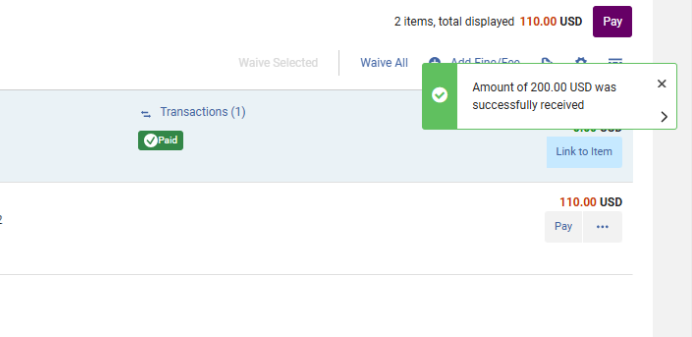
5: Complete the Payment In the Payment Details screen:
- Select a Payment method from the dropdown.
- Enter the Payment amount.
- Click <Pay>.
6: Confirmation Pop Up Note Alma immediately adjusts balances and records the payment in the patron’s account history and audit trail.
7: Closing the Process The fine is now recorded as having been paid. You may continue helping the patron from the Patron Services screen, or click "Done" to exit.
Part II: Applying a Fine or Fee to a Patron Account
1: Access the Patron Record Navigate to Fulfillment > Checkout/Checkin> Manage Patron Services; look up the patron’s record as though checking out items.
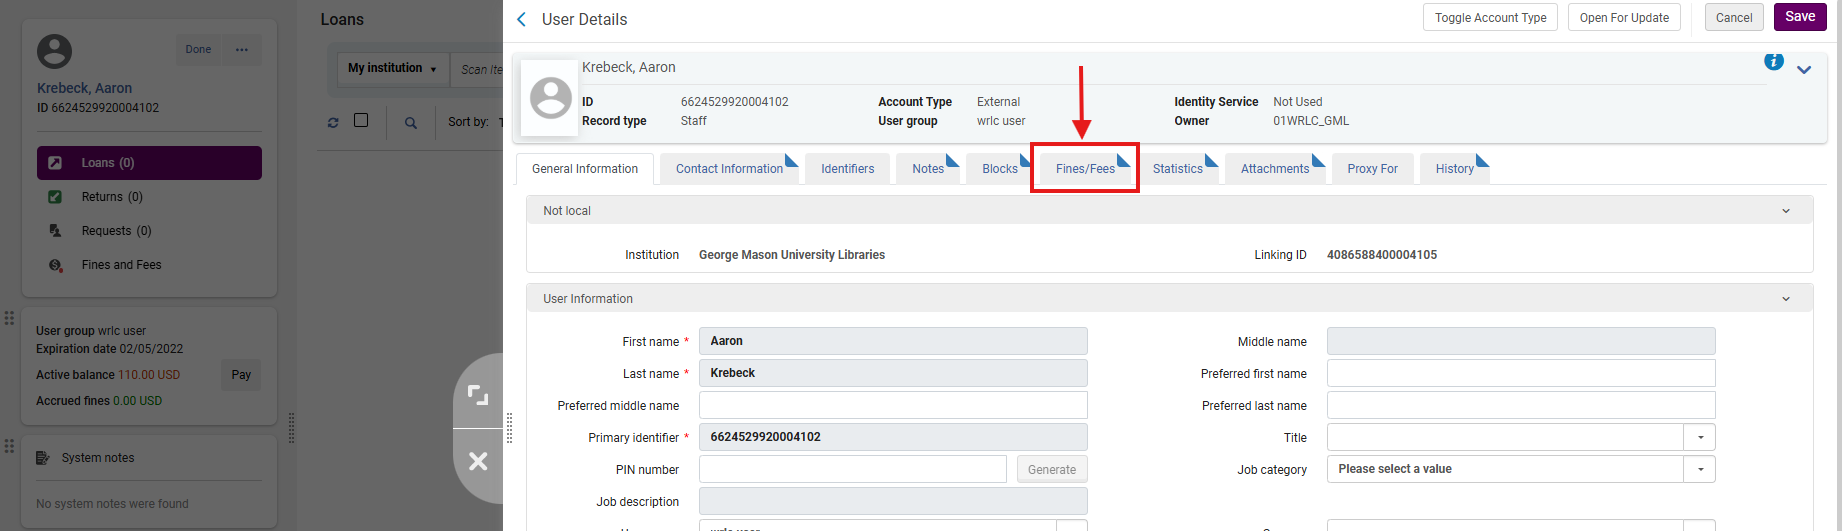
2. Access User Details Screen Click on the patron's name to open the right hand side panel and access the User Details screen
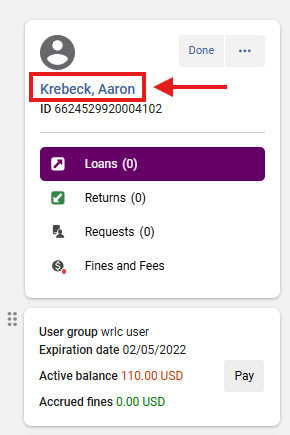
- Click on the <Fines/Fees> tab
3: Add a New Fine or Fee Click <Add Fine or Fee>
- Required fields:
- Fee Type (dropdown)
- Fee Amount (manual entry)
- Add additional fields if applicable (e.g., item, note). Libraries are strongly encouraged to standardize fee types for anyalytics accuracy

4: Save the Fee or Fine Click <Add> to apply additional charges
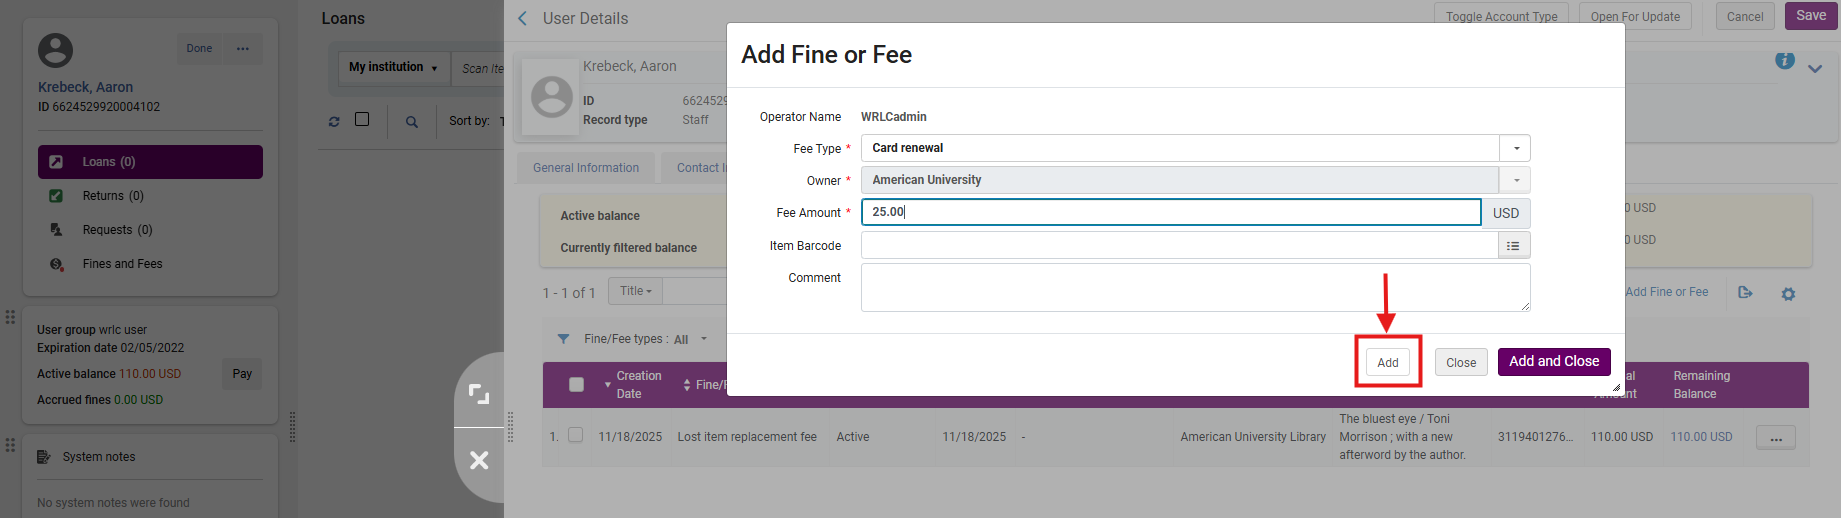
- or Click <Add and Close> to finish
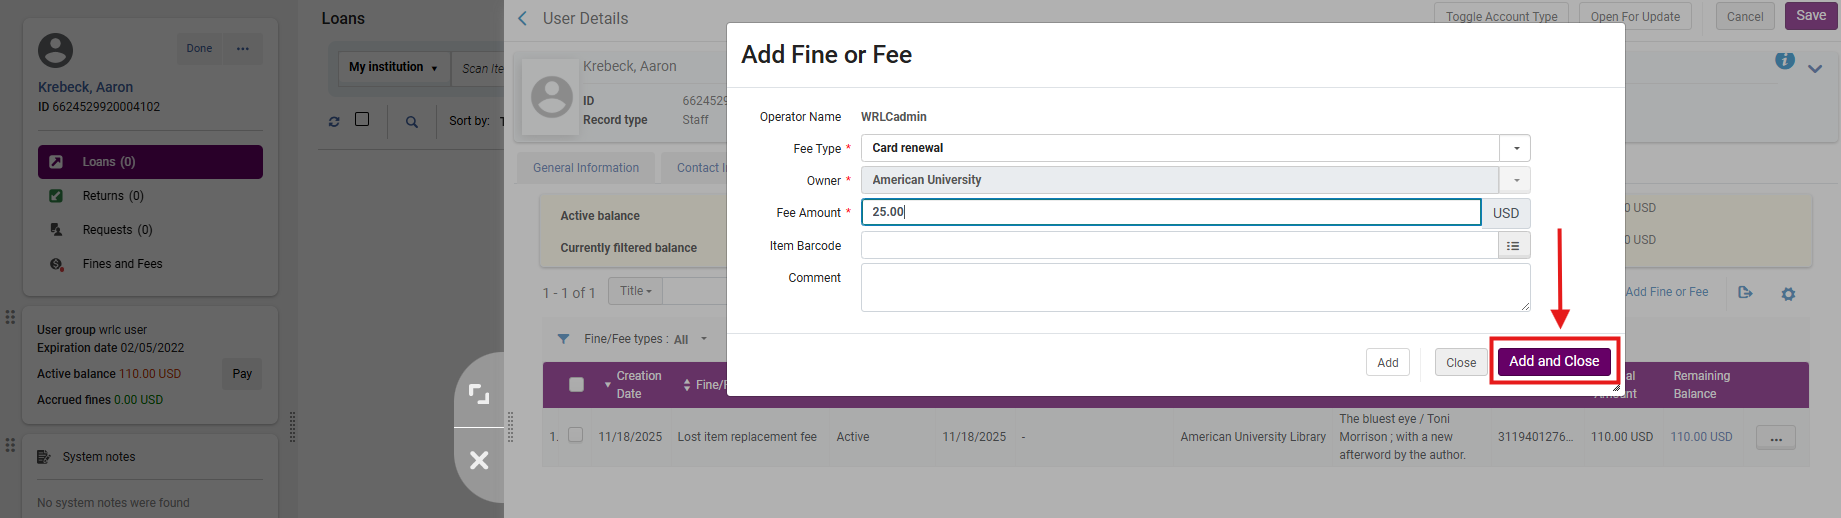
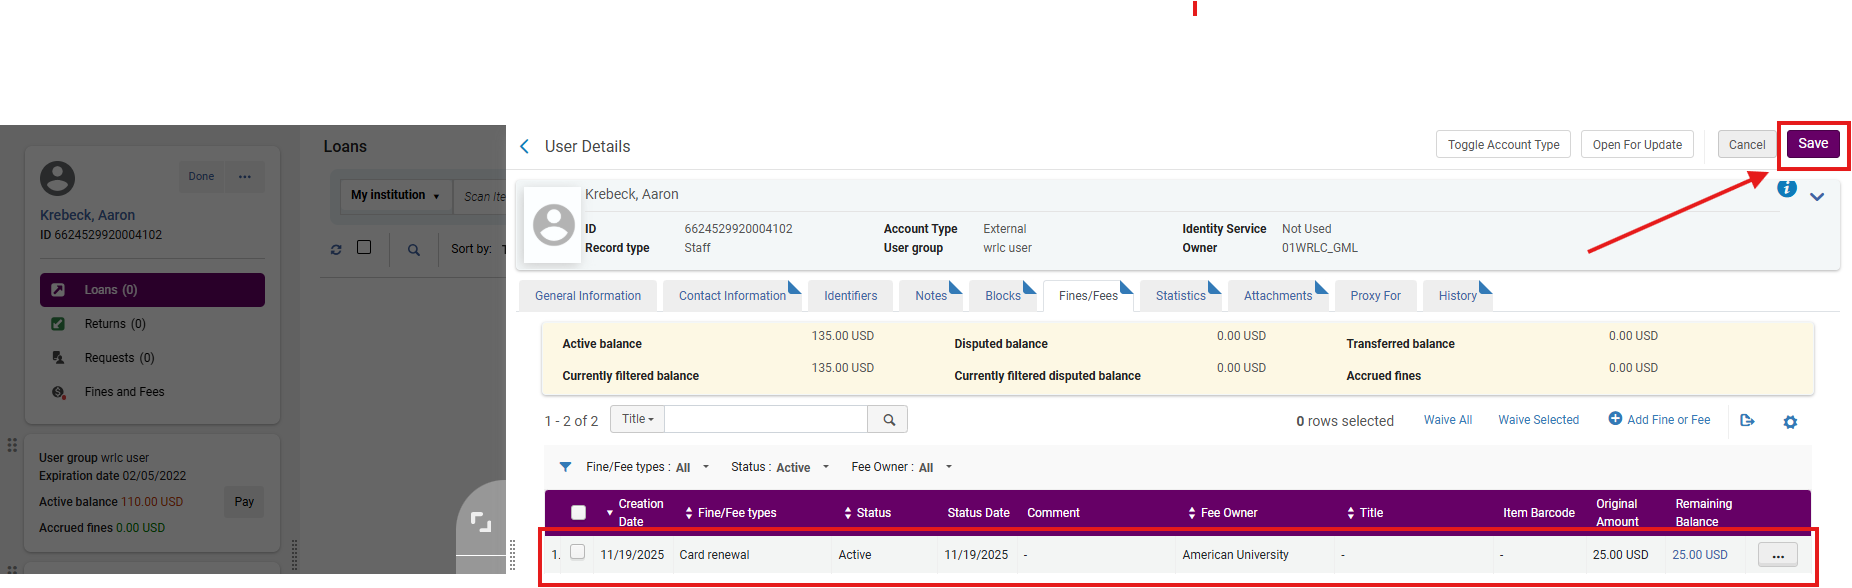
- Then click <Save> on the User Details screen.
Part III: Waiving a Fine or Fee
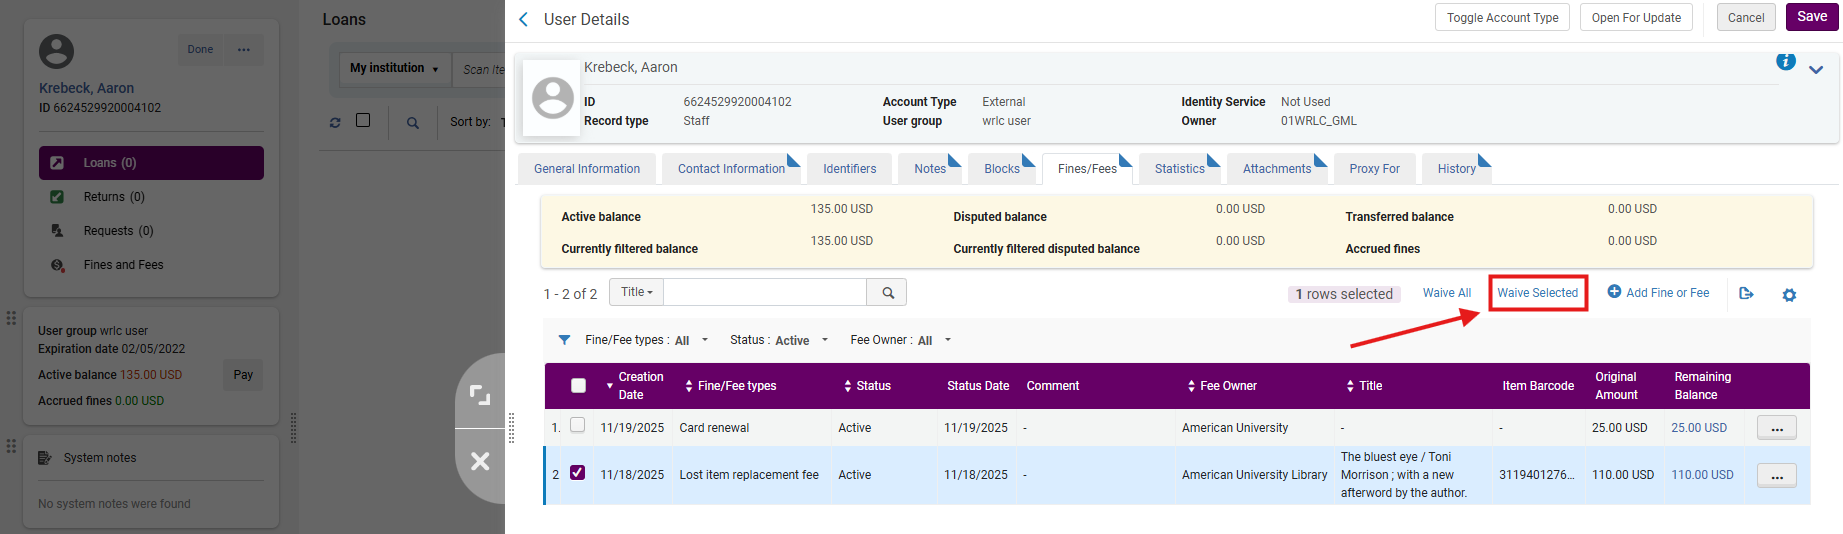
1: Select the Fine to Waive In User Details > Fines/Fees, select the fine(s).
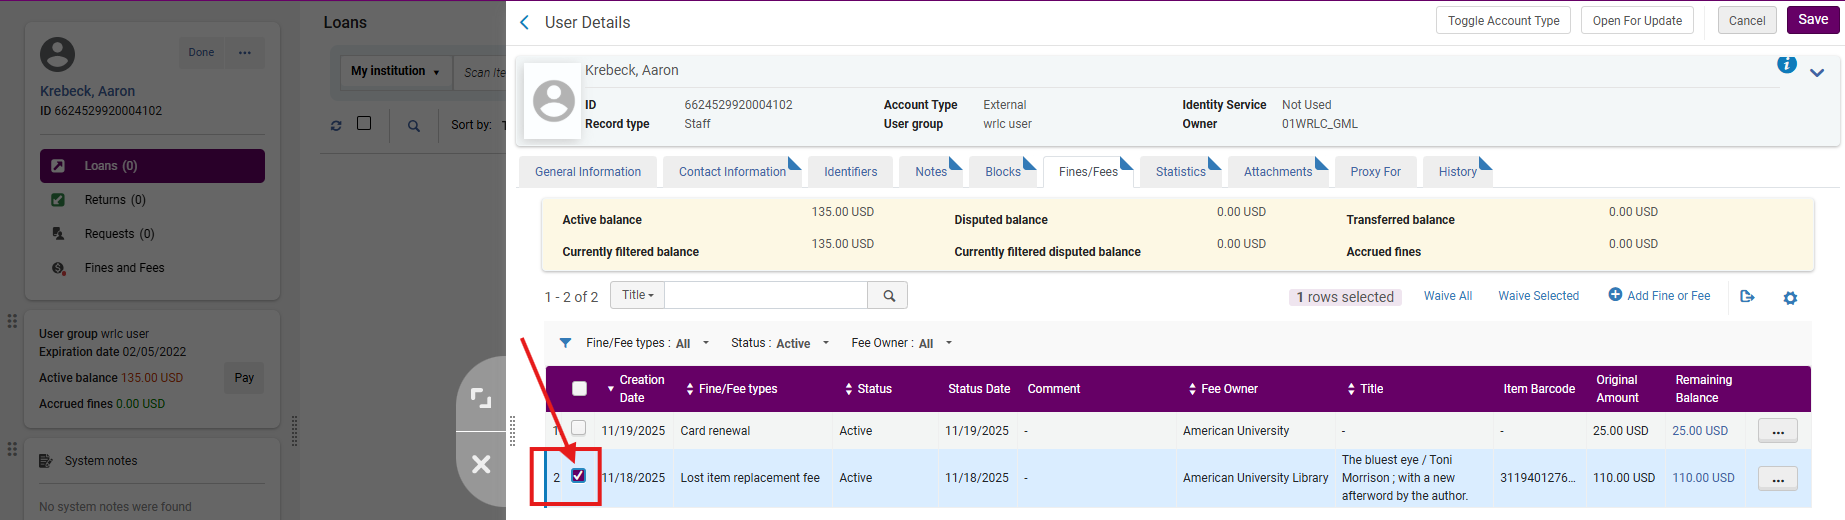
- Click <Waive Selected>.
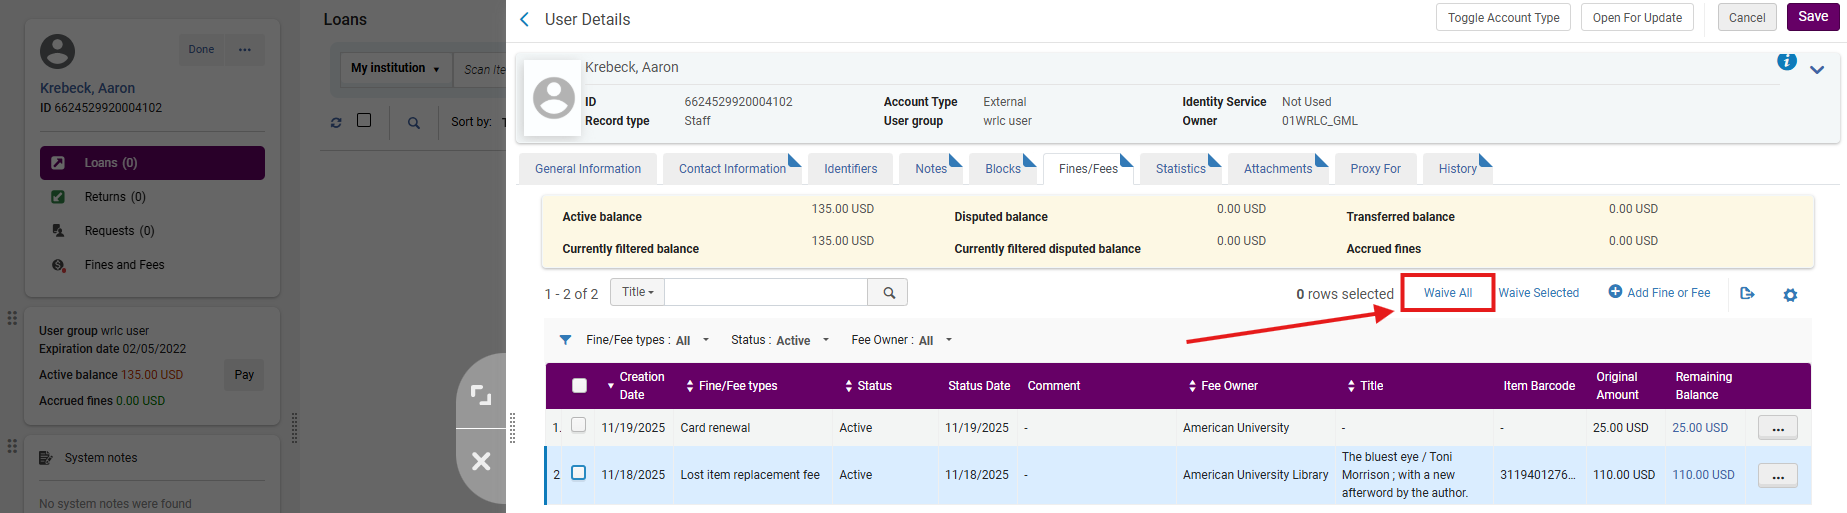
- or, Click <Waive All> to waive all listed Fines/Fees
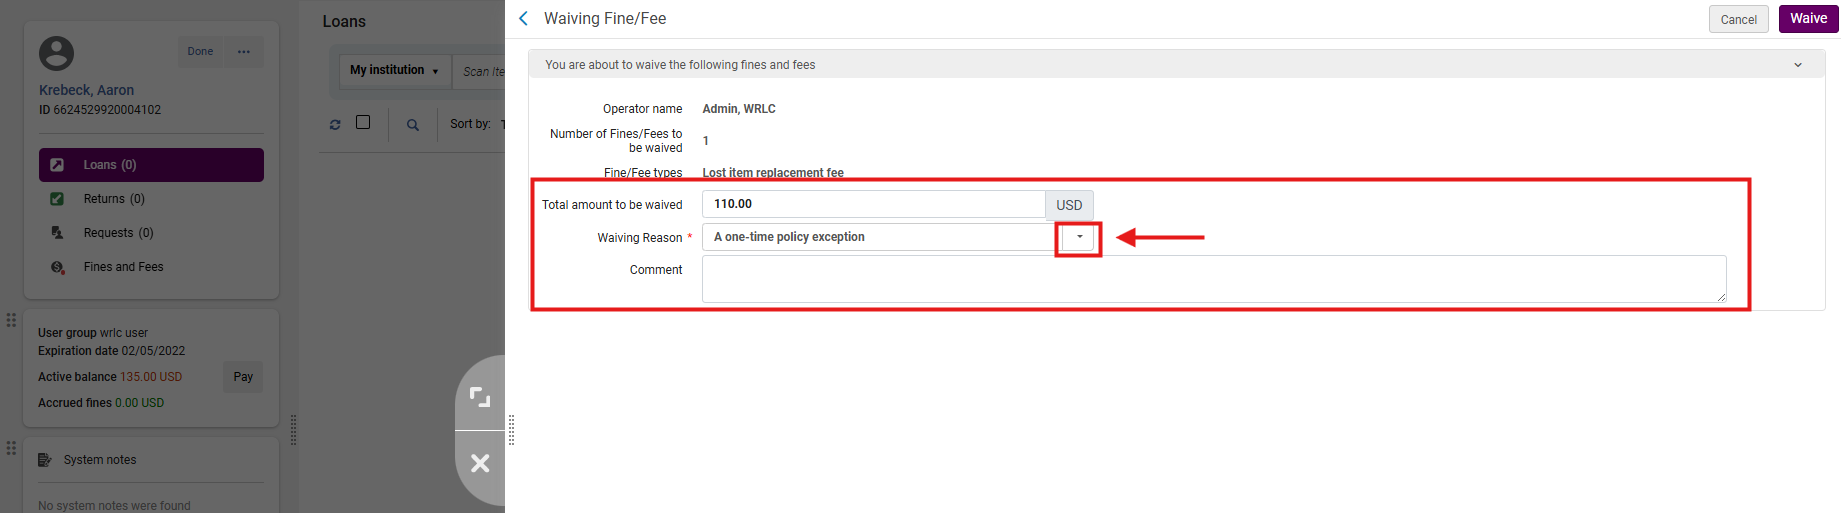
2: Complete the Waive Action In the waiver window:
- Use the <Waiving Reason> drop-down menu to select a Waiving Reason (required)
- Add notes if appropriate.
Note: Waiver reasons support institutional policy and are essential for audit purposes. Libraries are encourged to standardize and document reasons for financial adjustments.
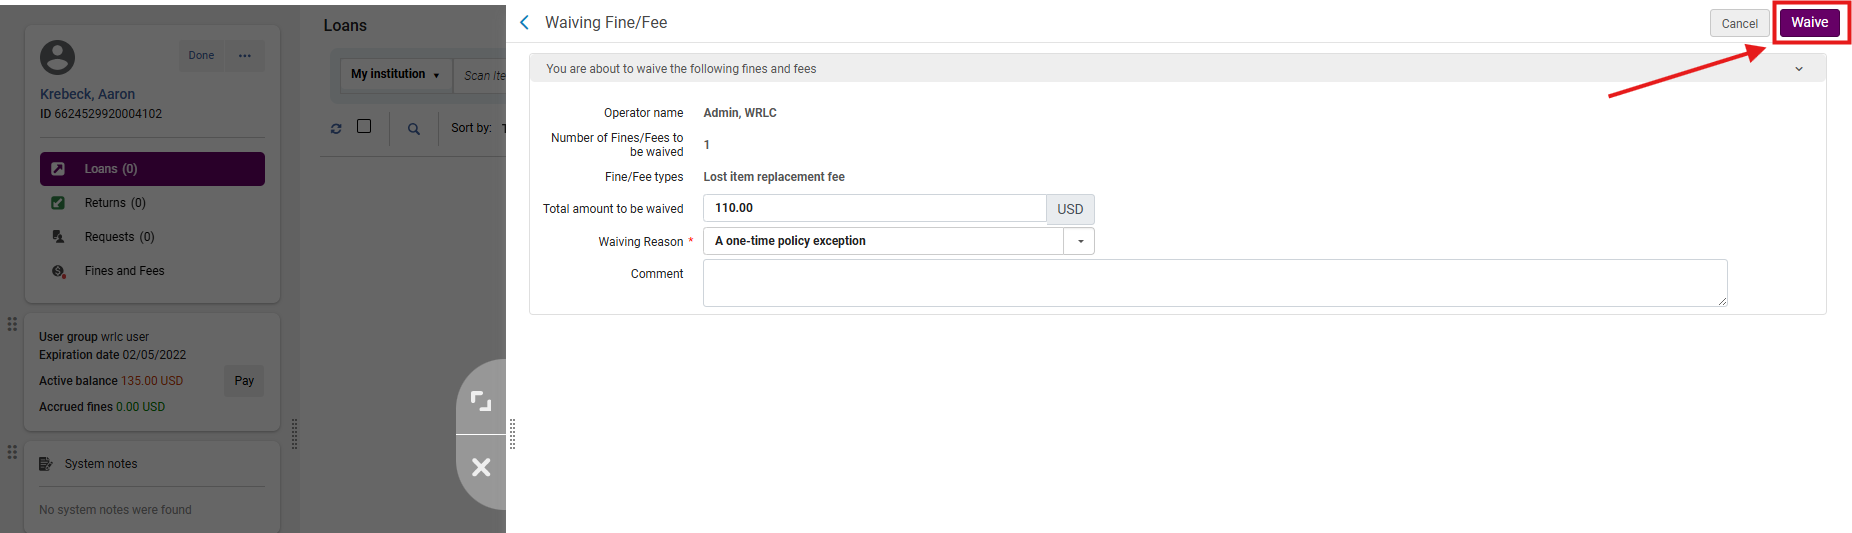
- Click <Waive>
- On the confirmation screen, click <Confirm>.

- Click <Save>.
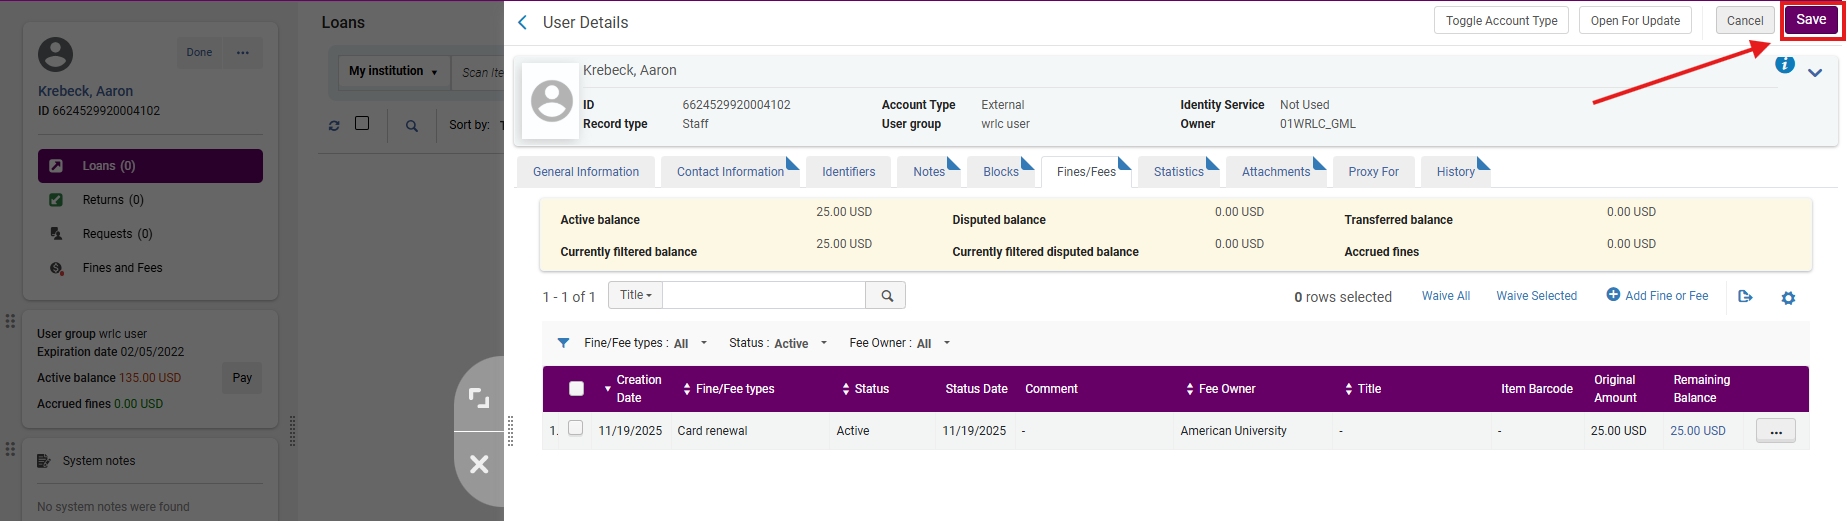
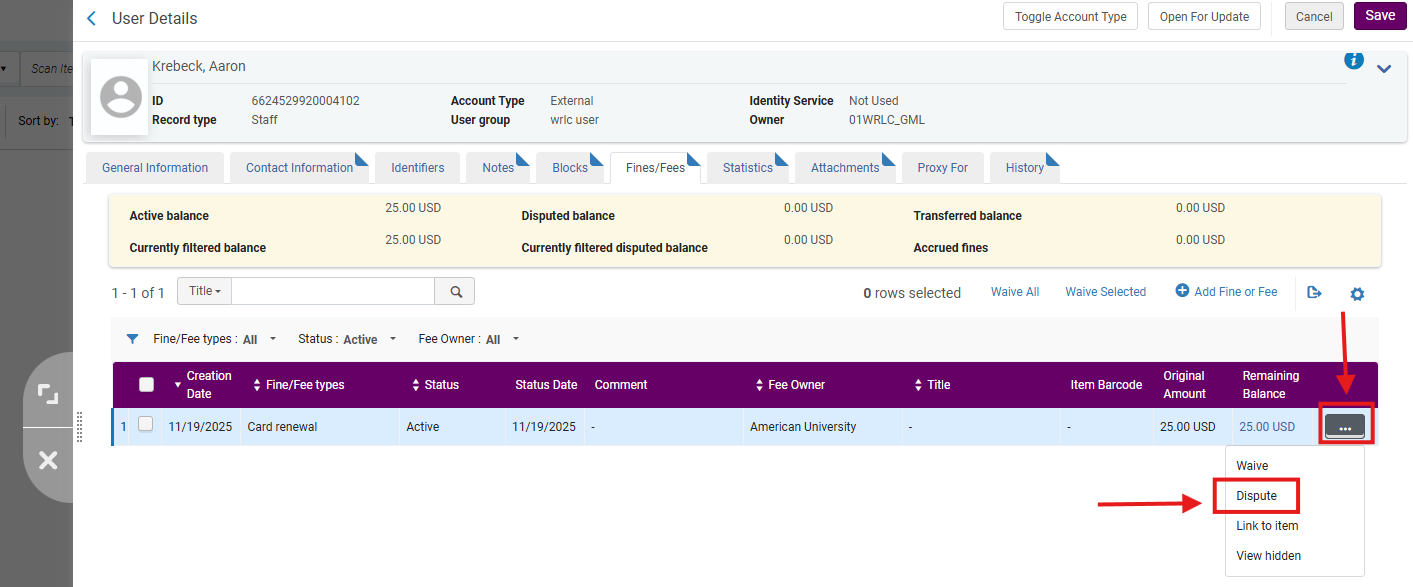
Part IV: Disputing a Fine
1: Mark a Fine as Disputed In User Details > Fines/Fees, open the row action menu (⋯) next to the fine; select <Dispute>
- In the Dispute screen, add comments if needed; Click <Dispute>
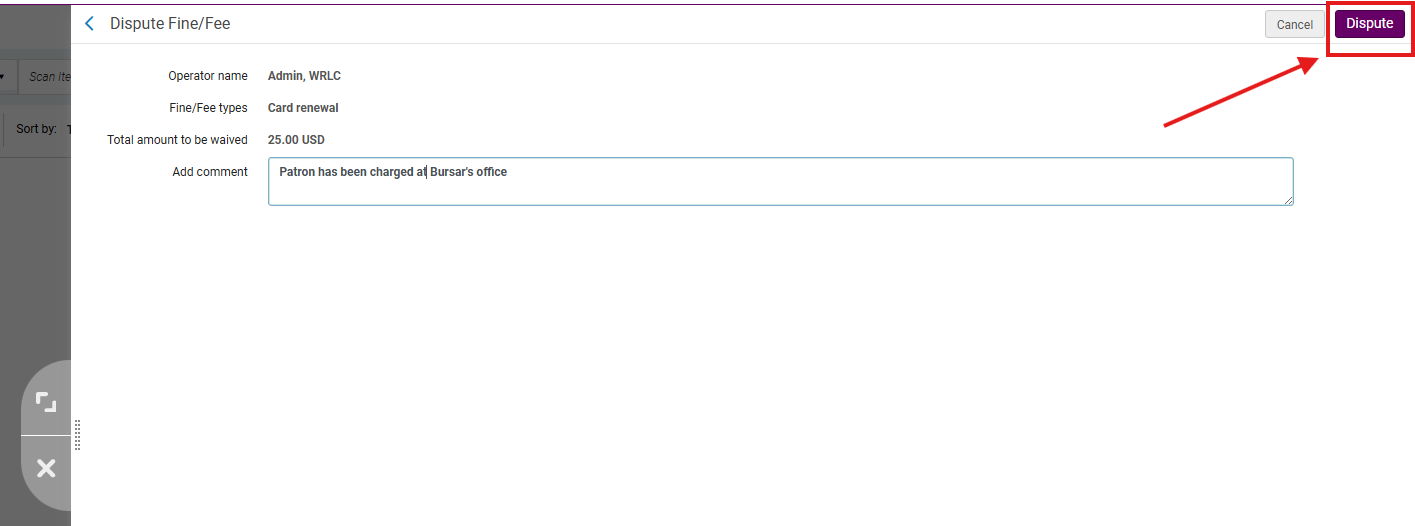
- Then <Confirm>

- Then <Save>
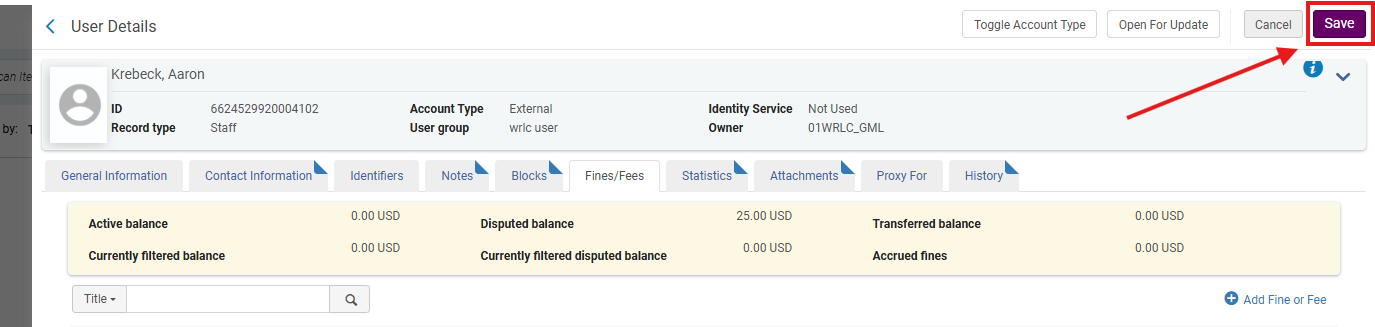
Note: Disputed fines remain frozen until staff waive or restore them. This prevents premature payment or overdue penalties.
Part V: Restoring a Disputed Fine
1: Access the Patron Record Navigate to Fulfillment > Checkout/Checkin> Manage Patron Services; look up the patron’s record as though checking out items.
- Click on <Fines and Fees>
Note: The Active Balance does not reflect an amount because the fine is in Dispute
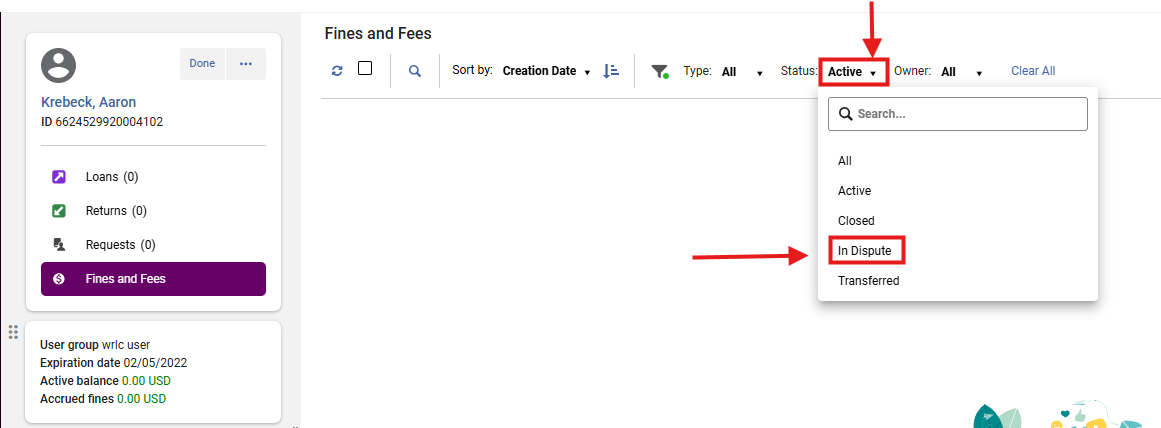
2: Filter for In-Dispute Fines In the Fines/Fees ribbon menu, open the Status dropdown menu; Select <In Dispute>
3: Restore the Fine Open the row action menu (⋯) for the fine; Select <Restore>

- Add comments if needed; Click <Restore>
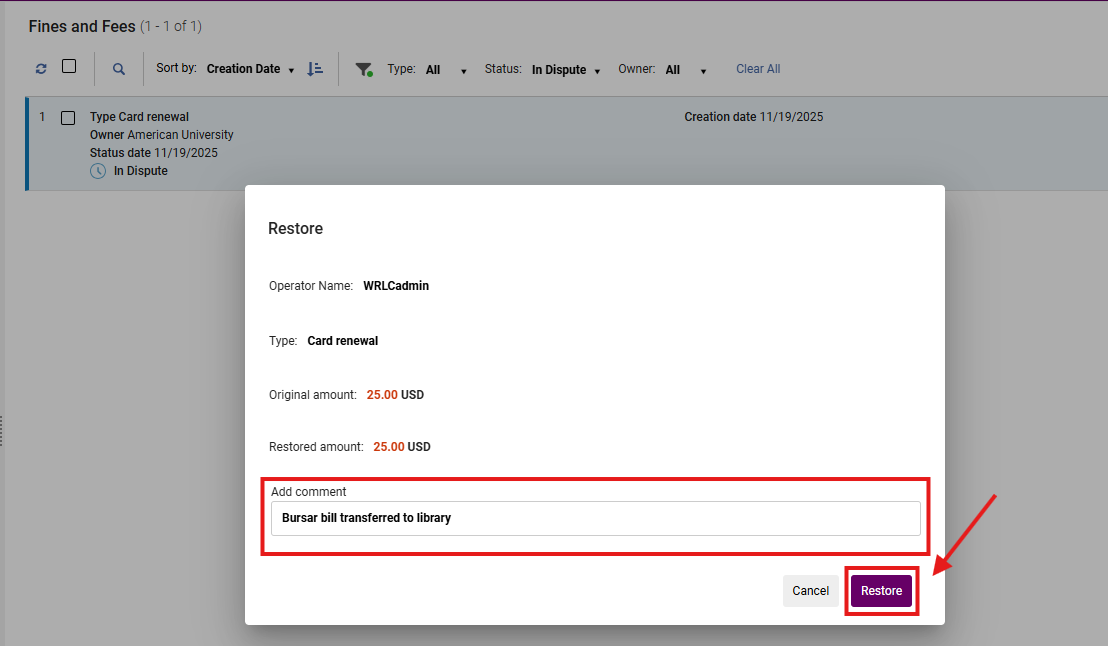
- Restored fines become active again and may resume accruing or require payment; added Comments are displayed

Part VI: Reviewing Patron Notifications
1: View Attachments In User Details, select the <Attachments> tab; Review any notification letters (fines, overdue notices, receipts) sent to the patron.

Note: This is the authoritative log of all Alma-generated patron communications
No comments to display
No comments to display