Primo NDE UI
Updating the Landing Page using Landing Page Configuration
Using the Landing Page tab and Labels to manage your view's landing page, e.g. https://wrlc-gu.primo.exlibrisgroup.com/nde/home?vid=01WRLC_GUNIV%3AGUQ&lang=en
Role required: Discovery Administrator OR View Management
Landing Page tab
To access the Landing Page Configuration tab, navigate to your view: Discovery > Display Configuration: Configure Views > Click the three dots button for your view > Edit
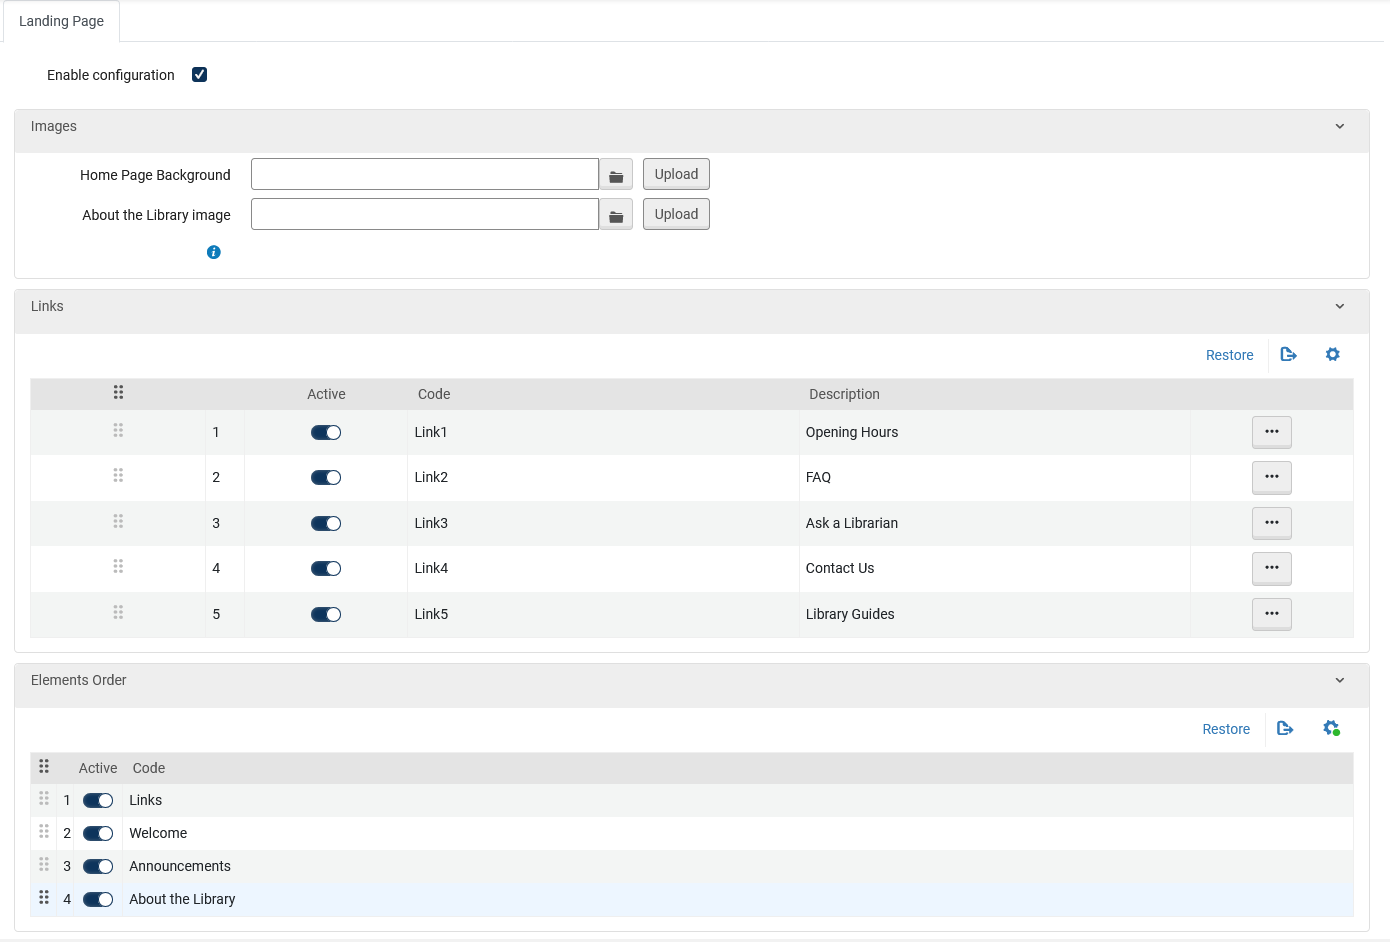
The Landing Page tab is the last one listed:

When you click on it, make sure the "Enable configuration" box is checked. Otherwise, your changes won't be visible in Primo.
Images, Links, and Elements
The Images section is for uploading custom images for the Home Page Background (behind the search bar) and the About the Library section. Recommended image dimensions and filetypes are in the Ex Libris documentation about Configuration Changes for the Landing Page (opens in new tab).
The toggles for the Links and Elements controls their visibility; toggling them off is an easy way to hide something that you don't currently need --e.g. if you don't have any Announcements to display right now.
Links
You can do all your Links edits from this page, just click on the three dots button to access the Description (link text), the linked URL, and the icon shown in Primo.

A list of the icons and their filenames is in the Ex Libris documentation about Configuration Changes for the Landing Page (opens in new tab).
Elements
The Elements are the sections on the NDE landing page; the only thing you can do here is turn them on or off. So, for example, if you don't want the Links section to display, you'd toggle it off here rather than turning off each link in the Links section--that would still keep an empty section where the links ought to be on your Landing Page.
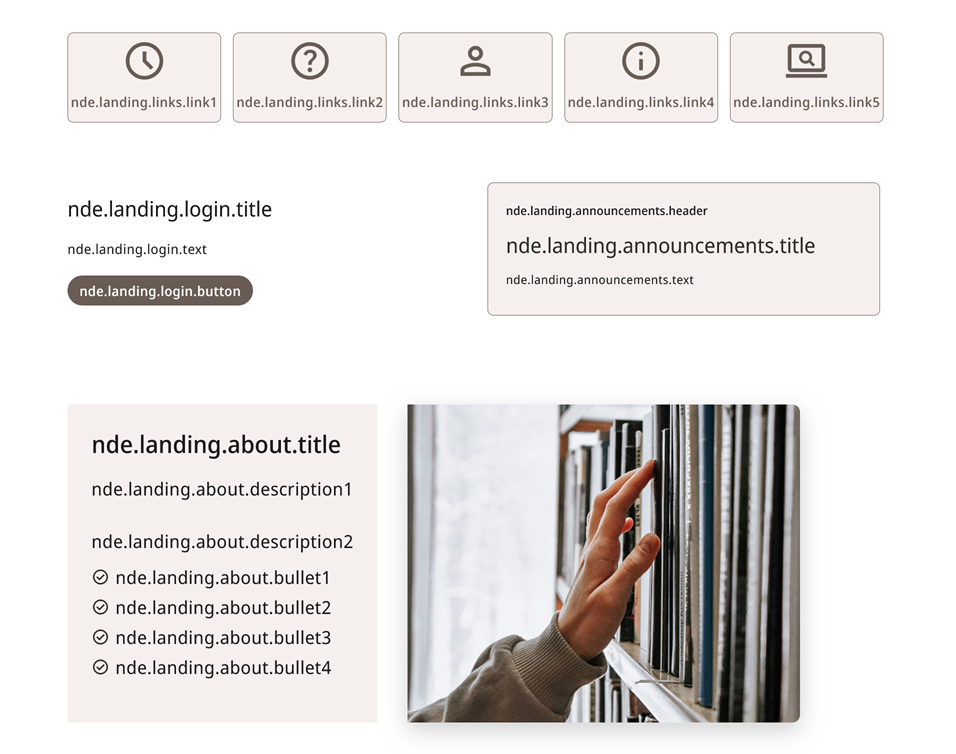
To edit the text that appears within the Welcome, Announcements, and About the Library areas of the page, you need to modify the Labels. You can figure out what label needs to be modified by adding &debugLabels=true to the end of your Primo URL, e.g. https://wrlc-gu.primo.exlibrisgroup.com/nde/home?vid=01WRLC_GUNIV%3AGUQ&lang=en&debugLabels=true
What you'll see looks something like this:
Labels
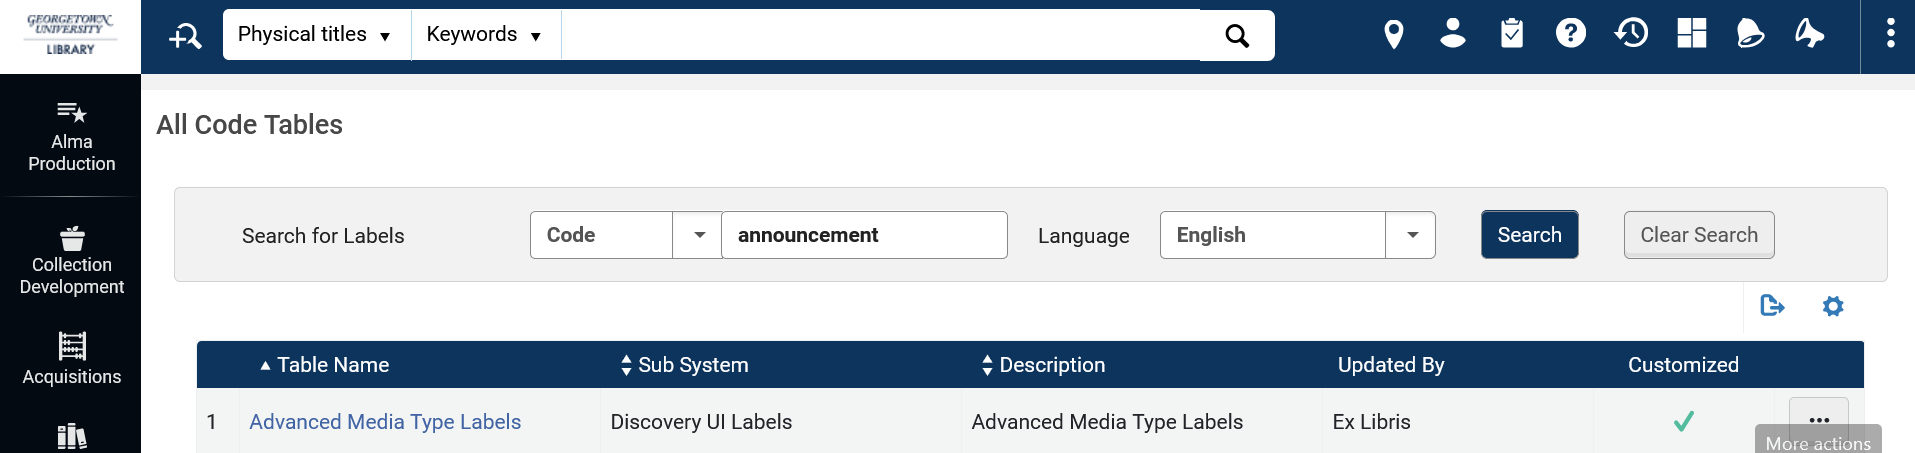
To access the Landing Page Labels table, navigate to: Discover > Display Configuration: Labels > then search for the correct Labels table --in the screenshot, I searched for announcement but you can also search landing, for example.
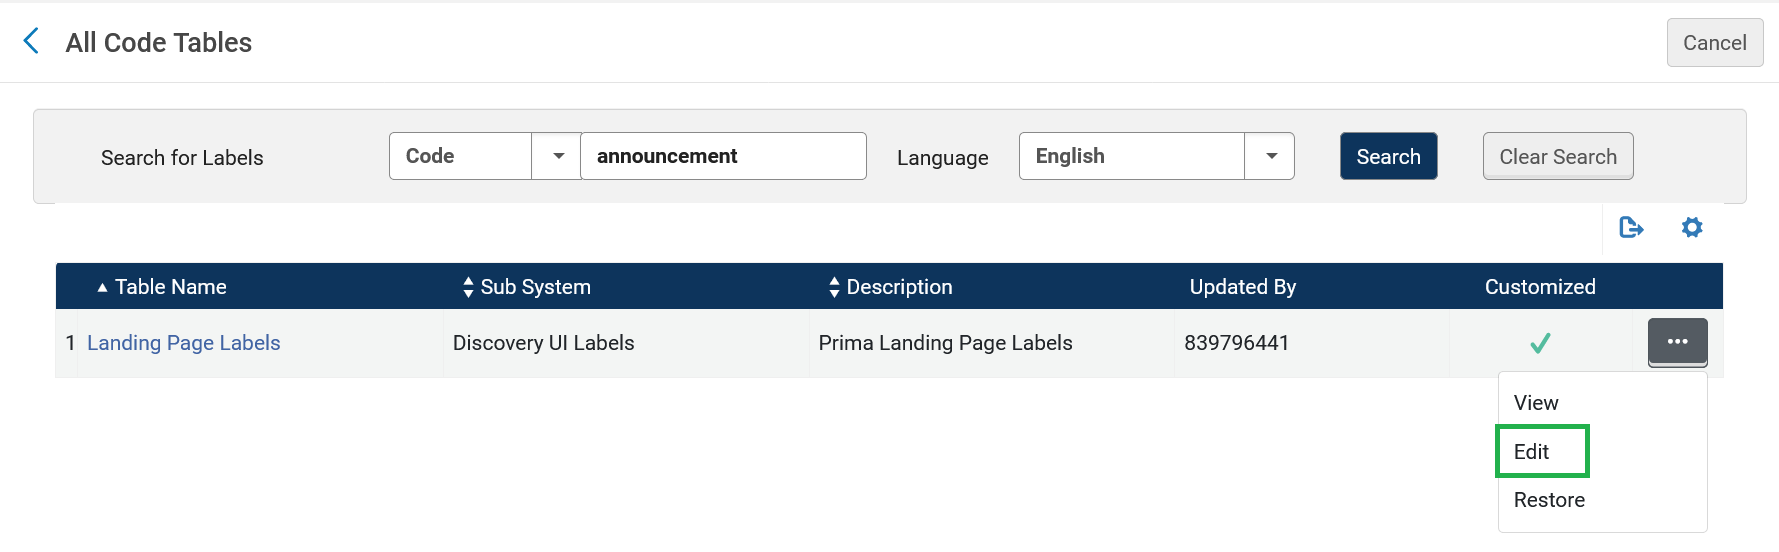
To be able to Edit the labels, you MUST click the three dots and select Edit. Clicking the table name takes you to the read-only view.
The labels in the list often display in a seemingly random order, so you may need to scroll or search for the label you want to edit.
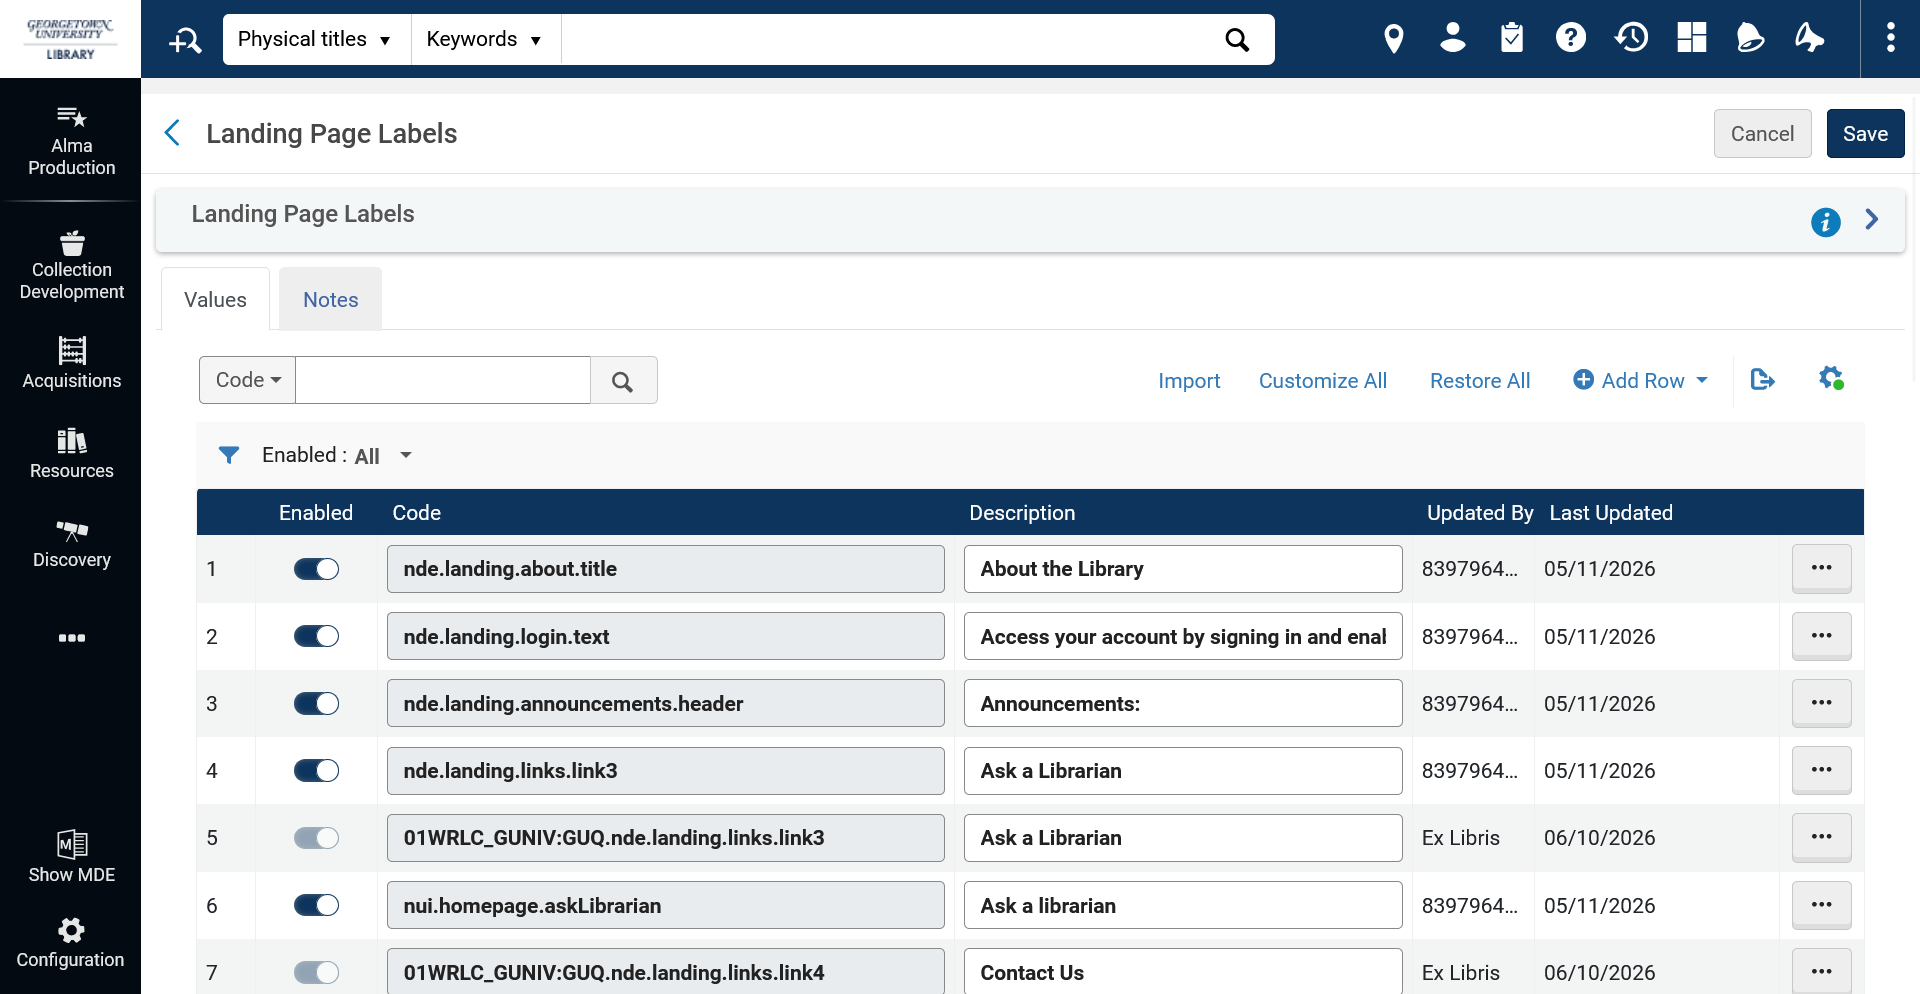
If you've already made changes to your link text, you'll see those added labels in this list, like 01WRLC_GUNIV:GUQ.nde.landing.links.link3 which is "Ask a Librarian"
Notice that this label is preceded by the View Code -- this is important if you have more than one view. Any label that is specific to one view MUST have the View Code at the beginning of the label code.
Adding a View-specific label
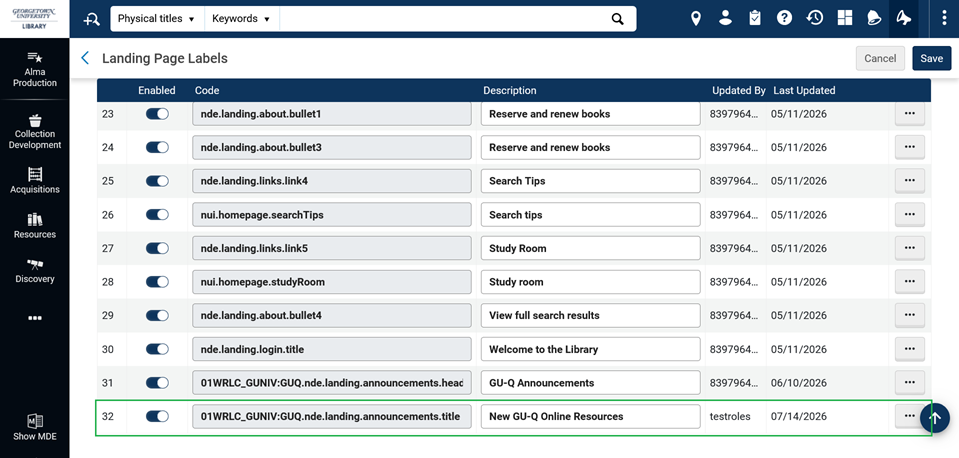
We want a different announcement title and text for our GU-Q Library, and the 01WRLC_GUNIV:GUQ.nde.landing.announcements.title label doesn't yet exist. So we need to add a new label by clicking Add Row at the top of the list and entering the label code and the desired text. In this case, I'm adding a new Announcement Title for GUQ:
Code: 01WRLC_GUNIV:GUQ.nde.landing.announcements.title
Description (i.e. visible text): New GU-Q Online Resources
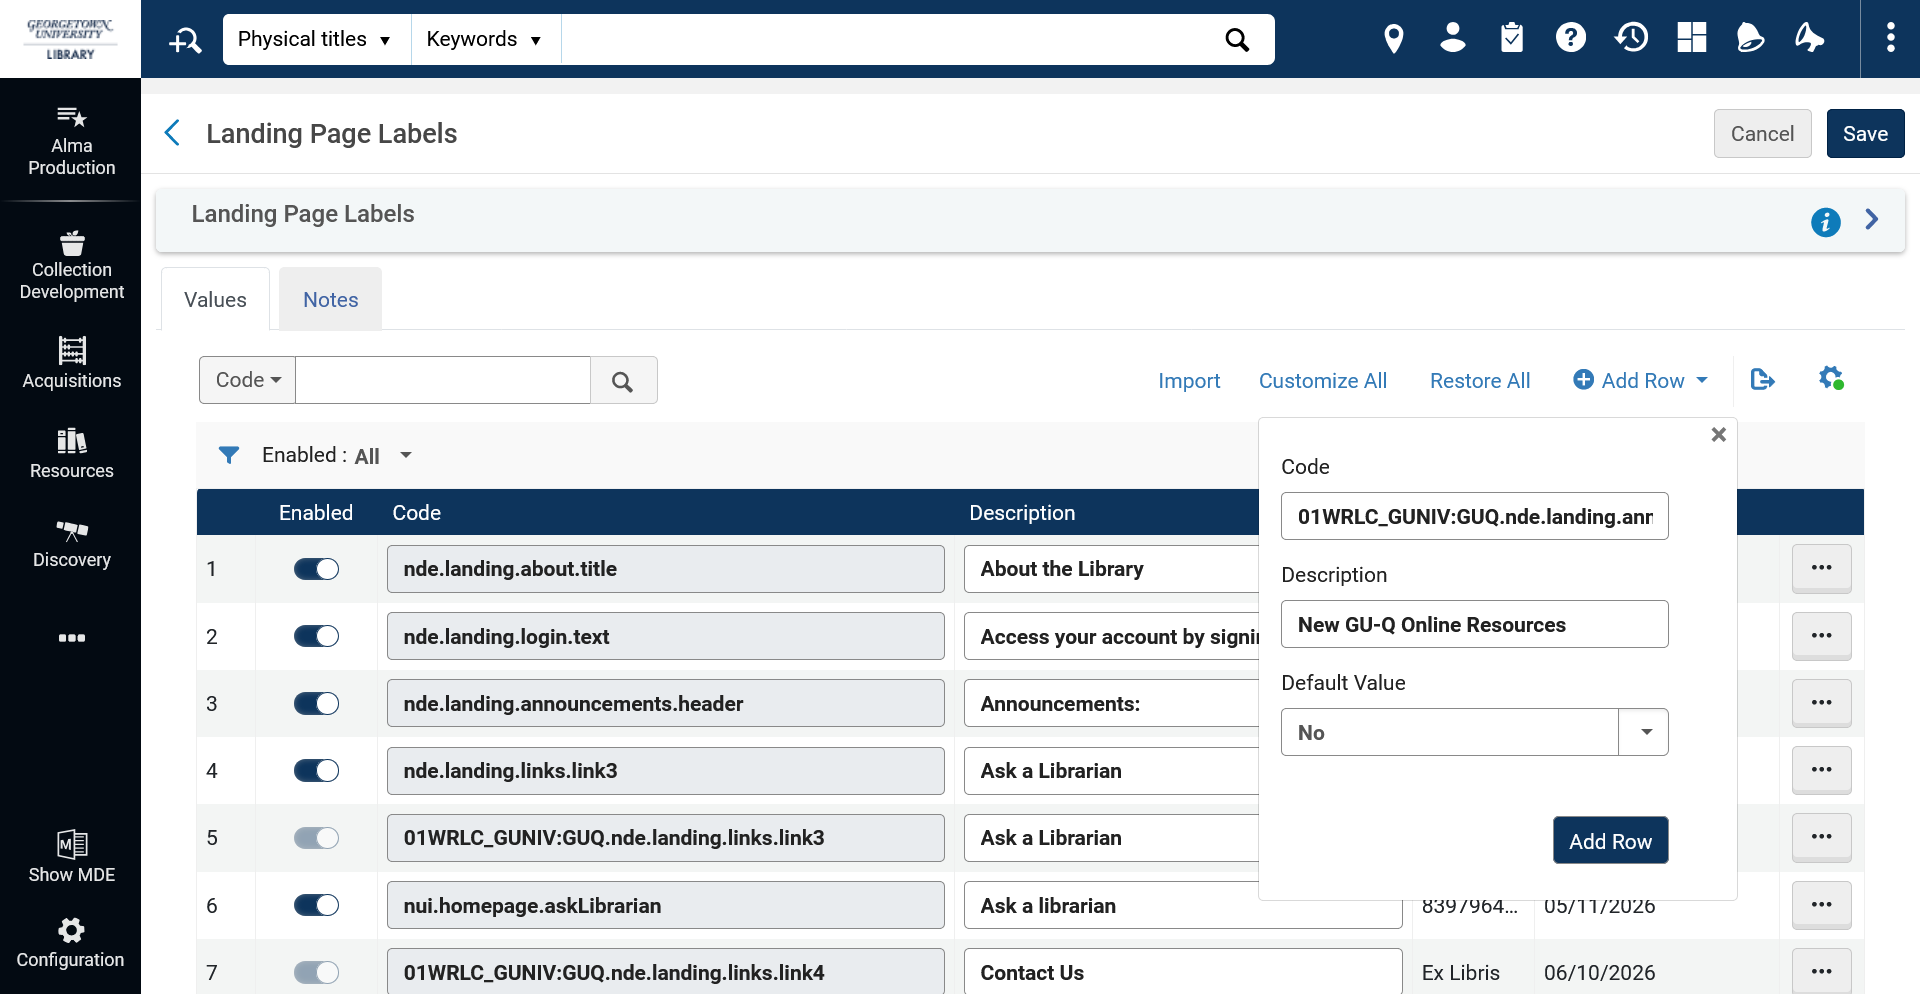
Click Add Row when you're satisfied with your new text, and the added label will appear at the bottom of the list:
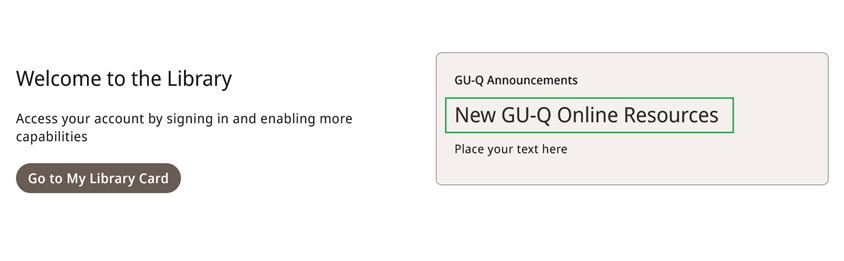
When you're finished making label edits, click Save for the whole table. Reload your Primo page, and the new text should appear:
Once you've added a view-specific label, it will stay there unless you decide to Delete it, so you only have to add them once. After that, you just need to edit the text as desired.
Editing a label
If you only have one view OR want to edit the default text that appears, you can edit the Description for the default code. Otherwise, make sure you're editing the label for the correct View.
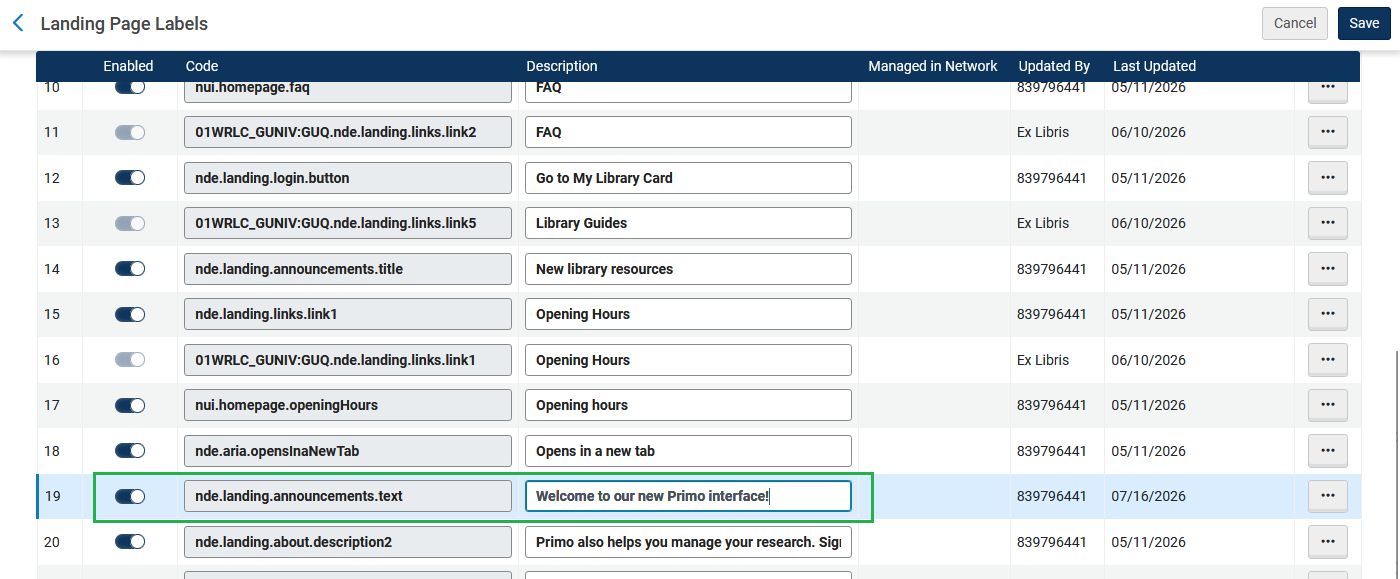
So, for example, if I want the default Announcements text to read "Welcome to our new Primo interface!" I'd edit nde.landing.announcements.text to say that, then click the Save button.
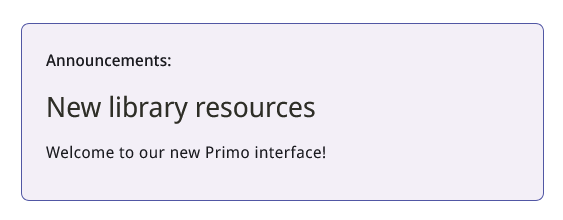
The Announcements section now has the new text:
Any label listed in this table can be edited, just make sure you're editing the correct one.
Label Tips
For labels that have more text than is visible in the text box in Alma (e.g. the announcement text), write your Description text somewhere else first and then copy it in.
If you have multiple labels to add at one time, you can export the list of what exists in Alma, add your new labels to the spreadsheet, and then import the spreadsheet. This has the benefit of re-sorting the labels alphabetically, though it may also change the Updated By and Last Updated field for labels you didn't actually modify.
Unknowns
as of 17 July 2026
HTML
It's not yet documented which labels on the Landing Page allow HTML or which HTML tags are supported. The supported HTML tags don’t all seem to work--for example, links work in the announcement text, but a bulleted list does not display as expected.
Selective label suppression
Generally speaking, if you want a specific label not to display, you change the Description field to NOT_DEFINED and that suppresses it from Primo. However, doing so for the Landing Page Labels leaves behind odd spaces and sometimes built-in formatting, e.g. if 01WRLC_GUNIV:GUQ.nde.landing.about.bullet3 is NOT_DEFINED, it looks like this:
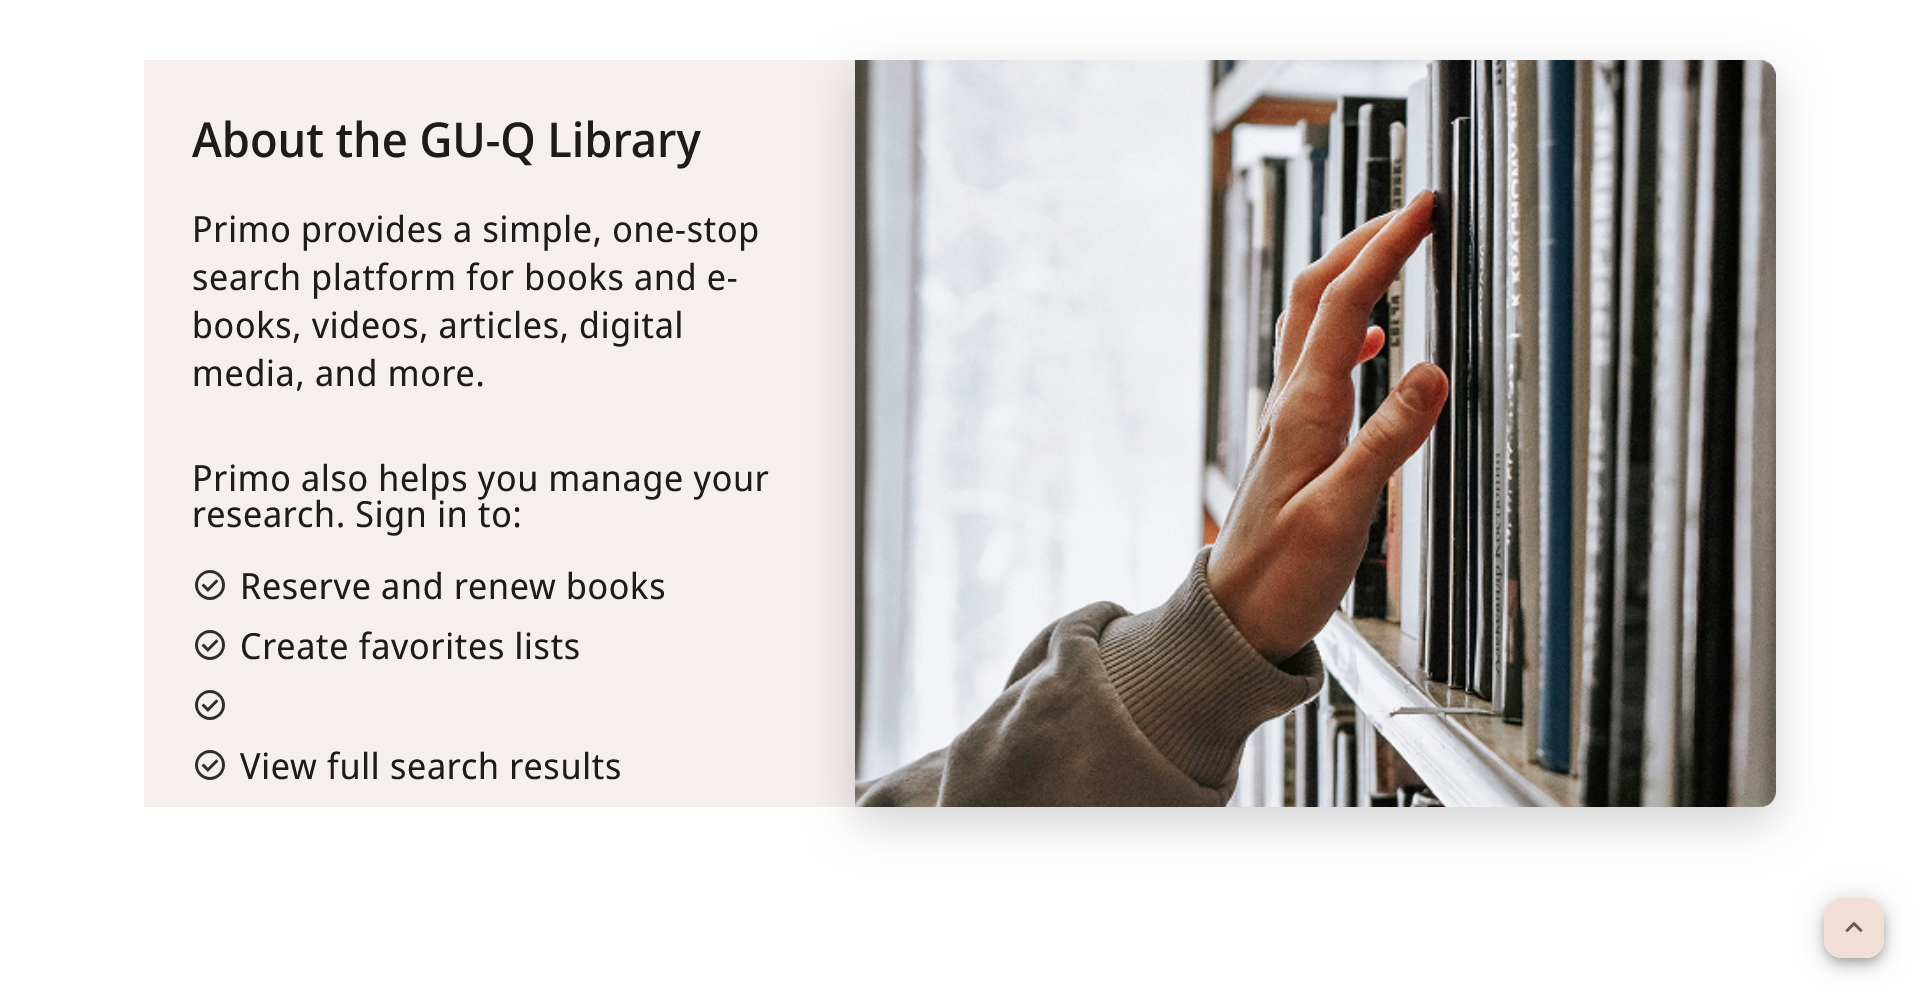
For the moment, it’s recommended to either hide the entire section, or make use of all of the labels that are present.