How to Set Up a Proxy Borrower and Check Out an Item by Proxy
This workflow explains how WRLC staff can configure one patron to act as a proxy borrower for another patron in Ex Libris Alma, and how to manage checkouts performed by proxy.
A Proxy Borrower is someone granted permission to borrow materials on behalf of another patron, such as a faculty member, administrator, or department. Proxies are most commonly graduate assistants, departmental staff, or designated library liaisons. While the proxy uses their own credentials to perform transactions, the items are checked out under the primary patron’s account to ensure proper due dates, policy application, and responsibility tracking.
Required Roles
The options available under the Fulfillment menu are dependent upon your assigned user roles. Your list of options may be different than the screenshots included below. If you do not have the necessary options, you will need to work with your institution's User Administrator to be assigned the appropriate roles for your work.
To manage patron services, you must have one of the following roles:
- Circulation Desk Manager
- Circulation Desk Operator
- Circulation Desk Operator - Limited
- Physical Inventory Operator
Part I: Setting Up a Local Patron as a Proxy Borrower
1: Open Patron Identification All proxy relationships must be created under a Fulfillment context to ensure the proxy’s circulation privileges, fines, and analytics data attach correctly to the local library environment.
2: Locate the Proxy Borrower’s Record Search for and select the patron who will serve as the proxy borrower (the person authorized to check out items for another patron). Their record will now appear in the Patron Services screen.

Note: Always start with the Proxy Borrower, not the primary account holder. This ensures the relationship is recorded from the proxy’s perspective, matching Ex Libris’ internal data structure.
3: Edit the Patron’s Information The page will refresh to the My Institution - Loans page.
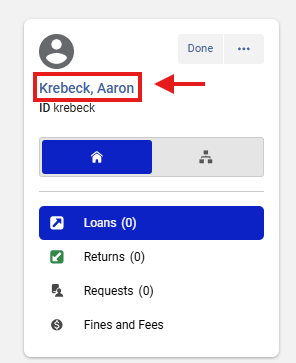
4: Open the User Details Panel Click on the patron's name to access the User Details panel that will produce from the right-hand side of the screen
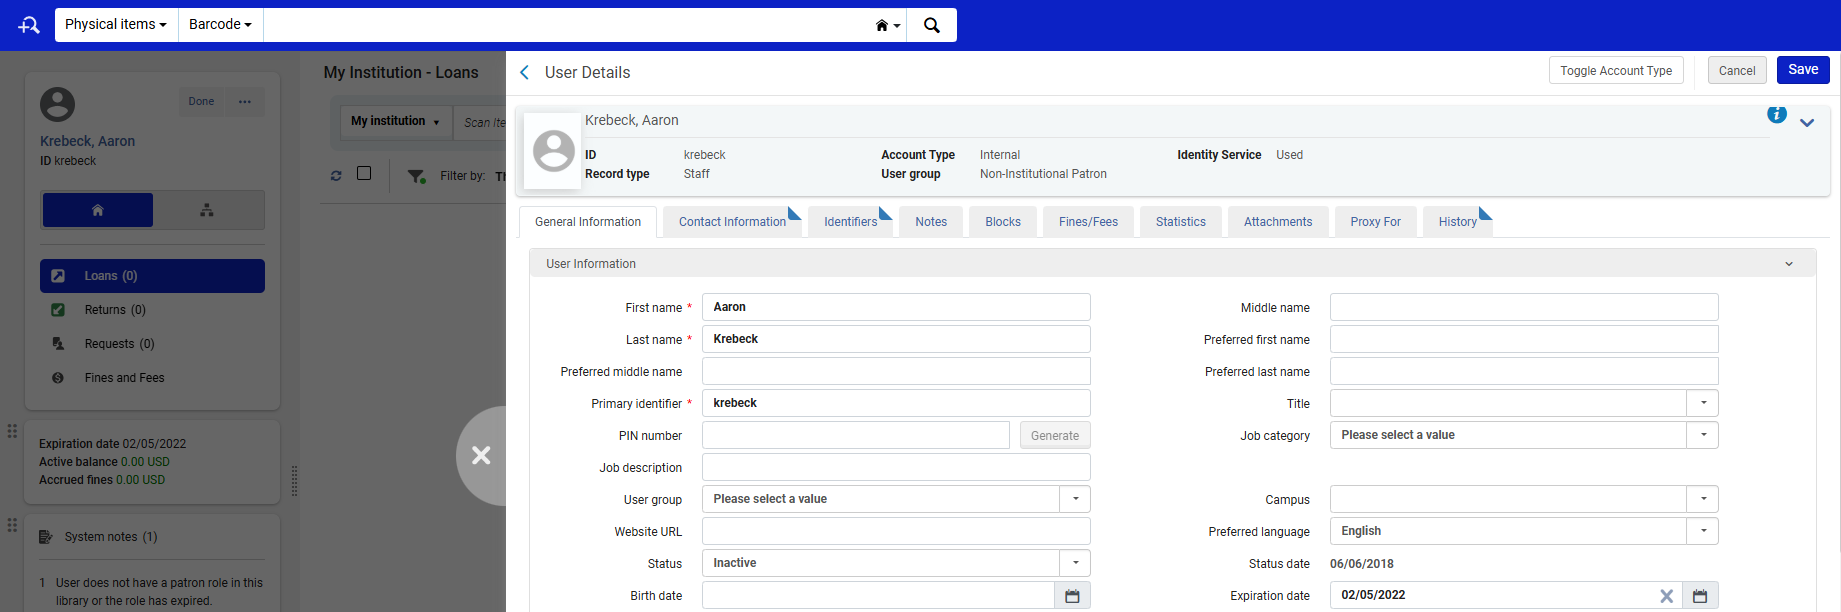
5: Open the “Proxy For” Tab In the User Details screen, click the Proxy For tab. This tab lists any primary users for whom this person already acts as a proxy.

6: Add a New Proxy Relationship Click <Add Proxy For>
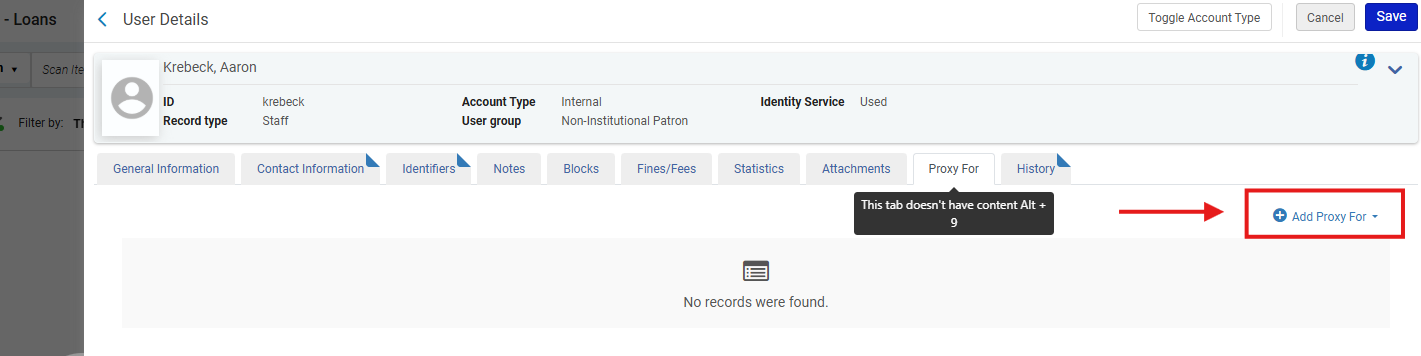
- The <Proxy For> drop-down menu appears. Search for the primary patron (the account holder for whom the proxy will act).
- Once identified, click <Add User>
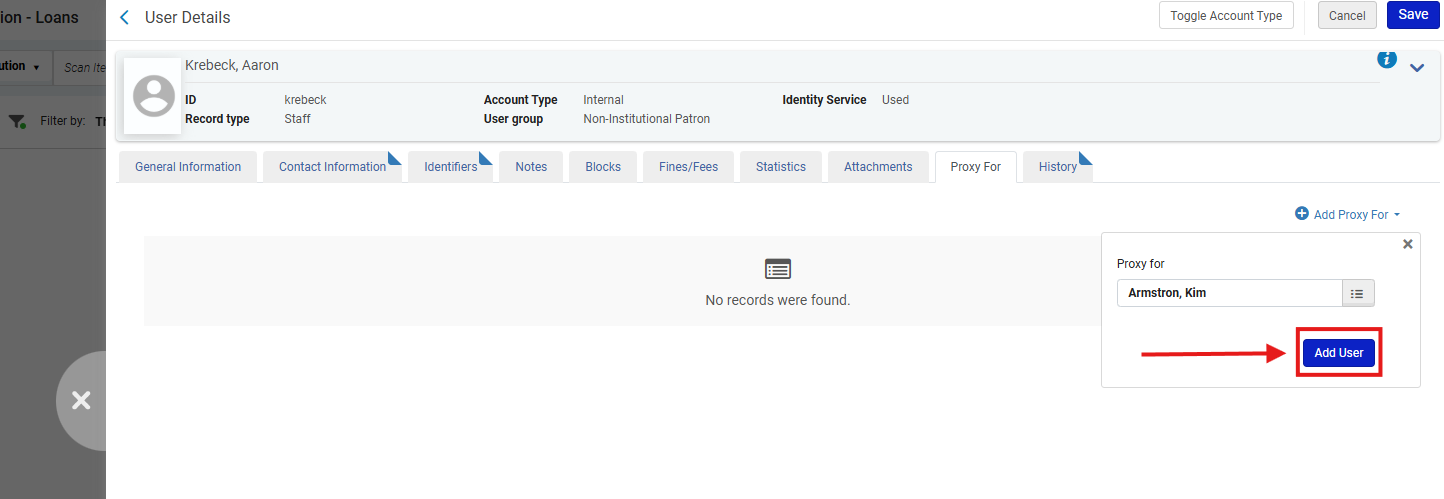
Why This Matters: This step establishes the system-level relationship between the two users. It allows the proxy to borrow materials on the other’s behalf while keeping the loan tied to the primary user’s account for policy and notification purposes.
Note: This relationship is one-directional- adding a proxy under Patron A does not automatically create reciprocal access under Patron B. If mutual authorization is desired (e.g., lab partners or departmental assistants), staff must configure it in both accounts.
7: Save Changes Click <Save> to finalize the proxy relationship
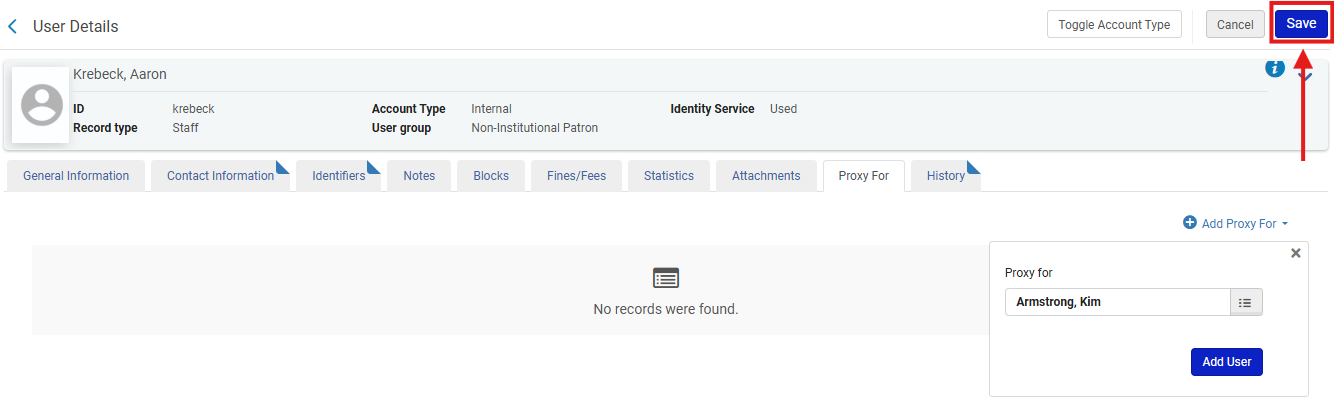
Note: Always verify the relationship by returning to the Proxy For tab and confirming that the linked user appears. Saving does not generate a confirmation message, so manual verification is the only way to ensure success.
Part II: Deleting a Proxy Relationship
1: Access the “Proxy For” Tab Repeat Steps 1–5 above to reach the Proxy For tab.
2: Remove the Relationship
- Find the name of the user for whom the patron acts as proxy
- Click the row action menu ellipsis (…) to open the options menu
- Select <Delete>
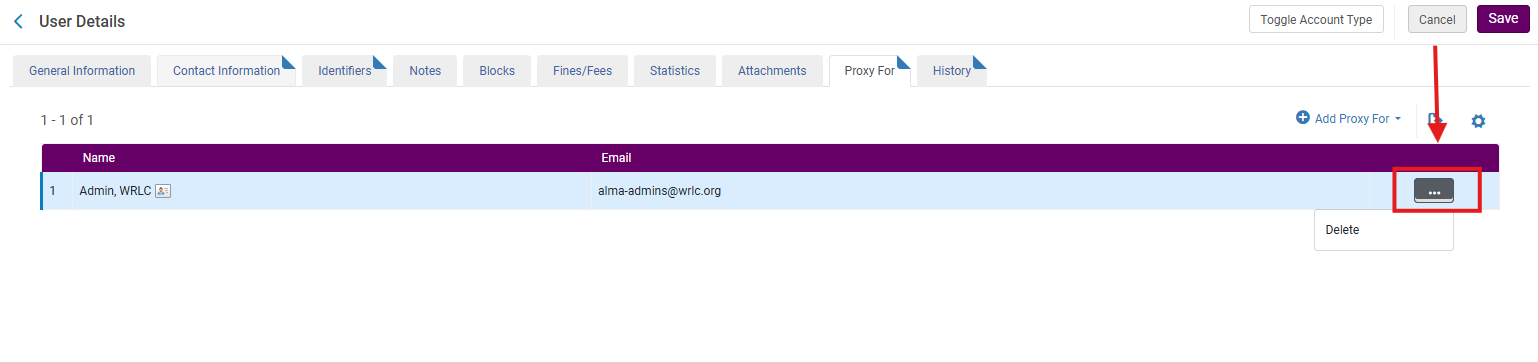
3: Save the Record Click <Save> to confirm the deletion

Note: Removing a proxy relationship takes effect immediately - the proxy will no longer appear in the "Proxy For” dropdown on the Patron Identification screen.
Part III: Checking Out Items by Proxy
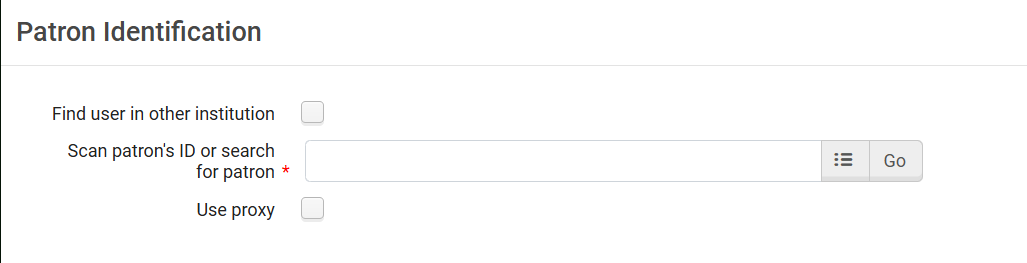
1: Open Patron Identification Navigate to Fulfillment> Manage Patron Services> Checkout/Checkin> Patron Identification; search for the patron who will be checking out materials on behalf of someone else

2: Enable Proxy Mode After you have identified the correct patron, check the <Use Proxy> box. Search for and select the Proxy Borrower (the person performing the checkout). Checking <Use Proxy>tells Alma to activate the proxy relationship lookup, ensuring transactions are recorded under the primary user’s record, not the proxy’s own.

3: Choose the Primary Patron
- A <Proxy For> field appears.
- Click the drop-down arrow to see all patrons for whom this person is authorized to act as a proxy
- Select the correct patron and click <Go>
Note: Proxy selection must occur before scanning items. If you forget to select a patron before scanning, Alma will create loans under the proxy’s own record, not the intended account.

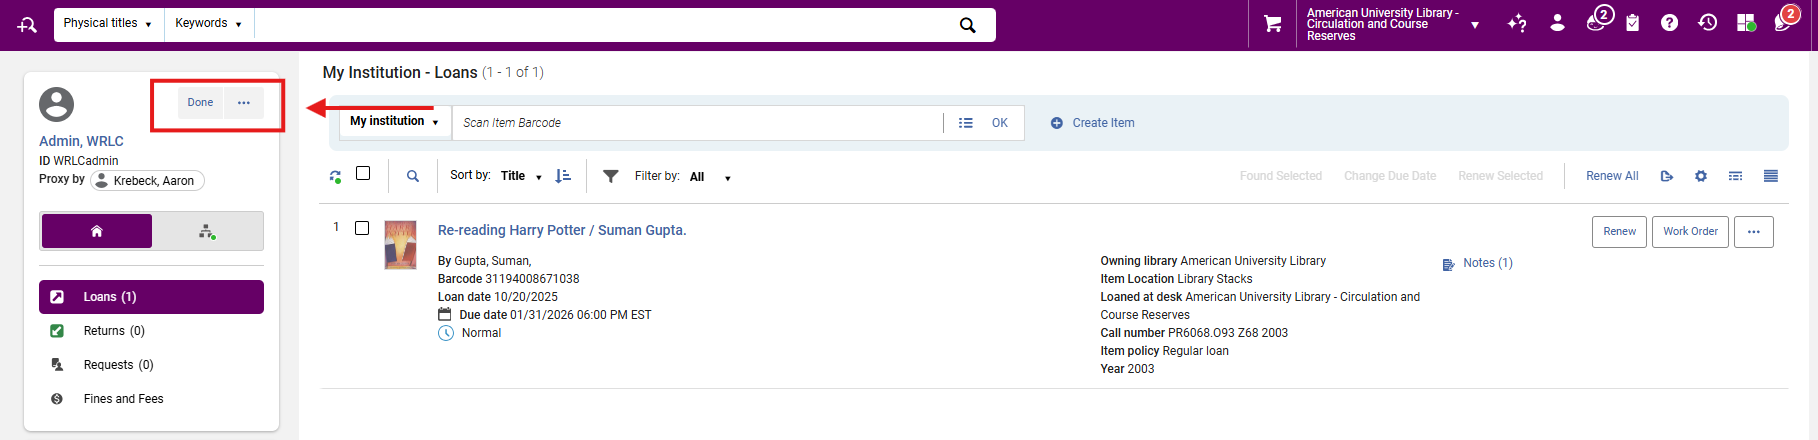
4: Check Out Materials The Patron Services screen for the selected (proxied) patron appears. A visible line shows “Proxy by [Name of Borrower]”. Proceed to check out items as usual. This field is Alma’s built-in audit trail for proxy transactions. All loans, receipts, and notices are still tied to the primary patron’s account, but the proxy’s name is retained for reporting and analytics.
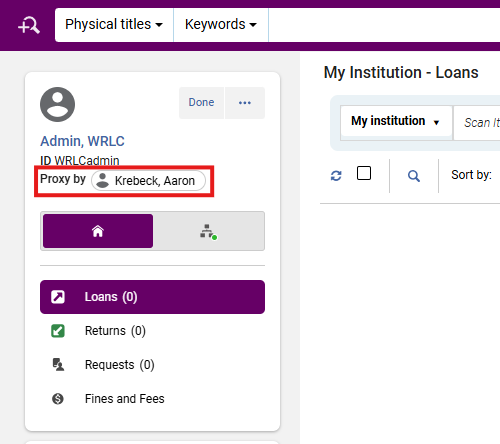
5: End the Session When finished, click Done to close the session. Clicking Done resets the Fulfillment session to prevent subsequent patrons from being mistakenly processed under the same proxy relationship.
Note: It is strongly encouraged that staff reverify the next patron’s identity immediately after closing proxy sessions to avoid privacy and security breaches.
Notes
- Notification Behavior: Loan notices, fines, and renewals go to the primary patron.
- Analytics: Loans performed via proxy are visible in Alma Analytics under Fulfillment> Loans> Proxy By Field.
- Expiration Sync: Proxy privileges do not auto-renew when either user’s expiration date changes. Staff must update or remove the relationship manually.
- Cross-Institution Limits: Proxies only function within a single institution’s IZ. Cross-institution proxies are not supported under standard AFN configurations (per Ex Libris documentation).
Frequently Asked Questions
- Can a faculty member have multiple proxies (e.g., student assistants)?
- Yes. Multiple proxies can be added under the same <Proxy For> tab. Each will appear in the dropdown during checkout.
- Can a proxy represent multiple patrons (e.g., departmental assistant)?
- Yes, a single proxy can represent several patrons. All linked patrons will appear in the <Proxy For> dropdown list.
- What if the proxy attempts to check out items for a user not listed under <Proxy For>?
- Alma will treat the transaction as a normal loan under the proxy’s account. Staff must verify proxy relationships before processing.
- What happens if a proxy’s account expires before the primary patron’s?
- The proxy relationship becomes inactive immediately. Reactivation requires renewing the proxy’s user record.
- The proxy relationship becomes inactive immediately. Reactivation requires renewing the proxy’s user record.
- Can proxy privileges be restricted (e.g., only circulation, no renewals)?
- Yes. Through Fulfillment Configuration> User Roles or Loan Terms of Use (TOUs) adjustments, libraries can limit proxy privileges.
- Yes. Through Fulfillment Configuration> User Roles or Loan Terms of Use (TOUs) adjustments, libraries can limit proxy privileges.
- Are proxy actions recorded for audit purposes?
- Yes. The “Proxy By” field records the proxy borrower’s name on each transaction and is reportable via Alma Analytics.