How to Manage Patron Blocks
This workflow explains how to handle item checkouts for patrons whose accounts are blocked in Alma, as well as how to apply or remove patron blocks.
When to Reference This Document:
-
When a patron cannot borrow due to fines, expired accounts, or administrative holds.
-
When Access Services staff need to apply or clear patron blocks.
-
When determining whether to override a block for exceptional circumstances.
Required Roles
- Fulfillment Operator
- Circulation Desk Manager
1: Identify a Blocked Patron During Checkout When you enter a blocked patron’s ID or name in Fulfillment > Checkout/Checkin> Manage Patron Services, a Blocks pop-up appears displaying the patron’s restrictions.
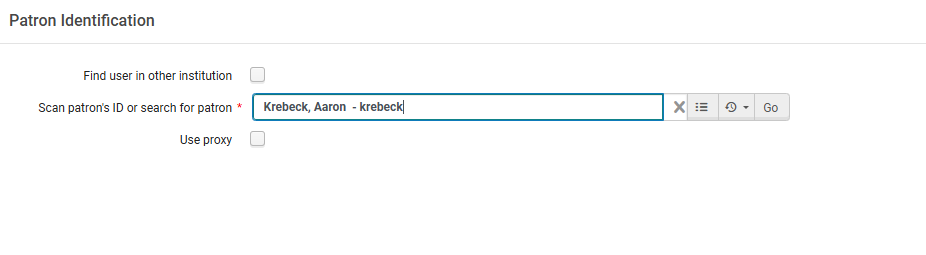

2: Choose an Appropriate Response Depending on your permissions, you may see two or three options in the pop-up:
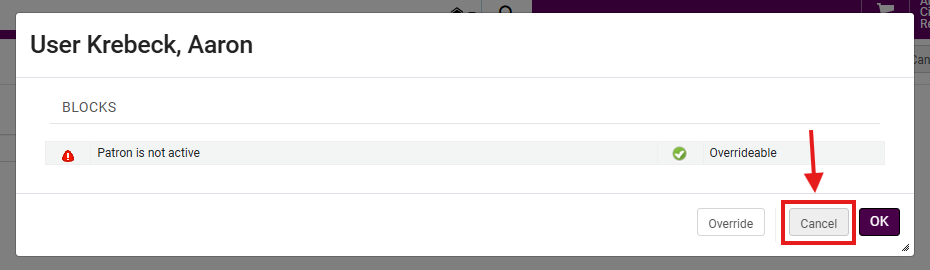
- <Cancel> Exit without action.
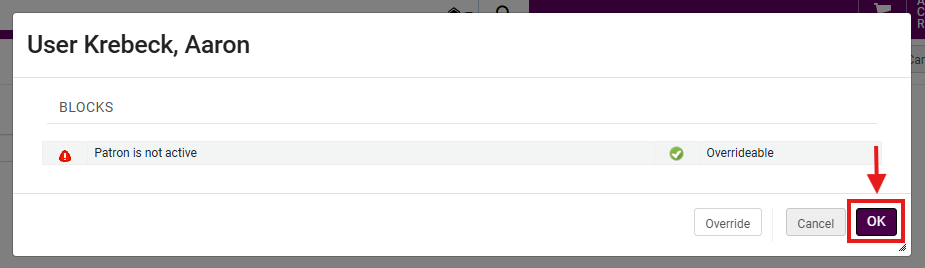
- <OK> View the patron’s record to review block details.
- <Override> (If authorized) Bypass the block and continue checkout.
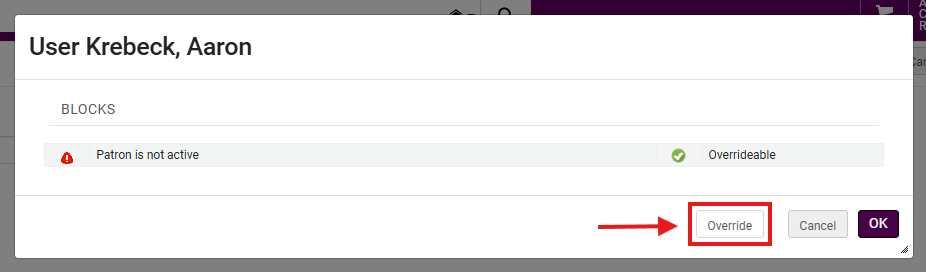
Why This Matters: Each action determines whether the patron’s loan proceeds or remains restricted. Overriding is reserved for staff with higher-level roles and should follow institutional guidelines.
3: Override During Loan Attempt If you proceed to the patron’s record and attempt a checkout, Alma displays another block alert.
- Click <Override> to continue the transaction if permitted.
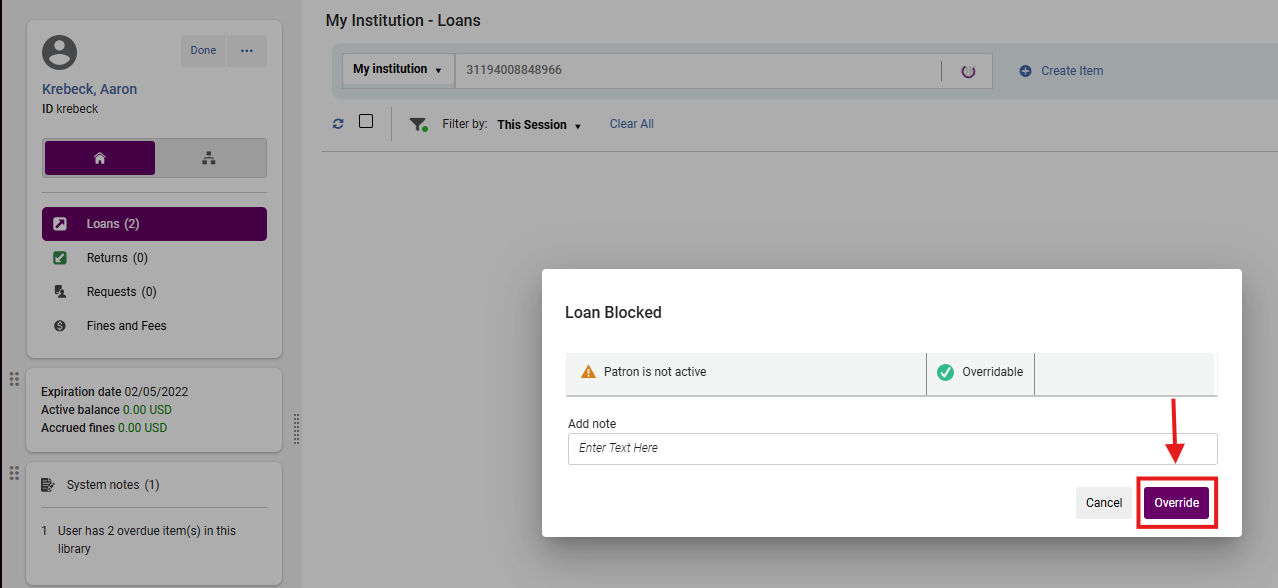
Why This Matters: This provides a secondary confirmation to ensure that block overrides are intentional and authorized.
4: Apply a Patron Block Fulfillment> Checkout/Checkin> Manage Patron Services> to locate the patron's record
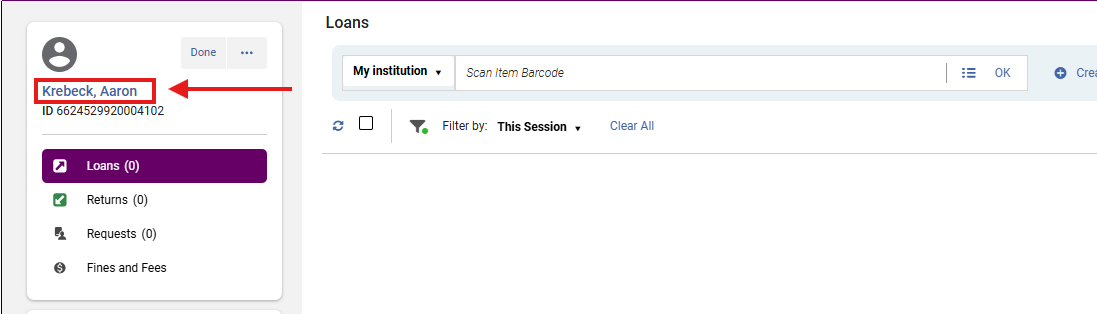
- When you arrive at the patron's account, Click on their name to open the User Details panel
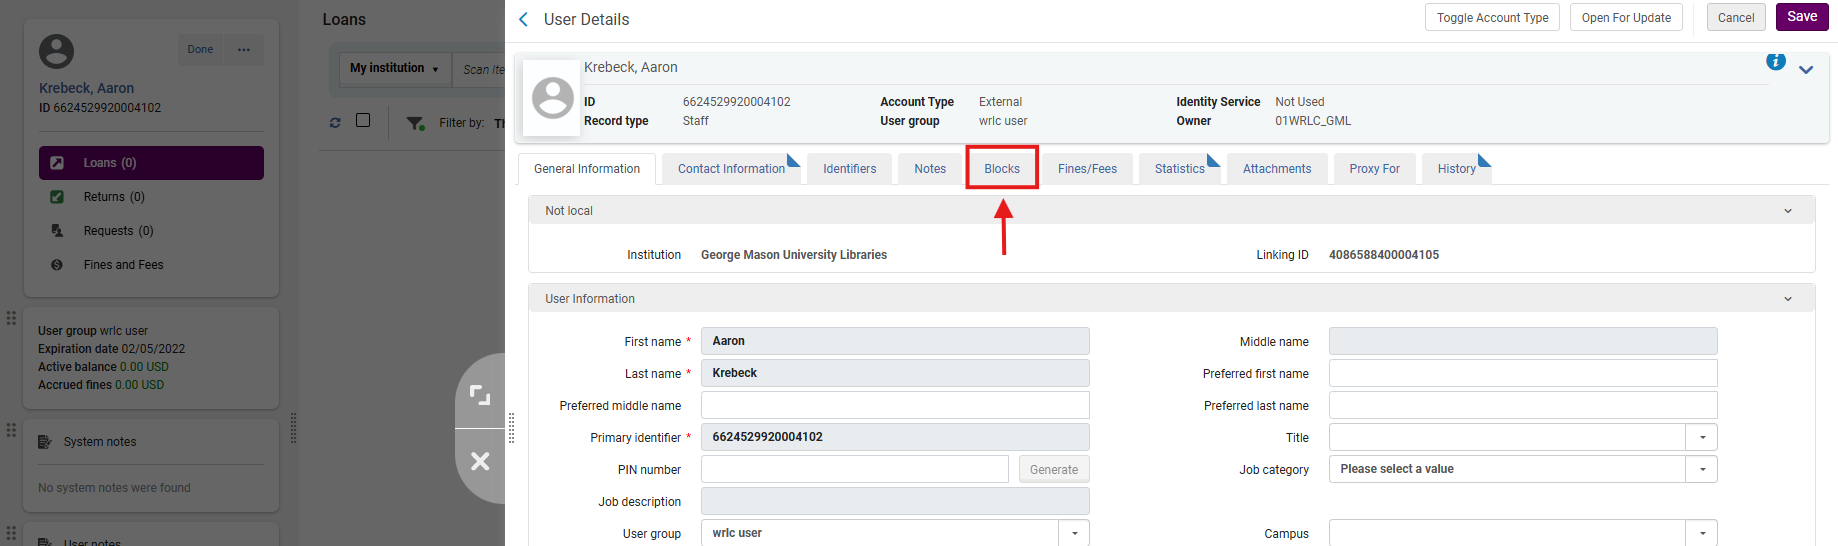
- The User Details panel will open from the right-hand side of the screen- select the <Blocks> tab.
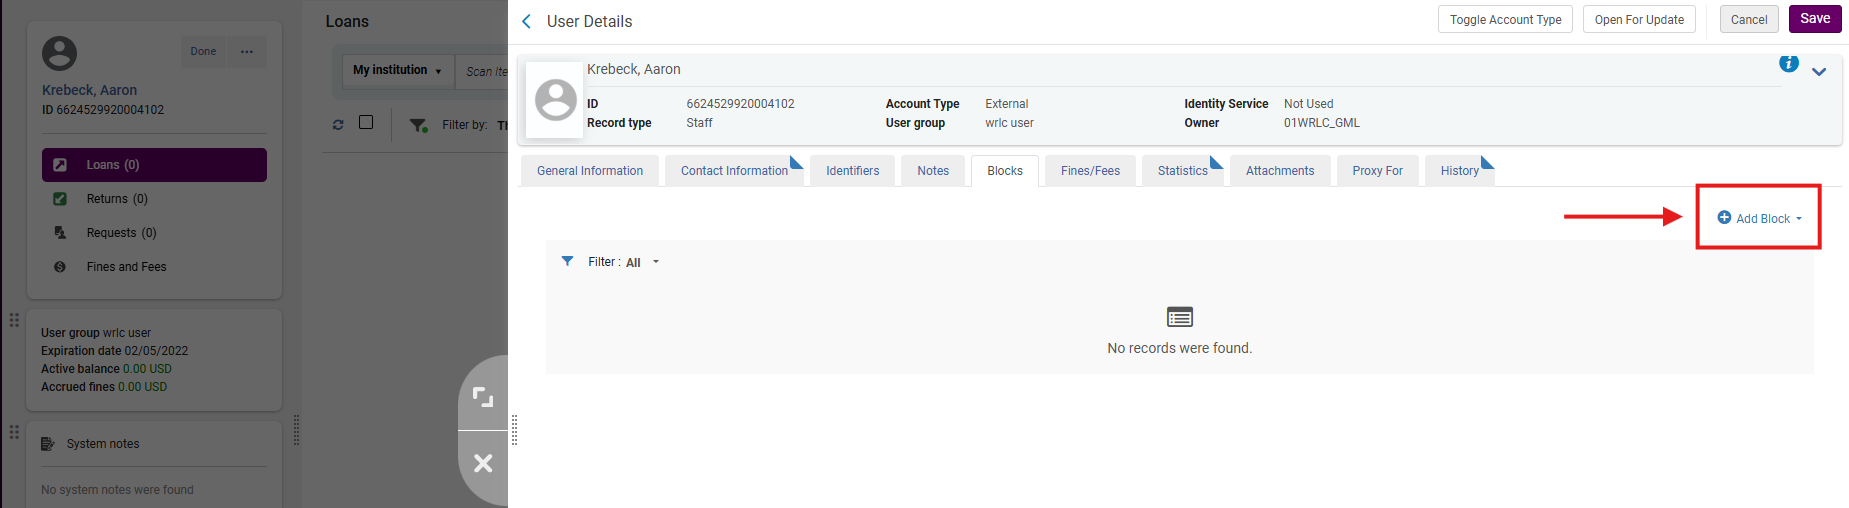
- Click <Add Block> to open the pop-up window.
- Choose a value from Block description drop-down menu, and if applicable, fill in Expiry Date and Note fields.
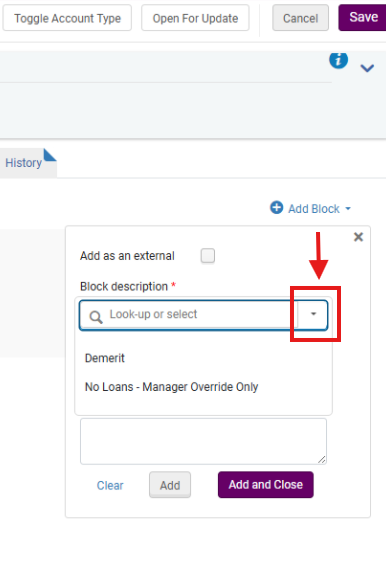
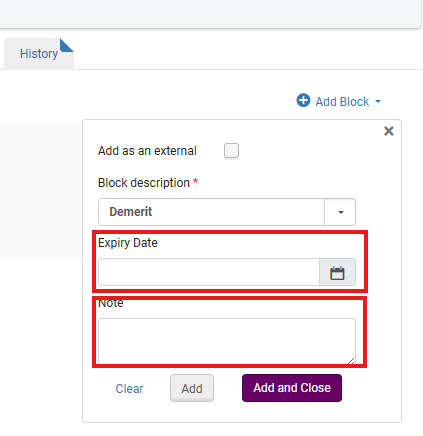
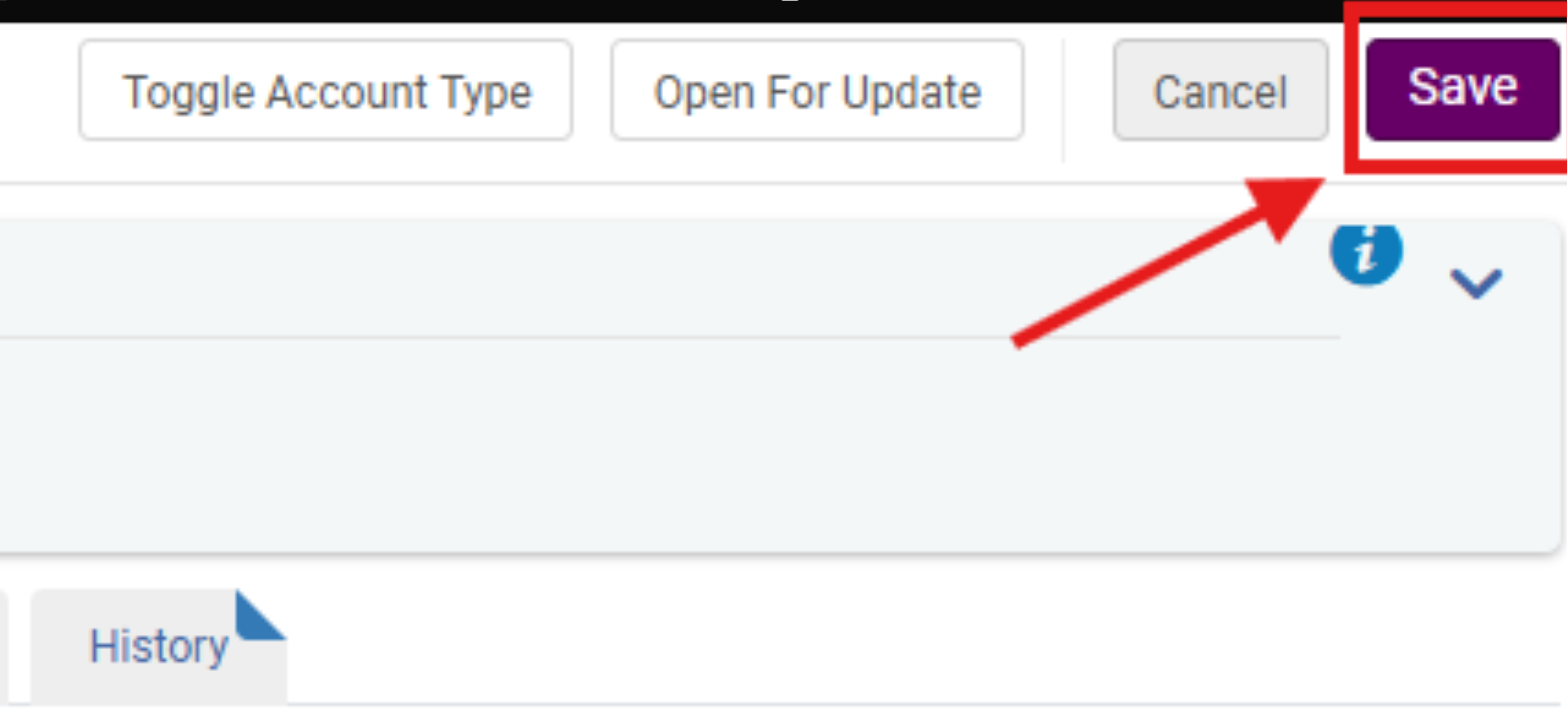
- Click <Add and Close> or <Add> to apply one or multiple blocks; Click <Save> to finalize.
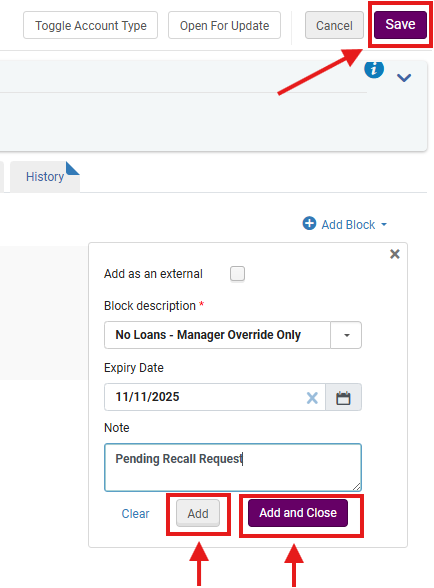
Note: Libraries are encouraged to use formalized block reasons for audit tracking and analytics accuracty
5: Remove a Patron Block Per previous workflow, search for the patron record and access the User Details panel
- Select the <Blocks> tab; the "dog-ear" on the tab indicates that the facet has exisiting blocks

- Toggle off any active blocks under Active that should be removed; the row action menu (....) provides additional options
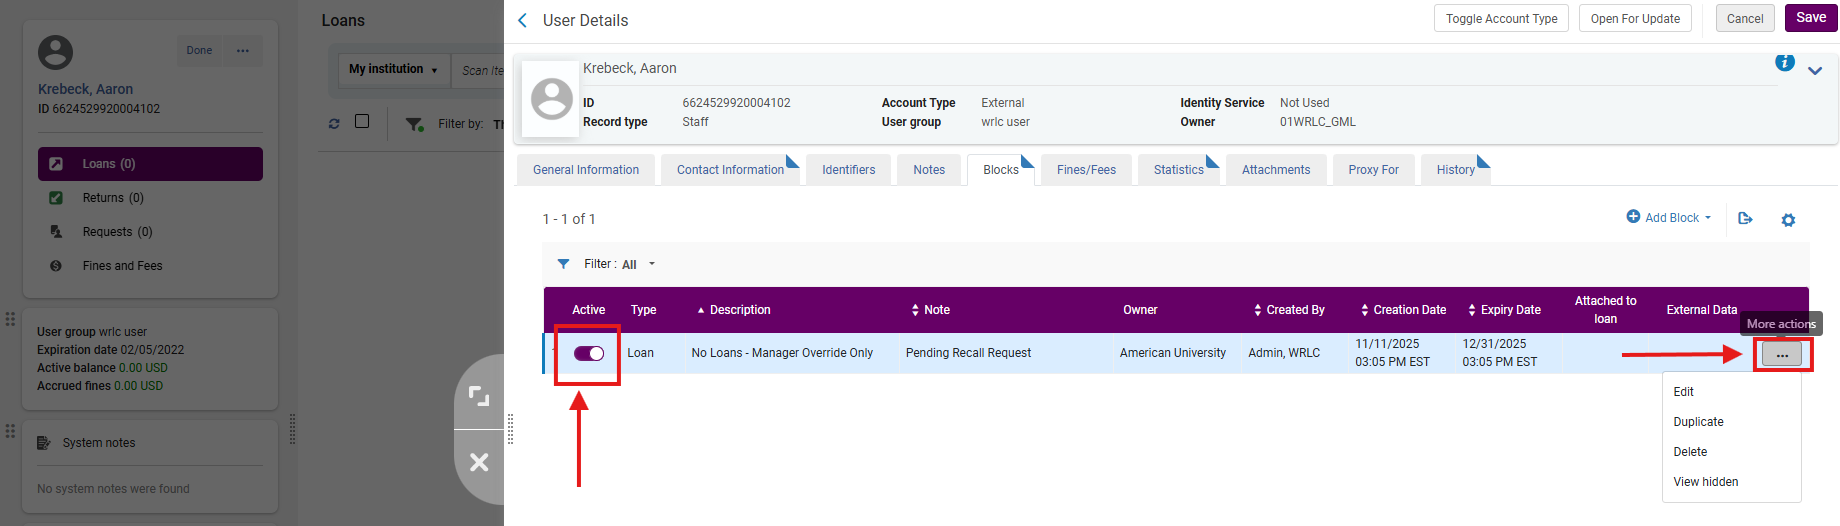
- As before, when adding blocks, Click <Save> to finalize
Why This Matters: Removing expired or resolved blocks restores normal account functionality and prevents unnecessary patron frustration. Libraries are strongly encouraged to complete periodic block reviews to ensure records remain current and relevant.
Frequently Asked Questions
-
Why was the patron blocked?
-
Common reasons include excessive fines, expired borrowing privileges, or unresolved lost-item fees. Check the block description for specifics.
-
-
Can I override any block?
-
Only staff with the Circulation Desk Manager role can override most blocks.
-
-
Does overriding remove the block permanently?
-
No. It temporarily allows the checkout. The block remains on the record until removed manually.
-
-
Can multiple blocks be active on one record?
-
Yes. Alma displays each block separately under the <Blocks> tab. All active blocks are enforced during fulfillment actions.
-
-
Will the patron be notified of new or lifted blocks?
-
Notifications depend on configured Fulfillment letter rules. Check with your systems administrator for local settings.
-
-
Can I set blocks with automatic expiration?
-
Yes. Enter an <Expiry Date> when adding a block. Alma will automatically clear it after that date.
-
-
Should blocks be used for temporary reminders or notes?
-
No. Use <Fulfillment Notes> or <User Notes> for reminders. Blocks are intended only for loan restrictions.
-