How to Check In Items
This workflow outlines how to check in items in Ex Libris Alma, either for a single patron or for multiple patrons. Checking in items ensures Alma updates item status, loan history, and availability for the next request or hold.
When to Reference This Document:
- When processing returns directly from a patron’s record.
- When handling bulk returns at a circulation desk.
- When backdating returned items for accurate fine calculation or loan statistics.
Required Roles
The options available under the Fulfillment menu are dependent upon your assigned user roles. Your list of options may be different than the screenshots included below. If you do not have the necessary options, you will need to work with your institution's User Administrator to be assigned the appropriate roles for your work.
To complete Fulfillment tasks outlined in this document, you must have one or more of the following roles:
- Circulation Desk Manager
- Circulation Desk Operator
- Circulation Desk Operator - Limited
- Physical Inventory Operator
Part I: Checking In Items for a Single Patron
1: Access the Patron Record Navigate to Fulfillment > Checkout/Checkin> Manage Patron Services> to open the Patron Identification screen, look up the patron’s record using their ID, name, or barcode.

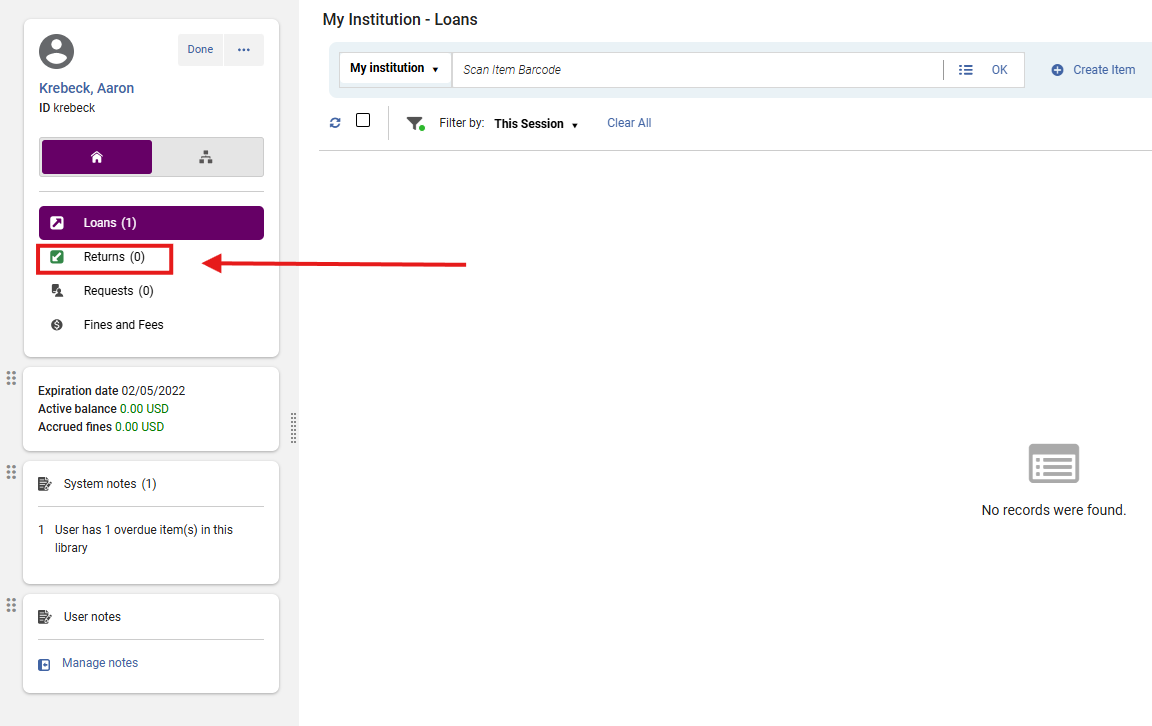
2: Select the Returns Tab In the resulting Patron Services screen, select the Returns tab.
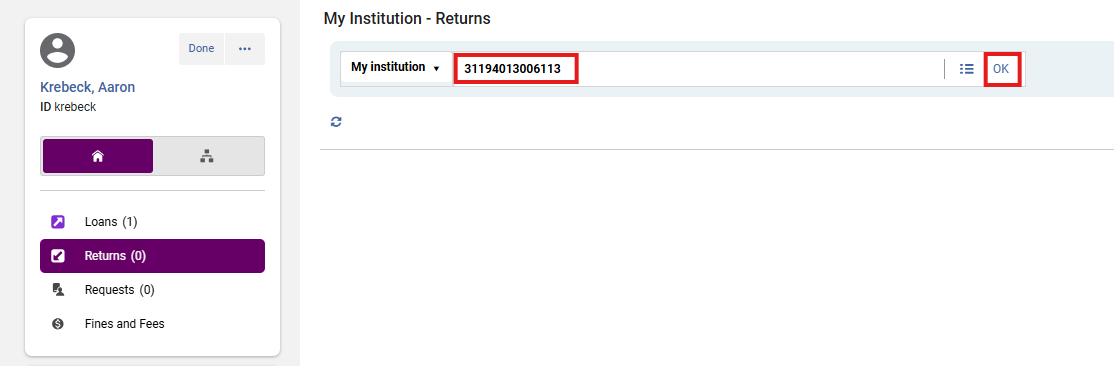
3: Scan or Enter the Item Barcode Scan the item’s barcode into the <Scan item barcode> field, or manually enter it and click <OK>.
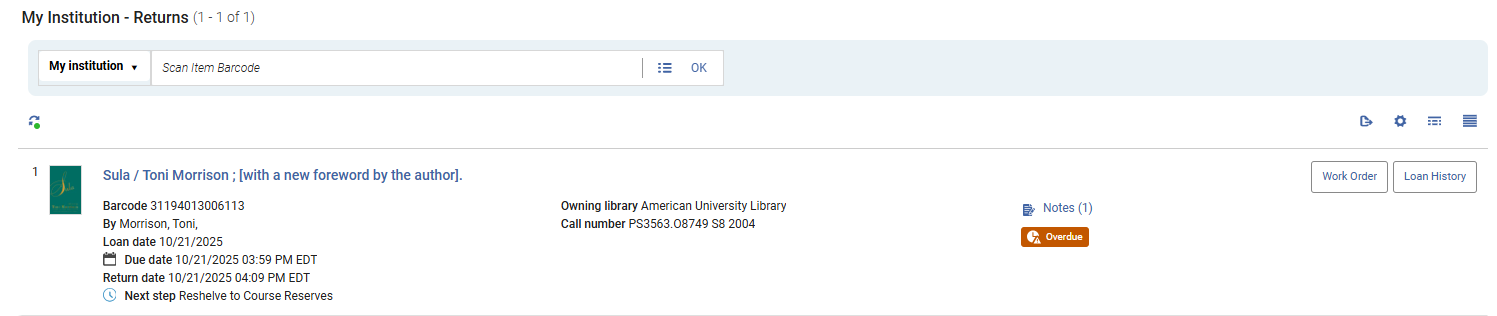
4: Review Returned Items Successfully checked-in items appear under Returns of this session. This list verifies that Alma processed each return and provides quick access for correction if an error occurred.
5: Exit or Continue When finished, either continue performing other actions in the patron record or click <Done> to exit. Closing the session prevents circulation actions from inadvertently applying to the wrong patron.
Part II: Checking In Items for Multiple Patrons
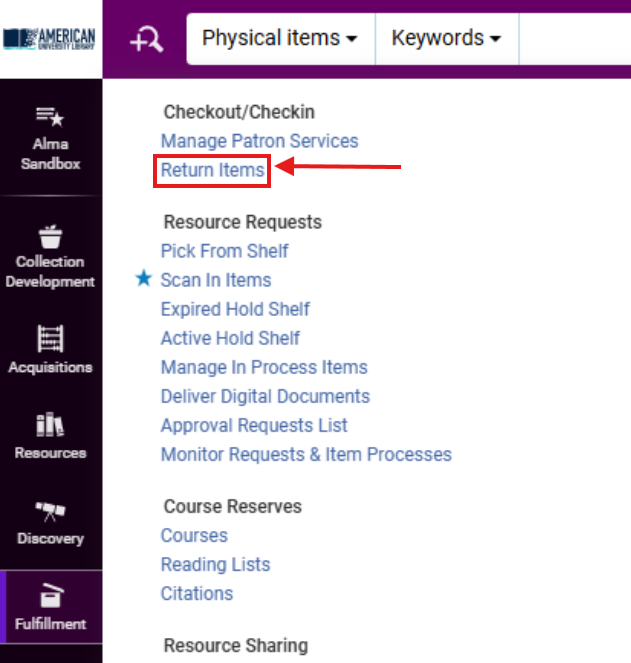
1: Open the Check-In Screen Navigate to Fulfillment > Checkout/Checkin> Return Items
2: Scan or Enter Item Barcodes The Manage Return Items screen will open. In the Scan item barcode field, scan or type the barcodes of returned items.
Each scanned barcode updates the loan record for the corresponding patron, making the item immediately available for reshelving or further fulfillment.

3: Override the Return Date or Time (Optional) Backdating returns ensures fines are correctly adjusted when items are returned during system outages or after-hours check-ins, or a holiday break when the library may be closed
- To backdate a return use the <Override return date and time> field:
- Enter the preferred date/time manually, or
- Click the calendar icon to select a date/time, then click on the check mark to <Apply>.
- Check in each item. Scan the items in one after the other.
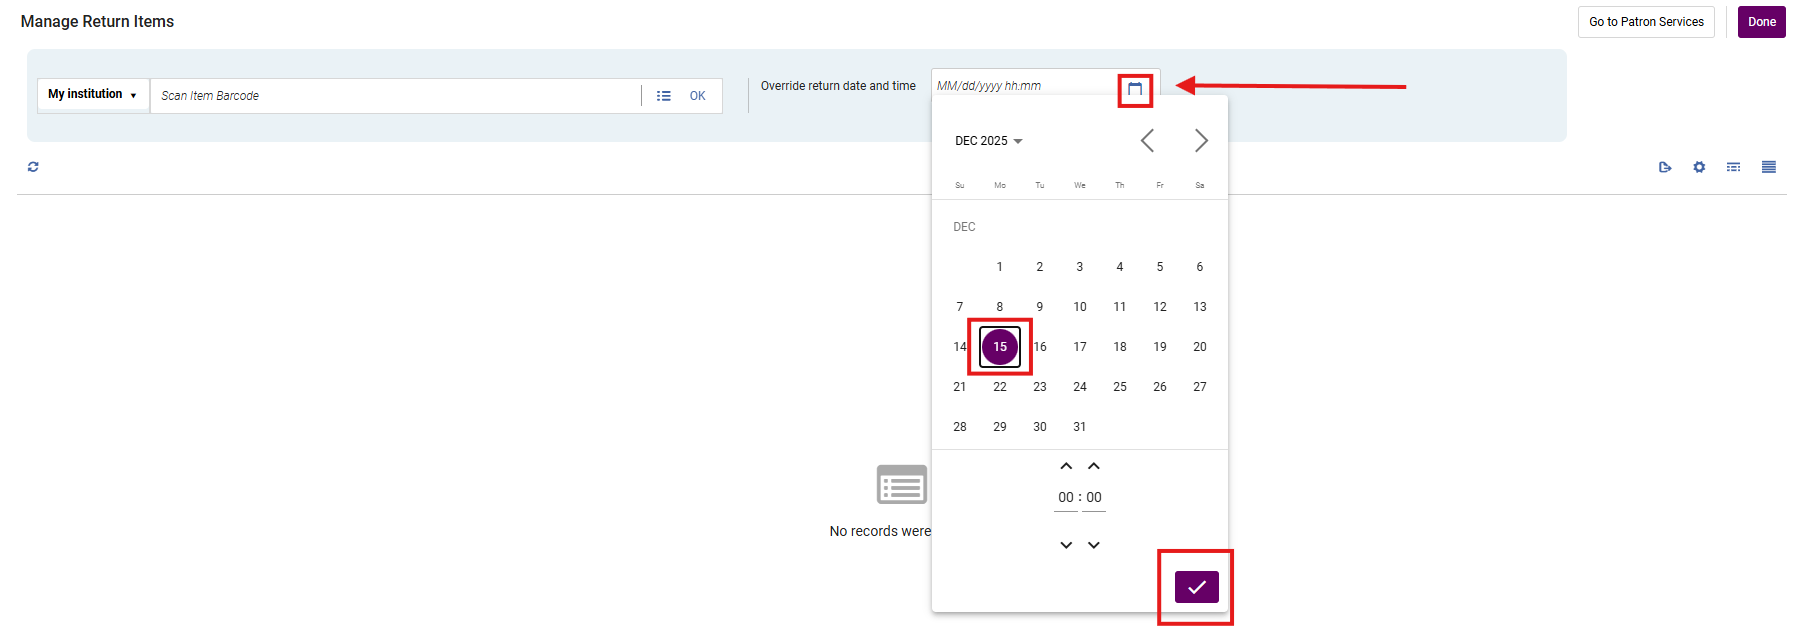
- The overridden date/time remains active until you click the “X” beside the field to revert to the current timestamp.

4: Maintain Patron Privacy If your workstation is shared or visible to others, clear the list of displayed returned items by clicking <Clear List>. This protects patron borrowing history from accidental disclosure while keeping the check-in session active.

5: Finish or Exit When finished, either proceed to other Fulfillment tasks or click <Done> to close the check-in screen. Exiting finalizes the session and resets the screen for the next operator.

How to Check In AFN Items
1: Open the Check-In Screen Navigate to Fulfillment > Checkout/Checkin> Return Items
2. Select the Owning Institution From the Item owner drop-down menu, select the institution that owns the item. Scan the items in one after another.
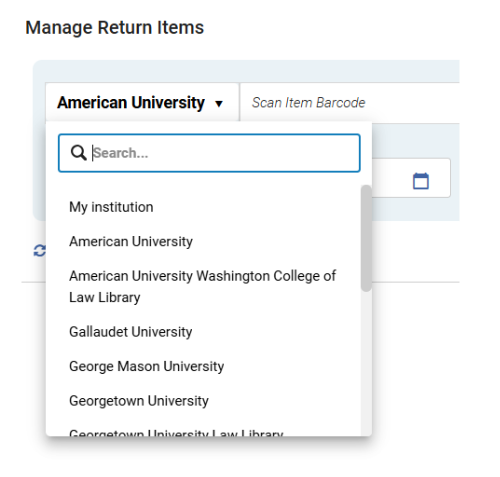
3: Scan or Enter Item Barcodes The Manage Return Items screen will open. In the Scan item barcode field, scan or type the barcodes of returned items.
Each scanned barcode updates the loan record for the corresponding patron, making the item immediately available for reshelving or further fulfillment.

4: Override the Return Date or Time (Optional) Backdating returns ensures fines are correctly adjusted when items are returned during system outages or after-hours check-ins, or a holiday break when the library may be closed
- To backdate a return use the <Override return date and time> field:
- Enter the preferred date/time manually, or
- Click the calendar icon to select a date/time, then click on the check mark to <Apply>.
- Check in each item. Scan the items in one after the other.
- The overridden date/time remains active until you click the “X” beside the field to revert to the current timestamp.
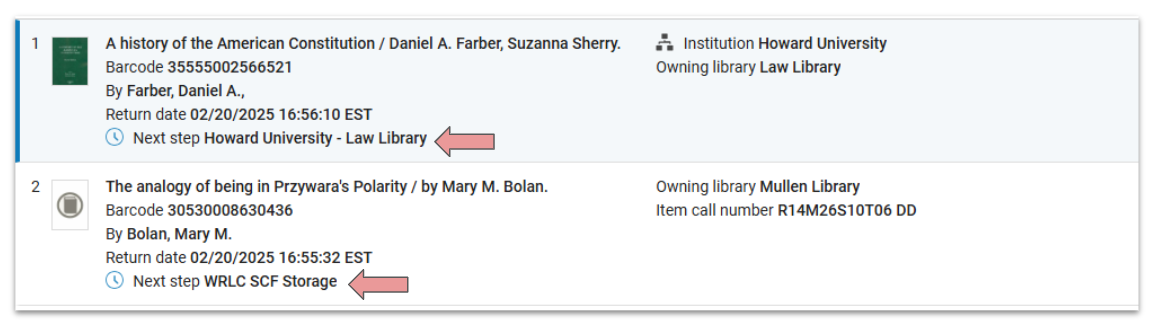
5. Next Steps As you scan in each item, note the Next Steps
6: Maintain Patron Privacy If your workstation is shared or visible to others, clear the list of displayed returned items by clicking <Clear List>. This protects patron borrowing history from accidental disclosure while keeping the check-in session active.
7: Finish or Exit When finished, either proceed to other Fulfillment tasks or click <Done> to close the check-in screen. Exiting finalizes the session and resets the screen for the next operator.

Frequently Asked Questions
-
What happens if I scan an item not checked out?
-
Alma will display an informational message stating that the item was not on loan and will not process a return.
-
-
Can I check in items with missing or unreadable barcodes?
-
Yes. Use <Select from a list> next to the <Scan item barcode> field to manually locate the record.
-
-
Why does a pop-up appear during check-in?
-
A <Fulfillment Note> is attached to that item. Review the note’s instructions before proceeding.
-
-
How do I confirm routing information?
-
The on-screen “Destination” column display the next stop for each checked-in item.
-
-
Can I return items for patrons without scanning each one?
-
No. Each item barcode must be scanned or entered individually for Alma to register the return.
-
-
Does Alma track the operator performing check-ins?
-
Yes. The operator’s name and workstation location are logged for every return transaction.
-
-
How can I verify if a return processed correctly?
-
Review the <Returns of this session> list or check Fulfillment > Loan History>. The transaction should show a returned status.
-
-
Can I undo a return?
-
No direct “undo” exists. You can, however, manually check the item out again to the correct patron if a return was done in error.
-
-
Will the <Override return date> affect all scanned items?
-
Yes. The override remains active for all items scanned until cleared manually.
-