Rules configured for your IZ Fulfillment Unit will be applied first, THEN rules configured in the 'WRLC Fulfillment Network' Fulfillment Unit will be applied
---
### How to Note that the TOU 'No FN Requesting' is managed in the Network Zone.
Similarly, if you wish to create Fulfillment Rules that target WRLC patrons only, you can add rules to a Fulfillment unit with an Input Parameter of User Group = 'wrlc user'
---
### For 'Borrowing Only' Institution Zones
If your entire Institution Zone is a Borrowing Only institution (you do not lend your items via CLS/AFN loans), you do not need additional configurations in your IZ. The Network-managed configurations found in the WRLC's [Rota Templates](https://alma-documentation-bookstack.azurewebsites.net/books/fulfillment/page/afn-network-zone-configurations#bkmrk-rota-templates) and [Partner Profiles](https://alma-documentation-bookstack.azurewebsites.net/books/fulfillment/page/afn-network-zone-configurations#bkmrk-fulfillment-%3E-partne) already prevent other WRLC patrons from requesting your institution's items.
For a full list for all WRLC partners that only borrow in the AFN, see the [Consortial Partners in CLS/AFN](https://alma.wrlc.org/books/fulfillment/page/consortial-partners-in-clsafn) page.
# Consortial Partners in CLS/AFN
#### **Lending and Borrowing Partners**
These partners are configured in the ROTA for the "Consortium Book Borrowing"
- American University - 01WRLC\_AMU
- Catholic University of America - 01WRLC\_CAA
- Gallaudet University - 01WRLC\_GAL
- George Mason University - 01WRLC\_GML
- Georgetown University - 01WRLC\_GUNIV
- George Washington University - 01WRLC\_GWA
- Howard University - 01WRLC\_HOW
- Marymount University - 01WRLC\_MAR
- University of the District of Columbia - 01 WRLC\_DOC
- Washington Research Library Consortium (SCF) - 01WRLC\_SCF
#### **Borrowing Partners\***
- American University, Washington College of Law - 01WRLC\_AMULAW
- Catholic University of America, Columbus School of Law - 01WRLC\_CUALAW
- Georgetown University Law Center - 01WRLC\_GUNIVLAW
- George Washington University School of Medicine and Health (Himmelfarb Health Sciences Library) - 01WRLC\_GWAHLTH
- George Washington University Law School (Jacob Burns Law Library) - 01WRLC\_GWALAW
- University of the District of Columbia, David A. Clarke School of Law - 01WRLC\_DOCLAW
- Trinity Washington University - 01WRLC\_TRN
\*Borrowing partners do not lend via CLS although they may lend via ILL requests and other methods.
# AFN Network Zone Configurations
The following Automated Fulfillment Network (AFN) configurations are set in the WRLC Network Zone. Most of the settings are visible (and not editable) in the Institution Zones; the only one that is not visible in the Institution Zone is the [Institutions Relations](https://alma.wrlc.org/books/fulfillment/page/afn-network-zone-configurations#bkmrk-institutions-relatio) configuration.
---
### Locate Profiles
**Configuration > Fulfillment > Resource Sharing > Locate Profiles**
[Borrowing-Only Institutions](https://alma.wrlc.org/books/fulfillment/page/consortial-partners-in-clsafn) also have Locate Profiles configured in the NZ. Even though they are not one of the potential lending partners, **a Locate Profile is used to first locate a borrowing request in the borrower's catalog prior to sending the request to potential partners**. This type of search determine whether a patron's resource request may be filled by local inventory, or whether the request must be directed to an external resource sharing partner as part of the locate process. This is specifically stated in the [Locating Items for Resource Sharing page](https://knowledge.exlibrisgroup.com/Alma/Product_Documentation/010Alma_Online_Help_(English)/030Fulfillment/050Resource_Sharing/Resource_Sharing_Configuration/Locating_Items_for_Resource_Sharing) on the Alma Knowledgebase.
For more information, see the Alma Knowledgebase page [Configuring Locate Profiles](https://knowledge.exlibrisgroup.com/Alma/Product_Documentation/010Alma_Online_Help_(English)/030Fulfillment/080Configuring_Fulfillment/060Resource_Sharing/010Basic_Resource_Sharing_Configurations#Configuring_Locate_Profiles).
---
### Workflow Profiles
**Configuration > Fulfillment > Resource Sharing > Workflow Profiles**
Workflows control the actions that can be performed on the borrowing and lending request task lists for the defined partner; Workflow Profiles are associated with a specific resource sharing partner profile.
There is one workflow each for borrowing and lending. Below are the borrowing and lending configurations for the WRLC AFN
**CLS Borrowing RS**
Please note that this configuration is NOT viewable in the Institution Zone.
Borrowing only partners do not lend via CLS although they may lend via ILL requests and other methods.
For more information, see the Alma Knowledgebase page [Configuring a Resource Sharing Partner](https://knowledge.exlibrisgroup.com/Alma/Product_Documentation/010Alma_Online_Help_(English)/030Fulfillment/050Resource_Sharing/005Managing_Resource_Sharing_Partners/Resource_Sharing_Partners#Configuring_a_Resource_Sharing_Partner)
---
### Rota Templates
**Fulfillment > Resource Sharing > Rota Templates**
Please note that the length of loans are dictated by TOUs and fulfillment units, NOT the item policy assigned to CLS items
For more information, see the Alma Knowledgebase page [Configuring Temporary Item Creation Rules](https://knowledge.exlibrisgroup.com/Alma/Product_Documentation/010Alma_Online_Help_(English)/030Fulfillment/080Configuring_Fulfillment/060Resource_Sharing/020Advanced_Resource_Sharing_Configurations#Configuring_Temporary_Item_Creation_Rules)
---
### Fulfillment Units
**Please note that if any of the settings above are left blank, the field will apply to all in the category. For example, if the User Group field is left blank, this profile will be applied to all user groups in your Institution Zone.
When set to 'Yes', the corresponding date is recalculated each time the linked record is refreshed from the source institution
- - Purge Date = NULL
- Purge After Expired = One month after expiration
When set to 'Yes', the corresponding date is recalculated each time the linked record is refreshed from the source institution
- - Resource Sharing Library = \[your institution's resource sharing library\]
- Copy Network Blocks = Yes
When set to 'Yes', Alma will delete all the current network blocks that exist on the linked account and re-create them each time the linked record is refreshed. Blocks can only be placed on linked accounts if they are configured in the ***User Block Definitions*** and ***User Block Descriptions*** section.
For more information, please see the [Configuring Linked Account Rules page](https://knowledge.exlibrisgroup.com/Alma/Product_Documentation/010Alma_Online_Help_(English)/050Administration/040Configuring_User_Management/110Linking_Users_in_Collaborative_Networks#rules.linkedAccount.rule_editor) on the Alma Knowledgebase.
---
#### Linked Account Shared Fields (Network Zone)
The configuration that determines which fields in the user account are shared in linked accounts is managed in the WRLC Network Zone. Below is the current configuration.
Important Requirements:
- Use only this numeric method
- Do not highlight cells
- Do not add notes, comments, or alternate symbols
# Long Lost Consortium Loan Services (CLS) Audit
##### **[Consortium Loan Services (CLS) Agreed Policies](https://www.libraries.wrlc.org/resource-sharing-wrlc-policies/borrowing-and-consortium-loan-service-cls-policies)**
These policies guide WRLC’s handling of lost Consortium Loan Services (CLS) materials. Consistent with Interlibrary Loan (ILL) practice, responsibility for replacing borrowed material rests with the patron’s home institution.
##### **Why This Process Exists**
- Fairly assign financial responsibility for lost CLS materials
- Confirm that reasonable efforts have been made to retrieve items before Lost Item Replacement costs are assessed
- Establish a consistent process for addressing Long Lost CLS items
##### **Background**
Due to the Alma migration, COVID and pandemic-era campus logistics, local circulation desk payment workflow changes, and related factors, WRLC's lending libraries accumulated a backlog of lost CLS items dating back to 2018. These items had not been systematically reviewed or resolved.
In addition, not all member libraries are able to collect fees. Because of this, the consortium will focus on resolving outstanding lost-item records between institutions instead of pursuing patron payments to the lending institutions.
In April 2026, the Resource Sharing Committee’s Long Lost Fine/Fee (LLFF) Task Force developed a policy proposal to address lost CLS materials and submitted it to the Library Directors Council (LDC) for approval.
The LLFF Task Force proposed aligning CLS lost-item handling with existing ILL practices. Under this approach, member institutions reconcile replacement fees for CLS items lost by their patrons when those items are not returned within an established timeframe. All inter-institutional accounting and logistics would be managed centrally by WRLC Headquarters.
##### **LDC Approved Policy Direction**
In May 2026, the LDC approved the LLFF Task Force proposal. RSC also voted on how to address the existing backlog, which years to prioritize first, and the timeline for future long-lost item audits. The approved approach includes:
- A one-time payment for the backlog of CLS Lost Item Replacement fees dating from 2018-2025
- A regular Lost and Paid schedule for future CLS items lost by member institutions’ patrons
- An accelerated timeline for moving items from Lost to Lost and Paid, as finalized by the LLFF Task Force and RSC
- Annual inter-institutional payments coordinated by WRLC, regardless of the final Lost and Paid timeline
##### **Lost and Paid Process**
Per CLS agreed policies, items age into Lost status in Alma when they are 40 days overdue. Under the Long Lost CLS audit process, items that remain in Lost status for three to six months are reviewed and resolved through the steps below.
The process shifts responsibility for replacement fees from the lending library to the patron's home institution, which manages patron billing according to local practices.
- In the lending IZ, the Lost Item Replacement Fee is removed from the linked WRLC user account, and the item is marked Lost and Paid
- The Lost Item Replacement Fee is then applied to the patron’s account at their home library
- The patron’s home institution assumes responsibility for reimbursing the lending library
- WRLC centrally manages inter-consortial invoicing for CLS Lost Item Replacement Fees, and these amounts are added to each library’s annual assessment
- The patron reimburses their home library according to local practices, such as direct payment through Alma, bursar billing, etc.
- Consistent with ILL practice, Lost and Paid items are considered non-returnable, and the fee remains on the patron’s account even if the item is later returned
##### **Patron Notifications**
WRLC will manage pre-charge patron notifications beginning one month before the Lost and Paid process outlined above
Notifications will be sent from a WRLC-managed email address and will include patron-specific information, such as:
- Patron name
- Lost item list
- Loan details
Based on each library’s preference, WRLC will support two notification templates:
- A replacement-fee notice for patrons subject to charges
- A reminder-only notice for faculty, staff, or exempt patron groups
Patron replies will be routed directly to each institution’s preferred circulation email address.
##### **Invoicing and Institutional Balances**
WRLC will manage invoicing for CLS Lost Item Replacement fees. Balances will be applied to each institution’s annual consortium assessment. Member libraries are responsible for working with their patrons to recover payment for lost material that has been added to the patron’s home library account.
##### **2026 Audit Timeline**
- **June 2026** CLS loan reports were shared with all Alma Fulfillment Network (AFN) libraries that participate in CLS lending, as well as corresponding university professional libraries that borrow from AFN libraries but do not lend material. The reports identify lost items borrowed by patrons at each institution and owed to the AFN lending libraries.
- **August 2026** WRLC will manage borrower notifications for lost CLS items. Emails will be tailored to each patron and will include:
- Patron name
- Lost item title or titles
- Relevant loan details
Based on each AFN lending library’s preference, WRLC can provide two notification templates:
- - Replacement-fee notices for patrons subject to charges
- Reminder-only notices for faculty, staff, or exempt patron groups
During this period, library staff will work with their patrons to retrieve and return lost material.
- **October 1, 2026** The window for retrieved material to be returned to the lending libraries will close. Per the new policy:
- In the lending library’s IZ, the Lost Item Replacement Fee of $110.00 will be removed from the linked WRLC user account
- Item's status will be updated to Lost and Paid in the owning library's IZ
- The Lost Item Replacement Fee will be added to the patron’s home library account, including item details such as title, barcode, and loan information
- Patron will be notified that the item has been paid for by their home institution
- **February 1, 2027** The Spring 2027 Long Lost CLS audit will resolve items that aged into Lost status between January 1, 2026, and November 15, 2026.
- **Post-February 2027**, the audit procedure will transition to RSC’s approved semester-based schedule
|
| **Long Lost Item**
**(loans that have aged into Lost status)**
| **WRLC Patron notifications**
| **Final Return Date**
| **Marked as**
**Lost and Paid**
**at Lending IZ**
|
| **Spring Semester**
| Nov 16- April 15
| April- May
| June 1
| June 2
|
| **Summer Semester**
| April 16- August 15
| August - Sept
| October 1
| October 2
|
| **Fall Semester**
| August 16- Nov 15
| Dec- Jan
| February 1
| February 2
|
| Code
| Name
| External Name
| Type
| Remote Storage
| Fulfillment Unit
| Call Number Type
| Map
|
| BORROWING
| Borrowing
| Borrowing
| Open
| leave blank
| Select value ending in “\_FU”
| leave blank
| leave blank
|
| LENDING
| Lending
| Lending
| Open
| leave blank
| Select value ending in “\_FU”
| leave blank
| leave blank
|
**3. **Go to Fulfillment | Locations | Physical Locations, click the ellipsis next to your Borrowing location, scroll down to the Physical Location Circulation Desk List section, click the Attach Existing Circulation Desk link, select your resource sharing library’s circulation desk, make sure the Check In, Check Out, and Reshelve boxes are checked, click Attach Existing Circulation Desk, and then click the Save button. Repeat this process for your Lending location.
#### Resource Sharing Library
*Your resource sharing library is the library where your temporary borrowing and lending locations are housed. It is possible to use your main library as your resource sharing library, or you can use the stand-alone resource sharing library that was created by Ex Libris. If you use the stand-alone resource sharing library, there will be a transit step between your main library and the resource sharing library whenever you receive or return a resource sharing item. If you use your main library as your resource sharing library, there is no transit step. *
*As a frame of reference, WRLC's AFN / CLS process uses your institution's Main Library , NOT the resource sharing library created by Ex Libris.*
**1.** Go to Configuration, select the library you want to be your resource sharing library from the Configuring dropdown, and then go to Fulfillment | Library Management | Library Details.
**2.** Scroll down to the Resource Sharing Information section and make sure the Is Resource Sharing Library box is checked. Also, make sure your OCLC symbol is listed in the Symbol field.
**3.** Scroll down to the Borrowing Information section and check the following :
- Cancel Request on Locate Failure
- Automatically Activate Locate Profile
Next, select your temporary borrowing location from the Default Location dropdown (the one you created in the [Temporary Resource Sharing Locations](https://alma.wrlc.org/books/fulfillment/page/configuring-peer-to-peer-resource-sharing-in-the-iz#bkmrk-temporary-resource-s) section). Lastly, select the library that you would like to serve as your default pickup location from the Default Pickup Location dropdown.
For libraries participating in WRLC's AFN, please note that the location configured as the default Borrowing location is already set to a CLS location. In order to use a different location for items borrowed from P2P partners, do not change the location in the Borrowing Information section (leave as is), and instead create a [Temporary Item Creation rule](https://alma.wrlc.org/books/fulfillment/page/configuring-peer-to-peer-resource-sharing-in-the-iz#bkmrk-temporary-item-creat).
**4.** Scroll down to the Lending Information section and check the following boxes :
- Automatically Locate Resource
- Reject Request When No Available Items
- Reject Request When No Requestable Items
- Reject Request When Only Electronic Available
- Ignore Electronic Resources
- Automatic Creation boxes
Next, select your temporary lending location from the Default Location dropdown (the one you created in the [Temporary Resource Sharing Locations](https://alma.wrlc.org/books/fulfillment/page/configuring-peer-to-peer-resource-sharing-in-the-iz#bkmrk-temporary-resource-s) section).
For libraries participating in WRLC's AFN, please note that location configured as the default Lending location is NEVER used for AFN requests. Lending requests in the AFN are regular hold requests instead. For more information, see the [Lending Setup section](https://alma.wrlc.org/books/fulfillment/page/afn-institution-zone-configurations#bkmrk-lending-setup) of the AFN Institution Zone Configurations page.
**5.** Scroll down to the bottom of the page, check the Locate By Fields box, click the No button, and then check the Title, Author, ISBN/ISSN, System Control Number, and LCCN (010) boxes.
**6.** Click the Save button.
#### Resource Sharing Jobs
*This job must be running in order for resource sharing requests to automatically move on to the next lender if they’re not filled within the expiry days value listed in the resource sharing partner.*
**1.** Go to Configuration | Fulfillment | General | Fulfillment Jobs Configuration, switch the status of the Expired Resource Sharing Requests job to Active, select Every Day at 02:00 from the Schedule dropdown, and then click the Save button.
#### Other Resource Sharing Settings
*Because the setting below are NOT library specific, they apply to all libraries within an institution. When working with multi-resource sharing libraries in a single institution zone, leave the location and library code information blank, and instead 1) assign specific library and locations via the [Lending and Borrowing sections of the Library Information page](#bkmrk-resource-sharing-lib-1), and 2) assign a resource sharing library in the patron record.*
| **Setting**
| **Value**
|
| ill\_item\_creation\_lib\_code
| the code for your resource sharing library
|
| ill\_item\_creation\_location\_code
| the code for your temporary borrowing location
|
| rs\_allow\_actions\_on\_scan\_in
| true
|
| rs\_auto\_request\_lending
| true
|
| rs\_disable\_borrowing\_auto\_assign
| true
|
| rs\_disable\_lending\_auto\_assign
| true
|
#### Workflow profiles
*Workflow profiles help determine how resource sharing requests behave.*
**1.** Go to Configuration | Fulfillment | Resource Sharing | Workflow Profiles.
**2.** Click the Add Workflow Profile link, enter “Peer to Peer Borrowing” into the Workflow Profile field, leave the Type dropdown set to Borrowing, check the boxes listed below, and then click the Add and Close button.
· Automatic renew, Cancelled By Patron, Cancelled by partner, Cancelled by staff, Conditional, Lender check in, Manual renew, Reject, Renew requested, Request accepted, Will supply
**3.** Click the Add Workflow Profile link again, enter “Peer to Peer Lending” into the Workflow Profile field, switch the Type dropdown to Lending, check the boxes listed below, and then click the Add and Close button.
· Borrower recall, Cancel reply, Conditional, Lender check in, Patron renewal, Staff renewal
#### Resource Sharing Partners
*Resource sharing partners allow Alma institutions to send resource sharing requests to each other.*
**1.** From the main Alma screen, go to Fulfillment | Resource Sharing | Partners, click the Community tab, change the search dropdown from Description to Name, and search for the partner, click the ellipsis next to their name, and then click Copy.
**2.** Click on the Institution tab, click the ellipsis next to the partner's name, and click Edit.
**3.** Select the workflow profiles you configured from the Borrowing Workflow and Lending Workflow dropdowns.
**4.** Click the Parameters tab, change the Expiry Time (Days) setting to the appropriate number, and then click the Save button.
#### Item Policy
*This Item Policy will be added to the temporary records Alma will create for the items you borrow from SUNY. This configuration work must be done at the resource sharing library level.*
**1.** Go to Configuration, select your resource sharing library from the Configuring dropdown, and then go to Fulfillment | Physical Fulfillment | Item Policy.
**2.** Click the Add Row button. The Item Policy configuration window will open.
**3.** Configure the Item Policy as shown in the image below and then click Add Row. Once the Item Policy configuration window closes, click the Save button.
#### Temporary Item Creation Rule
*This Temporary Item Creation Rule will add the Item Policy you previously configured to the temporary item records Alma will create for the items you borrow from your peer-to-peer lending institutions. It will also determine the temporary item record’s location. This configuration work must be done at the resource sharing library level.*
**1.** Go to Configuration, select your resource sharing library from the Configuring dropdown, and then go to Fulfillment | Library Management | Temporary Item Creation Rules
**2.** Click the Add Rule button
**3.** Configure the Temporary Item Creation Rule to have the following input parameters
Name = Resource Sharing Partner
Operator = InList
Value = \[List of Resource Sharing Partners\]
**4.** Make sure this rule is positioned at the top of your Temporary Item Creation rules list.
#### Fulfillment Policies
*These fulfillment policies will be used in the Loan and Lending Resource Sharing TOUs you will configure for items borrowed from and loaned to your peer-to-peer lenders. This configuration work should be done at the institution level. *
*Please contact your lending partners to determine the values necessary for your fulfillment policies.*
**1.** Go to Configuration, select your institution from the Configuring dropdown, and then go to Fulfillment | Physical Fulfillment | Advanced Policy Configuration.
**2.** Click the Add Fulfillment Policy button, select the type of policy you would like to configure, configure the relevant policies, and then click the Save button.
*Note: If you already have policies configured for these resource sharing partnerships, there’s no need to configure additional policies. You can use the policies you’ve already configured.*
#### Loan, Borrowing, Resource Sharing, and Lending Resource Sharing TOU's
*These TOUs will determine the loan and renewal periods for the items you borrow from and loan to your peer-to-peer partners. They will also determine which user groups are allowed to submit borrowing requests in Primo. This configuration work should be done at the institution level.*
*Please contact your lending partners to determine the values necessary for your fulfillment policies.*
**1.** Go to Configuration, select your institution from the Configuring dropdown, and then go to Fulfillment | Physical Fulfillment | Terms of Use and Policies.
**2.** Click the Add a Terms of Use button.
**3.** Click the Loan button and then click the Next button.
**4.** Select the relevant policies in the table below, click the Next button, and then click the Save button.
**5.** Click the Add a Terms of Use button again.
**6.** Click the Lending Resource Sharing button and then click the Next button.
**7.** Select the relevant policies in the table below, click the Next button, and then click the Save button.
**8.** Click the Add a Terms of Use button again.
**9.** Click the Borrowing Resource Sharing button and then click the Next button.
**10.** Select the relevant policies in the table below, click the Next button, and then click the Save button.
#### Fulfillment Unit Rules
*These fulfillment unit rules will determine which Loan and Lending Resource Sharing TOUs are assigned to the items you borrow from and lend to your peer-to-peer partners. This configuration work must be done at the resource sharing library level.*
**1.** Go to Configuration, select your resource sharing library from the Configuring dropdown, and then go to Fulfillment | Physical Fulfillment | Fulfillment Units
**2.** Click the ellipsis next to your resource sharing fulfillment unit and then click Edit.
**3.** Click the Fulfillment Unit Rules tab, select “Loan” from the Rule Type dropdown, and then click the Add Rule button.
**4.** Configure the Loan fulfillment unit rule to use your newly created Item Policy, then click the Save button.
**5.** Make sure the Loan fulfillment unit rule you’ve configured is positioned above any other Loan fulfillment unit rules that could potentially be applied to items borrowed from your peer-to-peer partners and then click the Save button.
**6.** Click the ellipsis next to your resource sharing fulfillment unit and then click Edit.
**7.** Click the Fulfillment Unit Rules tab, select “Lending Resource Sharing” from the Rule Type dropdown, and then click the Add Rule button.
**8.** Configure the Lending Resource Sharing fulfillment unit rule similar to the image below; in the list, add all of your P2P partners. Then click the Save button.
[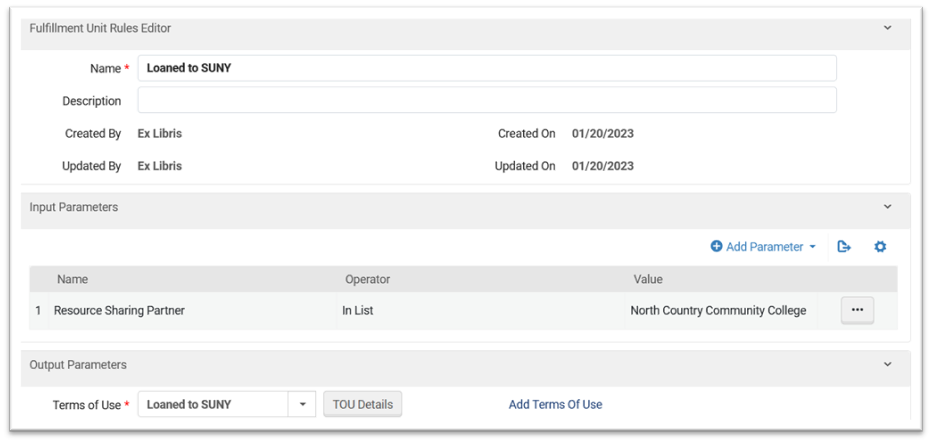](https://alma-documentation-bookstack.azurewebsites.net/uploads/images/gallery/2025-06/picture1-lending.png)
**9.** Make sure the Lending Resource Sharing fulfillment unit rule you’ve configured is positioned above any other Lending Resource Sharing fulfillment unit rules that could potentially be applied to items loaned to your peer-to-peer partners and then click the Save button.
**10.** Click the ellipsis next to your resource sharing fulfillment unit and then click Edit.
**11.** Click the Fulfillment Unit Rules tab, select “Borrowing Resource Sharing” from the Rule Type dropdown, and then click the Add Rule button.
**12.** Configure the Borrowing Resource Sharing fulfillment unit rule similar to the image below (when configuring the input parameter, select the user groups you want to be able to submit borrowing requests) and then click the Save button.
[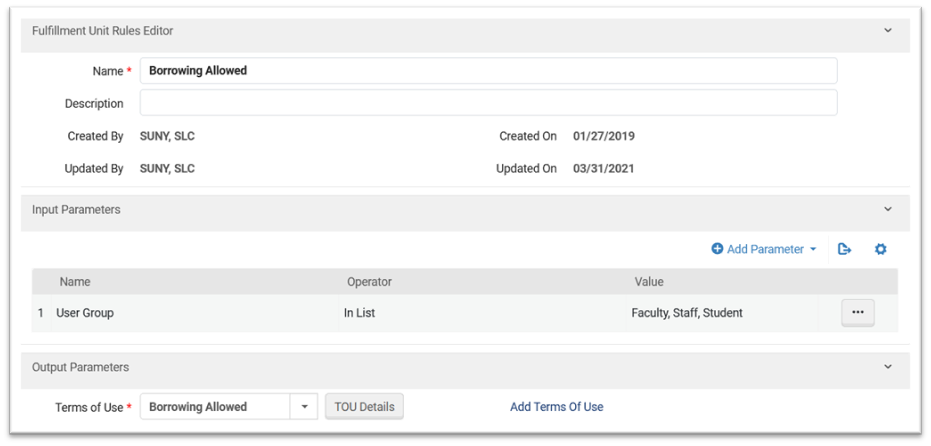](https://alma-documentation-bookstack.azurewebsites.net/uploads/images/gallery/2025-06/picture3-borrowing.png)
**13. **Make sure the Borrowing Resource Sharing fulfillment unit rule you’ve configured is positioned above any other Borrowing Resource Sharing fulfillment unit rules that could potentially prevent users from submitting borrowing requests.
#### Rota Template
*This Rota Template will determine which peer-to-peer libraries are added to your request rotas. This configuration work must be done from the main Alma page, not the Configuration page. *
**1.** Go to Fulfillment | Resource Sharing | Rota Templates
**2.** Click the Add Template button.
**3.** Configure the Rota Template and then click the Save and Add Members button.
**4.** Click the Add Partners button, select your peer-to-peer partners, and then click the Save Button.
#### Rota Assignment Rule
*This Rota Assignment Rule will determine where peer-to-peer libraries will be positioned in your request rotas. This configuration work should be done at the institution level.*
**1.** Go to Configuration, select your institution from the Configuring dropdown, and then go to Fulfillment | Resource Sharing | Rota Assignment Rules.
**2.** Click the Add Rule button.
**3.** Configure the Rota Assignment Rule according to the terms of your lending agreement, and then click the Save button.
**4.** Make sure the Rota Assignment Rule is positioned at the top of your rota assignment rules list.
#### Sending Borrowing Request Rule
*This rule will make sure borrowing requests assigned to your peer-to-peer libraries are sent automatically. This configuration work may not be necessary given how your other Sending Borrowing Request rules are configured. This configuration work should be done at the institution level.*
**1.** Go to Configuration, select your institution from the Configuring dropdown, and then go to Fulfillment | Resource Sharing | Sending Borrowing Request Rules.
**2.** Click the Add Rule button.
**3.** Configure the Sending Borrowing Request rule according to the terms of your lending agreement, and then click the Save button.
# Moving P2P partner profiles from the NZ to the IZ (Cancelled)
##### **NOTE: Ex Libris has changed their original assessment of the issue; after some testing, they now believe there is no way to move NZ partner profiles to an individual IZ without disruption of services to patrons. For that reason, WRLC is cancelling this project.**
**Problem**: The NZ-managed partners have the same Codes as the equivalent partners in the RS Directory. This prevents an IZ from downloading the Directory partners until the NZ partners are removed.
**Solution**: To circumvent this roadblock, *new* NZ-managed partners will be created as temporary replacements. They will have new, unique codes that will not conflict with those in the directory. This will make the cleanup a longer process, but it prevents any service disruptions to your patrons (as well as with SUNY).
### Phase One
#### Configuration in the Network Zone
1. Create the new Replacement Partners in the NZ
- As I mentioned, the only data that needs to be unique is the Code; make this unique in whatever way you like, as long as it doesn't match the Directory. But all other details within the partners can be identical to the current NZ partners.
2. Once they have been created, distribute these Replacement partners to the IZs by running the "Distribute Resource Sharing Configuration" job in the NZ
3. After which, the IZs should update any/all Rota Templates, replacing the Original NZ partners with the Replacement partners
4. When the IZs are fully configured to use the Replacement partners, return to the NZ and mark the Original partners as Inactive,
5. Then Distribute the changes again by running the "Distribute Resource Sharing Configuration" job in the NZ
- This is just an extra step to ensure that no new requests are created with these Original partners
At this point, all new incoming/outgoing requests will be using the Replacement partners. Since this is the case, you will be free to begin removing the Original partners piece-by-piece from all remaining Active requests. This process will take a while, as any request (Borrowing or Lending) that has one of these Original SUNY partners as the Active partner will need to finish organically, waiting for the patron to return the item and/or ship the item back to the lender. But it's at this point that the cleanup can begin.
#### Initial Network Zone Cleanup
6\. Once you have confirmed that Replacement partners are all working as expected (and I see no reason why they wouldn't), delete the Original partners from the NZ
- This will remove the Original partners from some but not all IZs, but this is expected
7\. Then distribute the deletion of the original partners by running the "Distribute Resource Sharing Configuration" job in the NZ
8\. Wait 24 hours for these changes to be visible in Alma Analytics, then run a Lending and a Borrowing Analytics report (see image below) in the Network Zone; send to participants.
#### Partner Borrowing & Lending Request Cleanup
It is recommended to go one partner at a time. For example: start by removing SUNYBUF from American, and once that is done move on to SUNYALB, and so on\*
##### A. Clean up Lending Requests
1. For Lending Requests with the following statuses, nothing needs to be done. We will let the lending workflow run its course until the request finally has a status of *Completed*
- Being processed
- Received by partner
- Returned by partner
- Shipped physically
- Overdue request
2. Lending Requests with the statuses below still have an "active" status according to Alma. Their status needs to be changed to one that Alma considers Inactive: *Request Completed*, *Deleted*, or any of the various *Cancelled* statuses
- Expired
- Locate failed
- Rejected the borrower request
To change a status manually, follow the steps below in the Lending Requests Task List. Filter your results appropriately, expand the results to show 50 at a time, and you will be able to update requests in batches of 50 (there is no job that can do this in Alma)

1. For Borrowing Requests that A) have the following statuses, and B) the ***active*** partner is one of the 4 SUNY schools, nothing needs to be done. We will let the lending workflow run its course until the request finally has a status of *Complete*
- Loaned item to patron
- Physically received by library
- Ready to be sent
- Renewed by partner
- Returned by patron
- Returned item to partner
- Shipped physically
2. For ***all other borrowing requests***, you can complete one of the following workflows:
1. For Borrowing Requests that A) have the following statuses, and B) the ***active*** partner is NOT one of the 4 SUNY schools, we will need to remove the Original SUNY partners from each BR's Rota. Active partners cannot be removed; only Pending and Rejected. This method, though, can only be one manually one request at a time, but allows you to cleanup the SUNY partners from any active BRs
- Loaned item to patron
- Lost communicated
- Physically received by library
- Ready to be sent
- Renewed by partner
- Returned by patron
- Returned item to partner
- Shipped physically
2. For borrowing requests with a status listed below, you can follow the workflow outlined in ***Cleaning up Lending Requests*** to change the status of these borrowing requests
- Expired
- Exported to third party
- Rejected by partner
##### C. Wait until all active lending and borrowing requests (those with items checked out to patrons) have a status of *Completed*
13\. Once one (or more) of the Original partners have been cleaned up from an IZ, run the Distribute job in the NZ once again
- - If all of the requests were cleaned up, that partner will be removed
- If not, you'll see the same error message indicating if any Borrowing and/or Lending requests remain
This is effectively the entire process. Over time, clean up all of the Original partners as much as possible. As we discussed, a there will be requests that are still actively sharing with one of the SUNY partners, so we'll have to wait for these to finish via normal means. But, the upside is that once these requests finish, they won't need to be cleaned up - they'll be in the Completed status, so no longer active in the system.
Eventually, all traces of the Original SUNY partners will be removed, and they will finally be fully deleted. Once that has occurred, it's time for the next phase.
### Phase Two Cleanup
- Once you're ready to begin, this is where you'll finally create the IZ-managed partners, as desired. Since the Original NZ partners are now deleted, each IZ can download the SUNY partners from the Directory, as desired
- And in doing so, any Rotas and Rules can be updated to use these Directory partners
- Once the IZs have fully switched to using Directory partners, the Replacement partners can now be deleted. The replacement partners will be marked as Inactive
- Then distribute these Replacement partners to the IZs by running the "Distribute Resource Sharing Configuration" job in the NZ
Then you will follow the remaining steps in Phase One, [Initial Network Zone Cleanup](https://alma.wrlc.org/books/fulfillment/page/moving-p2p-partner-profiles-from-the-nz-to-the-iz#bkmrk-phase-one-cleanup-st) and [Partner Borrowing & Lending Request Cleanup](https://alma.wrlc.org/books/fulfillment/page/moving-p2p-partner-profiles-from-the-nz-to-the-iz#bkmrk-partner-borrowing-%26-), this time slowly removing requests associated with the temporary profiles.
Additional Notes:
- Like we discussed, this is going to be a *long* process. This is mostly due to having to wait on some requests to finish organically before partners can be deleted. But the advantage to all of the extra steps means that there will be functionally no disruptions of service to any/all patrons. And your RS staff will see little-to-no difference in their day-to-day work.
- Some requests might be troublesome - you can't find them when searching in Alma, they won't let you update their status, etc.
- If these pop up, Ex Libris has methods to find and correct them, or just outright delete them if they are not needed
- Lastly, I would not recommend bothering with this process in your PSBs.
- If you don't need the PSBs for active Resource Sharing testing, it would be best to just wait for the August refresh, which will automatically copy Production settings to the PSBs
*The "one IZ at a time, one partner at a time" method is for ease of tracking progress. By focusing on a single partner within a single IZ, you can fully complete the cleanup for that partner, then run the Distribute job to remove them, and then move on to the next partner on the list. But this is far from the only approach to this cleanup; this is just how I would approach the situation were I in your shoes.
In reality, this cleanup can be handled by whatever method is most convenient for you all. You could focus on only Borrowing first, then do Lending second. Or you could work on both at the same time. You could focus on cleaning up one IZ at a time, or you could handle it as one large project for the whole network. Each IZ could be in charge of their own cleanup, performing it as quickly or as slowly as they need, and it wouldn't affect any of the other IZs.
# SUNY P2P partners Stony Brook, Binghamton, Albany, and Buffalo
Although the policy is for all Peer to Peer configuration to exist in the Institution Zone only, the following partner profiles are configured and managed in the WRLC Network Zone:
- Stony Brook University, SUNY
- Binghamton University, SUNY
- University at Albany, SUNY
- University at Buffalo, SUNY
If any WRLC institution wishes to make changes to the partner profiles above, please send in a Service Desk ticket at servicedesk@wrlc.org
#### Background
When the WRLC first started peer to peer lending in Alma, all of the configurations for this workflow were set in the Alma Network Zone; our four original partners were the schools listed above. The policy changed in 2025 to move P2P to be IZ-only, but the only part of configuration we were unable to move were the partner profiles.
This is because partner profiles need a unique code and a unique ISO symbol; our NZ profiles shared an ISO symbol with the partner profiles in the Community tab, so the Community profiles cannot be copied to the IZ. And if the NZ partner profiles were to have different ISO symbols, none of the requests attached to that particular partner profile would work. Moving the partner profiles to the IZ would result in service disruption for patrons.
More information on this issue can be found in Salesforce case #07877638
# Adding P2P Partners from the Resource Sharing Directory
#### Downloading a P2P Partner from the Resource Sharing Directory
To download a new P2P partner and add them to the rota template, follow the instructions below:
1. In Alma, go to **Fulfillment > Resource Sharing > Partners**
2. Choose the **Community** tab
3. Search for the relevant partner. In this view, you can search for the partner by **Description**, **Name**, **Pods I'm Part Of**, or **Symbol**
4. Once you've found the correct institution, click on the box next to their name to checkmark the profile. Then click **Copy** on the top right-hand corner OR click on the **ellipsis button (...)** next to their name, then choose **Copy.** By copying them to your instance of Alma, you have downloaded both the institution's Partner Profile and Locate Profile.
5. To add them to the rota, go to **Fulfillment > Resource Sharing > Rota Templates**
6. Find the appropriate Rota from the list. Click on the **ellipsis button (...)**, then choose **Edit**
7. Choose the **Template Members** tab
8. Click + **Add Partners** on the top right-hand corner. Then search for the relevant partner, and click **Add Partners**
9. Then choose the **Save** button at the top right-hand corner to save the rota template
---
#### Add Partner to the Temporary Item Creation Rule
The Temporary Item Creation Rule assigns a specific location and item policy to item records borrowed by your patrons from your P2P libraries. Adding the new partner to the list in the Temporary Item Creation Rule guarantees that items borrowed from your new P2P library will be given the correct location and item policy.
1. In Alma go to **Configuration**. Choose your designated Resource Sharing Library (for most WRLC institutions, it is your main library) from the drop down menu, then **Fulfillment > Library Management > Temporary Item Creation Rules**
2. Choose the temporary item creation rule that your Library uses for P2P partners. Click on the **ellipsis button (...)**, then choose **Edit**
3. Under **Input Parameters**, edit the **Parameter Resource Sharing Partner | In List**
4. Add your new P2P institution to the list, then click **Save** to save the input parameter
5. Click **Save** again to save the entire temporary item creation rule
---
#### Add Partner to your P2P Terms of Use (TOU)
1. In Alma go to **Configuration**. Choose your designated Resource Sharing Library (for most WRLC institutions, it is your main library) from the drop down menu, then **Fulfillment > Physical Location > Fulfillment Units**
2. Choose the Fulfillment Unit your Library uses for P2P from the list. Click on the **ellipsis button (...)**, then choose **Edit**
3. Choose the **Fulfillment Unit Rules tab**. Then choose the Rule Type of **Lending Resource Sharing** from the drop down menu.
4. Edit the appropriate rule from the Institution Rules List (for the original participants of the SUNY pilot project, it will be called **SUNY Lending**
5. Under **Input Parameters**, edit the **Parameter Resource Sharing Partner | In List**
6. Add your new P2P institution to the list, then click **Save** to save the input parameter
7. Click **Save** again to save the entire fulfillment unit rule
8. Then click **Save** again to save the entire fulfillment unit
---
#### Review the Partner Profile
It is always best practice to review the information in a recently downloaded partner profile, just to make sure that the correct configurations are in place. Workflows and Expiry times will vary depending on the set agreements between borrowing institutions; you will want to find out what these settings should be before making changes to partner profiles.
1. In Alma, go to **Fulfillment > Resource Sharing > Partners**
2. Find the relevant institution under the **Institution** tab (this is the tab that automatically appears when first opening this page). Click on the **ellipsis button (...)**, then choose **Edit**
3. Under the **General Information** tab, choose the appropriate **Borrowing** and **Lending Workflows** from the drop-down menu. These settings will vary depending on your agreement with the institution.
4. Under the **Parameters** tab, make sure the **Request Expiry** option is correct, as well as the **Expiry Time**. These settings will vary depending on your agreement with the institution.
A partner's Expiry Time setting determines how long the partner school has to respond to your school's borrowing requests. If your borrowing request isn't updated to shipped within the expiry period, the request will be automatically rejected the next time the Expired Resource Sharing Requests job runs in the partner school's IZ (it runs daily at 2:00am).
5. Then choose the **Save** button at the top right-hand corner to save the edited partner profile
---
#### Review the Locate Profile
It is also best practice to review the information in a recently downloaded locate profile, just to make sure that the correct configurations are in place. These settings will vary depending on the set agreements between borrowing institutions; you will want to find out what these settings should be before making changes to locate profiles.
1. In Alma, go to **Configuration > Fulfillment > Resource Sharing > Locate Profiles**
2. Find the relevant institution in the list. Click on the **ellipsis button (...)**, then choose **Edit**
3. Choose the **Locate Profile Parameters** tab
4. Check the settings (for example, **Ignore Electronic and Digital Resources**) to make sure these are correct. These settings will vary depending on your agreement with the institution.
5. Then choose the **Save** button at the top right-hand corner to save the edited locate profile
---
#### Check other relevant configurations
1. Make sure the **Expired Resource Sharing Requests** job is running daily (especially if you have configured Expiry Time)
1. Go to **Configuration > Fulfillment > General > Fulfillment Jobs Configuration**
2. Check to see that the **Expired Resource Sharing Requests** is Active and running everyday.
2. Make sure the **Resource Sharing Working Days** list includes the days your staff do not process ILL
1. Go to **Configuration > Fulfillment > Resource Sharing > Resource Sharing Working Days**
2. Add the days of the week your staff do NOT process ILL to the list
3. Then click **Save**
# How to Process Borrowed Peer to Peer (P2P) Items
This workflow explains how to process books borrowed from partnering Peer to Peer (P2P) libraries.
Thank you George Washington University for sharing your workflow processes.
**When to Reference This Document:**
- When books arrive via delivery or mail from partnering P2P institutions.
- When processing newly received items so they can be placed on the hold shelf for WRLC patrons.
- When returning borrowed item to partnering P2P institutions.
- When ensuring paperwork, routing slips, and Alma request metadata all match.
##### **Required Roles**
- Fulfillment Operator
- Circulation Desk Manager
##### **Part I: Incoming Books**
**1: Verify Paperwork and Item Barcode**
- Locate paperwork inside the P2P-loaned item
- Confirm barcode on book matches the barcode on the accompanying paperwork
**2: Open Receiving Items** Navigate to Fulfillment > Resource Sharing > Receiving Items>
**3: Enter the External Identifier** Locate the External Identifier information provided on the paperwork and click <OK>.
[](https://alma-documentation-bookstack.azurewebsites.net/uploads/images/gallery/2025-12/diTimage.png)
**Note:** Ex Libris identifies the External Identifier as the primary matching key between the item and the borrowing request.
**4: Assign a Temporary Barcode** The temporary barcode ties the physical item to the local inventory system while maintaining the lending institution’s original barcode.
- A pop-up will appear prompting for a Temporary barcode.
- Enter the item’s actual barcode.
- Click <Save>
[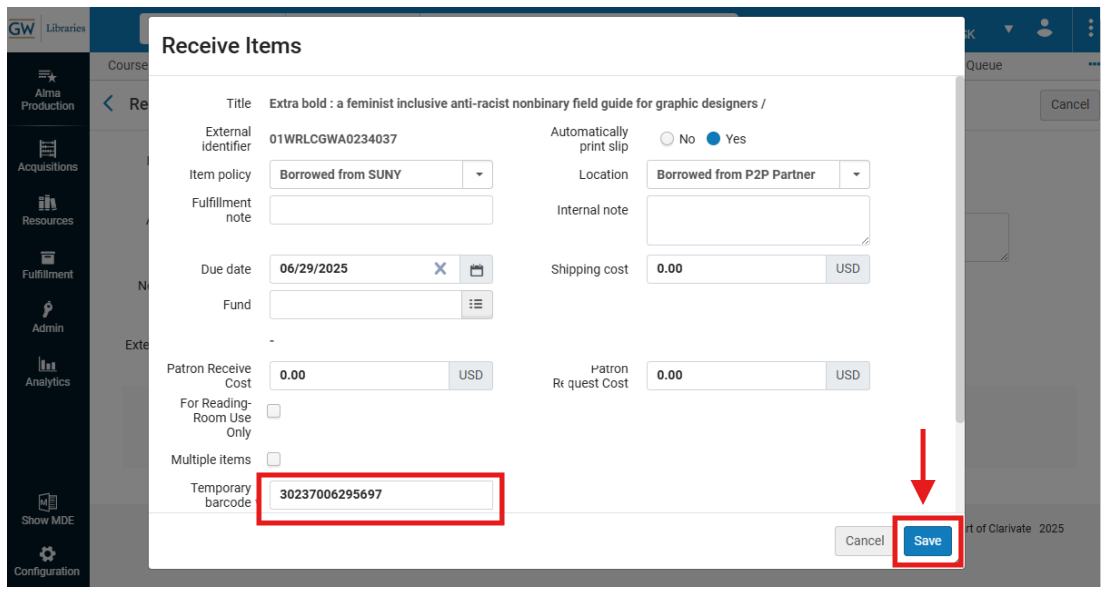](https://alma-documentation-bookstack.azurewebsites.net/uploads/images/gallery/2025-12/Vg3image.png)
**5: Print the Book Slip** After saving, Alma generates the Resource Sharing Receive Slip (if Quick Printing is enabled); Click <Print>
**6: Prepare the item for the Hold Shelf** Follow your libraries' procedures to prepare the item for the Hold Shelf
- **Note GW Procedures:** Create the Hold Strap
- Cut the printed slip lengthwise to form a strap.
- Tape it around the item’s cover so the patron name and Hold Until Date are visible.
**7: Place Item on the Hold Shelf** Follow your libraries' Hold Shelf procedures to shelve the incoming item for patron pickup.
##### **Part II: Returning Books**
**1: Open Return Items** Navigate to Fulfillment > Checkout/Checkin> Return Items>
**2: Scan the Item Barcode** Ensure My Institution is selected and Scan the item barcode
- Select <OK>
**Note:** Be sure to not use the External Identifier
[](https://alma-documentation-bookstack.azurewebsites.net/uploads/images/gallery/2025-12/Jyjimage.png)
**3: Confirm Transit Destination** Alma displays a pop-up indicating Transit Destination to the lending partner; Click <OK>
[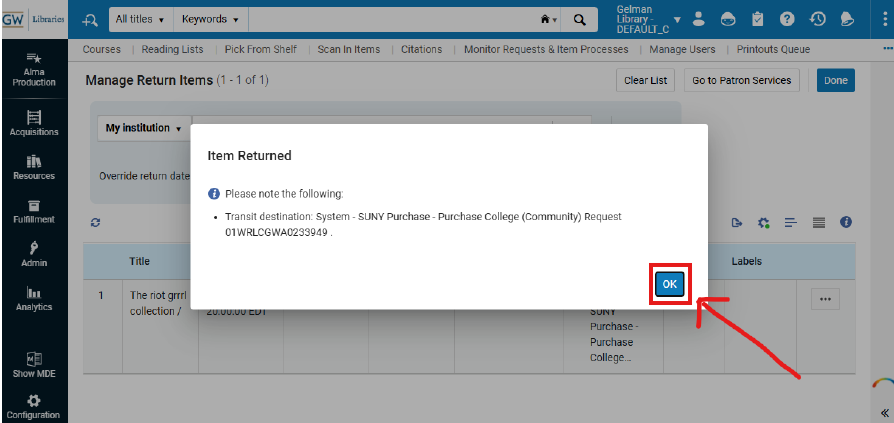](https://alma-documentation-bookstack.azurewebsites.net/uploads/images/gallery/2025-12/iXJimage.png)
**Note:** This step triggers Alma’s Resource Sharing workflow to update to In Transit for the lending library- acknowledging transit is essential for accurate tracking.
**4: Print the Return Slip** If you have enabled Quick Printing, Alma should automatically generate the "Resource Sharing Return Slip Letter; Click Print.
[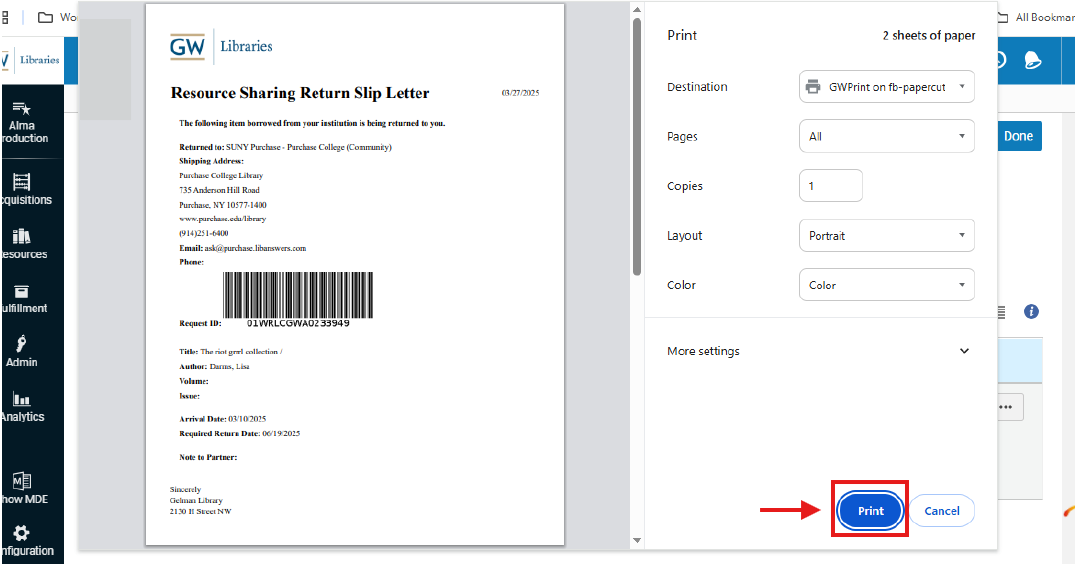](https://alma-documentation-bookstack.azurewebsites.net/uploads/images/gallery/2025-12/GeBimage.png)
**5: Prepare the Item for Shipment or Shelf Routing** Insert the printed slip into the item. Follow your libraries' mailing procedures
##### **Frequently Asked Questions**
- *What is the External Identifier and why is it important?*
- It links the borrowing request to the item; Ex Libris defines it as an essential Resource Sharing match point.
- *Why must the item barcode match the paperwork?*
- Alma uses the barcode to create the temporary item record and maintain lending consistency.
- *What happens if I scan the wrong barcode when returning an item?*
- Alma will fail to match the item to the correct P2P request; Rescanning and verifying identifiers can help ensure correct matches
- *Why is Quick Printing recommended?*
- It minimizes misrouting, aligns with Ex Libris slip workflows, and ensures slips print automatically at each step.
- *Do we need to keep both borrowing and lending slips?*
- No. Use only the slips generated *during the current Alma workflow step.*
- *What if Alma does not generate a slip?*
- Verify Quick Printing is enabled and that a default printer is available. Check Fulfillment > Configuration > Printing>.
- *Can we reuse previous P2P pull slips?*
- Discarding old slips because request data changes after each workflow stage.
- *Why is the Transit Destination message important?*
- It confirms the item has moved to the correct stage in the Resource Sharing lifecycle.
# How to Process Loaned Peer to Peer (P2P) Items
This section covers how to process outgoing P2P lending requests: printing pull slips, retrieving items, and shipping them to the borrowing library. Alma relies on consistent slip printing, item scanning, and shipment processing to maintain the lending side of the Resource Sharing workflow.
Thank you to George Washington University for sharing their workflow processes.
##### **Required Roles**
- Fulfillment Operator
- Circulation Desk Manager
**1: Print Pull Slips for Lending Requests** Navigate to Fulfillment > Resource Requests> Pick From Shelf>
- Verify you are at the correct Circulation Desk location and that Quick Printing, if available, is enabled; Quick Printing functionality provides streamlined print-based workflows
[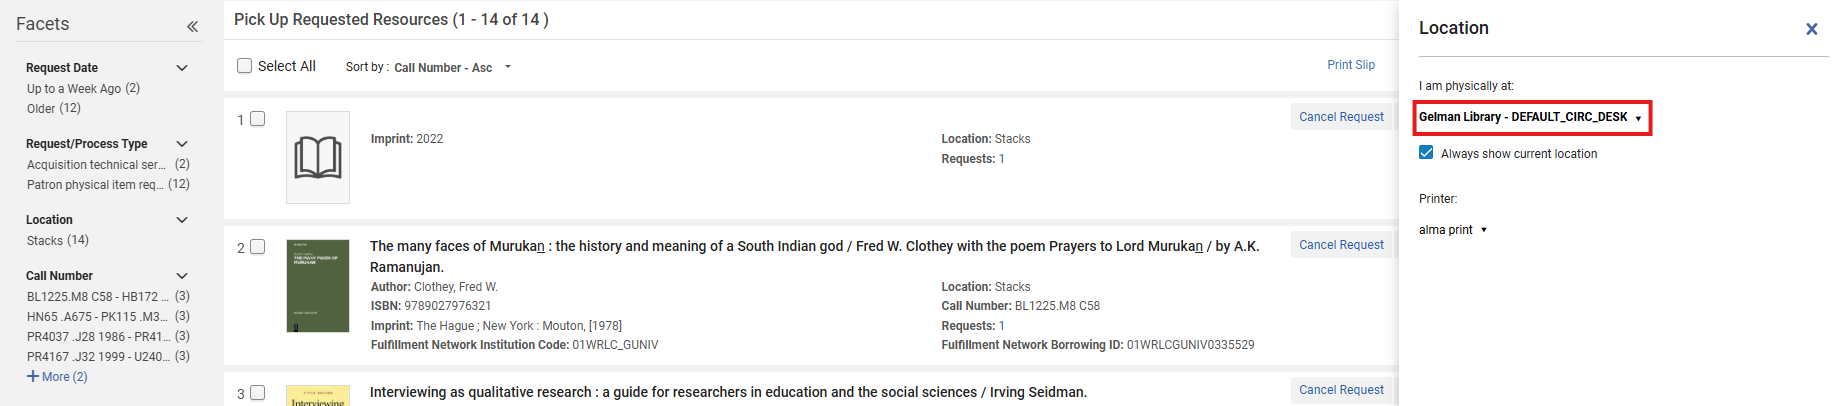](https://alma-documentation-bookstack.azurewebsites.net/uploads/images/gallery/2025-12/JSMimage.png)
- From the top menu ribbon check <Select all> or individual requests; Click <Print Slip>
[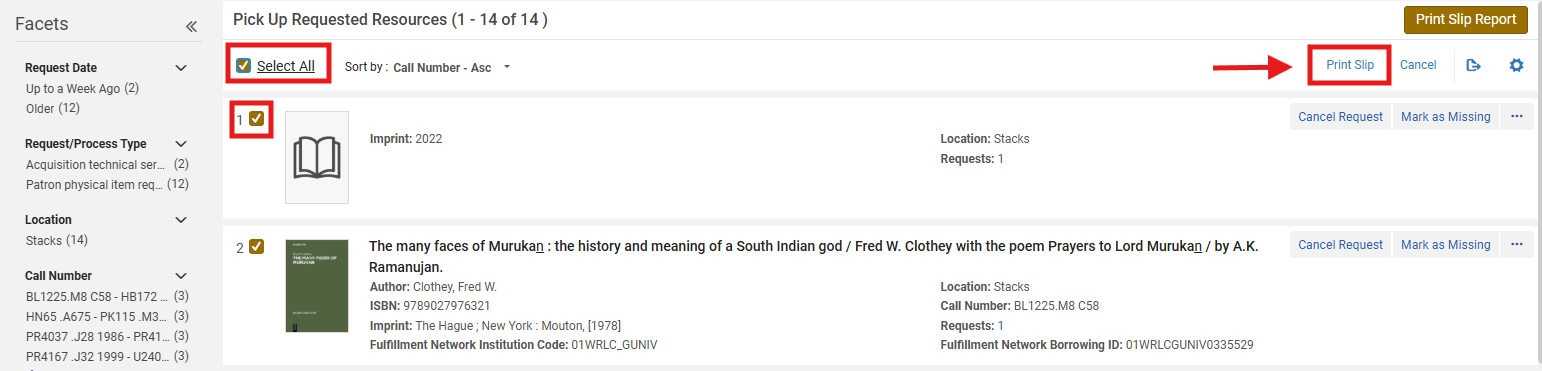](https://alma-documentation-bookstack.azurewebsites.net/uploads/images/gallery/2025-12/Aktimage.png)
**2: Retrieve Items from the Shelves** Use printed pulling slips to gather items.
[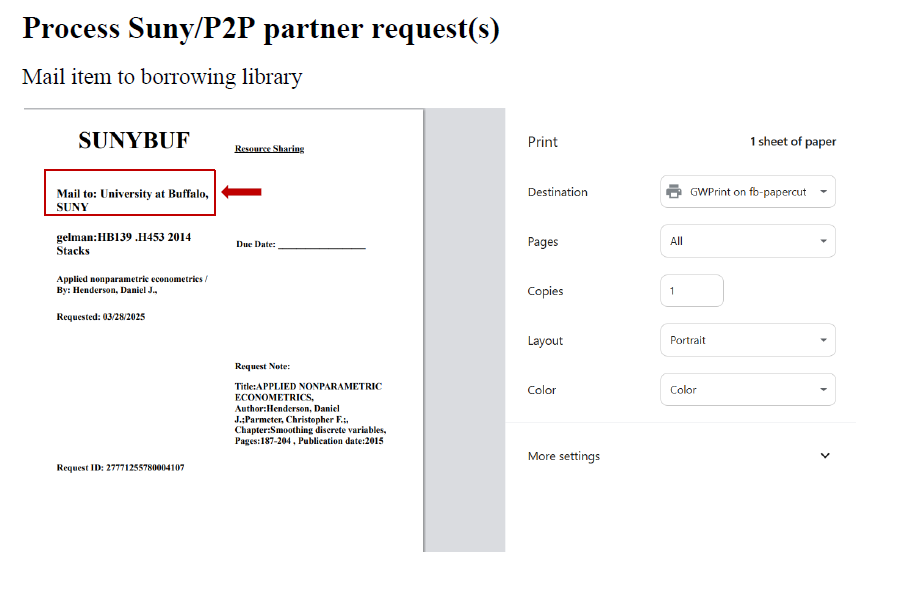](https://alma-documentation-bookstack.azurewebsites.net/uploads/images/gallery/2025-12/uanimage.png)
**3: Begin the Shipping Workflow** Navigate to Fulfillment > Resource Sharing > Shipping Items
**4: Configure Quick Printing for Shipping Slips** Set Automatically print slip to Yes; Enable Quick Printing.
[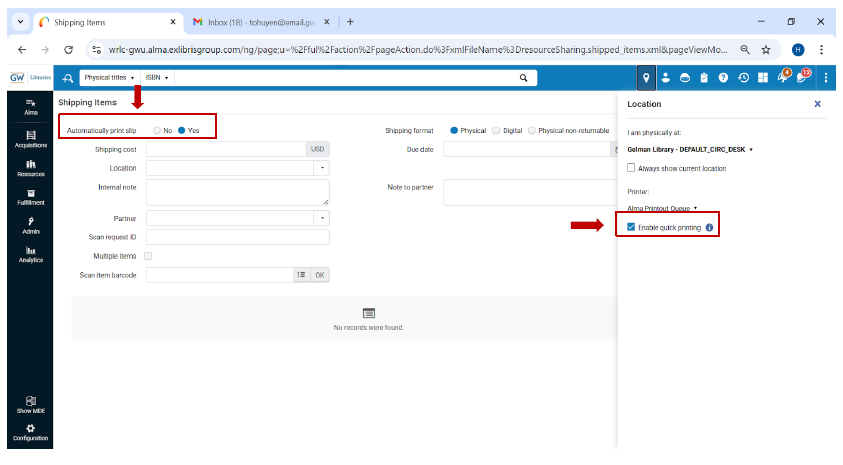](https://alma-documentation-bookstack.azurewebsites.net/uploads/images/gallery/2025-12/09pimage.png)
**5: Prepare Item for Shipping** Insert the Resource Sharing Shipping Slip Letter generated by Alma Shipping Slip; Follow yoru library's local workflow for mailing Resource Sharing items
##### **Frequently Asked Questions**
- *What is the External Identifier and why is it important?*
- It links the borrowing request to the item; Ex Libris defines it as an essential Resource Sharing match point.
- *Why must the item barcode match the paperwork?*
- Alma uses the barcode to create the temporary item record and maintain lending consistency.
- *What happens if I scan the wrong barcode when returning an item?*
- Alma will fail to match the item to the correct P2P request; Rescanning and verifying identifiers can help ensure correct matches
- *Why is Quick Printing recommended?*
- It minimizes misrouting, aligns with Ex Libris slip workflows, and ensures slips print automatically at each step.
- *Do we need to keep both borrowing and lending slips?*
- No. Use only the slips generated *during the current Alma workflow step.*
- *What if Alma does not generate a slip?*
- Verify Quick Printing is enabled and that a default printer is available. Check Fulfillment > Configuration > Printing>.
- *Can we reuse previous P2P pull slips?*
- Discarding old slips because request data changes after each workflow stage.
- *Why is the Transit Destination message important?*
- It confirms the item has moved to the correct stage in the Resource Sharing lifecycle.
# Addons
Information on Addons that enhance SCF processing of both physical and digitial requests.
# Alma Digitization Request Addon
RSAC decided that all digitization request be made though ILLiad. To facilitate requests for material held at the SCF, the Alma digitization addon for ILLiad was created. This Addon takes an ILLiad digitization request and creates an Alma digitization request that is sent to the SCF IZ.
The source code and installation instructions can be found on github here: **[Alma\_Digitization\_Addon](https://github.com/WRLC/Alma_Digitization_Addon)**.
TO BE COMPLETED.
# Alma Physical Item Request Addon
SCF request processing is transitioning from using emails for items to be sent to fill an ILLiad request for our partners to requests generated in Alma by the Alma\_Physical\_Addon. This new request path provides for more accountability and documentation. It will also be easier to see when an item is sent to fill a request.
The source code and installation instructions can be found on github here: **[Alma\_Physical\_Addon](https://github.com/WRLC/Alma_Physical_Addon)**.
##### **Set up, Installation and Configuration**
User/Account Set Up:
You will need to identify or create an ILL user in your Alma instance that will be the requesting patron. This may be the same or similar to the account used for ILLiad Addon Digitization. This user must have a Job Category of "ILL Staff", a local user group that is allowed to request items from the SCF. Make note of the Primary ID as you will need this for Configuration (see below).
Once you have this user created, please forward the Primary ID to WRLC () so that we can make sure a linked account is created in the SCF. We will also need your return address that will be printed on the slip that will be sent with the item. This should be the same return address that prints on your ILLiad slip.
Installation:
Download and install the Addon in your ILLiad client. See: [Installing the ILLiad Client Addon](https://github.com/WRLC/Alma_Physical_Addon#installing-the-illiad-client-addon)
Configuration:
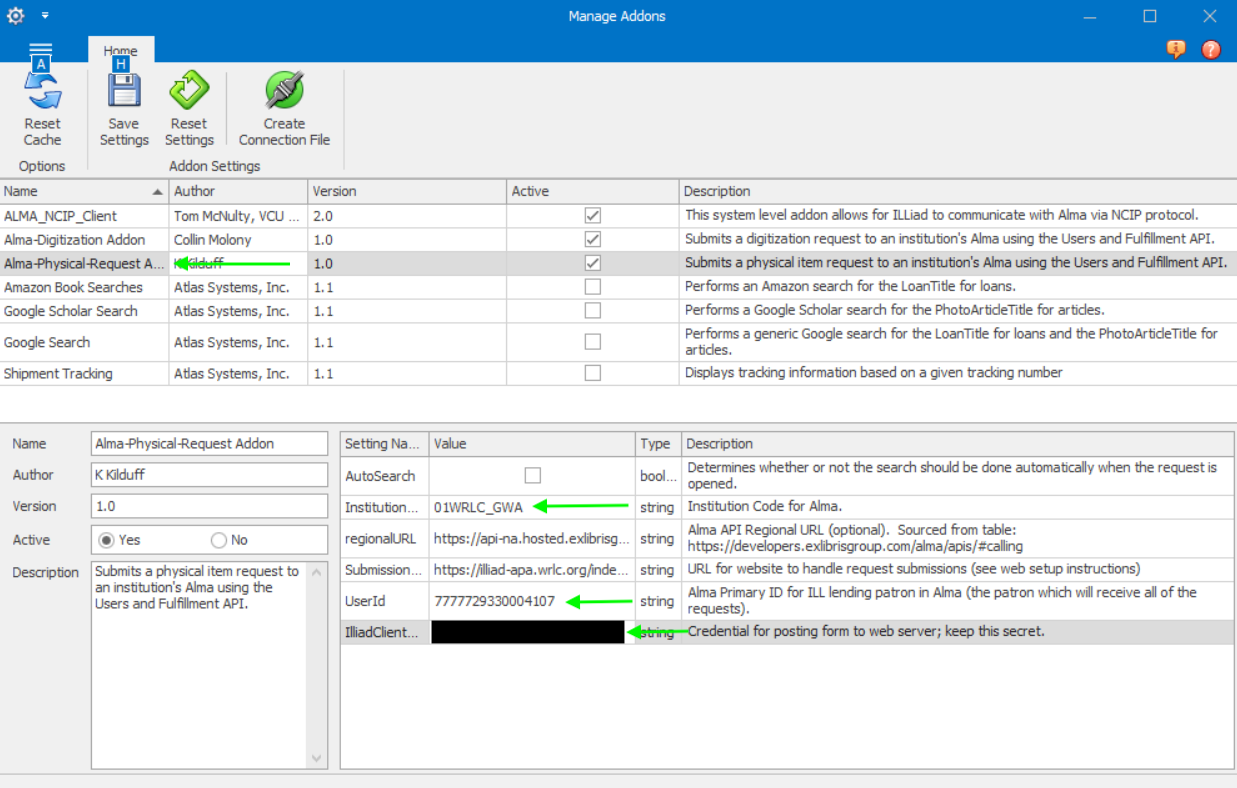
Configure these settings in the ILLiad client's 'Manage Addons' form:
- - - Institution Code = 01WRLC\_GML (Be sure to use your own code!)
- UserId = this is the Primary ID of the user from “User/Account Set Up”
- IlliadClientSecret = (same secret as Digitization Addon, contact WRLC for secret)
(Main ILLiad → Manage Addons → Select “Alma-Physical-Request Addon” )
##### **ILL Staff Addon Instructions**
1\. Once a request has been received in ILLiad for a physical item that is located at the SCF you will need certain item information. You will need to get the item’s “Item ID” and “MMS ID”. This can be accomplished using an Alma Physical item search.

2\. These two ID numbers need to be inserted into the ILLiad transaction form. The MMS ID goes in the “Call Number” field, and the Item ID goes under the “Reference Number” field (Reference number is used instead of item number because ILLiad truncated item number to 10 characters, but Alma’s Item IDs can be longer than 10 digits).

Note: You could also enter the MMS ID and Item ID on the ILLiad Physical Item Request form that is loaded in a following step.
3\. Select the WRLC Physical Request plugin tab.

4\. Once on the plugin tab, select the Load Request Page button for the WRLC Physical Request form. This will load the form with information pre-populated from ILLIad. You will still need to enter some data.

5. The WRLC Physical Request Addon Form

6. You must complete the “WRLC mails item (Y or N)” field.
- - - Yes
- - WRLC will mail the item if the address information is complete. (We may contact you if there are any questions.)
- We will insert a pull slip similar to this in the book (see below).
- We will scan the item in the SCF to put it “in transit” and then scan the item into the owning IZ. (This should put the item on the hold shelf for the requesting ILL patron. This will allow you to see when the item was pulled and sent to the requestor.)
- No
- - WRLC will scan the item “in transit” and send it to the owning library via the courier.
7. If you did not enter the Item ID and MMS ID in the “Transaction form, then you must do so now. Be sure that both IDs are correct and one or both are not numbers from the original request.
8\. All items will have instructions on the Pull Slip to return the item to the owning library. (See example below.)

# Delivery Routes, Codes and Routing Slips
Partners with Library Names, Pull Slip Codes and Courier Slip Code.
# Delivery locations with Codes
{{@47}}
# Courier routes
[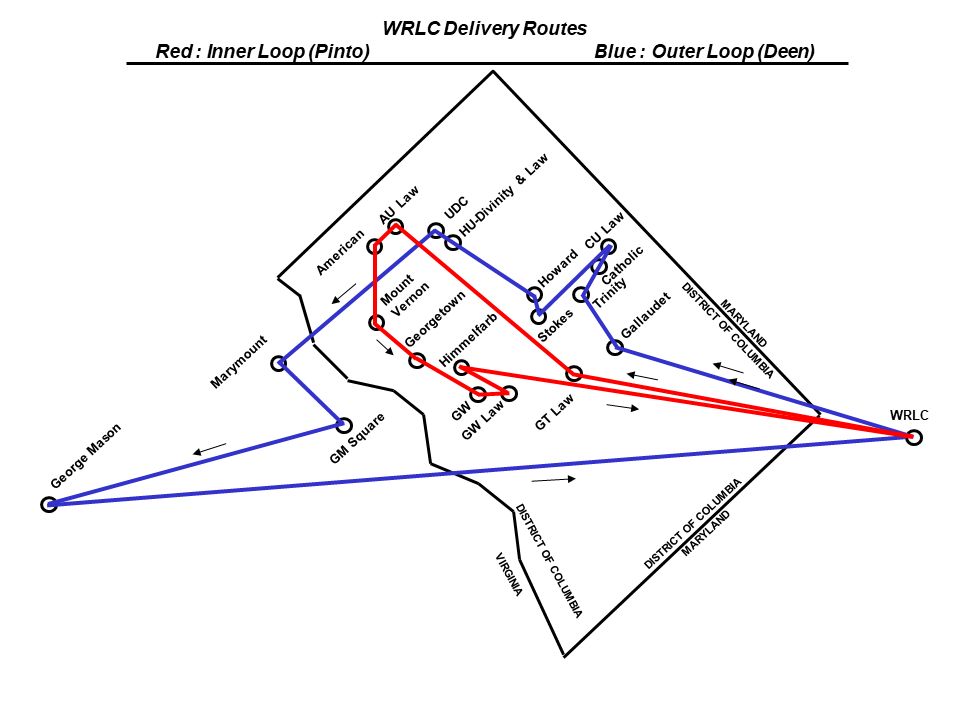](https://alma-documentation-bookstack.azurewebsites.net/uploads/images/gallery/2024-03/delivery-route-tammy-march-2024.png)
# Routing Slips for the WRLC Libraries
##### **Green** routing slips = return materials back to the lending libraries
##### **Pink** routing slips (emails, phone requests, etc.) = lend materials to the borrowing libraries
##### **White** routing slips (AFN, emails, phone requests, etc.) = lend materials to the borrowing libraries
[American](https://alma-documentation-bookstack.azurewebsites.net/attachments/35)
[Washington College of law](https://alma-documentation-bookstack.azurewebsites.net/attachments/57)
[Catholic](https://alma-documentation-bookstack.azurewebsites.net/attachments/37)
[Catholic Law](https://alma-documentation-bookstack.azurewebsites.net/attachments/34)
[UDC](https://alma-documentation-bookstack.azurewebsites.net/attachments/38)
[Gallaudet](https://alma-documentation-bookstack.azurewebsites.net/attachments/33)
[George Washington](https://alma-documentation-bookstack.azurewebsites.net/attachments/49)
[George Washington Health Sciences](https://alma-documentation-bookstack.azurewebsites.net/attachments/47)
[George Washington Law](https://alma-documentation-bookstack.azurewebsites.net/attachments/46)
[GW Mount Vernon](https://alma-documentation-bookstack.azurewebsites.net/attachments/52)
[GW Virginia Science & Technology](https://alma-documentation-bookstack.azurewebsites.net/attachments/59)
[George Mason](https://alma-documentation-bookstack.azurewebsites.net/attachments/40)
[George Mason Law](https://alma-documentation-bookstack.azurewebsites.net/attachments/39)
[George Mason Square](https://alma-documentation-bookstack.azurewebsites.net/attachments/36)
[George Mason Prince William](https://alma-documentation-bookstack.azurewebsites.net/attachments/41)
[Georgetown](https://alma-documentation-bookstack.azurewebsites.net/attachments/45)
[Georgetown Capitol Campus](https://alma-documentation-bookstack.azurewebsites.net/attachments/43)
[Georgetown Law](https://alma-documentation-bookstack.azurewebsites.net/attachments/44)
[Howard](https://alma-documentation-bookstack.azurewebsites.net/attachments/51)
[Howard Health Sciences](https://alma-documentation-bookstack.azurewebsites.net/attachments/48)
[Howard West Campus (Divinity & Law)](https://alma-documentation-bookstack.azurewebsites.net/attachments/50)
[Marymount](https://alma-documentation-bookstack.azurewebsites.net/attachments/53)
[Trinity](https://alma-documentation-bookstack.azurewebsites.net/attachments/58)
[WRLC](https://alma-documentation-bookstack.azurewebsites.net/attachments/55)
# Affiliate Libraries
Affiliate libraries of WRLC, such as National Geographic, place and receive requests only for their own institution’s materials stored at the Shared Collections Facility (SCF); they cannot request items from WRLC member institutions, and WRLC members cannot request theirs.
This section includes instructions on how patrons and staff at affiliate libraries can request their items at the SCF, either through the SCF Institution Zone or the SCF Primo instance.
# Requesting in Primo
- Go to your affiliate library's ***Primo***
- Click on the top-right ***Sign In*** link to sign into the system (you will have been given login credentials by WRLC)
[](https://alma-documentation-bookstack.azurewebsites.net/uploads/images/gallery/2025-02/aff-lib1.PNG)
- Once you are logged in, search for the item you would like to request
- Click on the title of the item from the search results list
- On the title page, click on the ***Item from SCF*** link \* Do NOT choose the other Availability options
[](https://alma-documentation-bookstack.azurewebsites.net/uploads/images/gallery/2025-02/aff-lib2.PNG)
- In the Request form, choose ***Work Address*** for the ***Pickup Location***
- Choose ***Send Request***
***[](https://alma-documentation-bookstack.azurewebsites.net/uploads/images/gallery/2025-02/aff-lib3.PNG)***
- The item will then arrive at your library in 1-2 business days
# Requesting in the Shared Collections Facility Alma
- Log into the Shared Collections Facility Alma (a link will have been given to you by WRLC)
- Once you are logged in, search for the item you wish to request. You can limit your search to only your library's items by creating an advanced search of ***Physical Items*** that have a ***Provenance Code*** of ***Property of \[Affiliate Library\]***
***[](https://alma-documentation-bookstack.azurewebsites.net/uploads/images/gallery/2025-02/aff-lib4.PNG)***
- Once you find the item you wish to request, click the ellipsis (...) button, then choose Request
[](https://alma-documentation-bookstack.azurewebsites.net/uploads/images/gallery/2025-02/aff-lib5.PNG)
- Then select the following values for your request
- Request Type = ***Patron Physical Item Request***
- Requester = ***search and select your name***
- Pickup Institution = ***Shared Collections Facility***
- Pickup At = ***Personal Delivery > Office Delivery***
[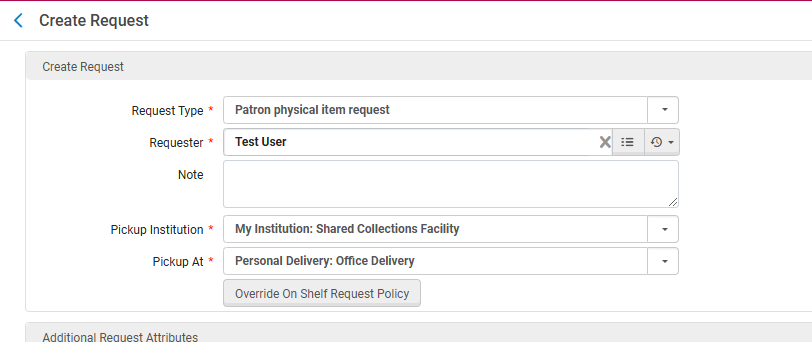](https://alma-documentation-bookstack.azurewebsites.net/uploads/images/gallery/2025-02/aff-lib6.PNG)
- Then click ***Submit***
- The item will then arrive at your library in 1-2 business days
# Fulfillment Unit Overview
Overview of the Alma Fulfillment Unit and its key components—Terms of Use, user groups, item locations, and other lending rules. This section explains how these elements are configured and how they interact to control loan periods, requests, and access within the Alma Fulfillment module.
# Fulfillment Units and Fulfillment Rules
##### [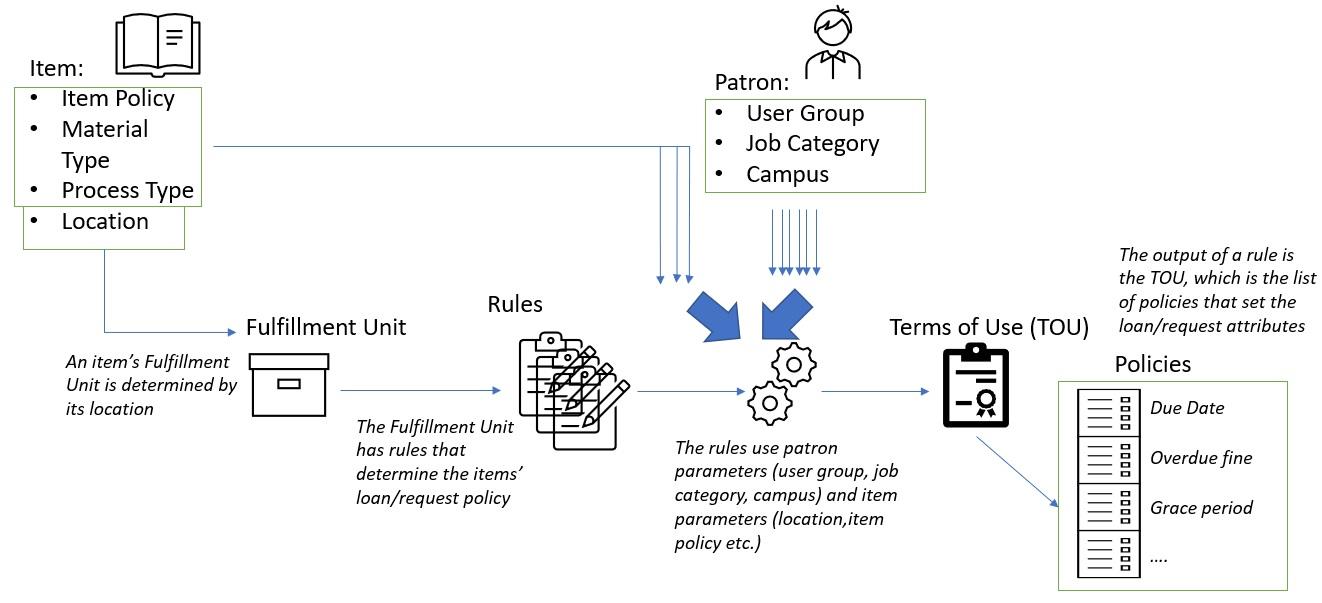](https://alma-documentation-bookstack.azurewebsites.net/uploads/images/gallery/2025-10/fu-and-policies.jpg)
In Alma, the **Fulfillment Unit** is the fundamental structural component that governs how items circulate within your institution.
A **Fulfillment Unit** is a logical grouping of one or more **physical locations** within your institution that all share and apply the **same set of circulation policies**.
---
### Core Components and Their Roles
The Fulfillment Unit acts as a container for the following essential components, which work together to process circulation transactions:
---
### Network Fulfillment Units (Consortial Environments)
In a consortial (shared) environment utilizing the Alma Network Zone (NZ), a **Network Fulfillment Unit** is used to manage circulation policies that apply across multiple institutions, such as consortial loan (CLS/AFN) transactions.
- **Function:** It is possible for an **Institution-only Fulfillment Unit** to incorporate rules from a **Network Fulfillment Unit** (like the 'WRLC Fulfillment Network'). This allows for centralized management of shared policies.
- **Example:** In your consortium, the 'WRLC Fulfillment Network' is the single NZ fulfillment unit containing all rules specific to CLS/AFN transactions.
[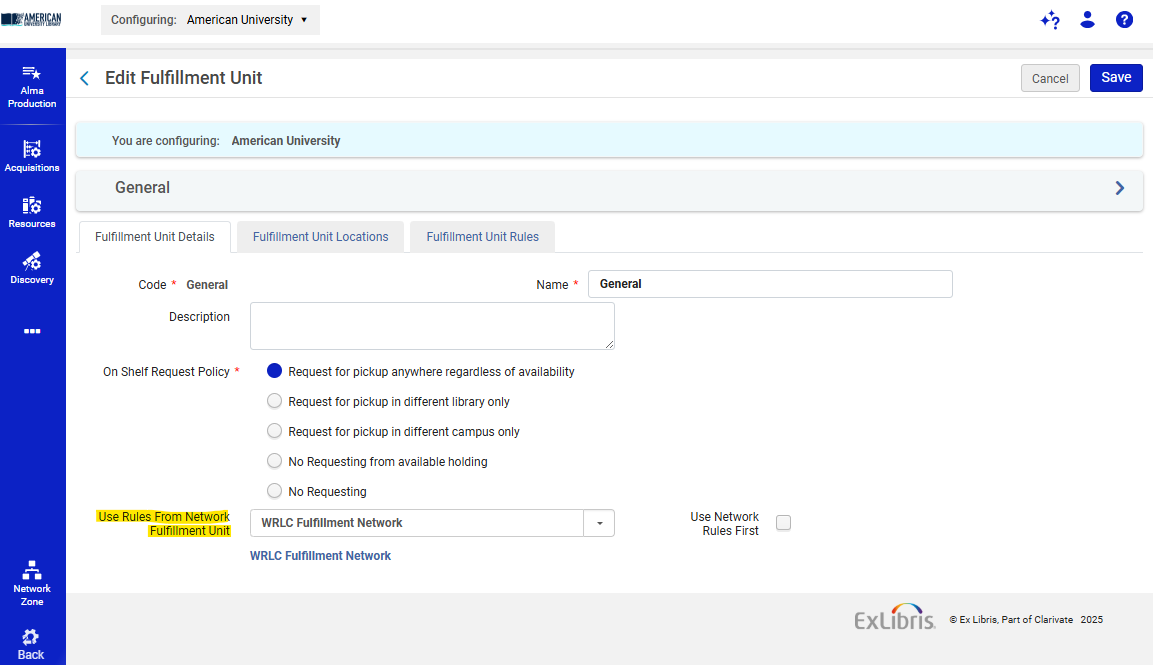](https://alma-documentation-bookstack.azurewebsites.net/uploads/images/gallery/2025-10/screenshot-2025-10-10-145712.png)
To configure the use of Network Zone rules in a specific Fulfillment Unit, choose the **WRLC Fulfillment Network** from the drop-down menu in the Fulfillment Unit configuration page, under the option **Use Rules From Network Fulfillment Unit**. Do **not** checkmark 'Use Network Rules First.'
For more information on the rules and TOUs in the WRLC Fulfillment Network fulfillment unit, please see the [Fulfillment Unit](https://alma-documentation-bookstack.azurewebsites.net/books/fulfillment/page/afn-network-zone-configurations#bkmrk-fulfillment-unit) section of the [AFN Network Zone Configurations](https://alma-documentation-bookstack.azurewebsites.net/books/fulfillment/page/afn-network-zone-configurations) page of the WRLC Alma Wiki.
---
### Configuring a Fulfillment Unit
Fulfillment Units can be found in **Configuration > Fulfillment > Physical Fulfillment > Fulfillment Units**
[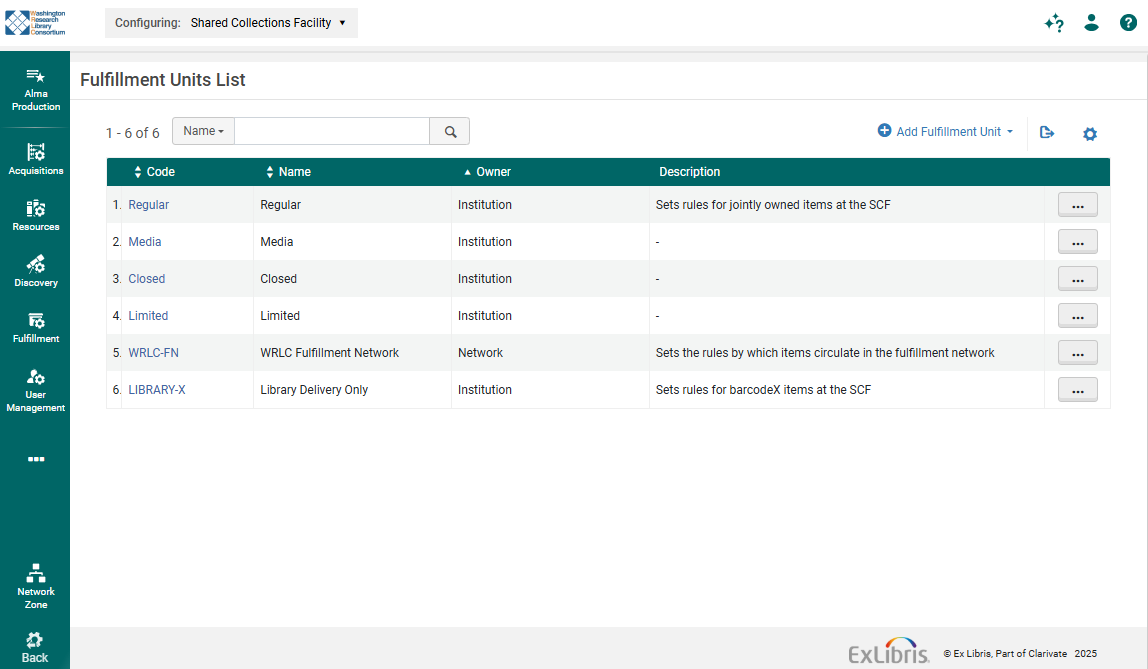](https://alma-documentation-bookstack.azurewebsites.net/uploads/images/gallery/2025-10/screenshot-2025-10-10-141253.png)
\*Please note that Fulfillment Units can be configured for entire institutions, or for specific libraries. Changing the Configuring drop-down menu at the top-left corner of the screen will change your results.
#### Creating (Adding) a Fulfillment Unit
1. Go to the **Fulfillment Units List** page.
2. Select **Add Fulfillment Unit**.
3. In the dialog box, enter a **Code** (required, max 10 characters) and a **Name** (required).
4. (Optional) Enter a **Description**.
5. Select an **On shelf request policy** to define how items can be requested when they are available on the shelf (e.g., *Request for pickup anywhere regardless of availability* or *No requesting*).
6. Select **Add Fulfillment Unit** to save the new unit.
#### Fulfillment Unit Details
- On the **Fulfillment Units List** page, select the FU's **Code** or choose **Edit** from its row actions list.
- The **Edit Fulfillment Unit** page appears, defaulting to the **Fulfillment Unit Details** tab.
- In this tab, you can modify the general parameters you set during creation: the Code, Name, Description, and the **On shelf request policy**.
- Save your changes. (Further configuration, such as associating **Locations** or defining **Rules**, is done by selecting the corresponding tabs.)
[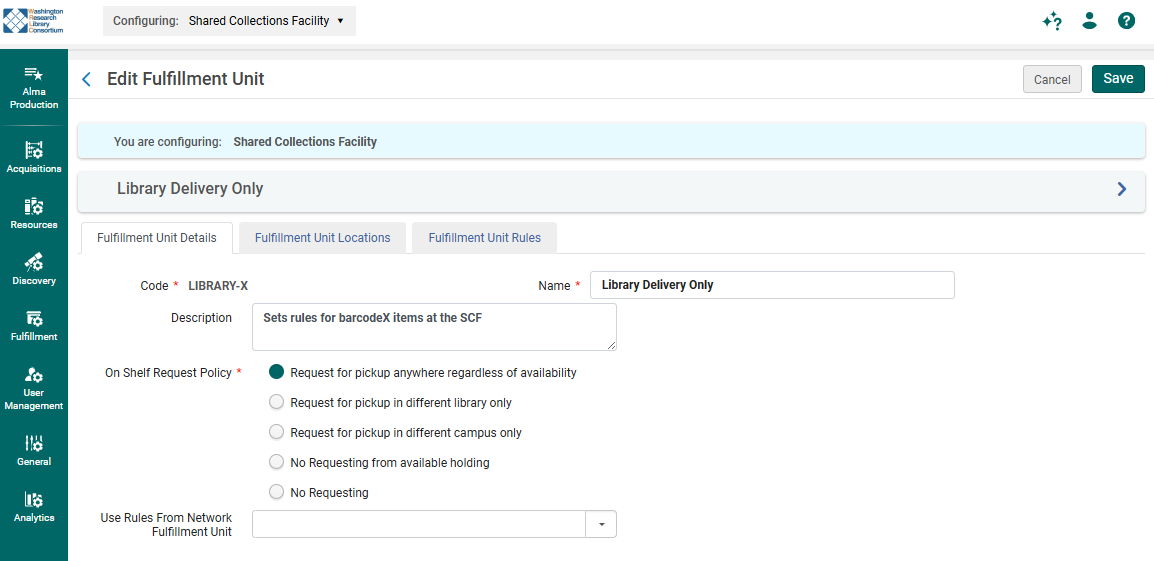](https://alma-documentation-bookstack.azurewebsites.net/uploads/images/gallery/2025-10/screenshot-2025-10-14-130422.png)
#### Fulfillment Unit Locations
- On the **Edit Fulfillment Unit** page, select the **Fulfillment Unit Locations** tab.
- **To Attach Existing Location(s):**
- Select **Attach Existing Location**.
- The **Physical Locations List** page appears. Select the location(s) you want to add, then select **Select**.
- *Note: A location can only be associated with one Fulfillment Unit.*
*[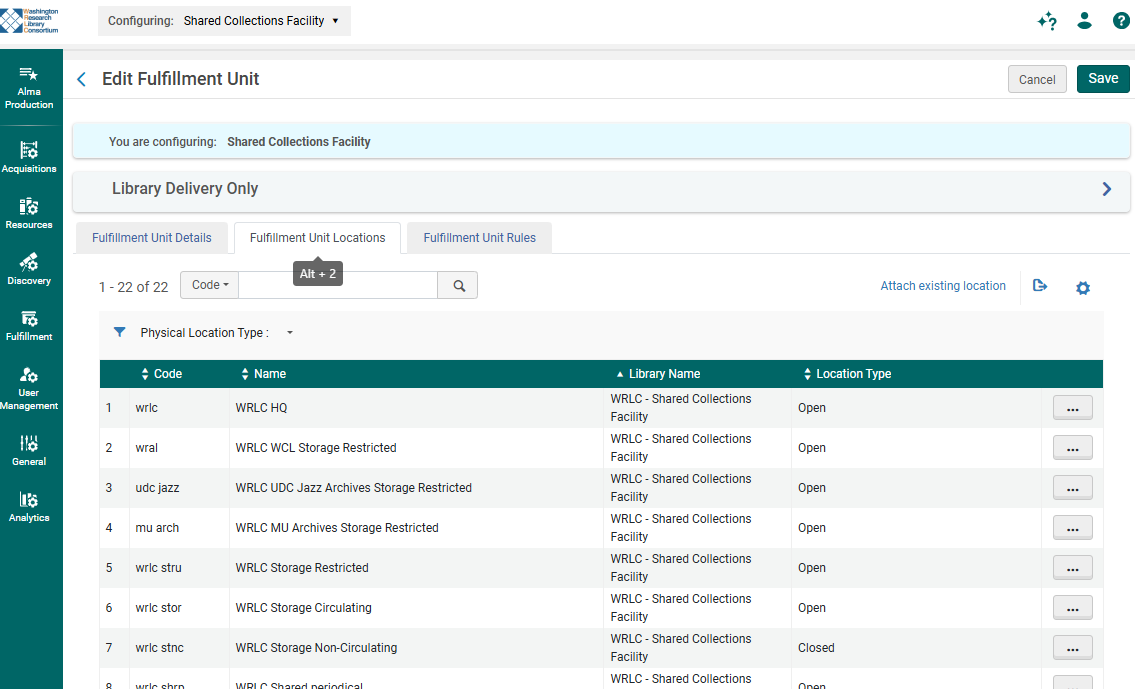](https://alma-documentation-bookstack.azurewebsites.net/uploads/images/gallery/2025-10/screenshot-2025-10-14-131010.png)*
For more information on how to create physical locations, please see the WRLC Alma Wiki page [Physical Locations](https://alma-documentation-bookstack.azurewebsites.net/books/fulfillment/page/physical-locations).
#### Fulfillment Unit Rules
**Fulfillment Unit Rules** are the method for attaching **Terms of Use** (TOU) to a Fulfillment Unit (FU). These rules determine which TOU applies to a specific patron service (Loan, Request, or Booking) based on various criteria.
For more information on how to create TOUs, please see the WRLC Alma Wiki page [Terms of Use (TOU)](https://alma-documentation-bookstack.azurewebsites.net/books/fulfillment/page/terms-of-use-tou).
1. **Access Rules Tab:** Navigate to the **Fulfillment Unit Rules** tab within the "Edit Fulfillment Unit" page.
2. **Select Rule Type:** Choose the type of rule you are configuring: **Booking**, **Loan**, or **Request**.[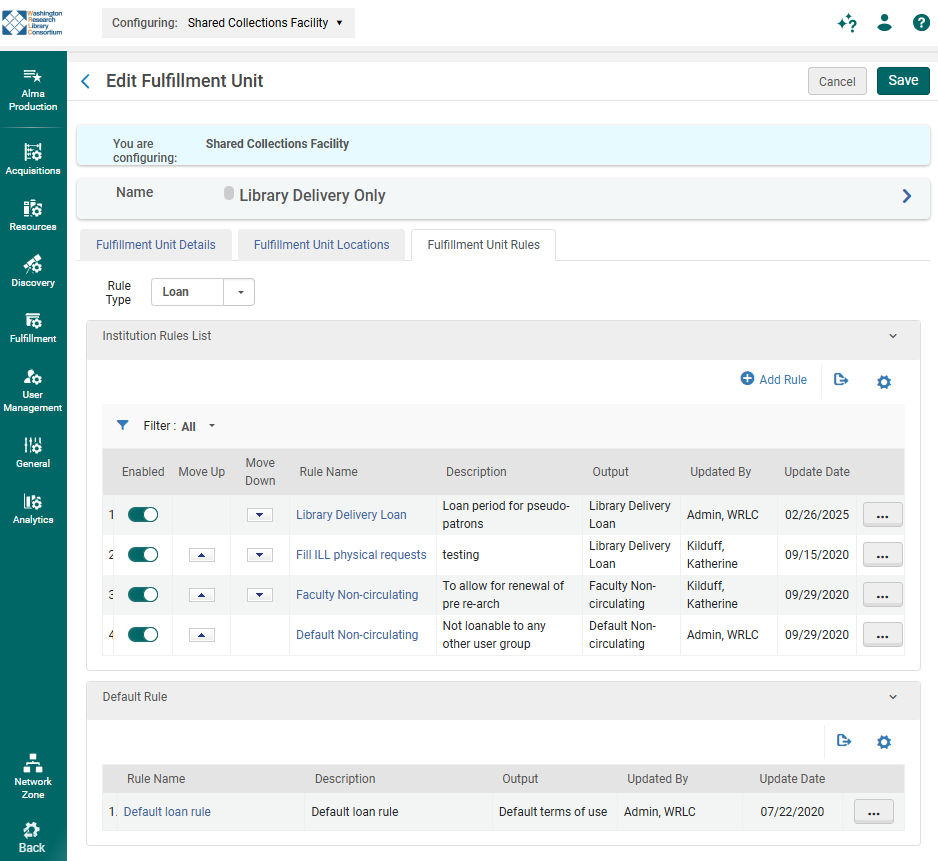](https://alma-documentation-bookstack.azurewebsites.net/uploads/images/gallery/2025-10/screenshot-2025-10-14-125003.png)
3. **Add a New Rule:** Select **Add Rule** to open the **Fulfillment Unit Rules Editor**.
4. **Define Rule Details:** Give the rule a **Name** (required) and an optional **Description**.
5. **Set Input Parameters:** Define the criteria that must be met for the rule to apply by specifying one or more **Input Parameters**. These are the conditional statements that filter which items or users the rule affects.
- **Components:** Each parameter is defined by a **Name** (the field to check, e.g., Material Type), an **Operator** (e.g., *equals*), and a **Value** (e.g., *DVD-ROM*).
- **Possible Parameters** include:
- **Material Type**
- [**Item policy**](https://alma-documentation-bookstack.azurewebsites.net/books/fulfillment/page/item-policies)
- [**User Group**](https://alma-documentation-bookstack.azurewebsites.net/books/fulfillment/page/user-groups)
- **Patron Affiliated Campus**
- **Process Type**
- **Location** (circulation desk)
- **Job category** (user role)
6. **Set [Terms of Use](https://alma-documentation-bookstack.azurewebsites.net/books/fulfillment/page/terms-of-use-tou) (Output Parameter):** The rule's output is the **Terms of Use (TOU)** that will be applied if all the input parameters are met. Select the desired TOU from the **Output Parameters** section.
7. **Save:** Select **Save** to store the new rule.[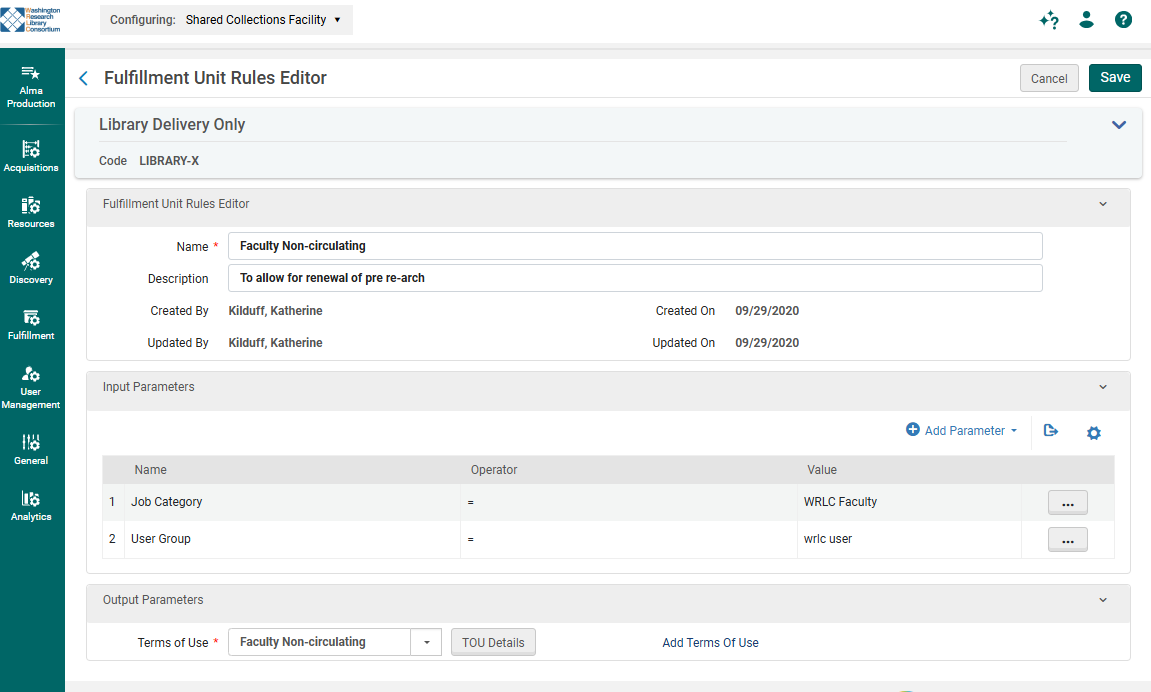](https://alma-documentation-bookstack.azurewebsites.net/uploads/images/gallery/2025-10/screenshot-2025-10-14-125043.png)
8. **Rule Order:** Rules are evaluated from top to bottom. If a rule's input parameters match, its associated **Terms of Use** is applied, and the system stops evaluating subsequent rules. Therefore, specific rules must be placed **before** more general rules. You use the up/down arrows to adjust the order.
For more information on how to configure Fulfillment Units, please see the Alma Knowledgebase page [Configuring Fulfillment Units](https://knowledge.exlibrisgroup.com/Alma/Product_Documentation/010Alma_Online_Help_(English)/030Fulfillment/080Configuring_Fulfillment/020Fulfillment_Infrastructure/Configuring_Physical_Fulfillment#Configuring_Fulfillment_Units).
---
### Understanding the Fulfillment Unit Hierarchy
The process of determining the final circulation policy follows a precise hierarchical order, which includes the evaluation of Network rules:
1. **Start with the Location:** When a patron attempts a transaction, Alma first identifies the **Fulfillment Unit** associated with the item’s **Physical Location**.
2. **Determine Transaction Type:** Alma immediately filters the relevant policies based on the type of transaction being performed (e.g., Loan, Request, or Booking). This restricts the evaluation to only the **Fulfillment Rules** associated with that category of **Terms of Use**.
3. **Evaluate Institution Rules:** Alma checks the list of **Fulfillment Rules** configured directly in the **Institution-only Fulfillment Unit**, evaluating them in their configured order.
4. **Evaluate Network Rules:** If no Institution Rule is met, Alma proceeds to evaluate the rules within the **Network Fulfillment Unit** (if one is configured for the Institution's unit). These rules are evaluated in their configured order.
5. **Apply Default Rule:** If no rule in either the Institution or Network unit is met, the system applies the final **Default Rule** at the end of the rule list.
6. **Apply the TOU:** The first **Rule** whose criteria are met (whether Institution, Network, or Default) will be triggered, and its linked **Term of Use (TOU)** will be applied to the transaction (e.g., a 3-week loan).
# Fulfillment Configuration Utility
The **Fulfillment Configuration Utility**, which can be found in **Fulfillment > Advanced Tools - Loans > Fulfillment Configuration Utility** is an essential diagnostic and testing tool within Alma used by administrators to validate and troubleshoot the circulation rule structure.
- **Purpose:** It allows staff to test exactly which **Fulfillment Rule** and **Term of Use (TOU)** will be applied for a specific circulation scenario *before* a live transaction is performed.
- **Function:** Users input a specific **Patron** (User Group) and an **Item** (Barcode/Location), select the transaction type (Loan, Request, etc.), and the utility immediately displays:
1. The specific **Fulfillment Unit** applied.
2. The exact **Fulfillment Rule** that was matched.
3. The resulting **Terms of Use (TOU)**, including the calculated loan due date or request policy details.
- **Benefit:** This utility is invaluable for verifying new configurations, troubleshooting reported policy discrepancies, and ensuring that the complex rules engine is functioning as intended.
[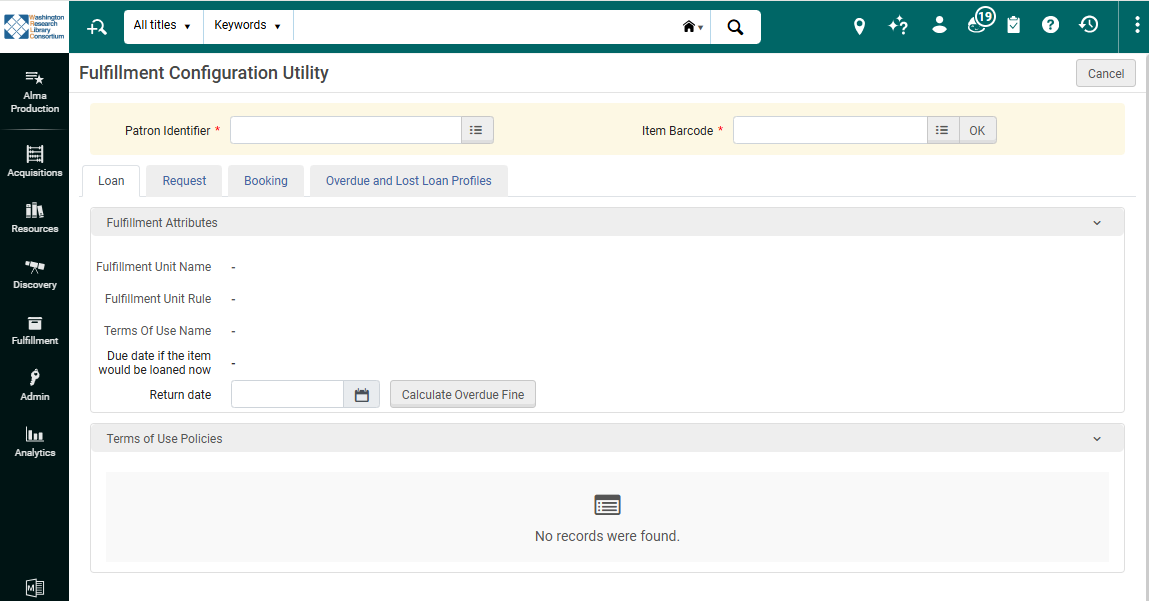](https://alma-documentation-bookstack.azurewebsites.net/uploads/images/gallery/2025-10/screenshot-2025-10-10-142059.png)
# Physical Locations
Physical locations in Alma are the essential infrastructure for managing physical inventory. A physical location is always associated with a **library** (not the institution) and dictates the default policies and workflows for the items housed there.
For more information on how to associate physical locations with Fulfillment Units, please see the WRLC Alma Wiki page [Fulfillment Units and Fulfillment Rules](https://alma-documentation-bookstack.azurewebsites.net/books/fulfillment/page/fulfillment-units-and-fulfillment-rules#bkmrk-fulfillment-unit-rul).
### Adding a new Physical Location
1. **Go to Configuration Menu > Fulfillment > Locations > Physical Locations.** Ensure you are configuring within the context of the specific library you are working with by using the *Configuring* filter on the Configuration page.
2. On the *Physical Locations List* page, select **Add Location**.
3. **Enter Basic Details:**
- Enter a unique **Location Code** (up to 10 characters, no commas) and **Name** (both required).
- (Optional) Enter an **External Location Name**—this is the name displayed to patrons in the discovery interface (e.g., Primo).
4. **Define Location Type:** From the **Type** list, select the appropriate location type:
- **Open:** Accessible by patrons for self-retrieval/checkout.
- **Closed:** Accessible by library staff only.
- **Remote Storage:** Similar to Closed, but located off-site.
- **Unavailable:** Items are considered unavailable for electronic services calculation.
- **Not in Library:** For copies currently held by an instructor (e.g., course reserves).
5. **Assign Fulfillment Unit:** From the **Fulfillment unit** list, select the unit that will govern the policy rules for items in this location.
6. **Define Call Number Type:** From the **Call number type** list, select the classification system used for holdings in this location (e.g., Library of Congress, Dewey Decimal).
7. **Add Map URL (Optional):** Specify the URL of a map to help patrons find the location.
8. **Finalize Creation:** Select **Add Location** to save the new location.
9. **Post-Creation (Recommended):** After adding, you must **Edit** the location (or the relevant circulation desk) to attach it to one or more **Circulation Desks** so that staff can handle items (e.g., check-in, check-out, reshelving) for that location.
---
### Editing a Physical Location
1. On the *Physical Locations List* page, select **Edit** from the row actions list for the desired location.
2. **Update Details:** Edit the location details (Code, Name, Type, Fulfillment Unit, etc.) as needed in the *Physical Location Details* section.
3. **Manage Circulation Desks:** In the *Physical Location Circulation Desks List* section, attach existing or new circulation desks and define the services they provide for this location.
4. **Configure Holdings:** In the *Holdings Configurations* section:
- Set the **Accession placement** (MARC subfield) for accession numbers.
- Select **Suppress from discovery** to hide items in this location from the patron interface.
- (Optional) Set the **Discovery Priority** for controlling the display order in Primo.
5. **Save Changes:** Select **Save** to store the updates.
---
### Associating Locations with Fulfillment Units
Physical locations are associated with specific **Fulfillment Units**. This is how circulation policies are assigned to locations.
**For instructions on how to associate locations with Fulfillment Units, please see the WRLC Alma wiki page [Fulfillment Unit Locations](https://alma-documentation-bookstack.azurewebsites.net/books/fulfillment/page/fulfillment-units-and-fulfillment-rules#bkmrk-fulfillment-unit-loc).**
---
### Adding a new SCF Remote Storage Location
Please open a ticket with WRLC () in order to create a new SCF location in your Institution Zone.
# User Groups
To configure user groups, you generally need the **User Administrator** or **General System Administrator** role. The process involves two main steps:
### Defining the User Groups
1. Navigate to the **User Groups** code table:
- **Configuration Menu** > **User Management** > **User Details** > **User Groups**.
2. On this table, you can **add, edit, or delete** the desired user group types (e.g., create codes for "Undergraduate," "Graduate," "Staff," etc.).
- *Note:* The User Group code **must not contain non-alphanumeric characters**.
---
### Mapping User Groups to User Record Types
After defining the groups, you must specify which **User Record Types** (Staff, Public, or Contact) can be associated with each group.
1. Navigate to the **User Record Type User Group** mapping table:
- **Configuration Menu** > **User Management** > **User Details** > **User Record Type/User Group**.
2. On this mapping table, for each **user group** you created, you associate it with the relevant **user record type(s)**.
- This ensures that when a user is created with a specific record type (e.g., Public), only the user groups mapped to the "Public" record type are available for selection.
Once configured, the user groups can be assigned to users when adding or editing their profiles, which may automatically trigger the application of role profiles or user registration terms if you've set up role assignment and registration rules.
---
### Associating User Groups with TOUs
User groups can be associated with specific **Terms of Use (TOUs)** within your **Fulfillment Unit Rules**. This is how circulation policies are assigned to specific types of users.
The association takes place within a Fulfillment Unit's rule table, which dictates which TOU is applied to a transaction based on both the type of transaction (request, loan, etc.) and a set of criteria (fulfillment rules).
**For instructions on how to create Fulfillment Rules, please see the WRLC Alma wiki page [Fulfillment Unit Rules](https://alma-documentation-bookstack.azurewebsites.net/books/fulfillment/page/fulfillment-units-and-fulfillment-rules#bkmrk-fulfillment-unit-rul).**
# Terms of Use (TOU)
A **Terms of Use** is a bundle of specific **fulfillment policies** (such as loan periods, fine structures, and renewal options) that are applied to items, patrons, or services within a library.
- TOUs are attached to **Fulfillment Unit Rules** to determine the policies applied when a patron requests a service (e.g., a Loan, Request, or Booking).
- Any changes made to a policy within a TOU are immediately applied wherever that TOU is in use.
For more information on TOUs, please see Alma Knowledgebase page [Configuring Terms of Use](https://knowledge.exlibrisgroup.com/Alma/Product_Documentation/010Alma_Online_Help_(English)/030Fulfillment/080Configuring_Fulfillment/020Fulfillment_Infrastructure/Configuring_Physical_Fulfillment#Configuring_Terms_of_Use).
---
### Configuring Terms of Use
1. Navigate to the **Terms of Use Management** page (**Configuration Menu > Fulfillment > Physical Fulfillment > Terms of Use and Policies**).[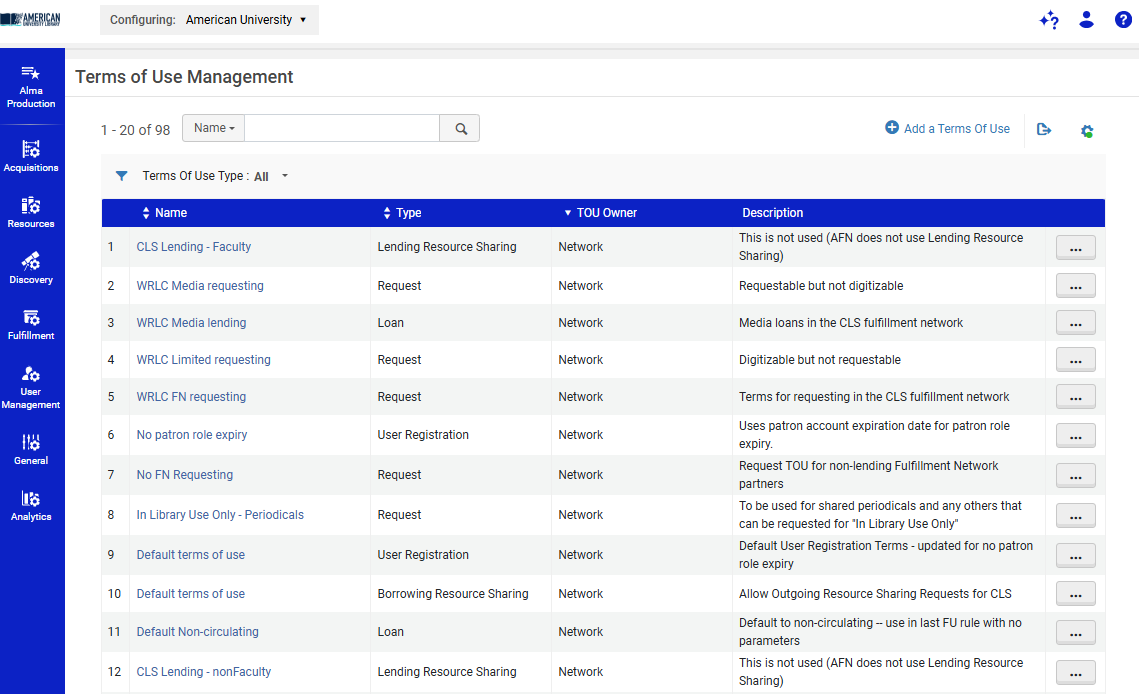](https://alma-documentation-bookstack.azurewebsites.net/uploads/images/gallery/2025-10/screenshot-2025-10-14-132108.png)
2. Select **Add Set of Terms of Use** to start the configuration wizard.
3. **Step 1: General Information**
- Enter a **Name** (required) and an optional **Description**.
- Select the **Type** (e.g., Loan, Request, Booking, or Resource Sharing).
- Select **Next**.
4. **Step 2: Policies**
- This page lists all the policies that will be included in this TOU (e.g., Loan Policy, Fine Policy, Request Policy).
- Select a policy from the drop-down list for each policy type.
- To create a new policy, select **Add** from the row actions list.
- To edit an existing policy (which will change it everywhere it's used), select **Edit**.
- Select **Next**.
5. **Step 3: Review**
- Review the details of the new TOU set.
- Select **Save** to finalize and add the new Terms of Use to the list.
---
### Viewing Related Fulfillment Rules
You can easily see which Fulfillment Unit Rules are using a specific TOU:
1. On the **Terms of Use Management** page, select **Show Related Fulfillment Rules** from the row actions list for a specific TOU.
2. The resulting page displays all the rules that currently employ that Terms of Use.
---
### Using TOUs in Fulfillment Units
TOUs are attached to specific **Fulfillment Units** via **Fulfillment Rules**. Each Fulfillment Rule uses one TOU, and the rules determine when the specific TOU is applied to a transaction.
**For instructions on how to associate TOUs with specific Fulfillment Rules, please see the WRLC Alma wiki page [Fulfillment Unit Rules](https://alma-documentation-bookstack.azurewebsites.net/books/fulfillment/page/fulfillment-units-and-fulfillment-rules#bkmrk-fulfillment-unit-rul).**
---
### Configuring Maximum Renewal TOU
**NOTE: To maintain compliance with WRLC Alma Fulfillment Network (AFN) Lending agreed practices, the FN Lending Terms of Use (TOU) Maximum Renewal Period policy must be configured as outlined below.**
- **Standard wrlc users receive a 42-day initial loan period with up to 3 additional 42-day renewals, resulting in a total allowable loan period of 168 days.**
- **Patrons assigned the WRLC Faculty Job Category receive fixed semester loan periods (1/31/YYYY, 5/31/YYYY, and 9/30/YYYY) with a total allowable loan period of 365 days, including renewals.**
The **Maximum Renewal Period** policy defines the total amount of time a patron may retain a loaned item beginning from the original loan date, including all renewals.
Per ExLibris documentation, *"Alma doesn't count the number of renewals for a loan. Renewal limits are managed by the 'Maximum Renewal Period' policy in the Loan Terms of Use (TOU) which indicates the total period of time that a user may have the loaned item." [(ExLibris: Loan doesn't renew as expected in Alma)](https://knowledge.exlibrisgroup.com/Alma/Knowledge_Articles/Loan_doesn%27t_renew_as_expected_%28doesn%27t_consider_library_maximum_allowed_policy%29?utm_source=chatgpt.com)*
Example: WRLC FN Lending Maximum Renewal Period configurations:
- Students:
- 42-day initial loan period plus 3 renewals
- Configure Maximum Renewal Period = 168 Days
- Faculty/Instructors:
- 1 year total loan period including renewals
- Configure Maximum Renewal Period = 365 Days
If the desired **Maximum Renewal Period** policy is already available within the **Terms of Use (TOU)**, you may select and update the existing policy as needed; **skip ahead to Step #4**
**1. If the policy is *not* available**, first create a new policy through: Configuration > Fulfillment > Physical Fulfillment > Advanced Policy Configuration> **Add Fulfillment Policy**
[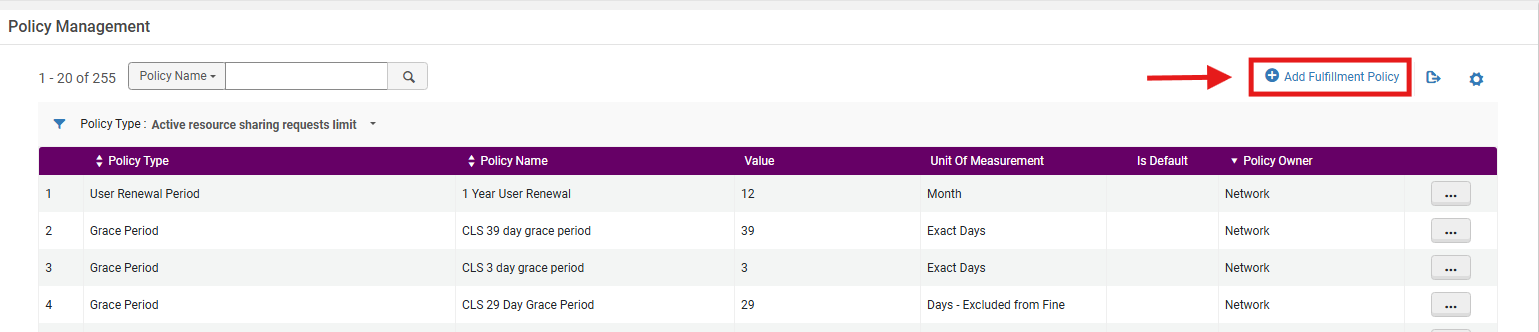](https://alma-documentation-bookstack.azurewebsites.net/uploads/images/gallery/2026-05/xlyimage.png)
**2. From the Select Fulfillment Policy Type list**, locate and select the desired policy> **Maximum Renewal Period**; select **Next**
[](https://alma-documentation-bookstack.azurewebsites.net/uploads/images/gallery/2026-05/Jxrimage.png)
**3. In the Policy Details page**, complete the policy form to configure the new policy's values:
- Enter a **Policy Name**, for example:
- WRLC FN Lending Maximum Renewal Period 168 Days
- WRLC Faculty Lending Maximum Renewal Period 365 Days
- Enter a **Policy Description**, for example:
- 42-day initial loan period plus 3 renewals; total allowable loan period = 168 days
- 1 year total allowable loan period including renewals
- From the **Value Type** drop-down menu, select **Other**
- Selecting **Other** enables the fields required to configure the policy duration and unit of measurement.
- In the **Value** field, enter the desired total loan duration
- From the **Unit of Measurement** drop-down menu, select the appropriate unit: **Days**
- Set **Default Policy** according to local library policy
- Select **True** if this policy should be the default option for this policy type
- Select **False** if this policy should only be available for selection when needed
- Select **Save**[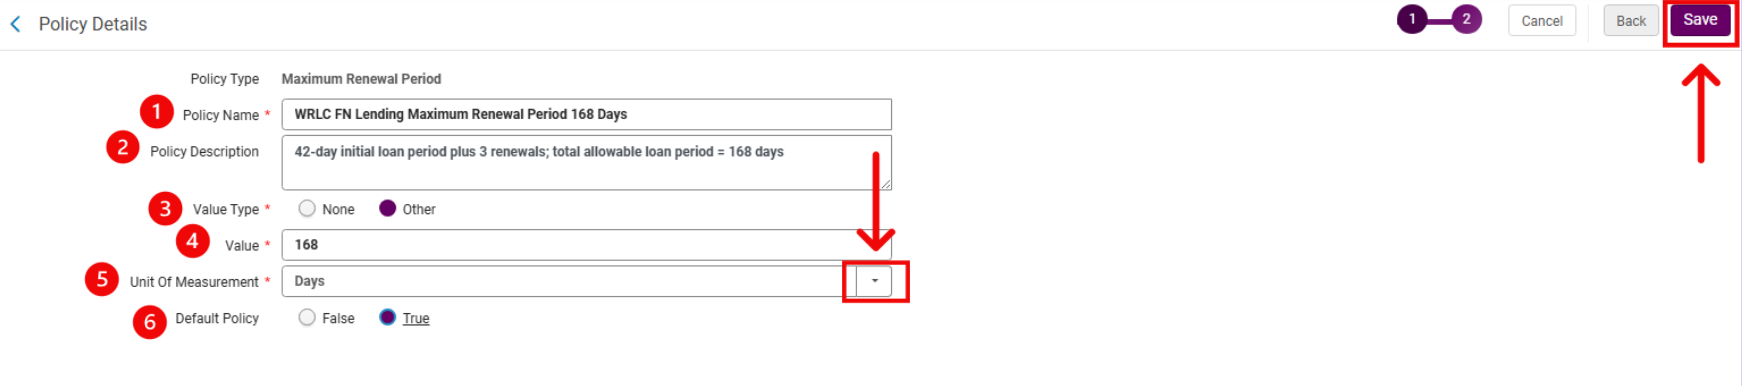](https://alma-documentation-bookstack.azurewebsites.net/uploads/images/gallery/2026-05/W65image.png)
**4. Open the desired Terms of Use (TOU)** Navigate to: Configuration> Fulfillment> Physical Fulfillment> Terms of Use and Policies
- Set <Terms of Use Type> to Loan
- Locate the desired TOU; in this example it is WRLC FN Lending, your library may use a different TOU title
- From the action row menu, select Edit
[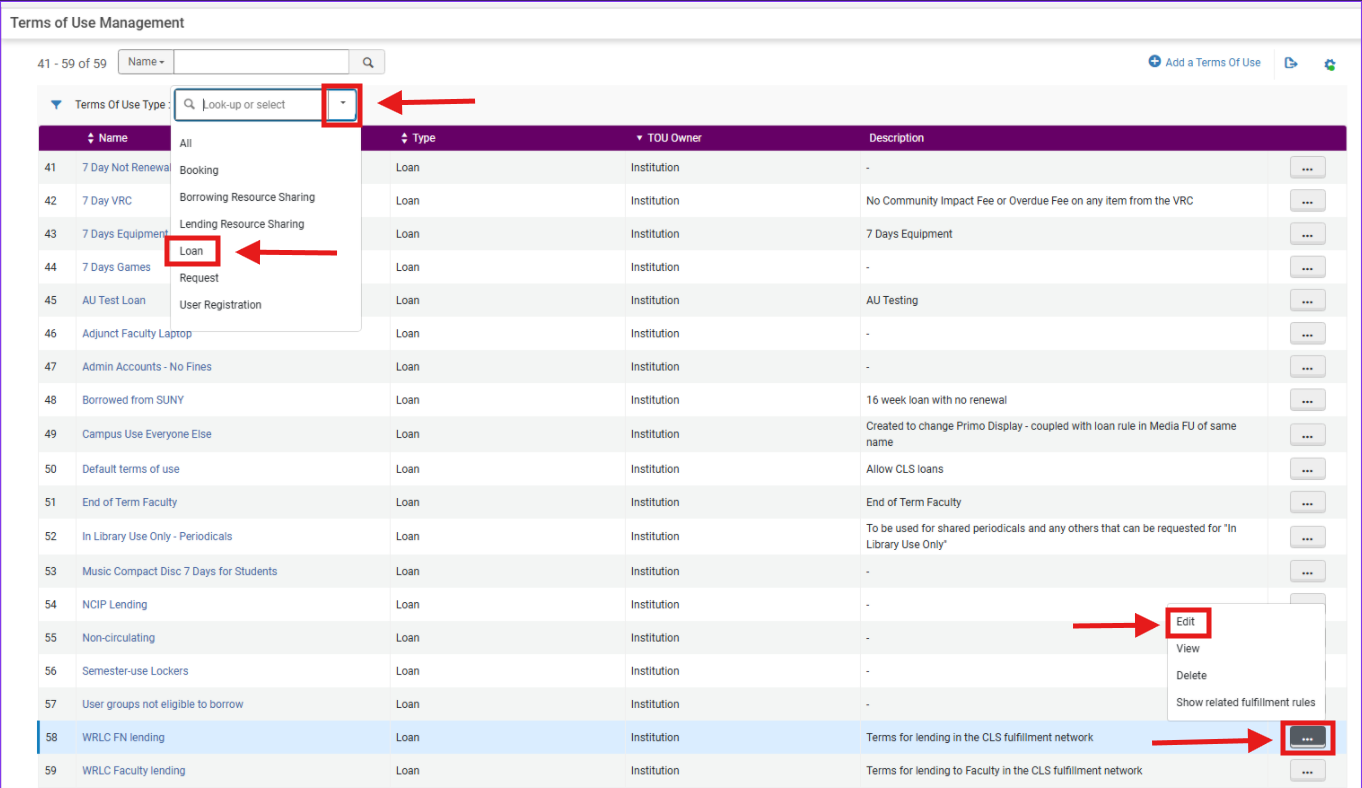](https://alma-documentation-bookstack.azurewebsites.net/uploads/images/gallery/2026-05/i8Yimage.png)
**5. Update the Maximum Renewal Period policy** from the <Terms of Use Policies> menu:
- From the Terms of Use Management page, locate Policy Type: Maximum Renewal Period
- Use the TOU's policy's drop-down menu to select the desired policy; here the policy example is <168 days (6 weeks old) but your library may have a different policy name
[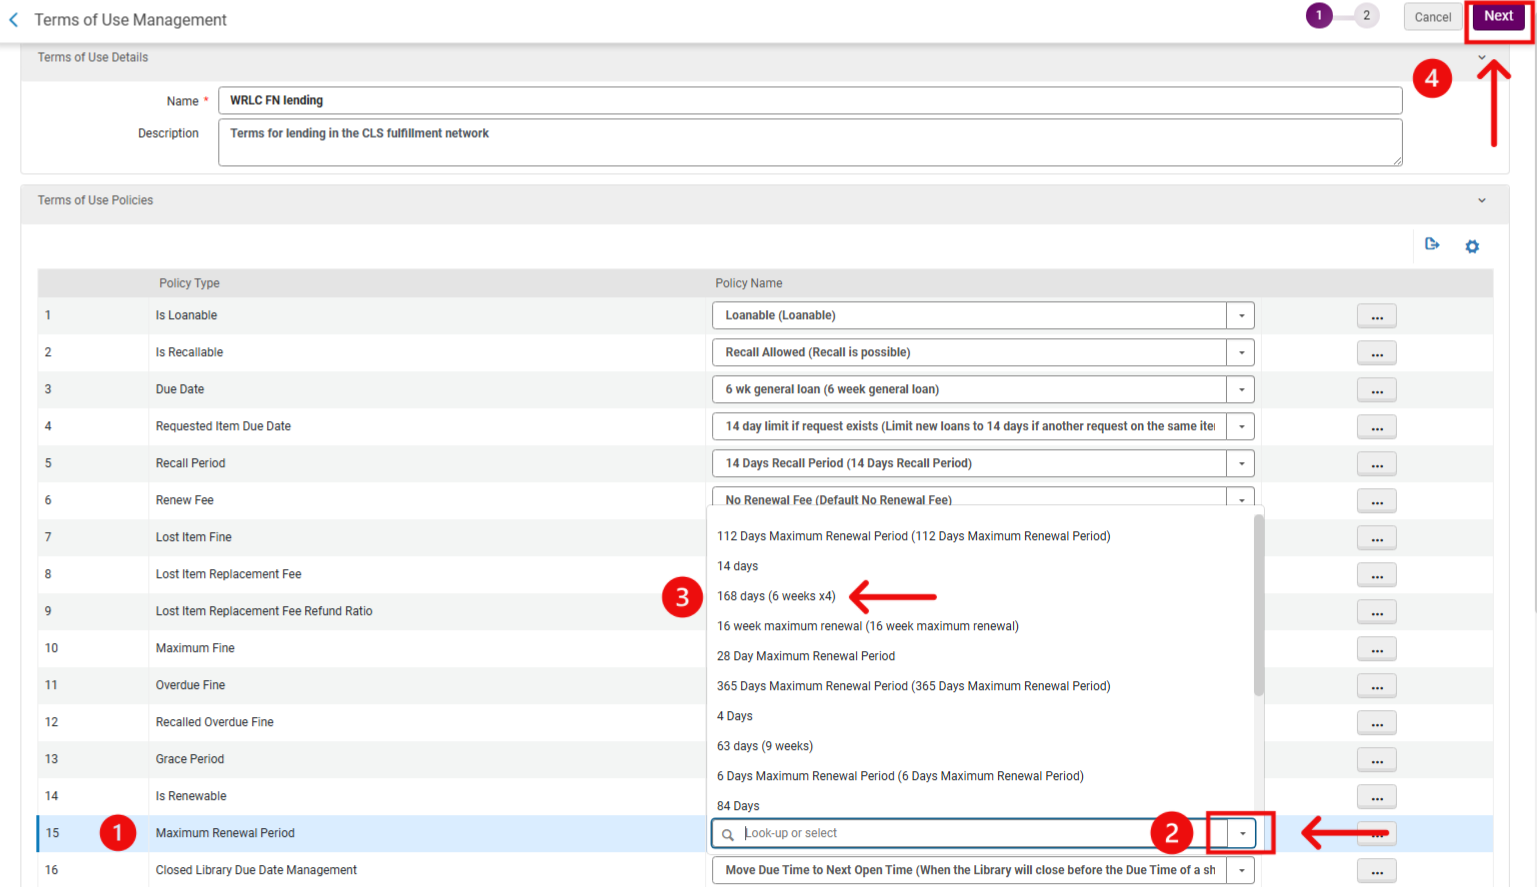](https://alma-documentation-bookstack.azurewebsites.net/uploads/images/gallery/2026-05/PrAimage.png)
**6. On the resulting Terms of Use Confirmation** page, locate the Maximum Renewal Period policy from the menu to confirm it has updated to the desired policy; select Save
[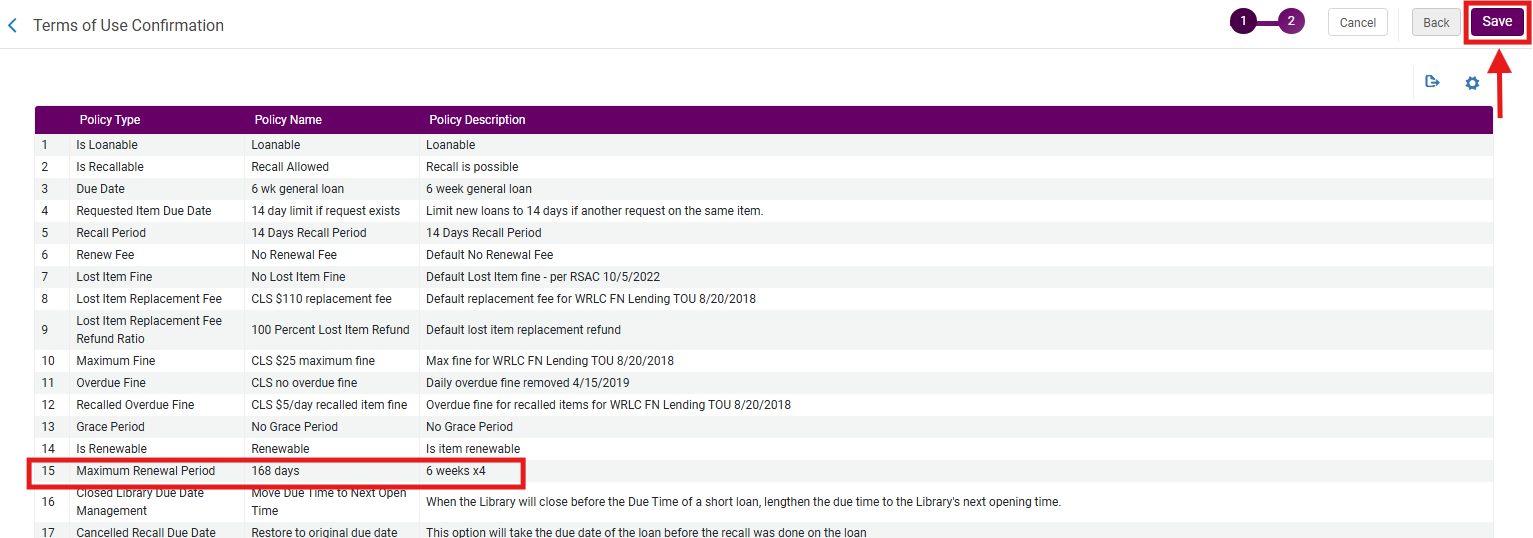](https://alma-documentation-bookstack.azurewebsites.net/uploads/images/gallery/2026-05/jIIimage.png)
# Item Policies
Alma **item policies** are a tool used in the Alma Fulfillment module to create **exception rules** that override the standard circulation rules for specific items.
---
### Configuring Item Policies
Item policies are configured via a **Code Table** at the institutional level. These steps define the policy codes that will later be used in the Fulfillment Rules engine.
1. **Navigate to the Configuration Menu:** Go to **Configuration Menu > Fulfillment > Physical Fulfillment > Item Policy**.
2. **Define Institutional Context:** Ensure you are configuring within the context of your **institution**. Defining policies at the library level is strongly discouraged.
3. **Add a New Policy:** Select the action to add a new item policy.
4. **Enter Code and Description:** Enter a unique **Code** and a clear **Description** for the new policy (e.g., Code: `DISPLAY`, Description: `Display Only`).
5. **Save the Code Table:** Select **Save** to implement the new or updated policies.
---
### Associating Item Policies with Terms of Use (TOU)
The item policies you define in the code table are activated by linking them to specific **Terms of Use (TOUs)** within your **Fulfillment Unit Rules**. This is how an item policy creates its exception.
The association takes place within a Fulfillment Unit's rule table, which dictates which TOU is applied to a transaction based on a set of criteria.
**For instructions on how to create Fulfillment Rules, please see the WRLC Alma wiki page [Fulfillment Unit Rules](https://alma-documentation-bookstack.azurewebsites.net/books/fulfillment/page/fulfillment-units-and-fulfillment-rules#bkmrk-fulfillment-unit-rul).**
---
### Applying Item Policies to Item Records
The Item Policy acts as a flag on an item record that, when matched in a Fulfillment Rule, triggers an exception to the standard circulation rules by applying a specialized Terms of Use.
Item policies are added in the item record, in a drop down menu under the **General** tab.
[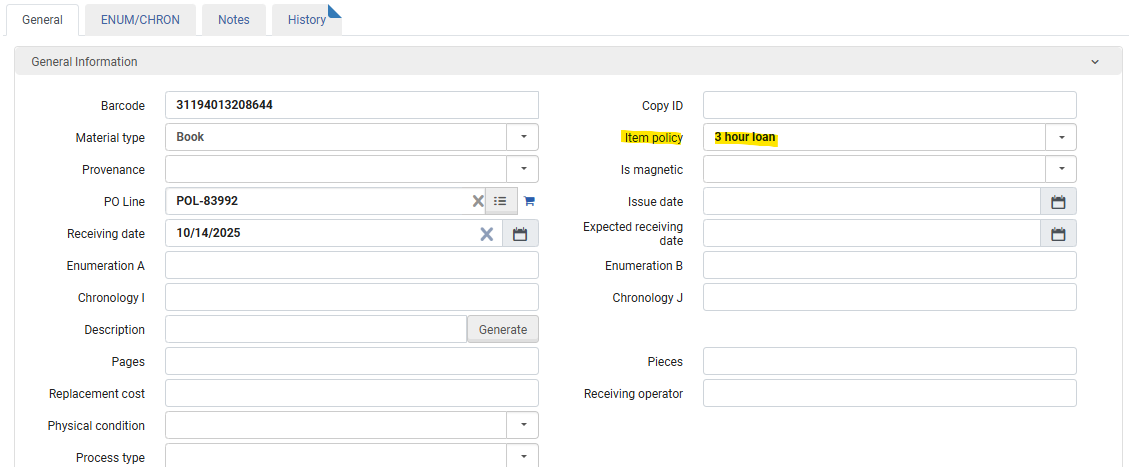](https://alma-documentation-bookstack.azurewebsites.net/uploads/images/gallery/2025-10/screenshot-2025-10-20-130613.png)
# Fulfillment Procedures
This chapter includes general Fulfillment overview procedures
# How to log into a Fulfillment Workstation and Change Locations
This document provides detailed guidance on how to log into Ex Libris Alma, select and manage fulfillment locations, and understand how these selections impact related workflows.
##### **Required Roles**
The options available under the Fulfillment menu are dependent upon your assigned user roles. Your list of options may be different from the screenshots included below. If you do not have the necessary options, you will need to work with your institution's User Administrator to be assigned the appropriate roles for your work.
To complete Fulfillment tasks outlined in this document, you must have one or more of the following roles:
- Circulation Desk Manager
- Circulation Desk Operator
- Circulation Desk Operator - Limited
- Physical Inventory Operator
**1: Navigate to Alma** Go to https://wrlc-xxx.alma.exlibrisgroup.com/mng/login, replacing 'xxx' with your institution’s code
- WRLC codes:
| AU | amu |
| AU LAW | amulaw |
| CU | cu |
| GA | gal |
| GM | gm |
| GT | gu |
| GT LAW | gulaw |
| GW | gwu |
| GW HIMMELFARB | gwahlth |
| GW LAW | gwalaw |
| HU | hu |
| MU | mar |
| UDC | doc |
| UDC LAW | doclaw |
- Bookmark your specific Alma URL to avoid misdirected logins in the future
**2: Login to Alma** Use your institution’s login credentials. A popup may appear asking you to select your desk or department. If not, proceed to verify your current location.
*Why This Matters: Desk selection defines access permissions, policies, and linked printers for fulfillment operations.*
[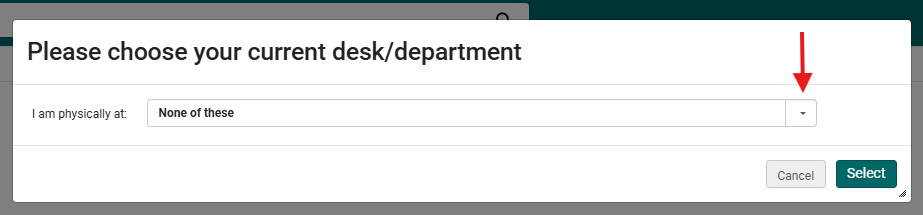](https://alma-documentation-bookstack.azurewebsites.net/uploads/images/gallery/2025-10/4pEawf-001.png)
**3: Select Your Desk/Department** Click the dropdown arrow and select your correct desk/department. Click Select to confirm. Please note that images are for training purposes only. Your institution's selections will be different.
[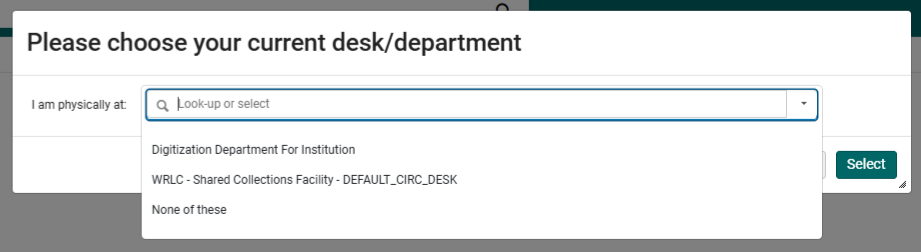](https://alma-documentation-bookstack.azurewebsites.net/uploads/images/gallery/2025-10/awf-002.png)
[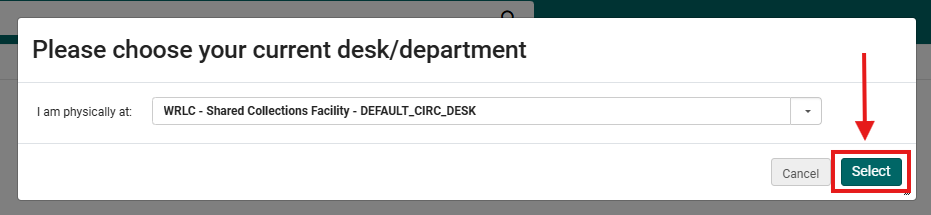](https://alma-documentation-bookstack.azurewebsites.net/uploads/images/gallery/2025-10/aYQawf-003.png)
**4: Verify or Change Current Location** Circulation Desks/Departments are also known as locations. If you want to verify or change which location you are logged into, look in the upper right hand corner. If the task bar looks like:
a. [](https://alma-documentation-bookstack.azurewebsites.net/uploads/images/gallery/2025-10/awf-004.png) proceed to Step 5
b. [](https://alma-documentation-bookstack.azurewebsites.net/uploads/images/gallery/2025-10/awf-005.png) proceed to Step 6
**5: Verify your Location** To verify which location you are logged into, hover your pointer over the location icon in the upper right of the screen. This ensures accurate task routing and reporting. A temporary pop-up should appear displaying your current location.
[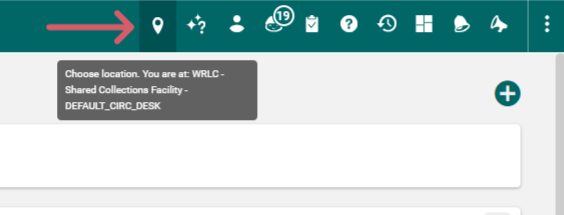](https://alma-documentation-bookstack.azurewebsites.net/uploads/images/gallery/2025-10/awf-006.PNG)
**6: Toggle Location View** To toggle between
a. [](https://alma-documentation-bookstack.azurewebsites.net/uploads/images/gallery/2025-10/awf-026.png) or
b. [](https://alma-documentation-bookstack.azurewebsites.net/uploads/images/gallery/2025-10/awf-025.png)
Click on the location icon or statement to display a drop-down menu.
Note: Keeping the location visible helps prevent cross-desk errors during multi-shift operations.
**7: Adjust Display Preferences** Check or uncheck the <Always show current location> box
[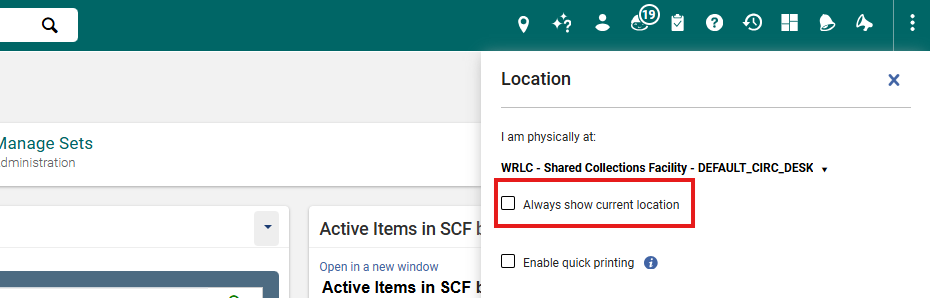](https://alma-documentation-bookstack.azurewebsites.net/uploads/images/gallery/2025-10/awf-008.png)
a. If it is unchecked, it will look like
[](https://alma-documentation-bookstack.azurewebsites.net/uploads/images/gallery/2025-10/awf-004.png)
b. If the <Always show current location> box is checked, the task bar will look similar to [](https://alma-documentation-bookstack.azurewebsites.net/uploads/images/gallery/2025-10/awf-005.png)
**Note: Keeping the location visible helps prevent cross-desk errors during multi-shift operations.**
**8: Change Locations** To change your active location, click the location icon or text and open the dropdown menu. Then to display the available location options, click on the drop-down arrow. After selecting the correct desk or department, confirm your choice and proceed with circulation or fulfillment tasks.
**Note: Alma saves your last used desk within a browser session, but this setting does not persist between browsers or devices.**
**[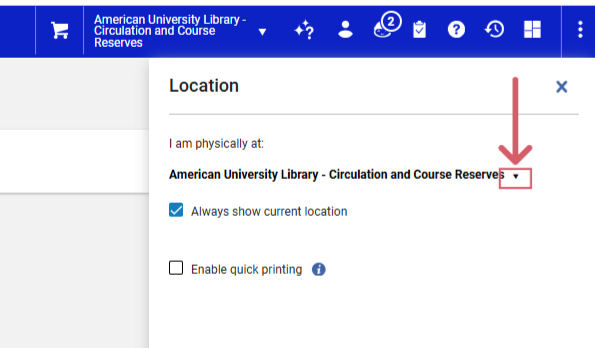](https://alma-documentation-bookstack.azurewebsites.net/uploads/images/gallery/2025-10/awf-009.png)**
**[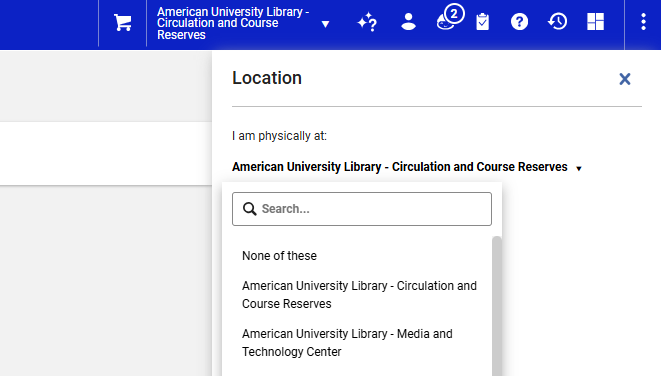](https://alma-documentation-bookstack.azurewebsites.net/uploads/images/gallery/2025-10/awf-010.png)**
##### **Additional Notes**
- Selecting the correct desk ensures all circulation and request transactions are recorded under the proper service point.
- Analytics reports depend on accurate desk information; incorrect selection can skew loan statistics.
- Browser cache can retain old desk preferences- clear it periodically to avoid mismatches.
##### **Frequently Asked Questions**
- What happens if a staff member logs into the wrong desk and completes checkouts?
Transactions remain tied to that desk. They cannot be reassigned in Alma. Notify your fulfillment manager for reporting corrections.
- Are some desks restricted to certain user roles?
Yes. Desk permissions correspond to Alma roles such as Fulfillment Operator and Circulation Desk Manager.
- How often should staff verify their default desk?
At the start of each login session or work shift.
- Can I detect transactions completed under the wrong desk?
Yes. Alma Analytics> Fulfillment> Loans by Desk helps identify inconsistencies.
- What if a desk is removed or renamed?
Your Alma administrator should notify staff and update assignments immediately.
# How to Record Recording In-House Loans (Browse Counts) in Alma
This workflow explains the two Alma-supported methods for recording in-house use, how to view usage counts, and where to report on them in Alma Analytics. In-House Loans can help libraries understand true collection usage beyond normal checkouts. In-House Loans are especially important for:
- Journals or reference materials that never leave the building
- High-use items placed on reserve
- Collection development decisions (e.g., identifying heavily used but rarely borrowed books)
**When to Reference This Document:**
- When tracking how often materials are used within the library (reserves, reference items, general stacks).
- When processing books left on tables, sorting shelves, or collecting materials from reading rooms.
- When fulfilling statistics or accreditation requirements for internal-use circulation.
##### **Required Roles**
- Fulfillment Operator
- Circulation Desk Manager
##### **Understanding In-House Loans vs. Loans in Alma**
**Loans (Standard Checkouts)**
A Loan in Alma occurs when an item is checked out to a patron and leaves the library with them. This is the type of circulation most people are familiar with:
- The item is charged to a specific patron account.
- The item has a due date and must be returned later.
- Overdue fines or renewal limits may apply depending on policy.
- The loan appears in both the patron’s account and the library’s circulation statistics.
- A student checks out a book and takes it home — that is a *Loan*.
---
**In-House Loans (Used-But-Not-Checked-Out Tracking)**
An In-House Loan is recorded when an item is used inside the library but not checked out to a patron.
This is often called “in-house use” or “internal use.”:
- The item never leaves the building.
- No patron is associated with it — Alma records it as library use.
- Staff scan the item in In-House Loan mode to record usage.
- Helps libraries measure how often materials are used even when not borrowed.
- A patron pulls a book from the stacks, uses it at a study table, and leaves it in a return bin — staff scan it as an *In-House Loan* before reshelving.
##### **Recording In-House Loans: Two Alma Methods**
**1: Use <Return Items> to Automatically Create In-House Loans** Navigate to Fulfillment > Checkout/Checkin > Return Items>; Scan the item barcode. If the item is not currently checked out to a patron, Alma automatically records an In-House Loan.
IMAGE
**Note:** This method is fast and ideal when staff reshelve books from carts or table pickups. Using <Return Items> ensures Alma differentiates true in-house use from a mistakenly returned item.
**2: Use <Scan In Items> with “Register in-house use” Enabled** Navigate to Fulfillment > Resource Requests > Scan In Items>
- Check the box <Register in-house use>.
- Scan each barcode of items used inside the library.
**Note:** This is the recommended method when student workers are scanning high volumes of items collected from study areas.
SUNY’s workflow documentation highlights this feature for reserves rooms and self-use spaces.
##### **Frequently Asked Questions**
- *Does Alma automatically record in-house use?*
- No. Staff must scan the item in **In-House Loan mode** or use a designated in-house return station.
- *Do In-House Loans count toward circulation statistics?*
- Yes — Alma reports them separately but includes them in overall usage metrics.
- *Can patrons see In-House Loans?*
- No. They are internal library activity records only.
# How to Look Up a Patron Without an ID Card New Page
This workflow explains how WRLC staff can retrieve a patron record in Ex Libris Alma when the patron does not have a physical ID card available for barcode scanning. It integrates best practices from Ex Libris and peer consortia to minimize search errors and ensure successful user identification across local and consortial libraries.
##### **Required Roles**
The options available under the Fulfillment menu are dependent upon your assigned user roles. Your list of options may be different than the screenshots included below. If you do not have the necessary options, you will need to work with your institution's User Administrator to be assigned the appropriate roles for your work.
To complete Fulfillment tasks outlined in this document, you must have one or more of the following roles
- Circulation Desk Manager
- Circulation Desk Operator
- Circulation Desk Operator - Limited
- Physical Inventory Operator
**1: Navigate to the Patron Identification Screen** In Alma’s left-hand navigation panel, select Fulfillment> Checkout/Checkin> Manage Patron Services. The Patron Identification screen will appear.
**Note:** Library staff are advised to always start with <Manage Patron Services> rather than <Search for Users> from the top navigation bar. The latter can display partial results or outdated user records, especially for consortial patrons. Accessing via <Manage Patron Services> also assists with ensuring the workstation logs the action under your currently active circulation desk- a key requirement for acurate analytics and desk-level activity
**2: Enter Patron Information** In the <Scan patron’s ID or search for patron> field, begin typing the patron’s name, Primary ID, Institution ID, or Barcode.
Alma will display a dropdown list of matching patron accounts; select the correct patron from the list to open their record
**Note:** Ex Libris’s documentation notes that name searches are case-insensitive but must match character order exactly. Common surnames (e.g., “Smith”) may yield dozens of results; in such cases, use a unique ID number, whenever possible, to avoid opening the wrong record.
[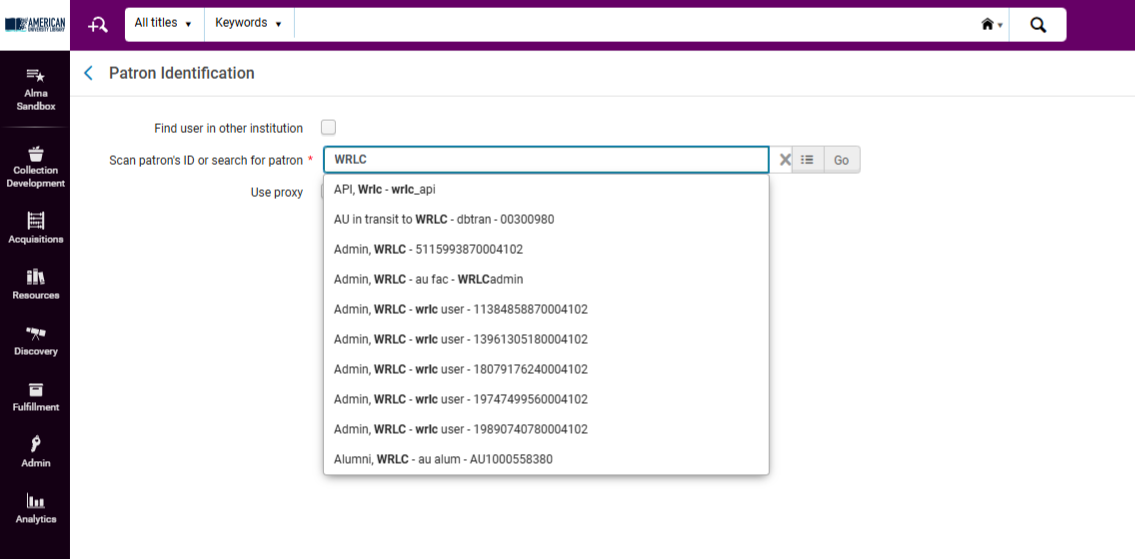](https://alma-documentation-bookstack.azurewebsites.net/uploads/images/gallery/2025-10/awf-021.PNG)
**3: Use “Select from a List” for Advanced Searching** If typing directly in the search field returns too many or no matches
- Click the <Select from a list> function
[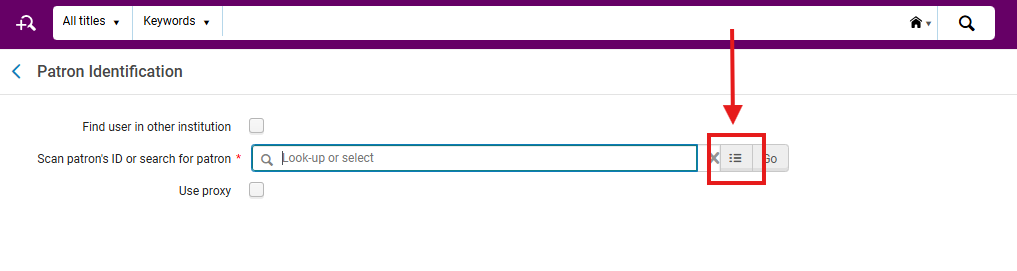](https://alma-documentation-bookstack.azurewebsites.net/uploads/images/gallery/2025-10/awf-022.png)
- This opens the <Find and Manage Users> screen
[](https://alma-documentation-bookstack.azurewebsites.net/uploads/images/gallery/2025-10/awf-023.png)
- Here, you can refine your search using additional filters such as:
- User Group (e.g., Undergraduate, Faculty, Staff)
- Status (Active, Expired)
- Identifier Type (Barcode, Primary ID, Institution ID)
- Owning Institution (for consortium-level searching)
***Why This Matters:** This feature allows targeted searches using fields not available from the quick search bar. It’s especially helpful in consortial environments where duplicate names may exist across institutions; Best practicies reccoments using the <Find and Manage Users> screen for troubleshooting <Patron not Found> errors and to confirm that the record has not expired*
**4: Select the Correct Patron Record** Review the list of returned results carefully
- Verify:
- Institution affiliation
- Patron group (e.g., Faculty, Graduate, Visitor)
- Expiration date
- Primary ID
Once confirmed, click the patron’s name to open the <Manage Patron Services> (Loans) tab
***Why This Matters:** Accurate user identification ensures correct due dates, fines, and request routing. Selecting the wrong patron account, even one with the same name, can result in loan activity being logged under another individual. In Alma, once an item is checked out to a patron, it cannot be reassigned. The only fix is to return the item and reissue it under the correct user.*
##### **Frequently Asked Questions**
- *What if Alma shows multiple records for the same patron?*
- Check which institution each record belongs to. If duplicates exist within your IZ, it is possible to merge accounts
- *What if a patron insists they’re registered but can’t be found?*
- Confirm their home institution and ID format. If they’re a visiting WRLC patron, search with <Find user in other institution>
- *Can we use partial names or wildcards?*
- Yes. Alma supports partial searches; for example, “smit” retrieves “Smith.” However, too broad a search may slow performance.
- *How do I handle a patron who appears inactive?*
- Verify with the patron's home library Circulation Desk whether the record should be reactivated. Only local staff can extend expiration dates; [WRLC.org](http://wrlc.org/)> Programs> Services Portal> WRLC Library Staff Intranet> Categories> Resource Sharing> [Consortium Loan Services (CLS) Contact List](https://www.libraries.wrlc.org/resource-sharing-wrlc-systems-support/consortium-loan-service-cls-contact-list)
- *What if multiple institutions share similar patron IDs?*
- Alma differentiates users by institution. Always verify the “Institution” column before opening a record.
- *What if I accidentally open the wrong record and begin checkout?*
- Return any checked-out items and reissue them to the correct patron.
- *Will name searches find patrons with alternate spellings or nicknames?*
- No. Alma matches exactly. Use identifiers instead when dealing with known nickname variations.
# How to Add a Patron to the Database
This workflow guides WRLC staff through creating new patron records in Ex Libris Alma.
##### **Required Roles**
The options available under the Fulfillment menu are dependent upon your assigned user roles. Your list of options may be different than the screenshots included below. If you do not have the necessary options, you will need to work with your institution's User Administrator to be assigned the appropriate roles for your work.
To complete Fulfillment tasks outlined in this document, you must have one or more of the following roles:
- Circulation Desk Manager
- Circulation Desk Operator
- Circulation Desk Operator - Limited
- Physical Inventory Operator
**1: Navigate to the Patron Registration Screen** In the left-hand navigation panel, select: Fulfillment> Checkout/Checkin>Manage Patron Services. The <Patron Identification> screen will appear
[](https://alma-documentation-bookstack.azurewebsites.net/uploads/images/gallery/2025-10/awf-013.png)
**2: Initiate New Patron Registration** Click the <Register New User> button at the bottom of the Patron Identification screen
[](https://alma-documentation-bookstack.azurewebsites.net/uploads/images/gallery/2025-10/awf-034.png)
- This opens the Quick User Management screen
[](https://alma-documentation-bookstack.azurewebsites.net/uploads/images/gallery/2025-10/awf-035.png)
**3: Complete Required Fields** Fill out all fields marked with a red asterisk (★); these are mandatory for Alma’s user record validation and for Student Information Systems (SIS) matching.
[](https://alma-documentation-bookstack.azurewebsites.net/uploads/images/gallery/2025-10/awf-036.png)
Required Fields Include:
- First Name
- Last Name
- Primary Identifier
- User Group
- Expiration Date
- Purge Date
- Email Type
- Email Address
***Why This Matters:** Alma validates user data using the Primary Identifier and User Group fields to determine circulation rights.*
*Incomplete records will fail SIS matching or cause fulfillment errors during checkout.*
**Note:** WRLC agreed best practices include that the Purge Date should align with the institution’s data-retention policy (often one year post-expiration). Setting it too soon may delete active records prematurely.
**4: Determine SIS Inclusion**
- If the patron will ***not*** be included in future Student Information System (SIS) uploads skip to Step 6- Ex:
- Alumni
- Community borrowers
- Library staff internal accounts
- If the patron ***will*** be included in future SIS uploads, continue with Step 5- Ex:
- Students, faculty, or staff newly onboarded since the last SIS run
**Note:** This distinction determines whether Alma should treat the user as a locally managed record <Internal> or one that will later synchronize automatically with the SIS (External). Incorrectly flagging a user as “SIS-managed” may result in their record being overwritten or deleted during the next SIS import.
**5: Set the “Patron Has Institutional Record” Flag; for SIS-Managed (External) Users**
- Verify that the <Primary Identifier> field is entered correctly; this field is the key matching field for SIS imports and must be identical to the value used in the institutional system
[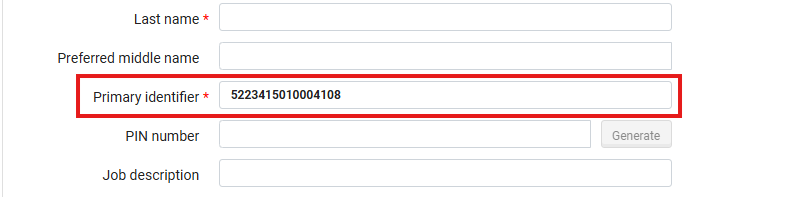](https://alma-documentation-bookstack.azurewebsites.net/uploads/images/gallery/2025-10/awf-037.png)
- Navigate to the <User Management> Information section
[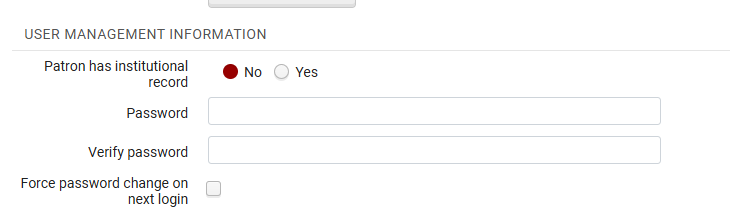](https://alma-documentation-bookstack.azurewebsites.net/uploads/images/gallery/2025-10/awf-038.png)
- Change <Patron has institutional record> from No to Yes
[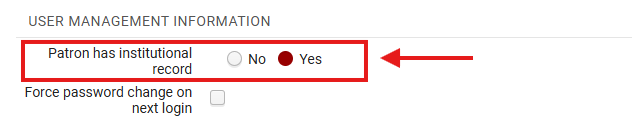](https://alma-documentation-bookstack.azurewebsites.net/uploads/images/gallery/2025-10/awf-039.png)
- After changing it, the screen will refresh automatically.
***Why This Matters:** This tells Alma to expect future updates from your SIS, enabling automatic synchronization of user data (name, contact info, expiry, etc.) and prevents duplicate user creation when future SIS loads occur; incorrect flagging may cause “stale” data issues where patron updates fail to load*
**6: Set Passwords for Locally Managed (Non-SIS) Users** If the patron ***will not*** be updated by SIS (e.g., alumni, community, internal accounts). Non-SIS patrons do not receive automatic credential provisioning. This step ensures they can authenticate for library discovery and My Account access:
- Enter a temporary password in the Password and Verify Password fields
[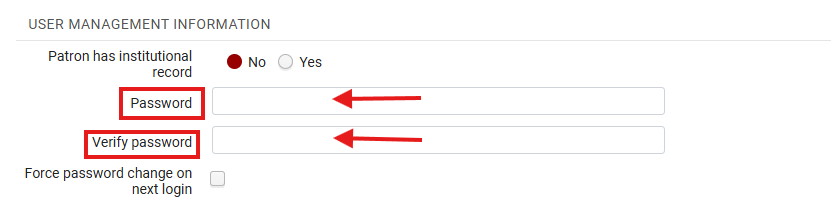](https://alma-documentation-bookstack.azurewebsites.net/uploads/images/gallery/2025-10/awf-040.png)
- Optionally check the “Force password change on next login” box; this ensures the patron sets a secure password later
[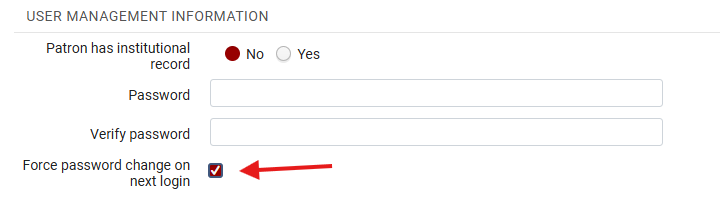](https://alma-documentation-bookstack.azurewebsites.net/uploads/images/gallery/2025-10/awf-041.png)
**Note:** These credentials allow login to Primo VE using their Primary Identifier and password; consider using <Force password change> for all community borrower accounts to prevent password reuse
**7: Save the New Record** Once all required fields are complete, click <Update User>. The system saves the patron record and returns you to the Manage Patron Services screen with the newly created user loaded automatically. The <Update User> action both commits the record and links it to your current Fulfillment desk for immediate use (e.g., for item checkout).
[](https://alma-documentation-bookstack.azurewebsites.net/uploads/images/gallery/2025-10/awf-042.png)
##### **Frequently Asked Questions**
- *What happens if I create a record for a patron who later appears in an SIS upload?*
- The SIS upload will attempt to match on Primary Identifier. If it differs, a duplicate record will be created. Always use the same ID used by SIS.
- *Can I convert a locally managed patron into an SIS-managed one later?*
- Yes, by editing the record and switching “Patron has institutional record” to “Yes,” provided the Primary Identifier matches.
- *How do I handle staff who need multiple roles (patron + operator)?*
- Assign both roles within one account. Do not create separate records. Use the “Roles” tab to add operator permissions.
- *What if a community borrower forgets their password?*
- Use User Management> Reset Password. For security, verify identity before issuing a reset.
- *If the SIS field “Patron has institutional record” is set incorrectly, can it be changed safely?*
- Yes, but verify SIS configuration first.
- *What if I forget to fill in a required field?*
- Alma will not save the record; missing fields are highlighted in red. Fill them and retry.
- *How can I import multiple local patrons at once?*
- Use the User Load Integration Profile under Admin> Manage Jobs for batch uploads.
# How to Set Up a Proxy Borrower and Check Out an Item by Proxy
This workflow explains how WRLC staff can configure one patron to act as a proxy borrower for another patron in Ex Libris Alma, and how to manage checkouts performed by proxy.
A Proxy Borrower is someone granted permission to borrow materials on behalf of another patron, such as a faculty member, administrator, or department. Proxies are most commonly graduate assistants, departmental staff, or designated library liaisons. While the proxy uses their own credentials to perform transactions, the items are checked out under the primary patron’s account to ensure proper due dates, policy application, and responsibility tracking.
##### **Required Roles**
The options available under the Fulfillment menu are dependent upon your assigned user roles. Your list of options may be different than the screenshots included below. If you do not have the necessary options, you will need to work with your institution's User Administrator to be assigned the appropriate roles for your work.
To manage patron services, you must have one of the following roles:
- Circulation Desk Manager
- Circulation Desk Operator
- Circulation Desk Operator - Limited
- Physical Inventory Operator
##### **Part I: Setting Up a Local Patron as a Proxy Borrower**
**1: Open Patron Identification** All proxy relationships must be created under a Fulfillment context to ensure the proxy’s circulation privileges, fines, and analytics data attach correctly to the local library environment.
In Alma, navigate to Fulfillment> Checkout/Checkin> Manage Patron Services> the Patron Identification screen opens
[](https://alma-documentation-bookstack.azurewebsites.net/uploads/images/gallery/2025-10/awf-013.png)
**2: Locate the Proxy Borrower’s Record** Search for and select the patron who will serve as the proxy borrower (the person authorized to check out items for another patron). Their record will now appear in the Patron Services screen.
[](https://alma-documentation-bookstack.azurewebsites.net/uploads/images/gallery/2025-10/p41awf-001.png)
**Note:** Always start with the Proxy Borrower, not the primary account holder. This ensures the relationship is recorded from the proxy’s perspective, matching Ex Libris’ internal data structure.
**3: Edit the Patron’s Information** The page will refresh to the My Institution - Loans page.
[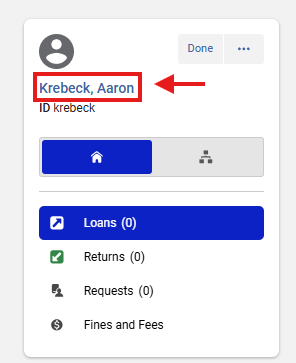](https://alma-documentation-bookstack.azurewebsites.net/uploads/images/gallery/2025-10/0keawf-002.png)
**4:** **Open the User Details Panel** Click on the patron's name to access the User Details panel that will produce from the right-hand side of the screen
[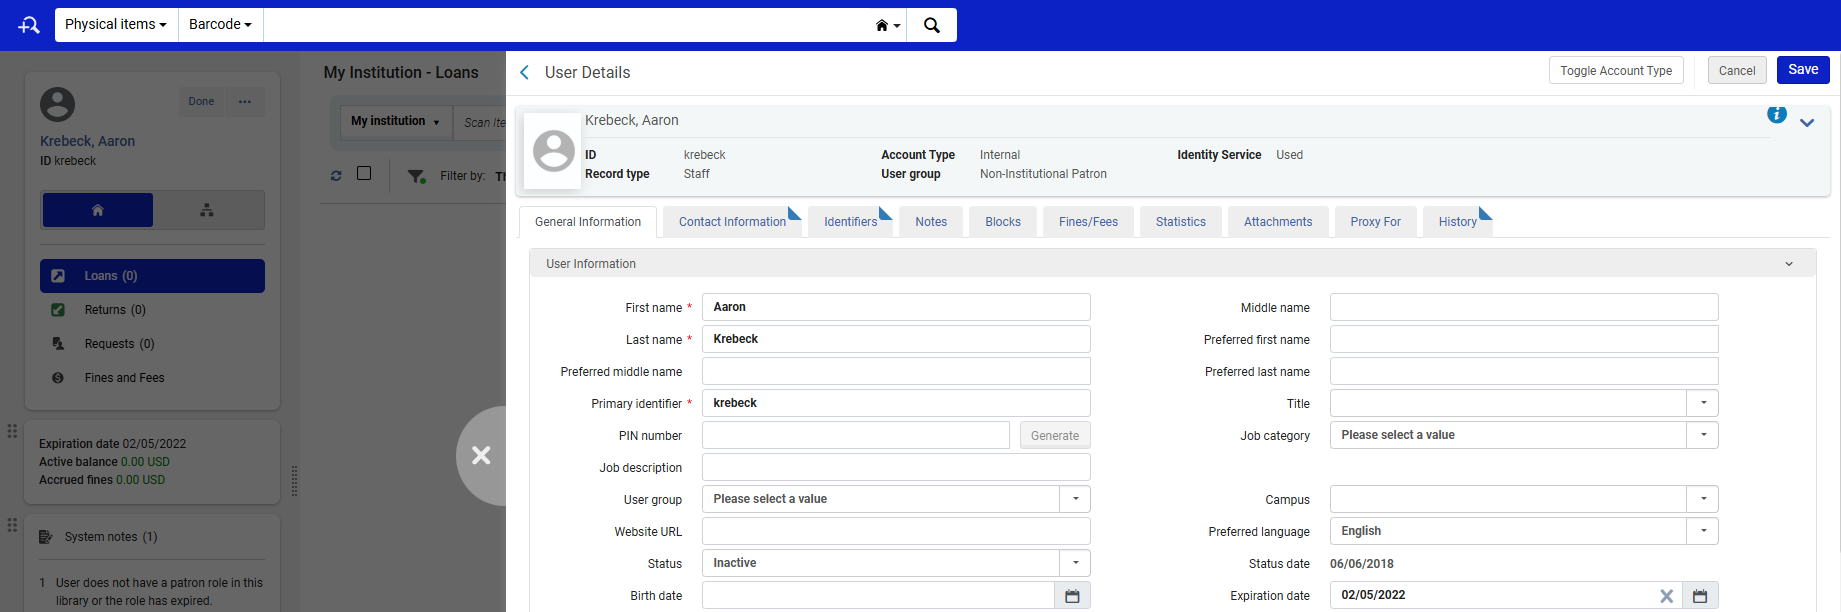](https://alma-documentation-bookstack.azurewebsites.net/uploads/images/gallery/2025-10/qiyawf-003.png)
**5: Open the “Proxy For” Tab** In the User Details screen, click the Proxy For tab. This tab lists any primary users for whom this person already acts as a proxy.
[](https://alma-documentation-bookstack.azurewebsites.net/uploads/images/gallery/2025-10/FgYawf-004.png)
**6: Add a New Proxy Relationship** Click <Add Proxy For>
[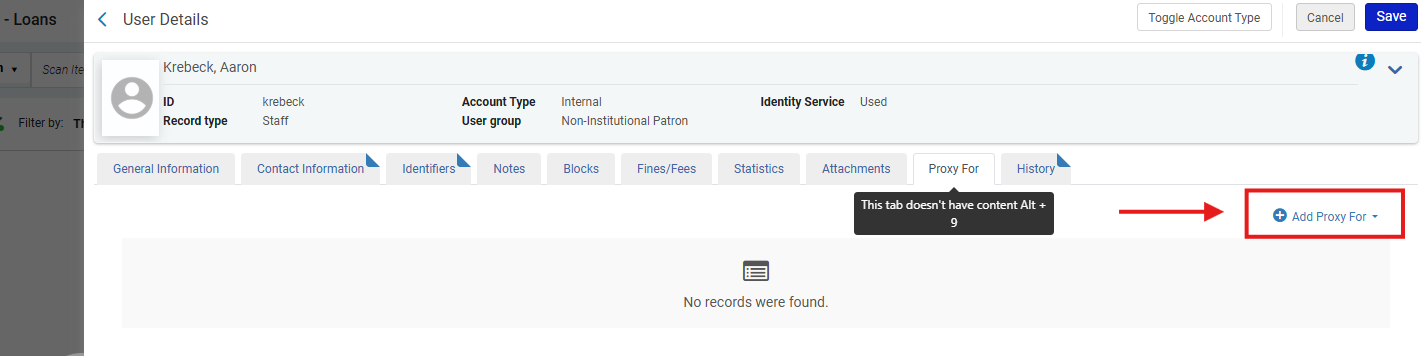](https://alma-documentation-bookstack.azurewebsites.net/uploads/images/gallery/2025-10/26Eawf-005.png)
- The <Proxy For> drop-down menu appears. Search for the primary patron (the account holder for whom the proxy will act).
- Once identified, click <Add User>
[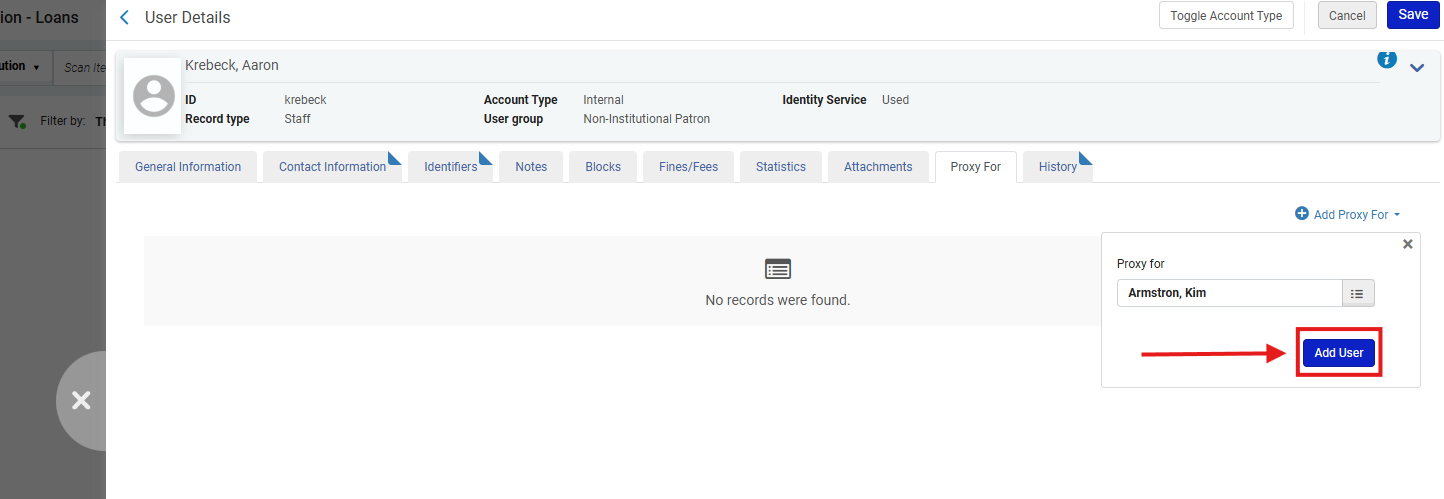](https://alma-documentation-bookstack.azurewebsites.net/uploads/images/gallery/2025-10/VAWawf-006.png)
***Why This Matters:** This step establishes the system-level relationship between the two users. It allows the proxy to borrow materials on the other’s behalf while keeping the loan tied to the primary user’s account for policy and notification purposes.*
**Note:** This relationship is one-directional- adding a proxy under Patron A does not automatically create reciprocal access under Patron B. If mutual authorization is desired (e.g., lab partners or departmental assistants), staff must configure it in both accounts.
**7: Save Changes** Click <Save> to finalize the proxy relationship
[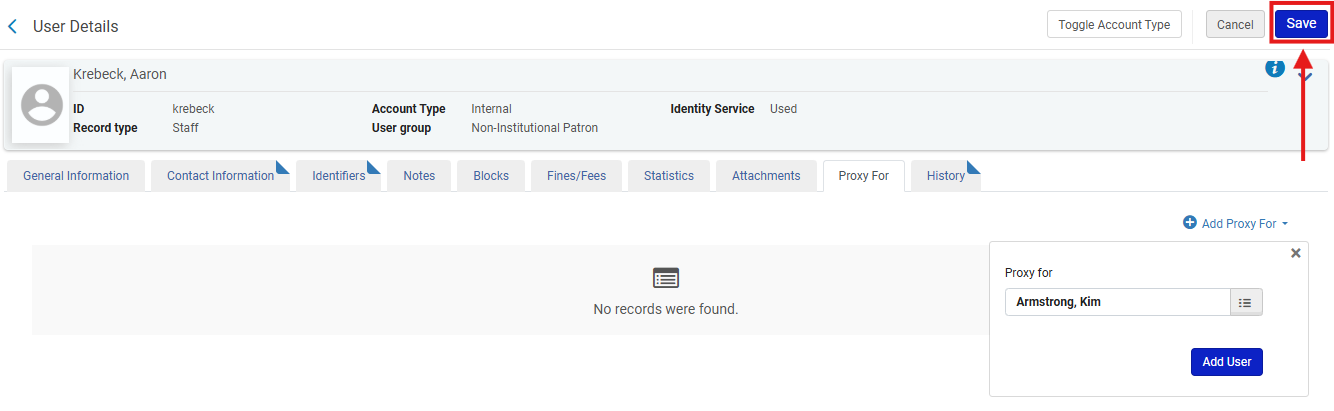](https://alma-documentation-bookstack.azurewebsites.net/uploads/images/gallery/2025-10/awf-007.png)
**Note:** Always verify the relationship by returning to the Proxy For tab and confirming that the linked user appears. Saving does not generate a confirmation message, so manual verification is the only way to ensure success.
##### **Part II: Deleting a Proxy Relationship**
**1: Access the “Proxy For” Tab** Repeat Steps 1–5 above to reach the Proxy For tab.
**2: Remove the Relationship**
- Find the name of the user for whom the patron acts as proxy
- Click the row action menu ellipsis (…) to open the options menu
- Select <Delete>
[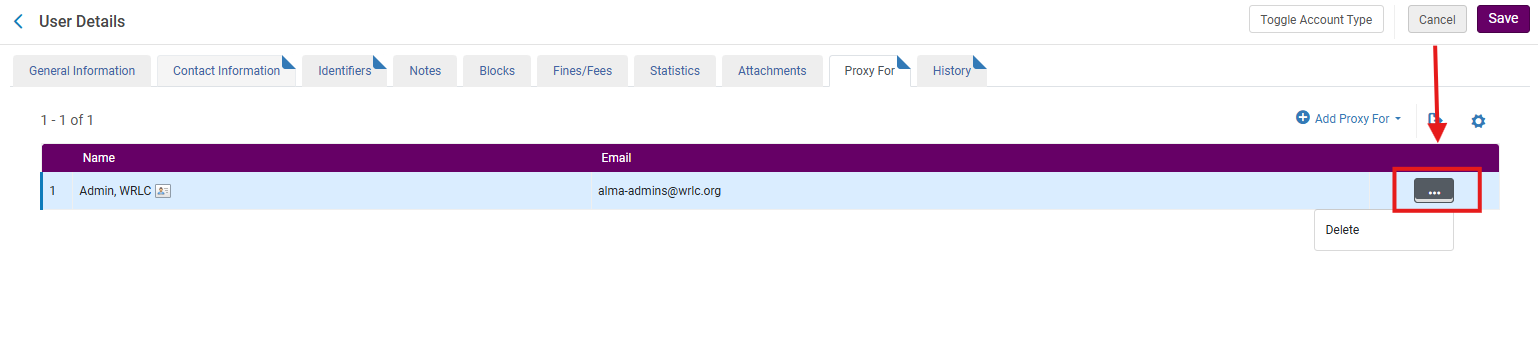](https://alma-documentation-bookstack.azurewebsites.net/uploads/images/gallery/2025-11/aw-01.png)
**3: Save the Record** Click <Save> to confirm the deletion
[](https://alma-documentation-bookstack.azurewebsites.net/uploads/images/gallery/2025-10/TMHawf-008.PNG)
**Note:** Removing a proxy relationship takes effect immediately - the proxy will no longer appear in the "Proxy For” dropdown on the Patron Identification screen.
##### **Part III: Checking Out Items by Proxy**
**1: Open Patron Identification** Navigate to Fulfillment> Manage Patron Services> Checkout/Checkin> Patron Identification; search for the patron who will be checking out materials *on behalf* of someone else
[](https://alma-documentation-bookstack.azurewebsites.net/uploads/images/gallery/2025-10/cXKawf-009.png)
**2: Enable Proxy Mode** After you have identified the correct patron, check the <Use Proxy> box. Search for and select the Proxy Borrower (the person performing the checkout). Checking <Use Proxy>tells Alma to activate the proxy relationship lookup, ensuring transactions are recorded under the primary user’s record, not the proxy’s own.
[](https://alma-documentation-bookstack.azurewebsites.net/uploads/images/gallery/2025-10/BDHawf-010.png)
**3: Choose the Primary Patron**
- A <Proxy For> field appears.
- Click the drop-down arrow to see all patrons for whom this person is authorized to act as a proxy
- Select the correct patron and click <Go>
**Note**: Proxy selection must occur before scanning items. If you forget to select a patron before scanning, Alma will create loans under the proxy’s own record, not the intended account.
[](https://alma-documentation-bookstack.azurewebsites.net/uploads/images/gallery/2025-10/afw-011.png)
**4: Check Out Materials** The Patron Services screen for the selected (proxied) patron appears. A visible line shows “Proxy by \[Name of Borrower\]”. Proceed to check out items as usual. This field is Alma’s built-in audit trail for proxy transactions. All loans, receipts, and notices are still tied to the primary patron’s account, but the proxy’s name is retained for reporting and analytics.
[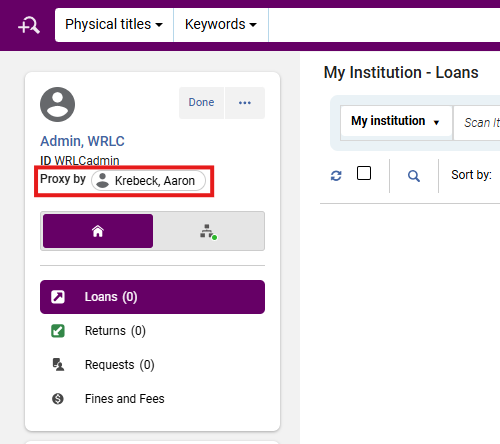](https://alma-documentation-bookstack.azurewebsites.net/uploads/images/gallery/2025-10/afw-012.png)
**5: End the Session** When finished, click Done to close the session. Clicking Done resets the Fulfillment session to prevent subsequent patrons from being mistakenly processed under the same proxy relationship.
[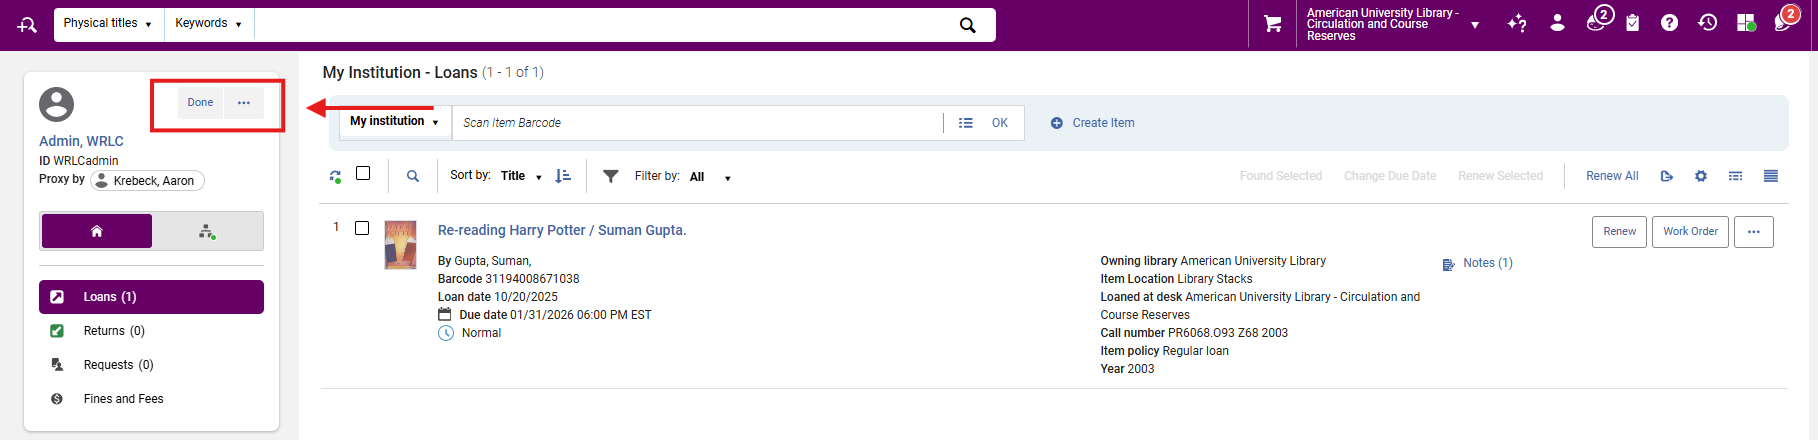](https://alma-documentation-bookstack.azurewebsites.net/uploads/images/gallery/2025-10/afw-013.png)
**Note:** It is strongly encouraged that staff reverify the next patron’s identity immediately after closing proxy sessions to avoid privacy and security breaches.
##### **Notes**
- Notification Behavior: Loan notices, fines, and renewals go to the primary patron.
- Analytics: Loans performed via proxy are visible in Alma Analytics under Fulfillment> Loans> Proxy By Field.
- Expiration Sync: Proxy privileges do not auto-renew when either user’s expiration date changes. Staff must update or remove the relationship manually.
- Cross-Institution Limits: Proxies only function within a single institution’s IZ. Cross-institution proxies are not supported under standard AFN configurations (per Ex Libris documentation).
**Frequently Asked Questions**
- *Can a faculty member have multiple proxies (e.g., student assistants)?*
- Yes. Multiple proxies can be added under the same <Proxy For> tab. Each will appear in the dropdown during checkout.
- *Can a proxy represent multiple patrons (e.g., departmental assistant)?*
- Yes, a single proxy can represent several patrons. All linked patrons will appear in the <Proxy For> dropdown list.
- *What if the proxy attempts to check out items for a user not listed under <Proxy For>?*
- Alma will treat the transaction as a normal loan under the proxy’s account. Staff must verify proxy relationships before processing.
- *What happens if a proxy’s account expires before the primary patron’s?*
- The proxy relationship becomes inactive immediately. Reactivation requires renewing the proxy’s user record.
- *Can proxy privileges be restricted (e.g., only circulation, no renewals)?*
- Yes. Through Fulfillment Configuration> User Roles or Loan Terms of Use (TOUs) adjustments, libraries can limit proxy privileges.
- *Are proxy actions recorded for audit purposes?*
- Yes. The “Proxy By” field records the proxy borrower’s name on each transaction and is reportable via Alma Analytics.
# How to Bring Up a Patron Record and Check Items Out
This workflow guides WRLC library staff through the process of locating a patron record and checking items out in Ex Libris Alma, including both local and consortium patrons.
##### **Required Roles**
The options available under the Fulfillment menu are dependent upon your assigned user roles. Your list of options may be different than the screenshots included below. If you do not have the necessary options, you will need to work with your institution's User Administrator to be assigned the appropriate roles for your work.
To complete Fulfillment tasks outlined in this document, you must have one or more of the following roles:
- Circulation Desk Manager
- Circulation Desk Operator
- Circulation Desk Operator - Limited
- Physical Inventory Operator
**1: Log in and Select Circulation Location** Log into Alma and select the correct Circulation Desk location for your workstation.
***Why This Matters:** The active desk determines which loan policies, printers, and analytics records apply; an incorrect desk can cause checkouts to route to the wrong library or cause print slip failure*
**2: Navigate to Manage Patron Services** In the left-hand menu, click Fulfillment> Checkout/Checkin> Manage Patron Services.
[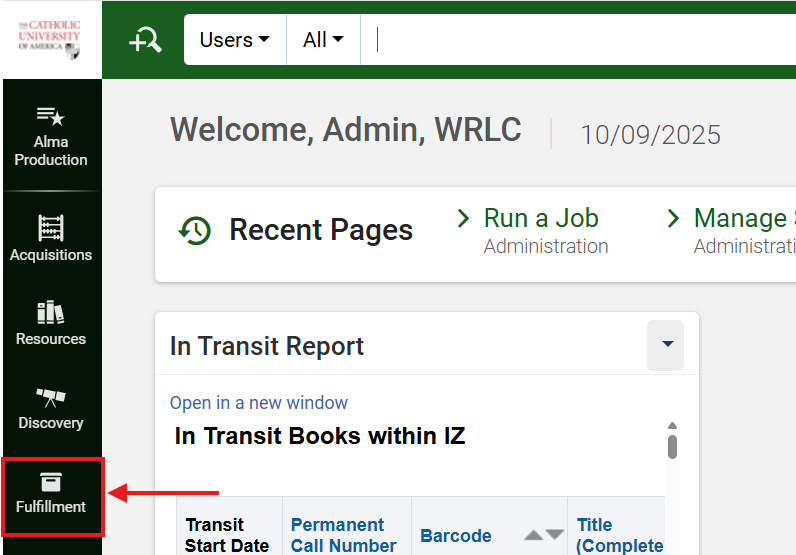](https://alma-documentation-bookstack.azurewebsites.net/uploads/images/gallery/2025-10/awf-011.png)
[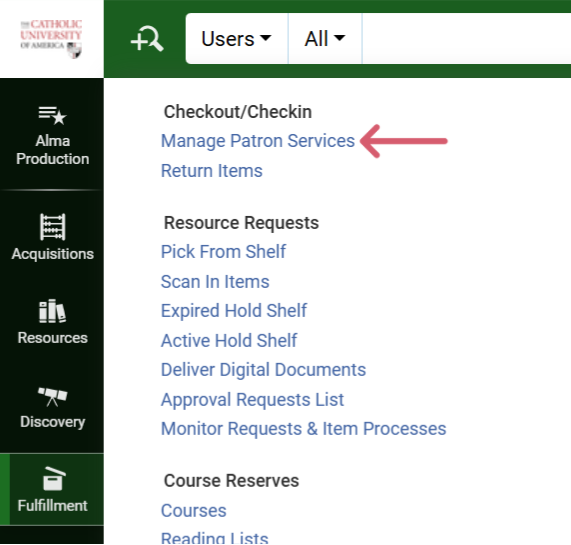](https://alma-documentation-bookstack.azurewebsites.net/uploads/images/gallery/2025-10/awf-012.PNG)
- **The Patron Identification** screen will open
[](https://alma-documentation-bookstack.azurewebsites.net/uploads/images/gallery/2025-10/awf-013.png)
**3: Locate the Patron Record** Patron records can be retrieved in one of three ways:
- Scan the patron’s ID barcode
- Search by patron name
- Search by identification number
**If the patron is a local user**, proceed to Step 8
**If the patron is from another WRLC institution**, continue with Step 4
**4: Search for a Patron from Another Institution**
- Check the <Find user in other institution box>
[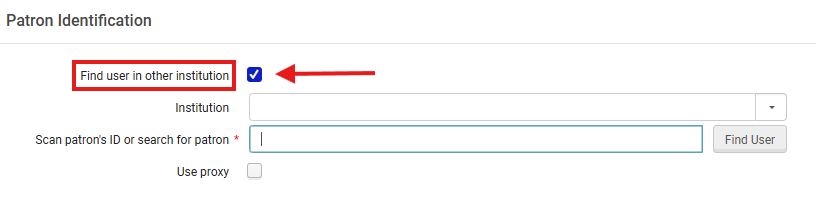](https://alma-documentation-bookstack.azurewebsites.net/uploads/images/gallery/2025-10/kQDawf-027.png)
- Click the dropdown arrow beside the <Institution> field to view the list of WRLC member libraries.[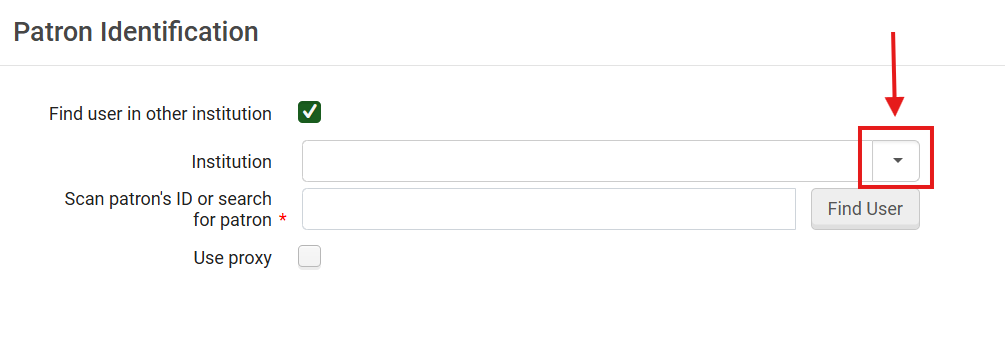](https://alma-documentation-bookstack.azurewebsites.net/uploads/images/gallery/2025-10/awf-014.png)
[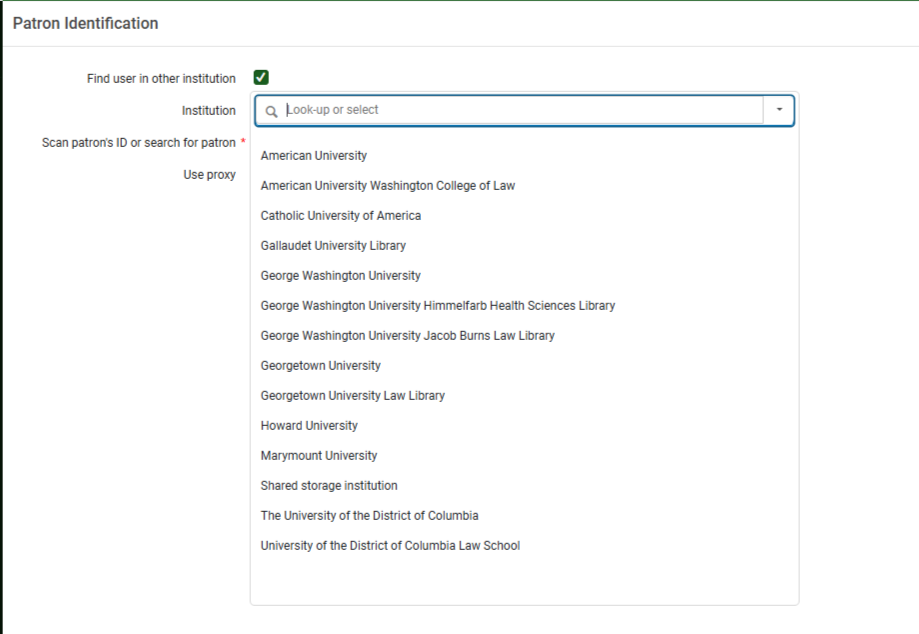](https://alma-documentation-bookstack.azurewebsites.net/uploads/images/gallery/2025-10/awf-029.PNG)
- Select the appropriate institution
[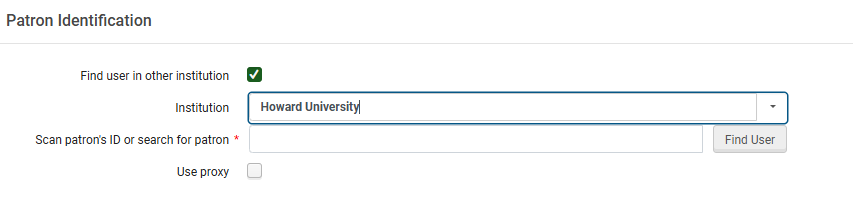](https://alma-documentation-bookstack.azurewebsites.net/uploads/images/gallery/2025-10/awf-030.png)
- Enter the patron’s name or identification number, then click <Find User>[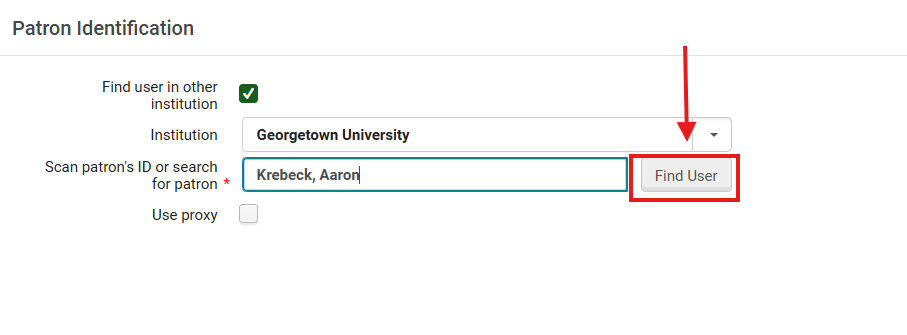](https://alma-documentation-bookstack.azurewebsites.net/uploads/images/gallery/2025-10/q6Zawf-016.png)
**Note:**
- When searching cross-institutionally, the name or ID must match exactly and must be unique within that institution; it should not apply to more than one account at that institution.
- If a patron has a common name, use their Primary ID, Institution ID, or Barcode for accuracy
- Scan IDs wherever possible instead of using typed name searches, as it reduces match failures
**6: Trinity University Patrons** Similar to WRLC’s Health and Law professional libraries, Trinity University does not lend its materials to other WRLC institutions. However, under its WRLC agreement, Trinity University patrons may borrow from participating AFN libraries, and courier deliveries include Trinity University.
- TU patrons are expected to follow the same Circulation and Borrowing policies as fellow AFN libraries.
- To facilitate lending, TU faculty, staff and student patrons are uploaded as patrons within the SCF IZ.
- Select <Shared Storage Institution> for Trinity University patrons
[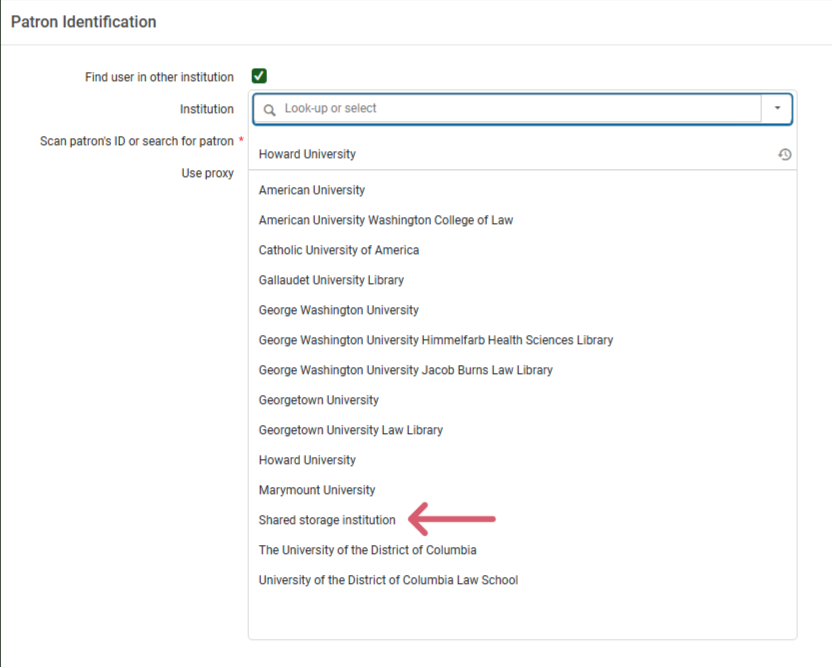](https://alma-documentation-bookstack.azurewebsites.net/uploads/images/gallery/2025-10/awf-032.PNG)
**7: Handling New or Unsaved Patron Records** If the WRLC patron already exists in your Institution Zone, their record will open automatically to the Loans Loans tab, proceed to Step 8
**If the patron *does not exist*** locally:
- The Quick User Management screen opens.
- Verify all fields with a red asterisk (\*) are filled in correctly, inlcuding expiration date, user group, and email address
- Click Update User to create a temporary local copy of the user record.
***Why This Matters:** Quick User Management creates a temporary local instance of the remote record, allowing immediate checkout. This avoids unnecessary network delays and keeps circulation seamless*
**8: Open the Patron’s Loans Tab** Once the user record loads, the Loans tab will display automatically- you are now ready to perform checkout actions.
[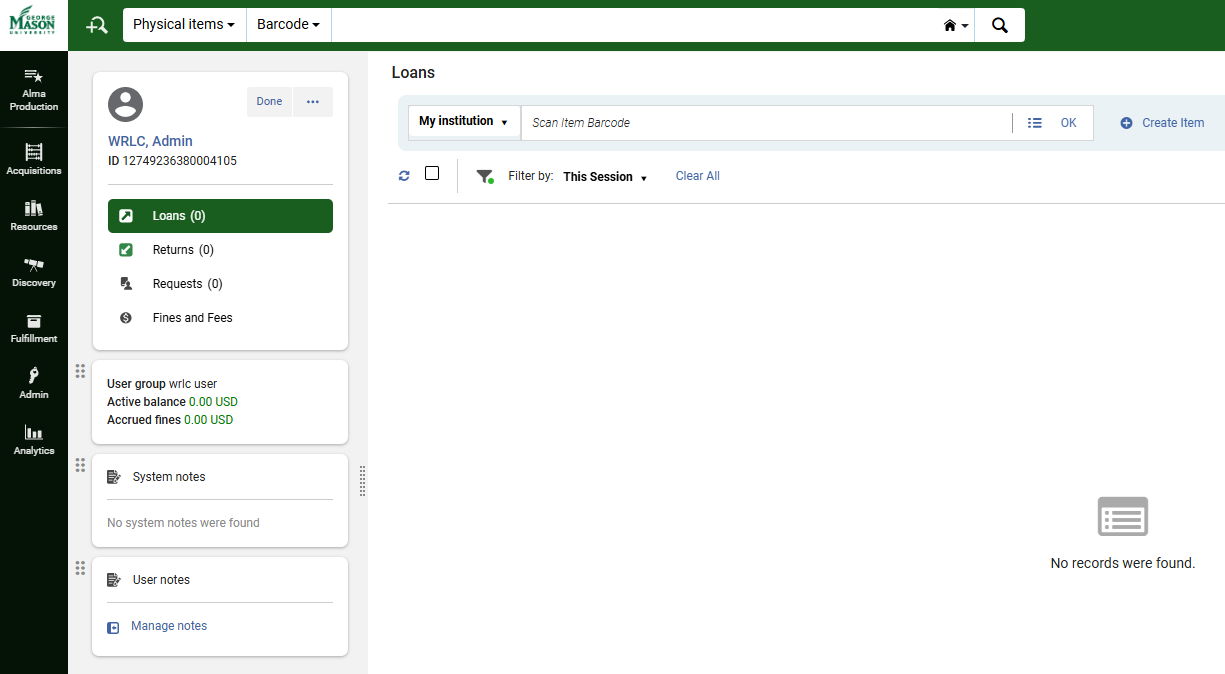](https://alma-documentation-bookstack.azurewebsites.net/uploads/images/gallery/2025-10/awf-033.png)
**9: Check Out Items to the Patron** Items may be checked out using one of the following methods:
- Scan the item’s barcode (recommended)
- Manually enter the barcode
- Search for the item in the catalog
Once the item is identified, click OK to confirm the checkout. The item will appear under the patron’s Loans list.
**Note:** You are strongly encouraged to scan physical item barcodes to ensure Alma recognizes the correct copy and location. Manual entry increases the chance of transposition errors
**10: Complete the Session** When all items have been checked out, click Done to close the patron record and end the session.
***Why This Matters:** Closing the session resets the workstation for the next user and prevents accidental checkouts under the wrong patron name.. This is particularly critical in shared circulation environments*
*[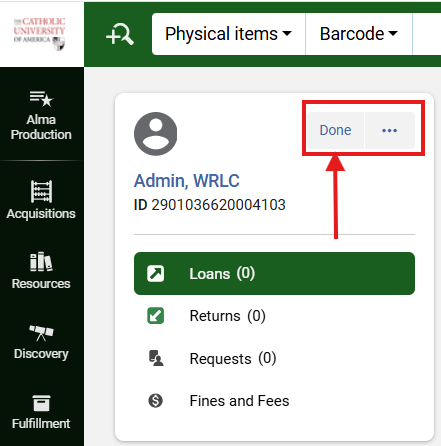](https://alma-documentation-bookstack.azurewebsites.net/uploads/images/gallery/2025-10/awf-019.png)*
##### **Frequently Asked Questions**
- *What if a patron from another WRLC library cannot be found using <Find user in other institution>?*
- Check spelling and capitalization. If still unsuccessful, verify the institution selected. If unresolved, contact the patron's library for assistance; [WRLC.org](http://wrlc.org/)> Programs> Services Portal> WRLC Library Staff Intranet> Categories> Resource Sharing> [Consortium Loan Services (CLS) Contact List ](https://www.libraries.wrlc.org/resource-sharing-wrlc-systems-support/consortium-loan-service-cls-contact-list)
- *Can temporary local users borrow electronic materials?*
- No. Quick User records enable physical loans only. E-resource access remains tied to the patron’s home institution.
- *What happens if I check out an item under the wrong patron?*
- The transaction must be manually reversed by returning the item and re-checking it out under the correct account.
- *Are checkout rules (loan length, renewal limits) the same for all WRLC patrons?*
- No. They depend on each library’s Fulfillment Unit Rules and Patron Group Policy; [WRLC.org](http://wrlc.org/)> WRLC Intranet> Categories (upper right hand menu ribbon)> Policies and Documentation> [Borrowing and Consortium Loan Service (CLS) Policies](https://www.libraries.wrlc.org/resource-sharing-wrlc-policies/borrowing-and-consortium-loan-service-cls-policies)
# How to Check an Item In or Out When the Barcode is Missing or Illegible
Circulation Desk staff may occasionally encounter physical materials with missing, damaged, or illegible barcodes during check-in or check-out. Manual lookup ensures continuity of circulation service while maintaining accurate fulfillment statistics. It also prevents delays or incomplete transactions that can disrupt hold queues and overdue calculations.
##### **Required Roles**
The options available under the Fulfillment menu are dependent upon your assigned user roles. Your list of options may be different than the screenshots included below. If you do not have the necessary options, you will need to work with your institution's User Administrator to be assigned the appropriate roles for your work.
To complete Fulfillment tasks outlined in this document, you must have one or more of the following roles:
- Circulation Desk Manager
- Circulation Desk Operator
- Circulation Desk Operator - Limited
- Physical Inventory Operator
**1: Identify When Manual Lookup Is Needed** If the item’s barcode is missing entirely, illegible or damaged, or unresponsive to the barcode scanner- you must look up the item manually instead of scanning. Manually selecting the correct item record prevents misidentification or accidental circulation of similar titles.
**2: Access the Appropriate Fulfillment Screen** Navigate to the correct screeen. While the interface differs slightly between these two workflows, the manual item lookup process is identical. Both methods use the <Select from a list> feature next to the <Scan item barcode> field.
- Check In: Fulfillment> Checkout/Checkin> Return Items> Manage Return Items> Select from a list
[](https://alma-documentation-bookstack.azurewebsites.net/uploads/images/gallery/2025-10/6SGawf-012.png)
- Check Out: Fulfillment> Checkout/Checkin> Manage Patron Services> Select from a list
[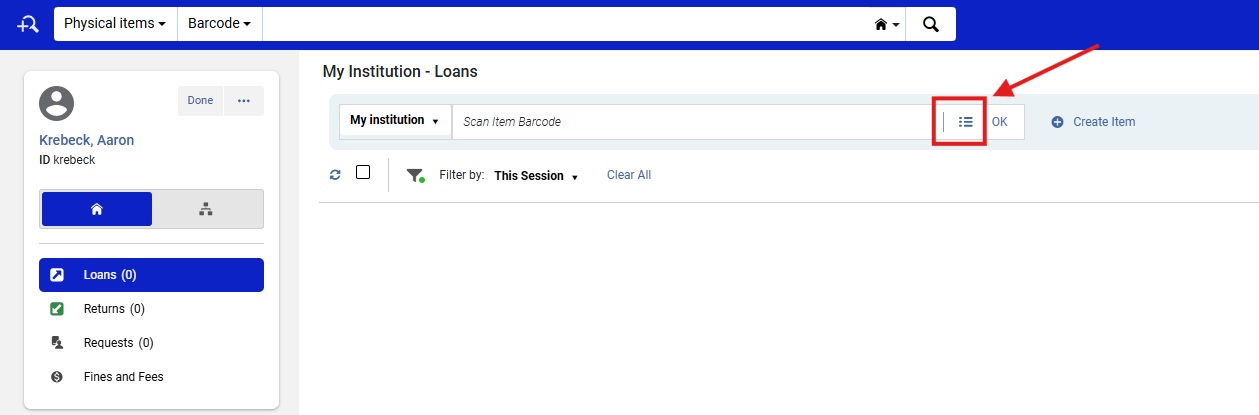](https://alma-documentation-bookstack.azurewebsites.net/uploads/images/gallery/2025-10/Ovuawf-013.png)
**Note:** Staff are encouraged to confirm they are in the correct function (Check-In vs. Check-Out) before manually selecting an item. This ensures proper circulation logging and avoids accidental returns or mistaken loans.
**3: Use the <Select from a List> Option** Click the <Select from a list> button next to the <Scan item barcode> field. This will allow you to to select from the Choose search index drop-down menu (ex. Keywords) and Choose search scope (ex. institution Zone -- house symbol)
- On the Check-Out screen (Manage Patron Services) the same right-hand side Physical Items panel will open
[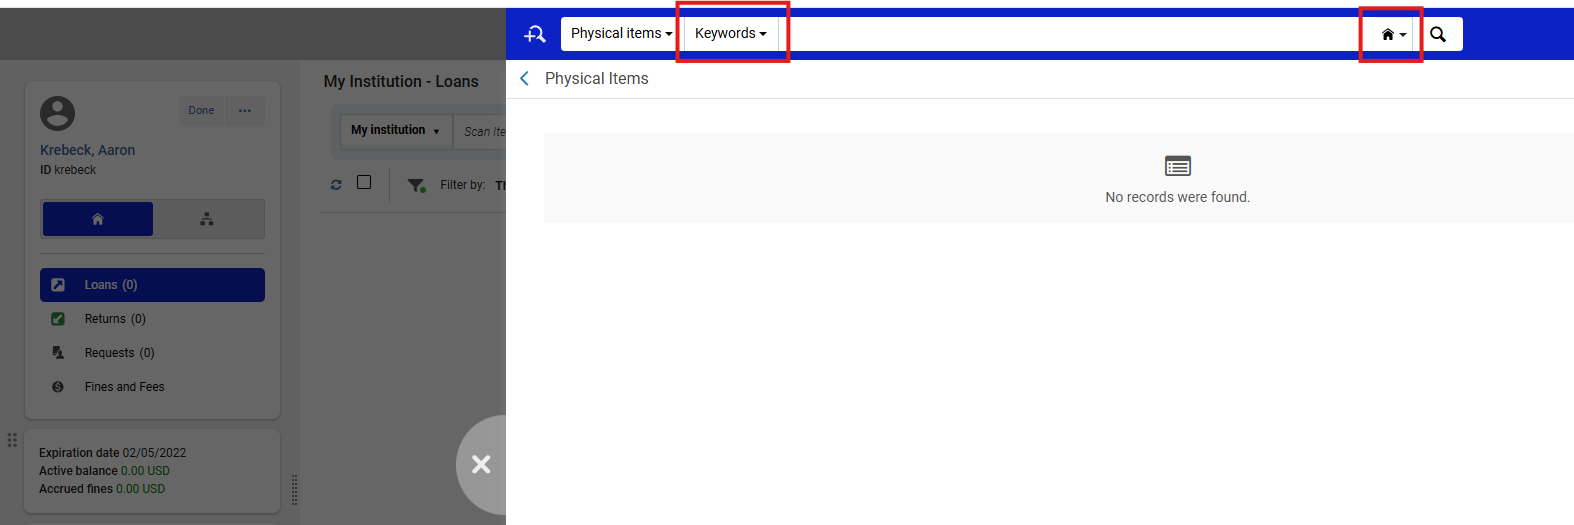](https://alma-documentation-bookstack.azurewebsites.net/uploads/images/gallery/2025-10/FxBawf-015.png)
**4: Locate the Correct Item Record** Locate your correct item record and select it by clicking the circle to the left of the title and then clicking <Select> in the upper-right to populate the <Scan item barcode> field. Selecting the correct record ensures Alma populates the Scan item barcode field with the appropriate internal item ID. This prevents circulation data mismatches and ensures holds, requests, and Analytics reports remain accurate.
[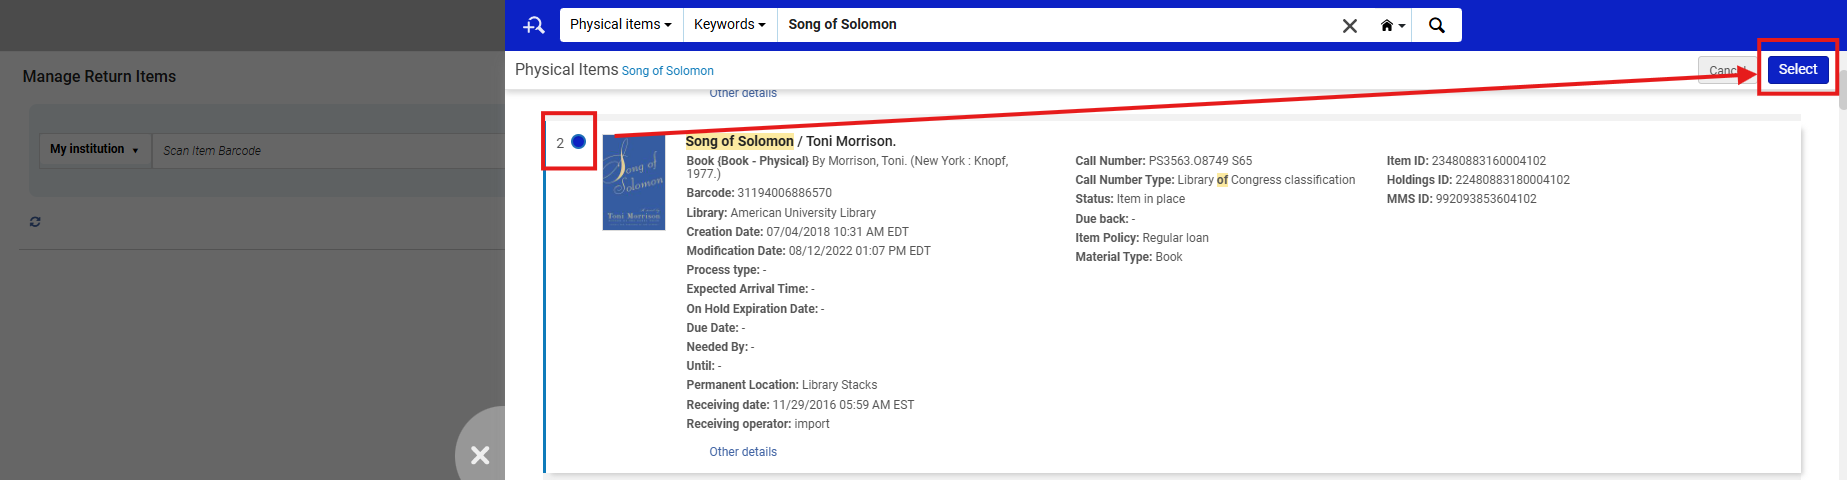](https://alma-documentation-bookstack.azurewebsites.net/uploads/images/gallery/2025-10/VUIawf-016.png)
**Note:** Alma distinguishes item records by MMS ID and Holding ID as well as Barcode. Be careful not to choose a record from another holding or location, particularly for multi-volume sets or shared titles.
**5: Confirm and Process the Transaction** Once the item record has been selected: Click <OK> to populate the barcode field and complete the Check-In or Check-Out transaction. Clicking <OK> finalizes the operation and ensures the transaction logs under the correct circulation function. Failing to confirm will leave the record open and unprocessed.
[](https://alma-documentation-bookstack.azurewebsites.net/uploads/images/gallery/2025-10/3wEawf-017.png)
**Note:** The <OK> confirmation both populates and executes the circulation action in one step. There is no secondary confirmation screen, so double-check your patron and item details before clicking.
##### **Frequently Asked Questions**
- *What if I can’t find the item record in the Physical Items list?*
- Confirm the search scope is set to Institution Zone (house symbol) and try alternate indexes (e.g., call number or title keyword). If still missing, the item record may be suppressed or deleted.
- *What if multiple identical titles appear in search results?*
- Verify call number, location, and material type before selecting. Do not guess or assume based on title alone.
- *Should I create a temporary barcode for immediate circulation?*
- Only if your local policy allows it.
- *Will the system remember the manually entered item ID for next time?*
- No. Manual selections do not persist; the item must be reselected each time until its barcode is restored.
# How to Manage the Pick from Shelf List
This workflow explains how to access and manage the Pick from Shelf list (also known as the Pick List) in Ex Libris Alma.
The pick list identifies items currently requested for patron holds, course reserves, or resource sharing requests within your library or across WRLC institutions.
##### **Required Roles**
To complete Fulfillment tasks outlined in this document, you must have one or more of the following roles:
- Fulfillment Operator
- Circulation Desk Manager
**1: Access the Pick List** This is the primary interface for viewing items your library must retrieve to fulfill local or consortial requests. It updates dynamically as requests are placed or fulfilled.
- Navigate to Fulfillment > Resource Requests> Pick From Shelf; the <Pick Up Requested Resources> screen will open.
[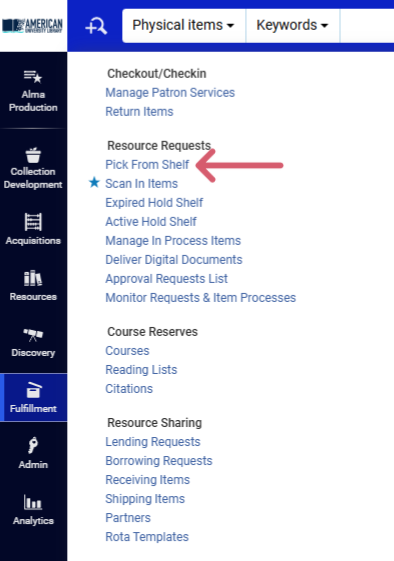](https://alma-documentation-bookstack.azurewebsites.net/uploads/images/gallery/2025-10/2u9awf-002.PNG)
**2: Review and Organize the List** Use facets on the left-hand side or the <Sort by> menu to filter and organize results (e.g., by location, request type, or call number). Efficient sorting reduces retrieval time, especially in multi-location libraries.
[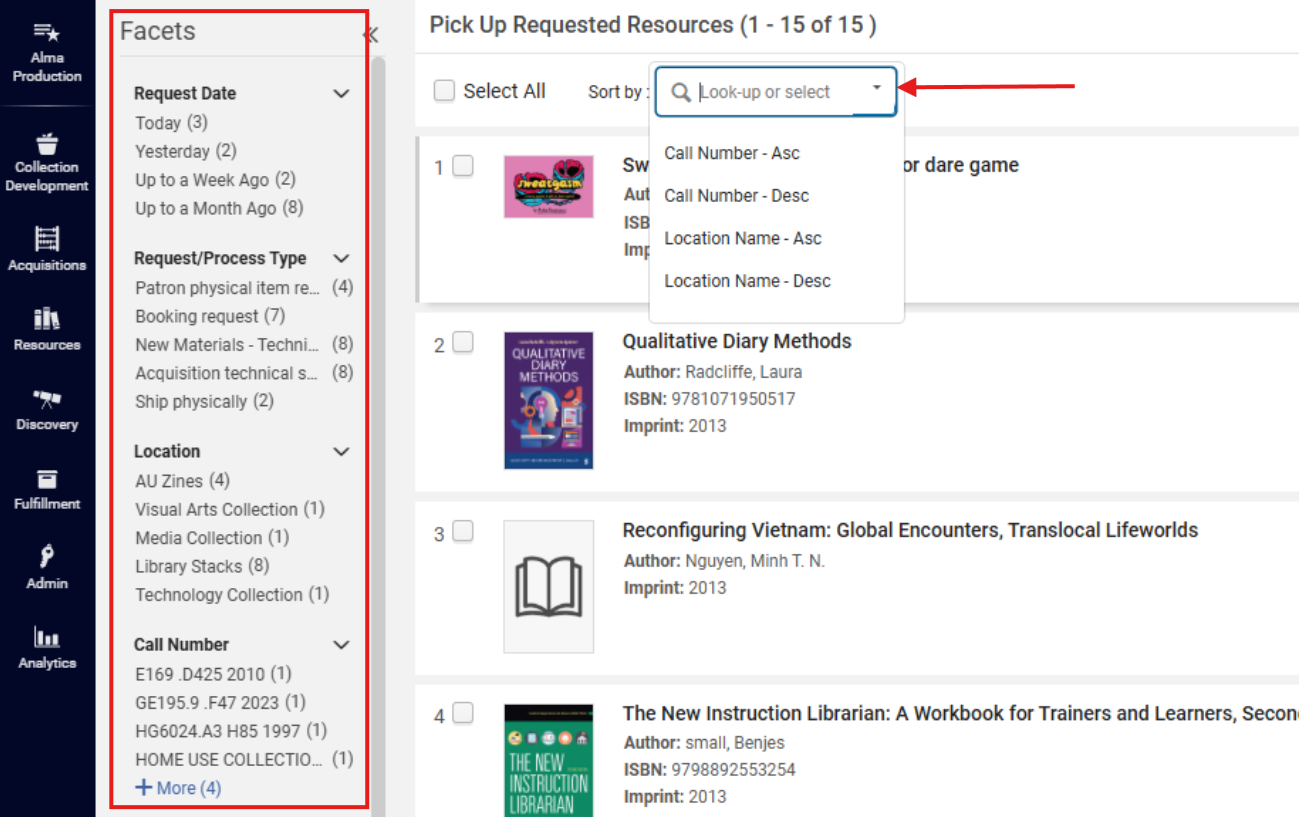](https://alma-documentation-bookstack.azurewebsites.net/uploads/images/gallery/2025-10/wF9awf-003.png)
**3: Print the Pick List or Individual Slips** Printed slips contain location details, item barcodes, and destination information needed to retrieve materials accurately and efficiently. There are three ways to print or download the list for retrieval:
- <Print Slip Report>:
- Click <Print Slip Report> to generate an Excel or XML file of all items currently on the pick list.
[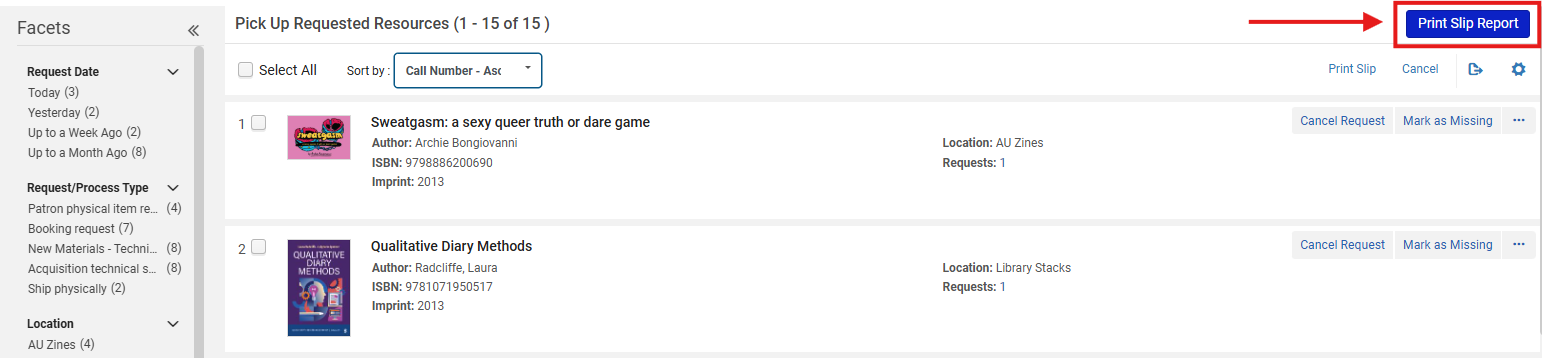](https://alma-documentation-bookstack.azurewebsites.net/uploads/images/gallery/2025-10/YKxawf-004.png)
- - A pop-up window will appear; choose the desired format and click <Download> or <Send>.
[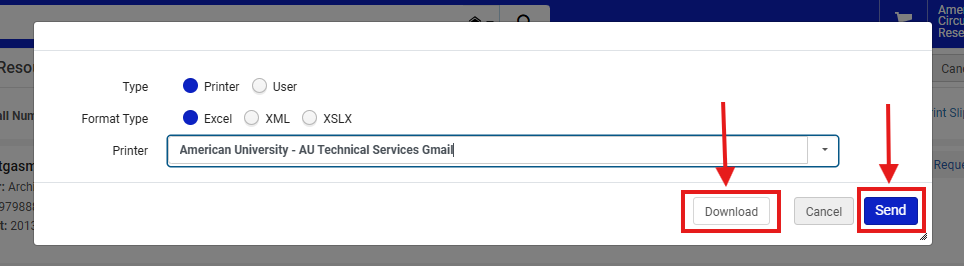](https://alma-documentation-bookstack.azurewebsites.net/uploads/images/gallery/2025-10/frcawf-005.png)
- <Print Slip> (bulk):
- Select individual items using the check boxes beside each entry and click <Print Slip>.
[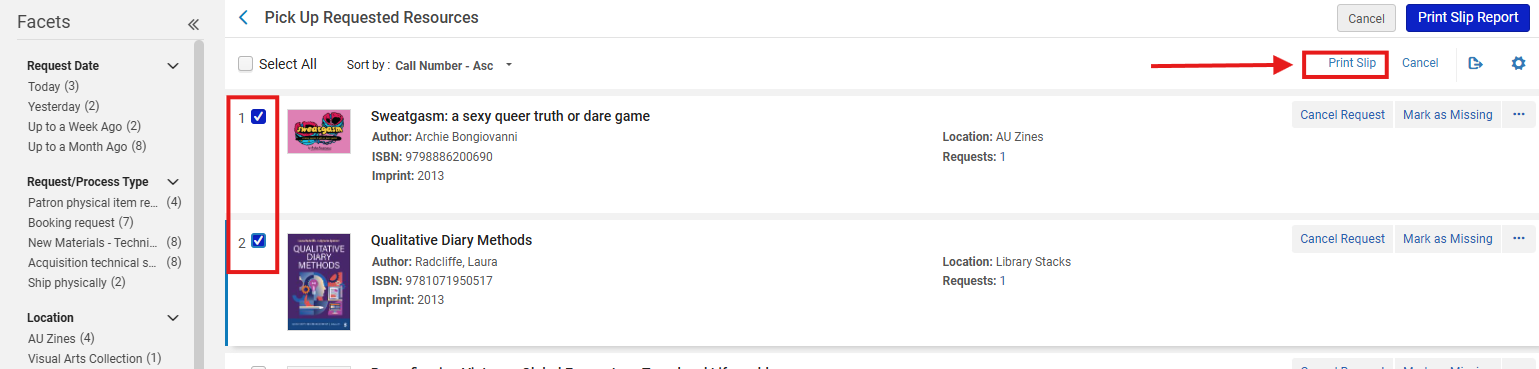](https://alma-documentation-bookstack.azurewebsites.net/uploads/images/gallery/2025-10/SG8awf-006.png)
- More Actions> Print Slip> (individual):
- Open the row action menu ellipsis (⋯) menu next to a specific item and choose <Print Slip>.
[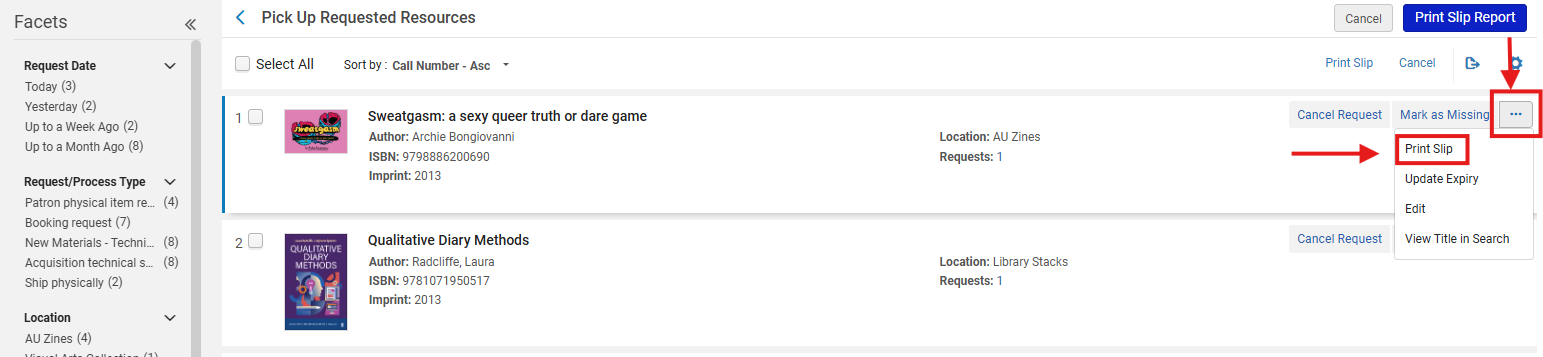](https://alma-documentation-bookstack.azurewebsites.net/uploads/images/gallery/2025-10/f5aawf-007.png)
**Note:** Print Slip Reports are more ideal for batch retrievals, while Print Slip can be more useful better for ad hoc requests.
Consider maintaining printed lists until items are scanned into Alma to avoid losing track of physical materials during pickup.
**4: Locate and Retrieve Requested Items** Use the printed slips or pick list report to locate items on the shelves. Retrieve the materials and bring them to your workstation for processing. This step physically fulfills pending Alma requests and updates internal status when items are later scanned in.
**5: Process Retrieved Items** Once all items are collected, navigate to Fulfillment > Resource Requests> Scan In Items
[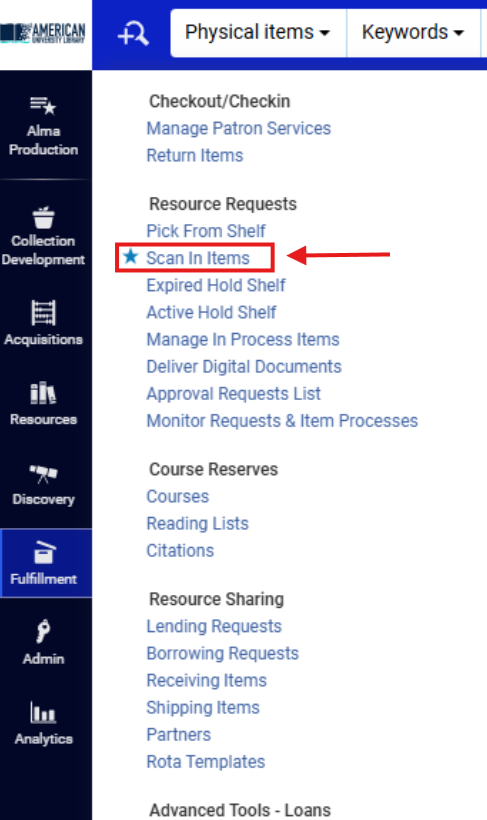](https://alma-documentation-bookstack.azurewebsites.net/uploads/images/gallery/2025-10/9B3awf-008.png)
- The Scan In Items screen opens. Enter or scan each item’s barcode in the <Scan item barcode> field. Scanning items from the pick list both updates Alma to reflect that the item has been found and generates internal routing slips for delivery or hold shelf placement.
[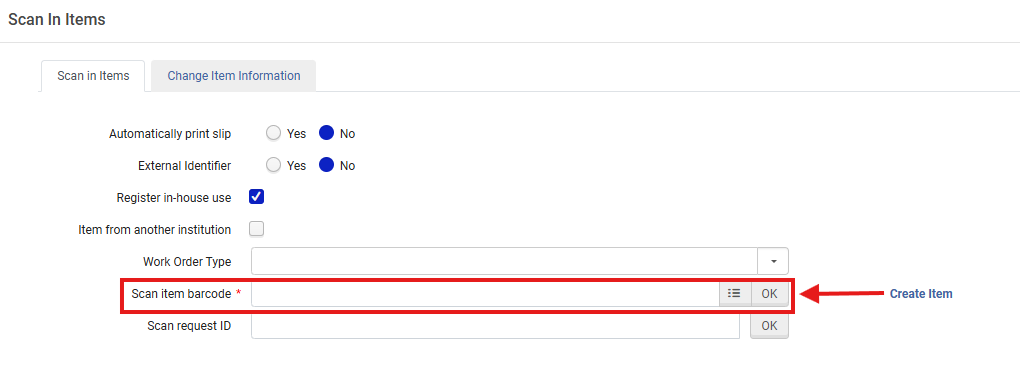](https://alma-documentation-bookstack.azurewebsites.net/uploads/images/gallery/2025-10/FvRawf-009.png)
Note: Scan In Items processing updates the item’s workflow status automatically. For example, from Item in Place to Item in Transit or On Hold Shelf depending on request type and location.
**6. Review Scanned Items and Destinations** Destination slips guide routing and ensure the correct final location (e.g., local hold shelf, resource sharing shipment, or digitization). As you scan each barcode, a destination slip prints automatically.
- The lower part of the screen displays:
- Item details
- Destination library or department
- Current request type or status
**Note:** To avoid misdelivery or double transit, double-check destination details before routing- especially when items are requested by other institutions
##### **Frequently Asked Questions**
- *What if I don’t see <Pick From Shelf> in my Fulfillment menu?*
- Your user role may lack Fulfillment Operator privileges. Contact your supervisor or system administrator.
- *What if a requested item is not on the shelf?*
- Mark the item as Missing and report to cataloging or circulation management- confirm the workflow with your library's Circulation Desk management staff. The request will reroute automatically
- *Can I sort the pick list by call number?*
- Yes. Use the <Sort by> menu and choose “Call Number” for sequential pulling.
- *Should I reprint slips if I scan items directly without printing first?*
- No, Alma automatically updates item status during scanning; printing is optional.
- *What if a hold slip prints for the wrong destination?*
- Use <Change Destination>, available in the item’s row action menu ellipsis menu, to correct routing.
- *How long do items remain on the pick list?*
- Until scanned into <Scan In Items> or the request is canceled/expired.
- *What if multiple libraries share stacks?*
- Filter the list by Location before printing or scanning to avoid retrieving items belonging to other institutions.
# How to Set an Item Status to Missing
This workflow explains how to manually set a physical item’s status to <Missing> in Ex Libris Alma when the item cannot be found during shelf checks, fulfillment requests, or inventory reconciliation. Manually setting an item to <Missing> ensures accurate holdings information, prevents further requests, and helps maintain the integrity of Catalog and Analytics reports.
- Item records must have a current shelf status of <Item in place> in order to have the <Missing> status applied manually.
- Items in transit, on loan, or under work order cannot be toggled to <Missing> until their current status is resolved.
##### **Required Roles**
The options available under the Fulfillment menu are dependent upon your assigned user roles. Your list of options may be different than the screenshots included below. If you do not have the necessary options, you will need to work with your institution's User Administrator to be assigned the appropriate roles for your work.
To complete Fulfillment tasks outlined in this document, you must have one or more of the following roles:
- Fulfillment Operator
- Circulation Desk Manager
- Physical Inventory Operator (optional)
**Note:** If you do not see <Toggle Missing Status> in the <More actions> menu, your user account may lack the necessary privileges. Contact your supervisor or system administrator for role verification.
**1: Search for the Item Record** Using the <Physical Items> search ensures you’re retrieving individual item records, not holdings or bibliographic records. This level of specificity allows direct access to item statuses.
- Use the persistent search box at the top of the Alma screen.
- Using the drop-down menu, set the search type to <Physical Items>.
[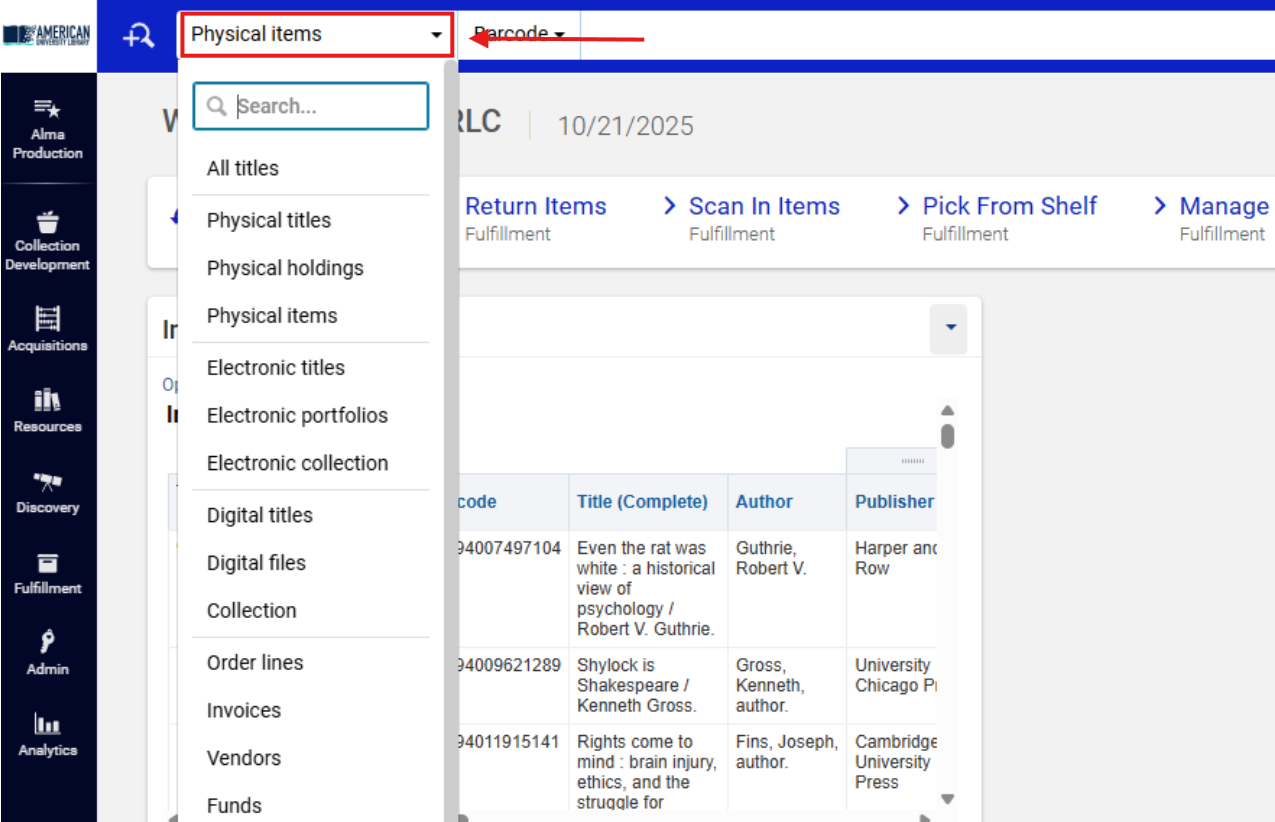](https://alma-documentation-bookstack.azurewebsites.net/uploads/images/gallery/2025-10/3Hfawf-010.png)
- Using the second search bar filter, Select Title, Barcode or MMS ID of the Missing Item
[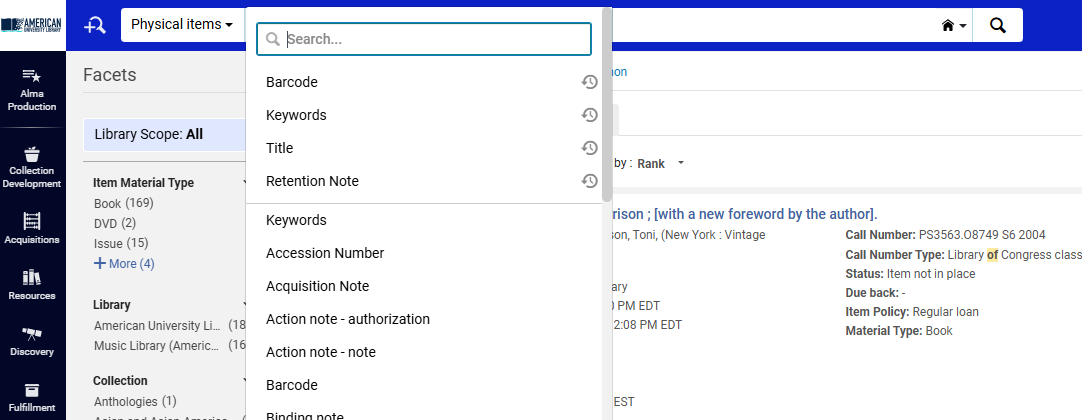](https://alma-documentation-bookstack.azurewebsites.net/uploads/images/gallery/2025-10/7lzawf-015.png)
- Enter the title, barcode, or MMS ID of the missing item.
[](https://alma-documentation-bookstack.azurewebsites.net/uploads/images/gallery/2025-10/apLawf-016.png)
**2: Open the <More Actions> Menu** When you locate the correct item record, click the row action menu ellipsis (⋯) on the right-hand side of the record line to open the <More actions> menu. The <More actions> menu provides record-level management options such as editing, toggling statuses, and initiating work orders. Only this menu allows manual updates to the <Missing> flag.
[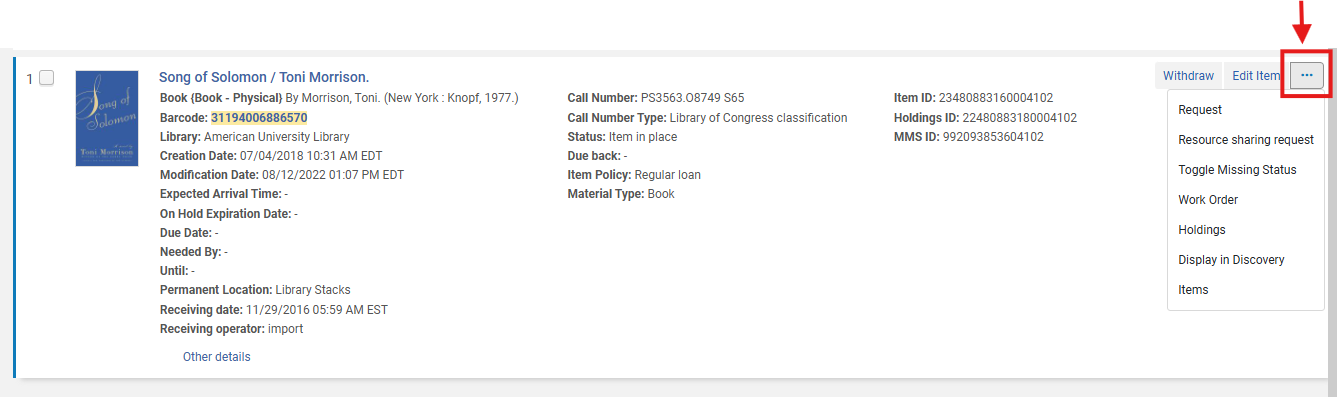](https://alma-documentation-bookstack.azurewebsites.net/uploads/images/gallery/2025-10/eFkawf-017.png)
**3: Select <Toggle Missing Status>** From the drop-down menu, select <Toggle Missing Status>. The item is now recorded as Missing in Alma. This action immediately updates the item’s process type to Missing, removing it from the Item in place inventory count and from active fulfillment requests.
Toggling this status also updates associated availability displays in Primo VE.
[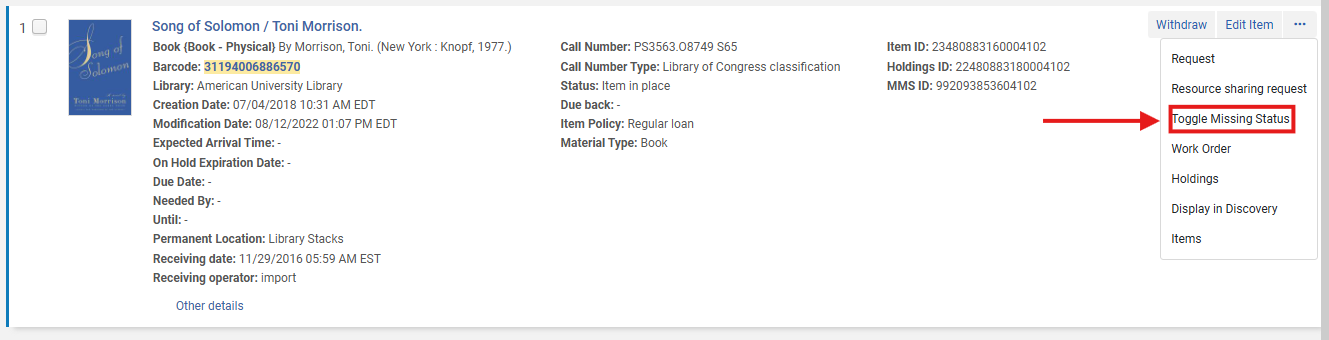](https://alma-documentation-bookstack.azurewebsites.net/uploads/images/gallery/2025-10/awf-018.png)
**4. Missing Status Confirmation Update** A pop up window will publish from the right hand sign of the screen- confirming the update has been successfully completed
[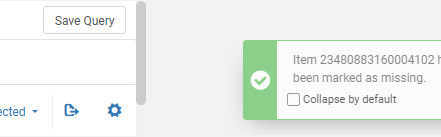](https://alma-documentation-bookstack.azurewebsites.net/uploads/images/gallery/2025-10/ftMawf-019.png)
**5: Restore the Item When Found** If the item is later located, you can revert its status to <Item in place> by:
- Repeating the steps above and selecting <Toggle Missing Status> again, or
- Simply checking the item in using Fulfillment > Checkout/Checkin> Manage Item Returns
Checking an item in automatically clears the Missing status, ensuring the record accurately reflects the item’s physical availability.
##### **Frequents Asked Questions**
- *What if I can’t toggle the Missing status?*
- Check the item’s process type. Only items listed as Item in place can be toggled manually.
- *What if the item doesn’t have a shelf status of Item in place?*
- You must first clear or complete its current process type (e.g., in transit, work order). Items with active requests or transit statuses cannot be toggled to Missing until resolved.
- *Can I toggle the Missing status for items belonging to another institution?*
- No. You can only modify records belonging to your home institution’s Inventory Zone (IZ).
- *Can I mark multiple items as Missing at once?*
- No. Alma’s manual toggle applies to one record at a time. For batch updates, use an import job under: Admin > Manage Jobs> with the <Change Physical Items> profile.
- *Does marking an item Missing cancel existing patron requests?*
- Yes. Ex Libris confirms that when an item becomes Missing, Alma automatically cancels open requests for that item
- *How soon does the change appear in Primo VE?*
- Almost immediately. The display updates once the daily indexing job runs, usually within 15-30 minutes.
- *Can items marked Missing be automatically reinstated?*
- Only when scanned into <Manage Item Returns> or toggled manually.
- *How can I track missing items over time?*
- Use Alma Analytics under Physical Items > Missing Items Report or generate a local fulfillment report.
# How to Add a Fulfillment Note to an Item
A <Fulfillment Note> in Ex Libris Alma displays a pop-up message whenever an item is checked out or checked in.
This note provides staff with important information or warnings related to that item- such as loan restrictions, condition alerts, or routing instructions. Properly using <Fulfillment Notes> improves communication among Access Services, Technical Services, and Resource Sharing staff. It prevents missed item conditions, patron misunderstandings, or overlooked processing requirements.
##### **Required Roles**
To add or edit a <Fulfillment Note>, a staff member must hold one of the following Alma roles:
- Physical Inventory Operator
- Cataloger or Metadata Editor
- Circulation Desk Manager (optional)
**1: Search for the Item Record** A <Physical Items> search ensures access to the editable item record (rather than holdings or bibliographic levels). Fulfillment notes are attached to item records only.
- Use the persistent search box and set it to <Physical Items>.[](https://alma-documentation-bookstack.azurewebsites.net/uploads/images/gallery/2025-10/3Hfawf-010.png)
- Enter the item’s title, barcode, or MMS ID and press <Enter> to run the search.
[](https://alma-documentation-bookstack.azurewebsites.net/uploads/images/gallery/2025-10/apLawf-016.png)
**2: Open the Item Record Editor** Locate the correct item in the search results. The following two options open the same Physical Item Editor
- Do one of the following:
- Click the barcode link to open the item editor, or
[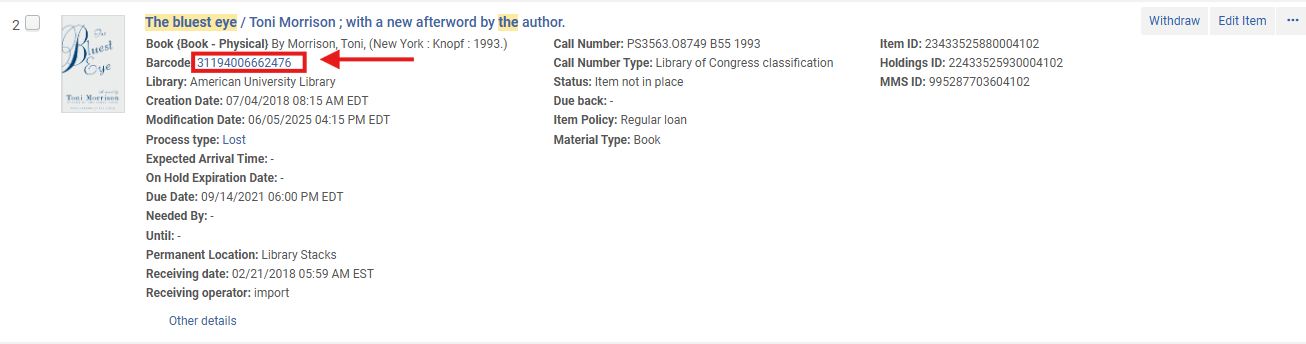](https://alma-documentation-bookstack.azurewebsites.net/uploads/images/gallery/2025-10/RLxawf-021.png)
- - Select <Edit item>
[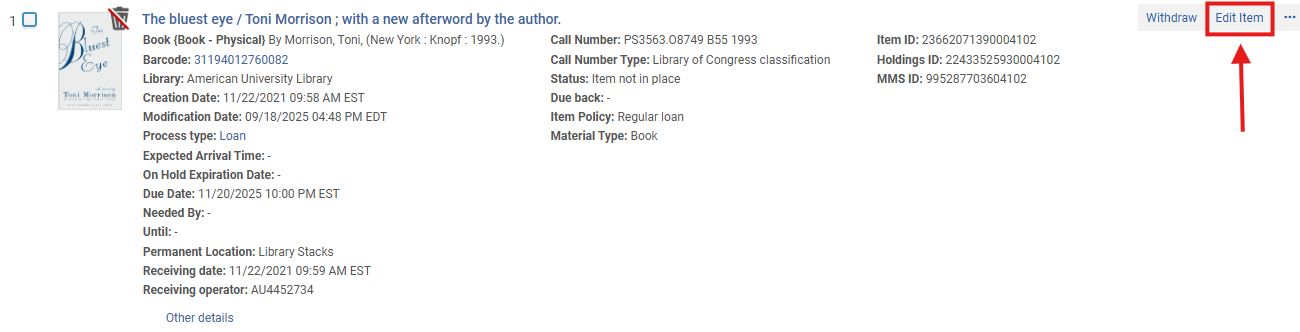](https://alma-documentation-bookstack.azurewebsites.net/uploads/images/gallery/2025-10/V0yawf-022.png)
**3: Access the <Notes> Tab** In the Item Editor, select the Notes tab. The <Fulfillment Note> field controls pop-up alerts that display during checkout and return. Other Notes types, such as Internal or Public Notes, do not trigger circulation prompts.
- Scroll to the <Functional Notes> section.
- Locate the <Fulfillment Note> field.
[](https://alma-documentation-bookstack.azurewebsites.net/uploads/images/gallery/2025-10/rKXawf-023.png)
**4: Enter the Fulfillment Note Text** In the <Fulfillment Note> field, type a clear, concise message describing the alert (e.g., “Check accompanying CD before reshelving.”). This text becomes the content of the pop-up shown to staff during checkout or check-in.
Per Ex Libris guidance, overly long notes may truncate on smaller screens- keep entries brief but specific.
[](https://alma-documentation-bookstack.azurewebsites.net/uploads/images/gallery/2025-10/awf-024.png)
**5: Save the Item Record** Click <Save> to record your changes. Saving commits the note to the item record and activates the pop-up message immediately for subsequent Fulfillment actions.
[](https://alma-documentation-bookstack.azurewebsites.net/uploads/images/gallery/2025-10/KxMawf-025.png)
##### **Frequently Asked Questions**
- *What if I don’t see the <Fulfillment Note> field?*
- Confirm that you are on the Notes tab and not in the General Information tab. Only the Notes section contains the <Fulfillment Note> field.
- *Can multiple fulfillment notes exist for one item?*
- No. Each item supports a single Fulfillment Note. To add new information, edit and update the existing text.
- *Will the note appear for all users?*
- Yes. The pop-up displays for any circulation or fulfillment user processing that item, regardless of desk or operator.
- *Does the note display for requests and holds?*
- No. It appears only at the moment of checkout or return, not during request routing or scanning into transit.
- *Can public users see the Fulfillment Note in Primo VE?*
- No. It is visible only to staff in Alma during fulfillment actions.
- *Does removing the note delete transaction history?*
- No. The note only affects staff prompts; it does not alter Analytics or Loan history.
- *Can Fulfillment Notes be temporary?*
- Yes. Staff can remove or edit them at any time. Consider dating temporary messages (e.g., “Hold for processing until 2025-04-15”).
- *How can I verify that a Fulfillment Note is active?*
- Perform a test checkout. The pop-up should appear when scanning the item barcode.
# How to Renew Items
This workflow explains how to renew checked-out items for a patron in Ex Libris Alma. Renewals extend the due date for eligible items based on fulfillment policies, user groups, and loan terms. Accurate renewals ensure patrons retain needed materials while maintaining compliance with WRLC loan policies and minimizing unnecessary overdue notices.
**When to Reference This Document:**
- When a patron requests additional time with their borrowed materials.
- When staff process renewals during a desk transaction or remotely by staff intervention.
- When troubleshooting renewal denials or loan policy restrictions.
##### **Required Roles**
The options available under the Fulfillment menu are dependent upon your assigned user roles. Your list of options may be different than the screenshots included below. If you do not have the necessary options, you will need to work with your institution's User Administrator to be assigned the appropriate roles for your work.
To complete Fulfillment tasks outlined in this document, you must have one or more of the following roles:
- Circulation Desk Manager
- Circulation Desk Operator
- Circulation Desk Operator - Limited
- Physical Inventory Operator
**1: Access the Patron Record** Navigate to Fulfillment > Checkout/Checkin> Manage Patron Services
[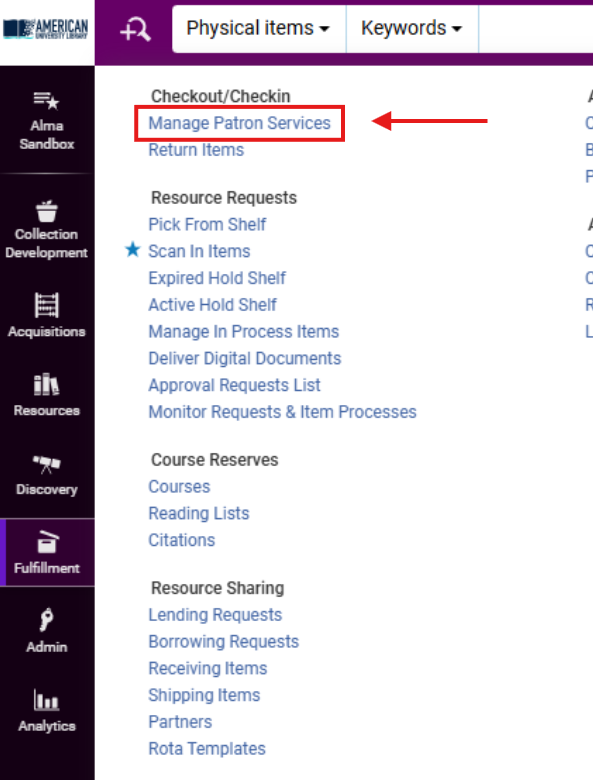](https://alma-documentation-bookstack.azurewebsites.net/uploads/images/gallery/2025-10/awf-05.png)
- Look up the patron’s record using their ID, name, or barcode. Accessing the record through Manage Patron Services allows direct control of the patron’s current and historical loans in one interface.[](https://alma-documentation-bookstack.azurewebsites.net/uploads/images/gallery/2025-10/awf-01.png)
**2: Display All Active Loans** Confirm that the Loans tab is active on the Patron Services screen. In the Filter by field, change from <This Session> to <All> using the drop-down arrow. Selecting <All> ensures you view every active loan, including those checked out in prior sessions.
[](https://alma-documentation-bookstack.azurewebsites.net/uploads/images/gallery/2025-10/H30awf-01.PNG)
**3. Renew Items Individually** Click on the <Renew> button located within the item's Loan record. Alma applies fulfillment policies and may deny renewal if an item is requested by another patron or restricted by the library’s rules.
[](https://alma-documentation-bookstack.azurewebsites.net/uploads/images/gallery/2025-10/IRVawf-01.png)
**4: Renew Selected Items** Click the check boxes to the left of the items to be renewed. Click <Renew Selected>. This renews only the chosen loans.
[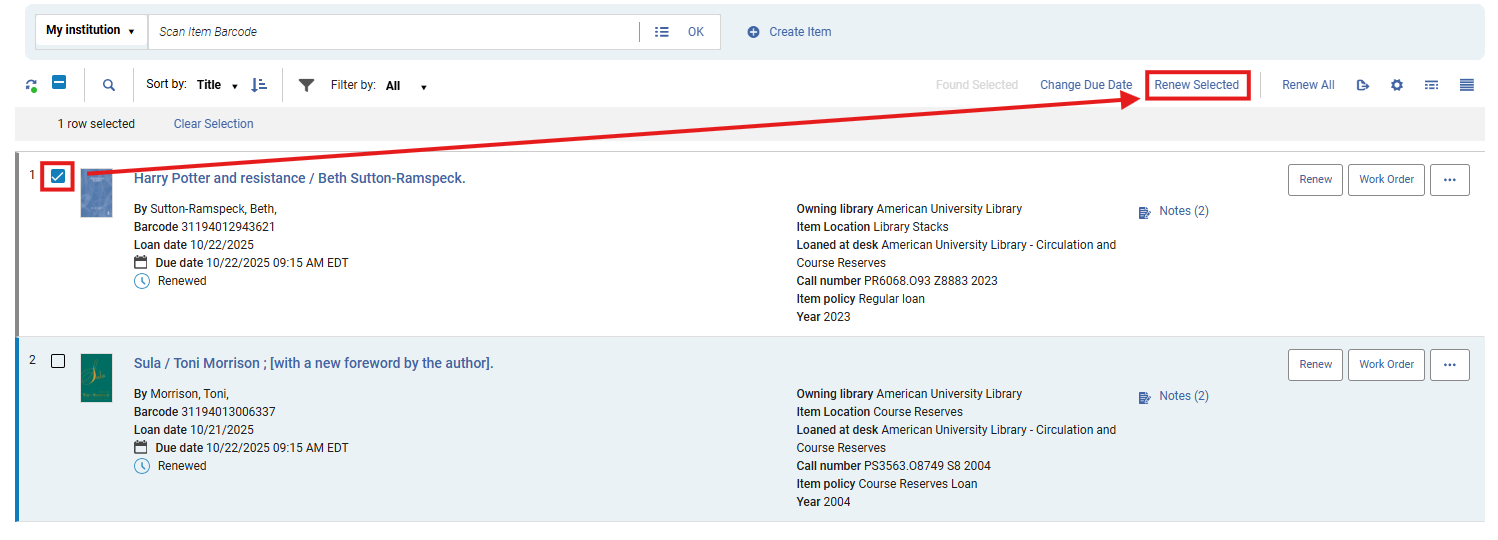](https://alma-documentation-bookstack.azurewebsites.net/uploads/images/gallery/2025-10/qr5awf-02.png)
**5: Renew All Items** To renew all active items, either:
- Click <Renew All>, or
[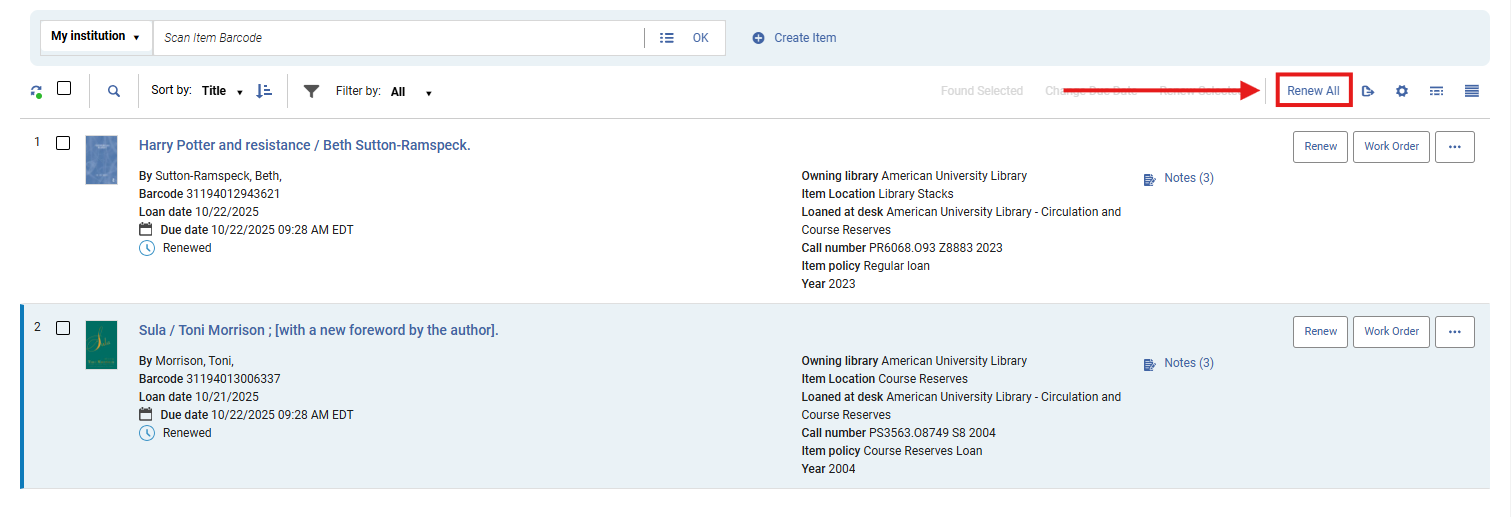](https://alma-documentation-bookstack.azurewebsites.net/uploads/images/gallery/2025-10/q4Nawf-04.png)
- Select all items using the top check box and click <Renew Selected>. This action streamlines renewals for patrons with multiple eligible items, such as faculty or graduate students with long-term loans.
[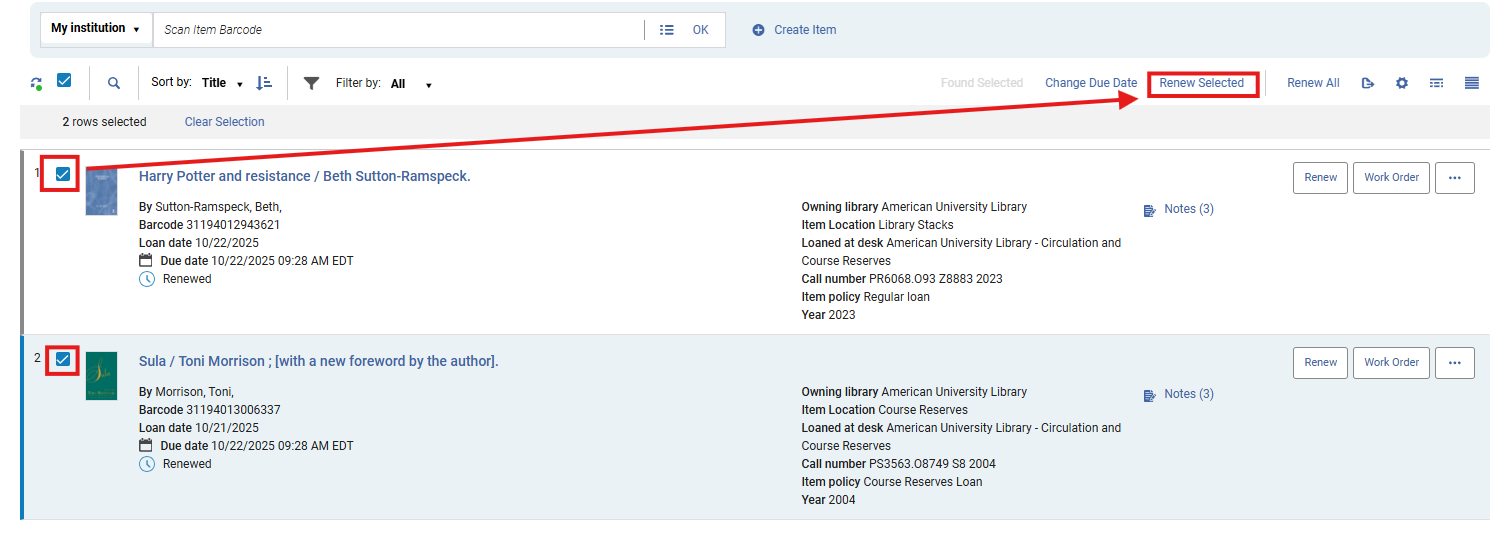](https://alma-documentation-bookstack.azurewebsites.net/uploads/images/gallery/2025-10/Ovjawf-05.png)
**5: Confirm Renewals and Exit** Renewed items display updated due dates in the Loans list and a confirmatino pop-up note will also publish from the upper right-hand side of the screen
[](https://alma-documentation-bookstack.azurewebsites.net/uploads/images/gallery/2025-10/ZjNawf-06.png)
[](https://alma-documentation-bookstack.azurewebsites.net/uploads/images/gallery/2025-10/rKIawf-01.PNG)
- When finished, continue to other tasks or click <Done> to close the patron session. Closing the session prevents staff from unintentionally editing or renewing another patron’s items.
[](https://alma-documentation-bookstack.azurewebsites.net/uploads/images/gallery/2025-10/1X7awf-02.png)
##### **How to Renew an AFN Loan**
Technically, within Alma, only the lending library can renew an item. While patrons have the ability to request a renewal from the My Library account, it may occasionally be helpful to renew an AFN item on behalf of a patron.
**1: Access the Patron Record** Navigate to Fulfillment > Checkout/Checkin> Manage Patron Services
[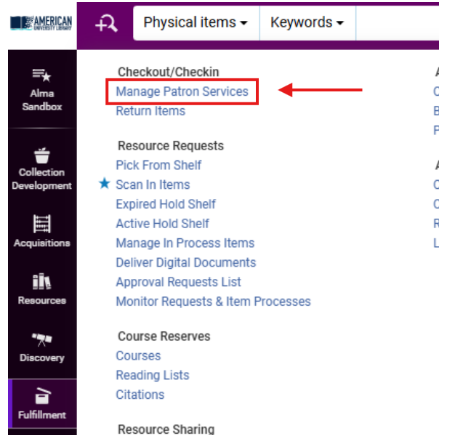](https://alma-documentation-bookstack.azurewebsites.net/uploads/images/gallery/2025-11/E6Limage.png)
- Look up the patron’s record using their ID, name, or barcode. Accessing the record through Manage Patron Services allows direct control of the patron’s current and historical loans in one interface.
[](https://alma-documentation-bookstack.azurewebsites.net/uploads/images/gallery/2025-11/MuZimage.png)
**2: Display All Active Loans** Confirm that the Loans tab is active on the Patron Services screen. In the Filter by field, change from <This Session> to <All> using the drop-down arrow. Selecting <All> ensures you view every active loan, including those checked out in prior sessions.
[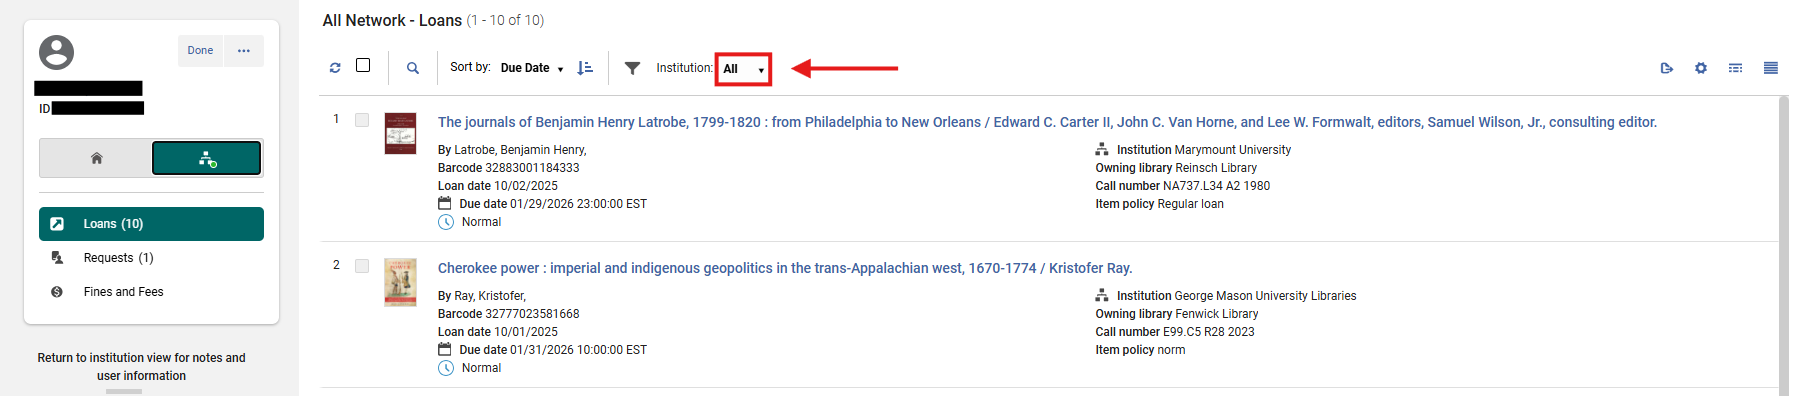](https://alma-documentation-bookstack.azurewebsites.net/uploads/images/gallery/2025-11/NYKimage.png)
**3: Display NZ Loans** After ensuring that All loans can be viewed, select the patron's NZ loan account view. If NZ loans exist, a green dot will appear next to the binocular icon
[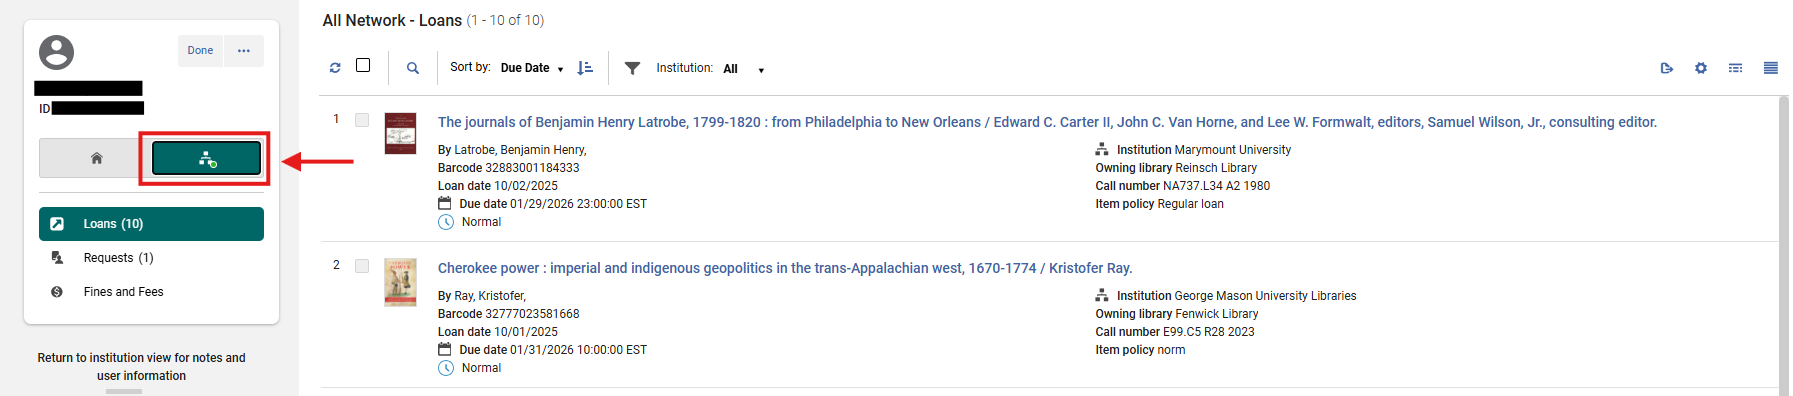](https://alma-documentation-bookstack.azurewebsites.net/uploads/images/gallery/2025-11/Qrwimage.png)
**4: Locate the Item to be Renewed** Highlight the barcode of the item to be renewed and select the Copy option that appears; take note of the partnering lending institution
[](https://alma-documentation-bookstack.azurewebsites.net/uploads/images/gallery/2025-11/mNjimage.png)
**5: Select the Patron's Home Institution** Once the desired NZ loan's barcode has been copied onto your clipboard, select the home institution Icon to return to the <My Institution> loan field
[](https://alma-documentation-bookstack.azurewebsites.net/uploads/images/gallery/2025-11/QWeimage.png)
**6: Select AFN Library** Click on the My Institution drop-down menu to locate and select the item's home institution
[](https://alma-documentation-bookstack.azurewebsites.net/uploads/images/gallery/2025-11/LFOimage.png)
**7: Enter the Barcode** Paste the copied barcode number into the My Institution-Loans field and select <OK>
[](https://alma-documentation-bookstack.azurewebsites.net/uploads/images/gallery/2025-11/uRaimage.png)
**8: Confirm Renewals and Exit** Renewed items display updated due dates in the Loans list and a confirmatino pop-up note will also publish from the upper right-hand side of the screen
[](https://alma-documentation-bookstack.azurewebsites.net/uploads/images/gallery/2025-11/oVHimage.png)
- When finished, continue to other tasks or click <Done> to close the patron session. Closing the session prevents staff from unintentionally editing or renewing another patron’s items.
[](https://alma-documentation-bookstack.azurewebsites.net/uploads/images/gallery/2025-11/57bimage.png)
##### **Frequently Asked Questions**
- *What if renewal fails for some items?*
- Alma enforces fulfillment policies: items with holds, recalls, or maximum renewal limits cannot be renewed. Review the on-screen message for specific reasons.
- *Can staff override renewal blocks?*
- Yes, if you have the <Circulation Desk Manager> role and local policy allows. Otherwise, renewals denied by loan rules must be handled by authorized staff.
- *Will Alma notify patrons of new due dates automatically?*
- Alma sends updated loan notices through the configured Fulfillment notification job.
- *Can I renew items from the <Manage Patron Services> screen without viewing “All” loans?*
- You can, but only items from the current session will appear. Selecting <All> ensures no active loans are overlooked.
- *Can patrons renew items themselves in Primo VE?*
- Yes, provided no blocks exist and the library’s policies permit patron-initiated renewals.
- *What if an item has a fulfillment note?*
- A pop-up message appears when you attempt to renew it. Follow the note’s instructions before proceeding.
- *Are renewal actions tracked in Analytics?*
- Yes. Alma logs renewal counts by operator, date, and location for reporting under *Fulfillment > Loans > Renewal Events*.
# How to Manage Item Holds
This workflow explains how to process items with hold requests. It covers when to send items to the hold shelf, how to manage active and expired holds, and how to reshelve, forward, or activate subsequent requests.
**When to Reference This Document:**
- When checking in items that trigger hold requests.
- When reviewing and managing materials currently on the hold shelf.
- When processing expired holds or activating next-in-line requests.
##### **Required Roles**
- Fulfillment Operator
- Circulation Desk Manager
**1: Identify Items to Send to the Hold Shelf** During check-in, if an item has a hold, a pop-up alert will appear indicating the destination (the hold shelf).
[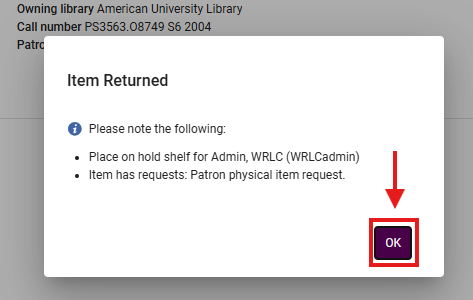](https://alma-documentation-bookstack.azurewebsites.net/uploads/images/gallery/2025-11/aw-001.png)
- Click <OK> to confirm the message and continue processing.
**Why This Matters:** This pop-up is Alma’s prompt that a pending request exists. Routing it correctly ensures the request is fulfilled and the item doesn’t re-enter general circulation.
**2: Review Request Details** On the Manage Item Returns screen, a <Requests> button appears next to items with active holds. The “Next step” column indicates where each item should be sent.
[](https://alma-documentation-bookstack.azurewebsites.net/uploads/images/gallery/2025-11/aw-002.png)
- Click <Requests> to view detailed information about the hold.
**3: Place the Item on the Hold Shelf** After verification, place the item on your library’s hold shelf following local procedures (e.g., alphabetical by patron last name or request number).
**4: Manage Active Holds** To view and manage all current holds, navigate to Fulfillment > Resource Requests> Active Hold Shelf> the Active Hold Shelf Items screen opens.
[](https://alma-documentation-bookstack.azurewebsites.net/uploads/images/gallery/2025-11/aw-003.png)
- Available actions include:
- **Sort items:** Use the <Sort by> drop-down to reorder the list by call number, date received, or patron
[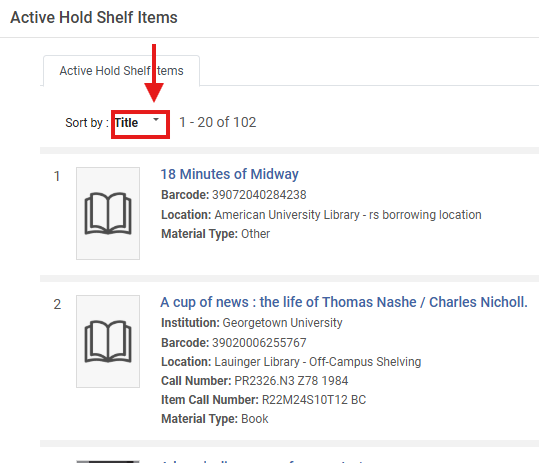](https://alma-documentation-bookstack.azurewebsites.net/uploads/images/gallery/2025-11/aw-004.png)
[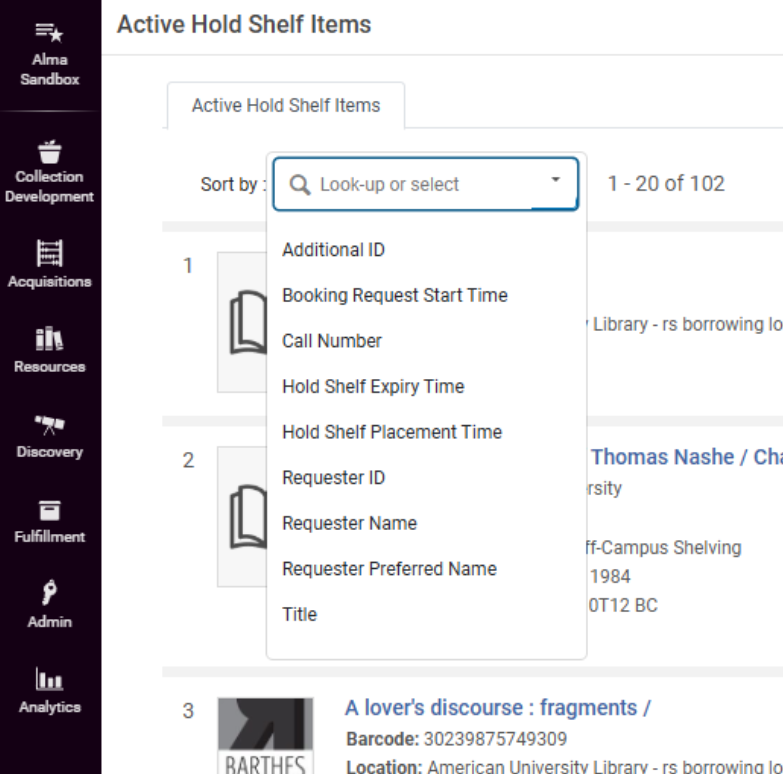](https://alma-documentation-bookstack.azurewebsites.net/uploads/images/gallery/2025-11/aw-005.png)
- **Cancel a hold**: Click <Cancel Request> in the item line.
- - In the confirmation pop-up, choose a cancellation reason, optionally add a note, uncheck Notify user if appropriate, then click <Confirm>
[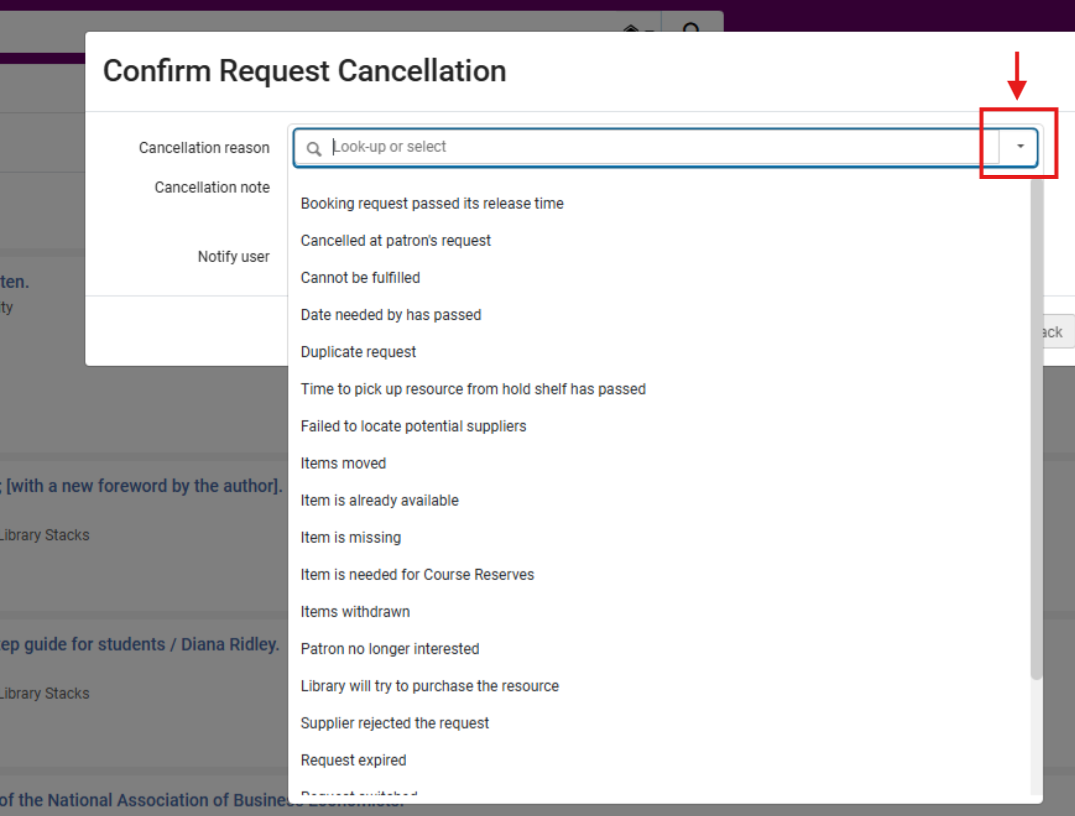](https://alma-documentation-bookstack.azurewebsites.net/uploads/images/gallery/2025-11/O1qaw-007.png)
[](https://alma-documentation-bookstack.azurewebsites.net/uploads/images/gallery/2025-11/aw-008.png)
- **Change expiration date:** Click <Update Expiry>, enter or select the new expiration date, then click <Save>.
[](https://alma-documentation-bookstack.azurewebsites.net/uploads/images/gallery/2025-11/aw-010.png)
[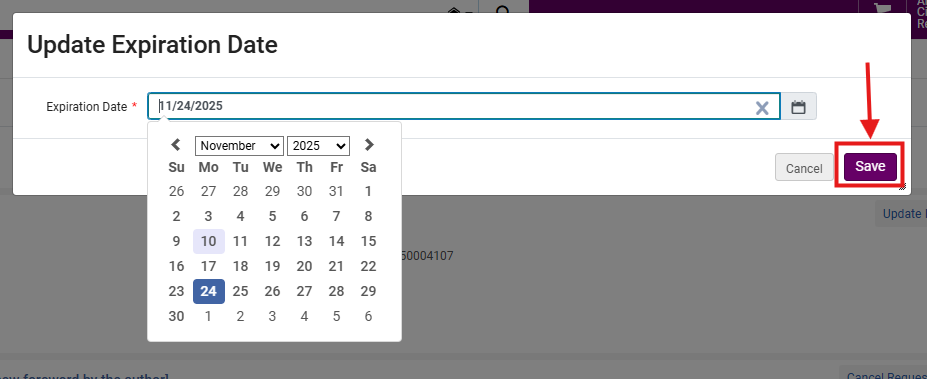](https://alma-documentation-bookstack.azurewebsites.net/uploads/images/gallery/2025-11/aw-011.png)
- **Mark as missing**: From the row action menu ellipses (⋯), select <Mark as Missing>, then click <Confirm> in the pop-up message.
[](https://alma-documentation-bookstack.azurewebsites.net/uploads/images/gallery/2025-11/aw-012.png)
[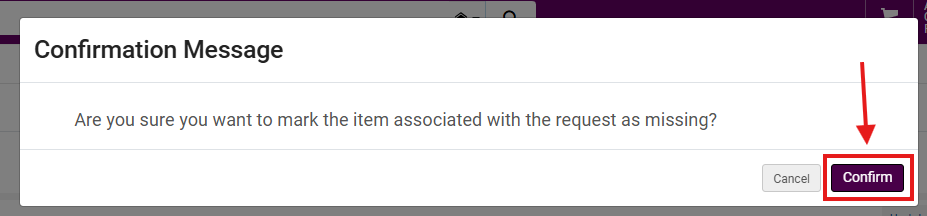](https://alma-documentation-bookstack.azurewebsites.net/uploads/images/gallery/2025-11/aw-013.png)
**5: Manage Expired Holds** Navigate to Fulfillment > Resource Requests> Expired Hold Shelf
- The Expired Hold Shelf Items screen opens, showing items whose hold period has lapsed.
[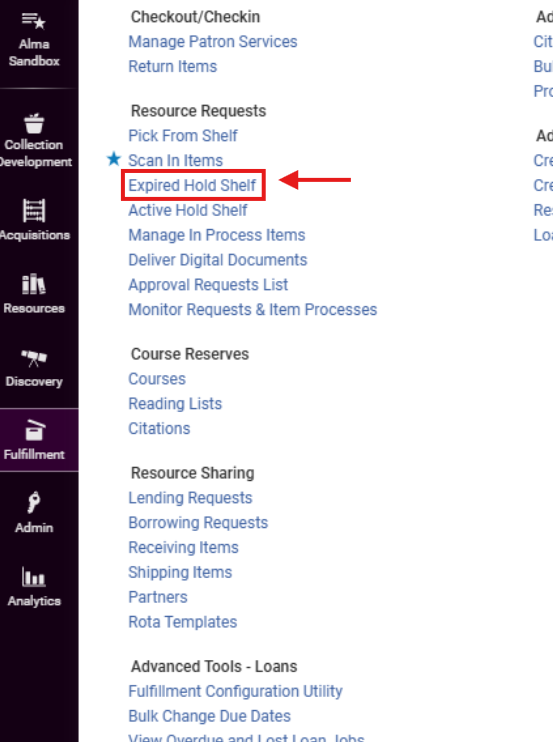](https://alma-documentation-bookstack.azurewebsites.net/uploads/images/gallery/2025-11/awf-014.png)
- Available actions include:
- **Sort or filter:** Use Facets or the <Sort by> drop-down to organize items.
[](https://alma-documentation-bookstack.azurewebsites.net/uploads/images/gallery/2025-11/1Lkaw-01.png)
- - **Reshelve:** Click <Reshelve> for individual items
[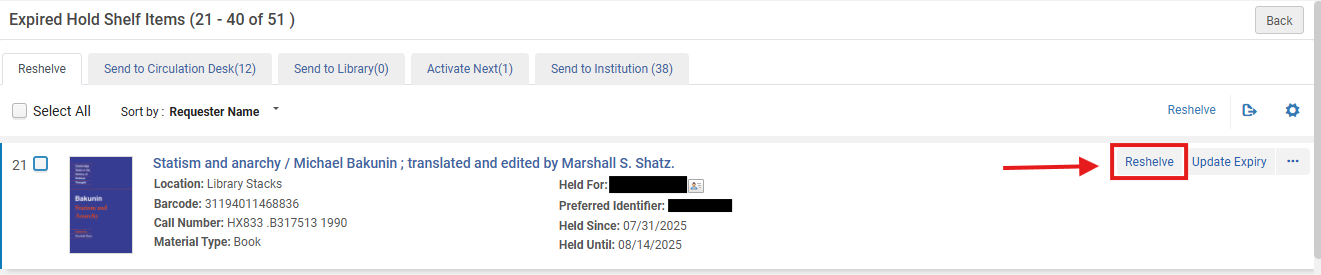](https://alma-documentation-bookstack.azurewebsites.net/uploads/images/gallery/2025-11/aw-02.png)
- - - or select multiple items using check boxes and click the primary <Reshelve> button; this updates item status from On Hold Shelf to Item in Place
[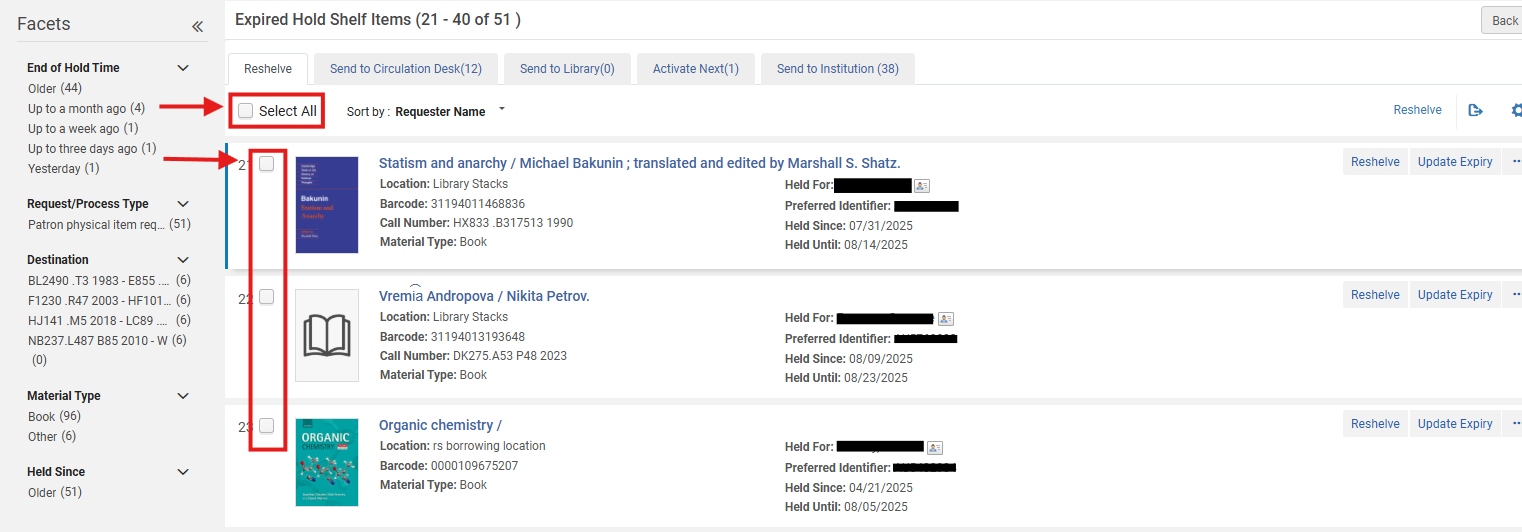](https://alma-documentation-bookstack.azurewebsites.net/uploads/images/gallery/2025-11/aw-03.png)
- **Update expiration date:** Click <Update Expiry>, choose a future date, and click <Save> to extend the hold.
[](https://alma-documentation-bookstack.azurewebsites.net/uploads/images/gallery/2025-11/aw-04.png)
[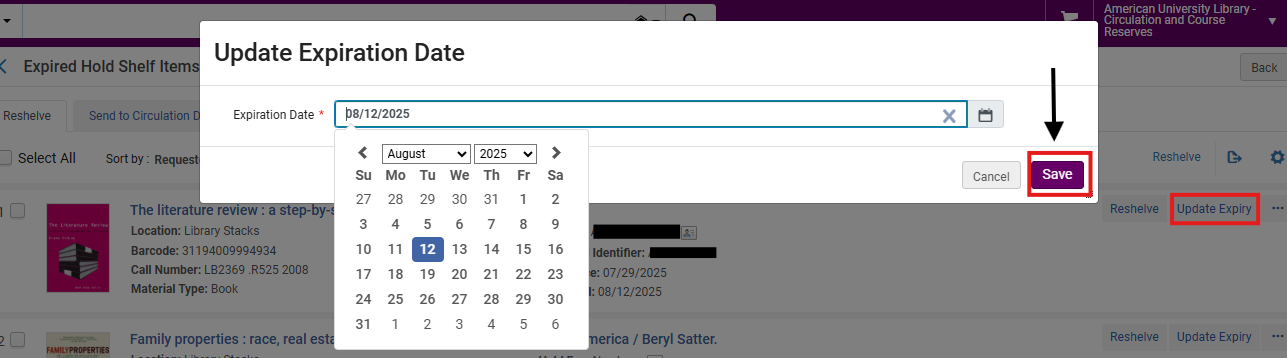](https://alma-documentation-bookstack.azurewebsites.net/uploads/images/gallery/2025-11/aw-05.png)
- **Additional actions:** From the row action menu (⋯), you can:
- Edit the hold record
- Mark the item as missing
- View the audit trail
[](https://alma-documentation-bookstack.azurewebsites.net/uploads/images/gallery/2025-11/aw-06.png)
- **Forward items:** Items needing transfer to another desk or library will appear under <Send to Circulation Desk> or <Send to Library> tabs.
- - Similar to the <Reshelve> function, Click <Transit> to initiate the transfer.
[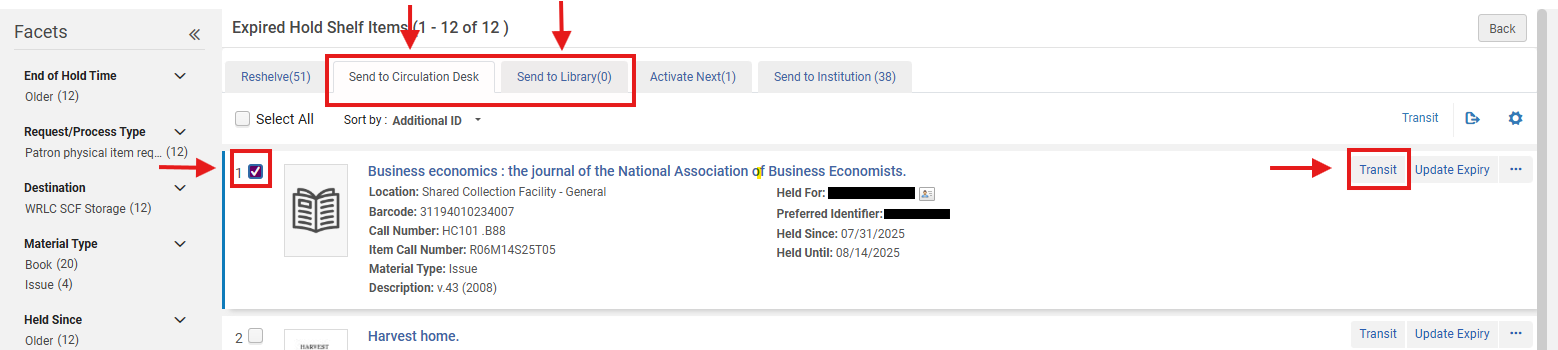](https://alma-documentation-bookstack.azurewebsites.net/uploads/images/gallery/2025-11/aw-07.png)
- **Activate the next hold**: Items with queued requests appear under the <Activate Next> tab.
- Select the item(s) and click <Activate Next> to process the subsequent request.
[](https://alma-documentation-bookstack.azurewebsites.net/uploads/images/gallery/2025-11/aw-08.png)
##### **Frequently Asked Questions**
- *When should I send an item to the hold shelf?*
- Whenever the pop-up during check-in or the “Next step” field directs you to do so.
- *What if the pop-up doesn’t appear but a request exists?*
- Verify the item’s process type in <Manage Item Returns>. If the <Requests> button appears, follow its guidance to route correctly.
- *Can I cancel a hold from the Active Hold Shelf screen?*
- Yes. Click <Cancel Request>, choose a reason, and confirm. Alma logs all cancellations for audit tracking.
- *How long do items remain on the hold shelf?*
- Until the expiration date passes. The date is determined by your fulfillment configuration and can be extended via <Update Expiry>.
- *What should I do with items under the Expired Hold Shelf that patrons never collected?*
- Reshelve them, forward them to the appropriate location, or activate the next hold using the corresponding tab.
- *What if a held item goes missing?*
- From the row action menu (⋯), select <Mark as Missing>. This updates Alma’s status and removes it from the hold queue.
- *Will Alma notify patrons when a hold is ready?*
- Yes. Alma automatically sends pickup notices through the Fulfillment notification job when items move to the hold shelf.
- *Can I view previous hold shelf actions?*
- Yes. Use <View Audit Trail> from the row action menu (⋯) to review routing and cancellation history.
- *How do I handle items that need to move between WRLC libraries?*
- Use <Transit> under <Send to Library> or <Send to Circulation Desk> tabs to ensure correct cross-institution delivery.
# How to Add a Patron Note
This workflow explains how to add, edit, and delete notes on a patron’s record in Ex Libris Alma and how those notes appear to patrons in Primo VE.
When to Reference This Document:
- When staff need to record information about patron communication, borrowing conditions, or account restrictions.
- When providing internal reminders for Access Services staff.
- When sharing messages visible to patrons through Primo VE.
**Why This Matters:** Patron notes enhance communication between staff and users, reduce repeat issues, and document relevant interactions or exceptions in a consistent, visible format.
##### **Required Roles**
- Fulfillment Operator
- Circulation Desk Manager
**1: Access Patron Notes from Patron Services** Fulfillment> Checkout/Checkin> Manage Patron Services
- When you arrive at the Patron Services screen , click on <Manage Notes> within the Patron services panel, this will open the User Details panel from the right-hand side of the screen
[](https://alma-documentation-bookstack.azurewebsites.net/uploads/images/gallery/2025-11/aw-25.png)
- You can also click on the patron's name to open the User Details panel
[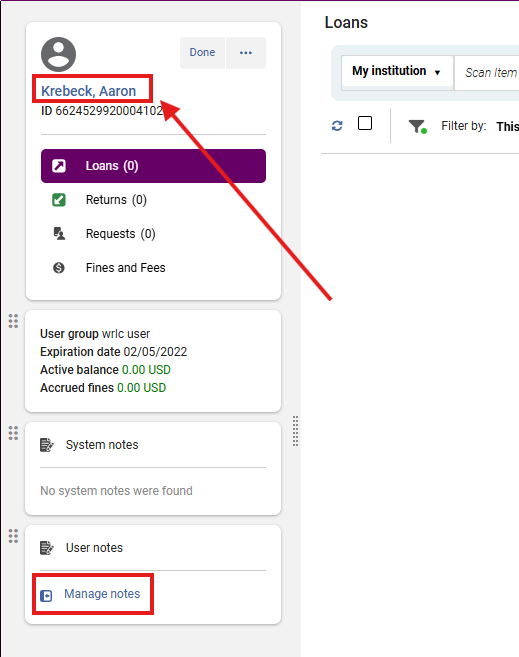](https://alma-documentation-bookstack.azurewebsites.net/uploads/images/gallery/2025-11/aw-26.png)
**3: Add a New Note** From the User Details screen, click on the Notes tab
[](https://alma-documentation-bookstack.azurewebsites.net/uploads/images/gallery/2025-11/aw-27.png)
- Click on <Add Note>
[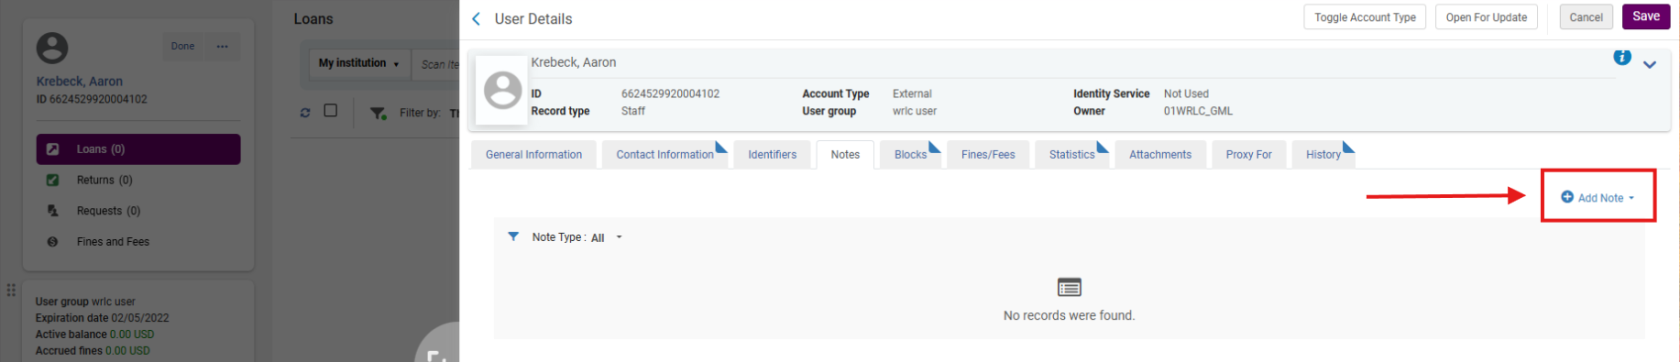](https://alma-documentation-bookstack.azurewebsites.net/uploads/images/gallery/2025-11/aw-28.png)
- In the drop-down window:
- Enter text in the <Note> field
- Use the <Type> drop-down to assign a note type (e.g., General, Circulation, Fine-related)
[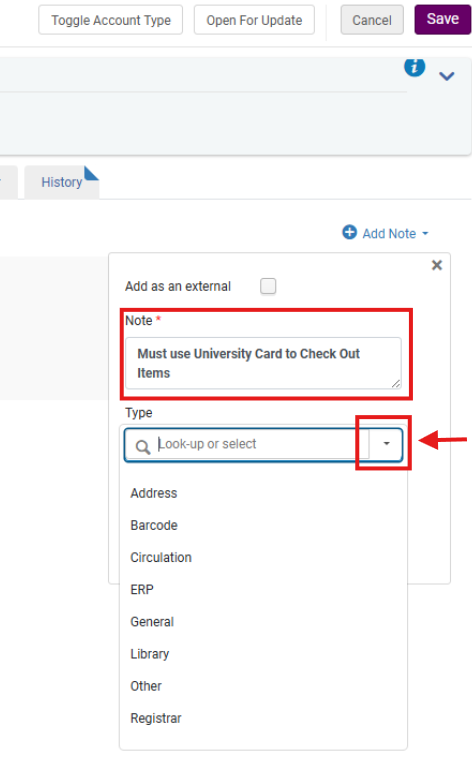](https://alma-documentation-bookstack.azurewebsites.net/uploads/images/gallery/2025-11/rz8aw-001.png)
[](https://alma-documentation-bookstack.azurewebsites.net/uploads/images/gallery/2025-11/gKVaw-002.png)
- Optional settings:
- Check <User viewable> to make the note visible to the patron in Primo VE.
- Check <Pop up note> if you want the message to appear as a pop-up when staff access the record.
[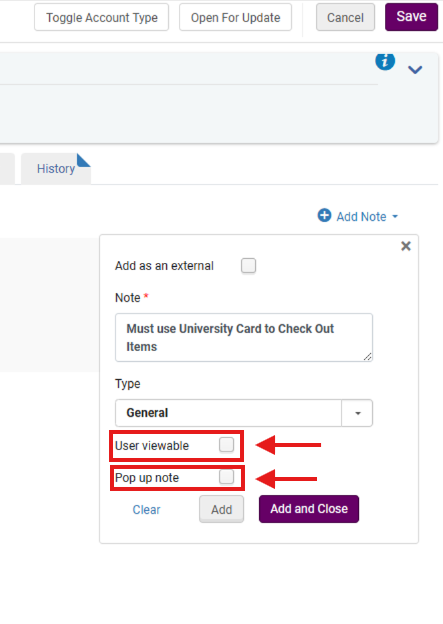](https://alma-documentation-bookstack.azurewebsites.net/uploads/images/gallery/2025-11/GfGaw-003.png)
- Click <Add> to create additonal notes or <Add and Close> if you are done
[](https://alma-documentation-bookstack.azurewebsites.net/uploads/images/gallery/2025-11/S6Aaw-004.png)
- Be sure to click on <Save> to complete the workflow
[](https://alma-documentation-bookstack.azurewebsites.net/uploads/images/gallery/2025-11/rvNimage.png)
**Why This Matters:** Adding structured notes ensures consistent visibility and appropriate access levels. Libraries are encouraged to Ex definine local note types to standardize communication across staff roles
**4: Edit an Existing Note** On the <Notes> tab, locate the note to be updated.
- From the row action menu (⋯), select <Edit>
[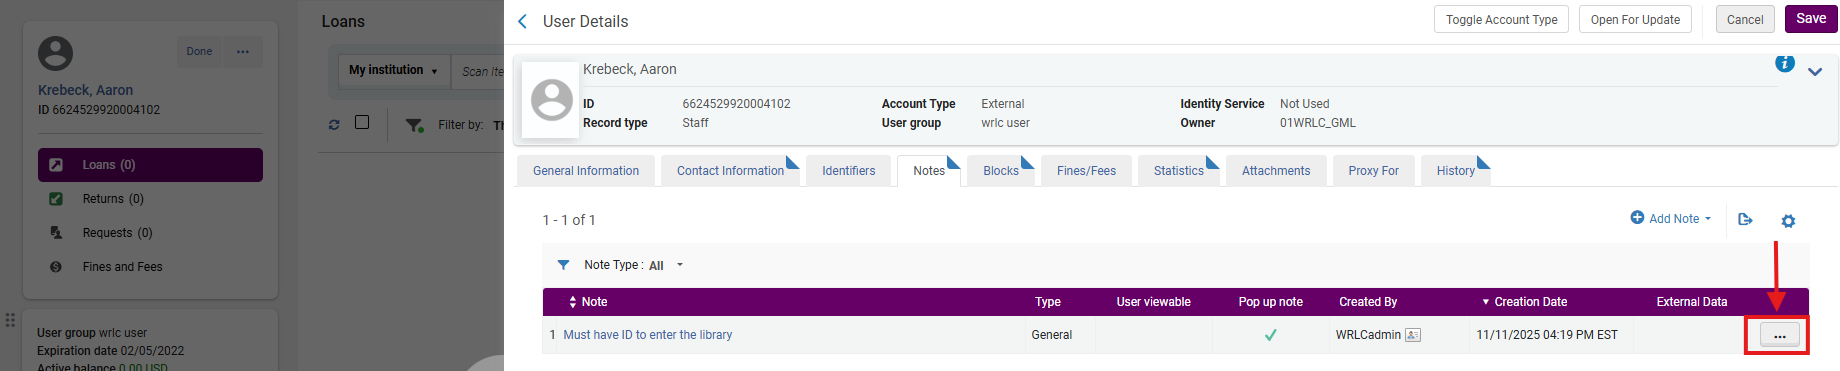](https://alma-documentation-bookstack.azurewebsites.net/uploads/images/gallery/2025-11/bohimage.png)
[](https://alma-documentation-bookstack.azurewebsites.net/uploads/images/gallery/2025-11/5rBimage.png)
- In the Edit Note screen, make your changes and click <Update Note>.
[](https://alma-documentation-bookstack.azurewebsites.net/uploads/images/gallery/2025-11/xYIimage.png)
- Click <Save> to finalize.
[](https://alma-documentation-bookstack.azurewebsites.net/uploads/images/gallery/2025-11/Nzoimage.png)
**Why This Matters:** Editing maintains record accuracy and ensures that temporary or outdated information is promptly revised.
**5: Delete a Note** On the <Notes> tab, locate the note to be deleted.
- From the row action menu (⋯), select <Delete>.
[](https://alma-documentation-bookstack.azurewebsites.net/uploads/images/gallery/2025-11/dc7image.png)
- Click <Save> to complete the workflow
[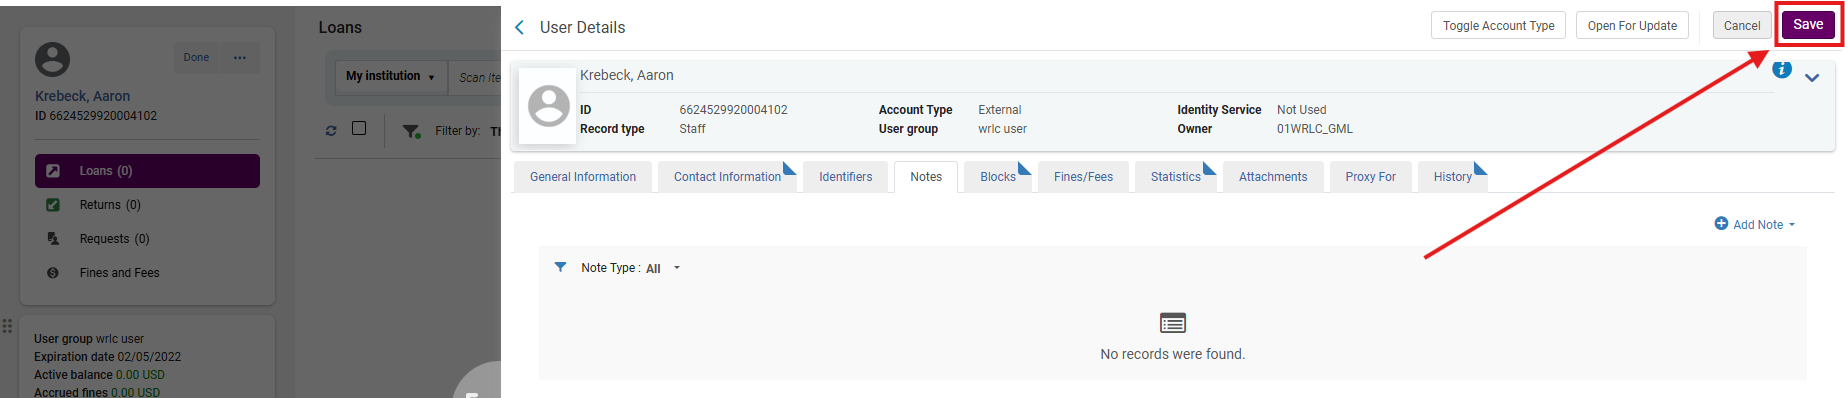](https://alma-documentation-bookstack.azurewebsites.net/uploads/images/gallery/2025-11/VYCimage.png)
**6: View Patron Notes in Primo VE (User Perspective)** Patrons can view User Viewable notes via <Library Card> in Primo VE:
After logging in, click their name in the upper-right corner.
[](https://alma-documentation-bookstack.azurewebsites.net/uploads/images/gallery/2025-11/qF5image.png)
Select <My Library Account> from the drop-down menu.
[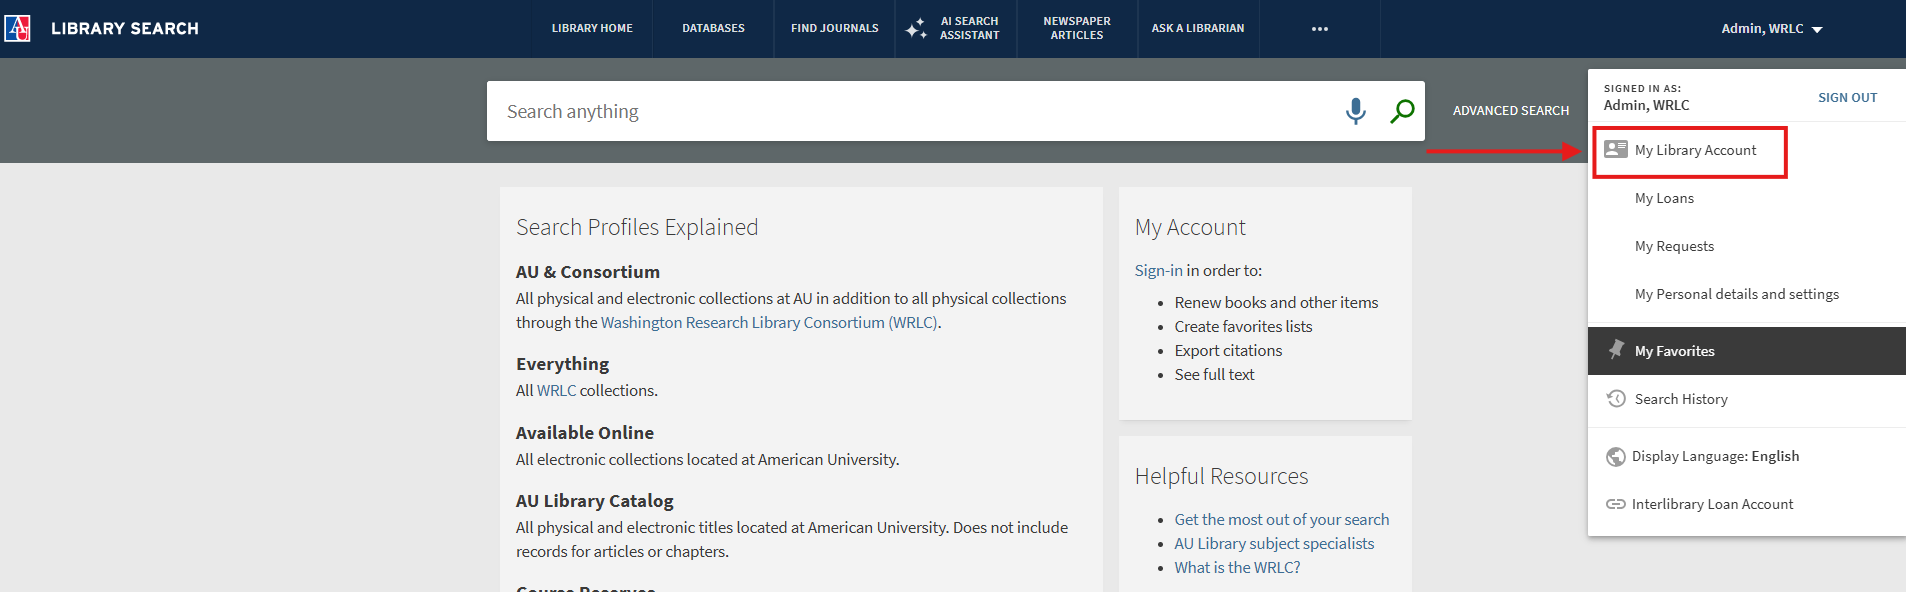](https://alma-documentation-bookstack.azurewebsites.net/uploads/images/gallery/2025-11/Sz7image.png)
In the <My Library Account> dashboard, notes appear under <Blocks + Messages>.
[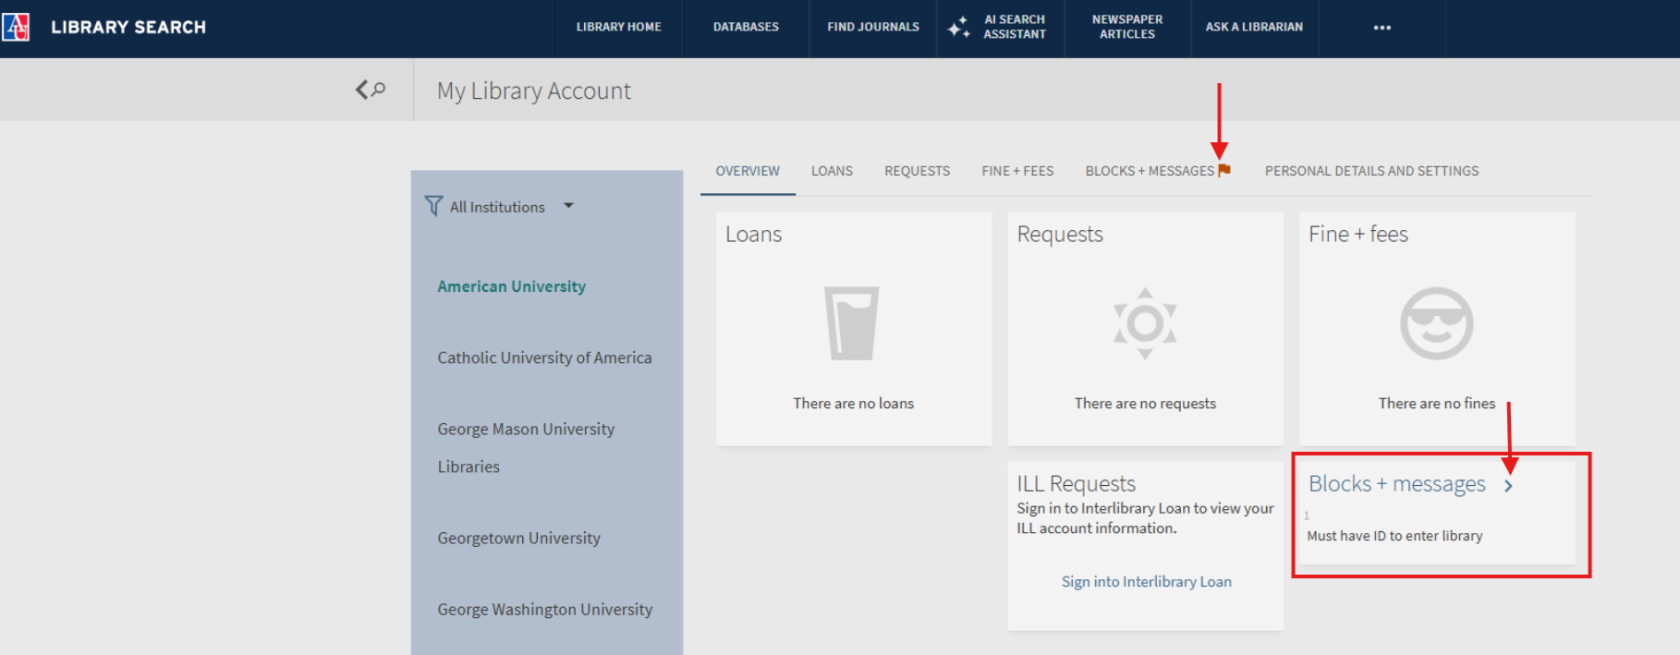](https://alma-documentation-bookstack.azurewebsites.net/uploads/images/gallery/2025-11/nXyimage.png)
Patrons may also open the <Blocks + Messages> tab for expanded viewing.
[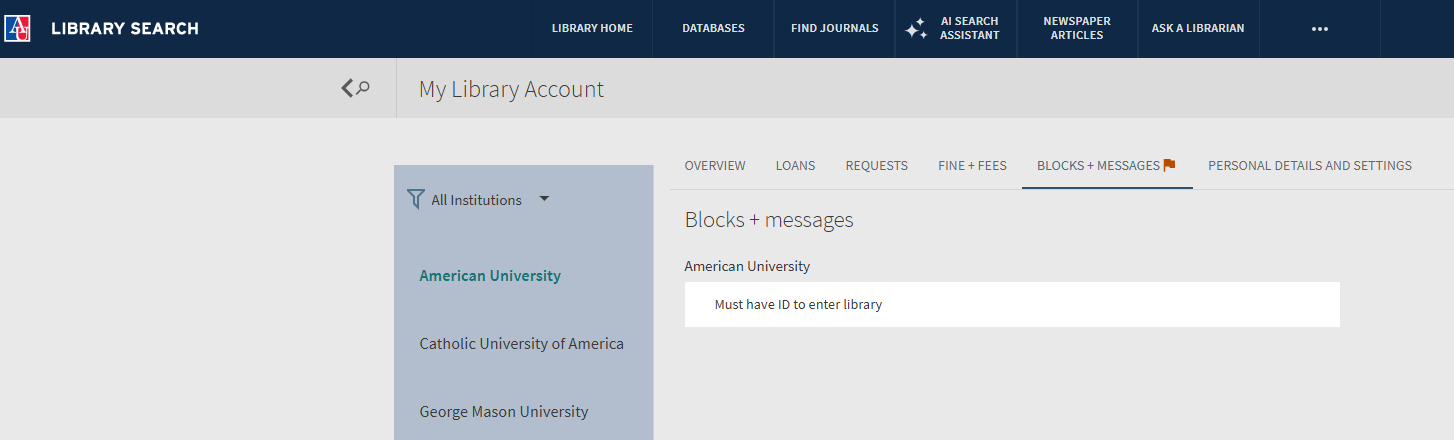](https://alma-documentation-bookstack.azurewebsites.net/uploads/images/gallery/2025-11/FHximage.png)
**Why This Matters:** Transparent communication improves patron trust and reduces service desk confusion. Libraries are encouraged to consider consistent use of User Viewable notes for policy clarifications and notices about account status or pending updates.
##### **Frequently Asked Questions**
- *What is the difference between a <User viewable> note and an internal note?*
- <User viewable> notes appear in Primo VE for patrons; internal notes are staff-only and used for internal recordkeeping.
- *Can both <User viewable> and <Pop up note> be selected together?*
- Yes. This combination allows a note to appear as a staff pop-up in Alma and be visible to patrons online.
- *When should I use <Pop up note>?*
- For time-sensitive or critical alerts such as “Verify ID before checkout” or “Pending fine resolution.”
- *Can I edit or delete a note created by another staff member?*
- Yes, if your role includes the <Fulfillment Operator> or <Circulation Desk Manager> permissions. Consider including initials and dates in note text for transparency.
- *Do patrons receive a notification when a note is added?*
- No. Notes are visible passively in Primo VE but do not trigger emails or alerts.
- *Can I search for patrons by note text?*
- No. Notes are not indexed for searching in Alma. For retrievable communication, use <User Blocks> or <Fulfillment Notes>.
- *What happens if a note’s type is left blank?*
- The note defaults to a general type, which can be filtered but not categorized for reporting. SUNY advises assigning a type whenever possible.
- *Can notes expire automatically?*
- Not currently. Notes remain on the record until manually edited or deleted.
# How to Check In Items
This workflow outlines how to check in items in Ex Libris Alma, either for a single patron or for multiple patrons. Checking in items ensures Alma updates item status, loan history, and availability for the next request or hold.
**When to Reference This Document:**
- When processing returns directly from a patron’s record.
- When handling bulk returns at a circulation desk.
- When backdating returned items for accurate fine calculation or loan statistics.
##### **Required Roles**
The options available under the Fulfillment menu are dependent upon your assigned user roles. Your list of options may be different than the screenshots included below. If you do not have the necessary options, you will need to work with your institution's User Administrator to be assigned the appropriate roles for your work.
To complete Fulfillment tasks outlined in this document, you must have one or more of the following roles:
- Circulation Desk Manager
- Circulation Desk Operator
- Circulation Desk Operator - Limited
- Physical Inventory Operator
##### **Part I: Checking In Items for a Single Patron**
**1: Access the Patron Record** Navigate to Fulfillment > Checkout/Checkin> Manage Patron Services> to open the Patron Identification screen, look up the patron’s record using their ID, name, or barcode.
[](https://alma-documentation-bookstack.azurewebsites.net/uploads/images/gallery/2025-10/iWQawf-026.png)
**2: Select the Returns Tab** In the resulting Patron Services screen, select the Returns tab.
[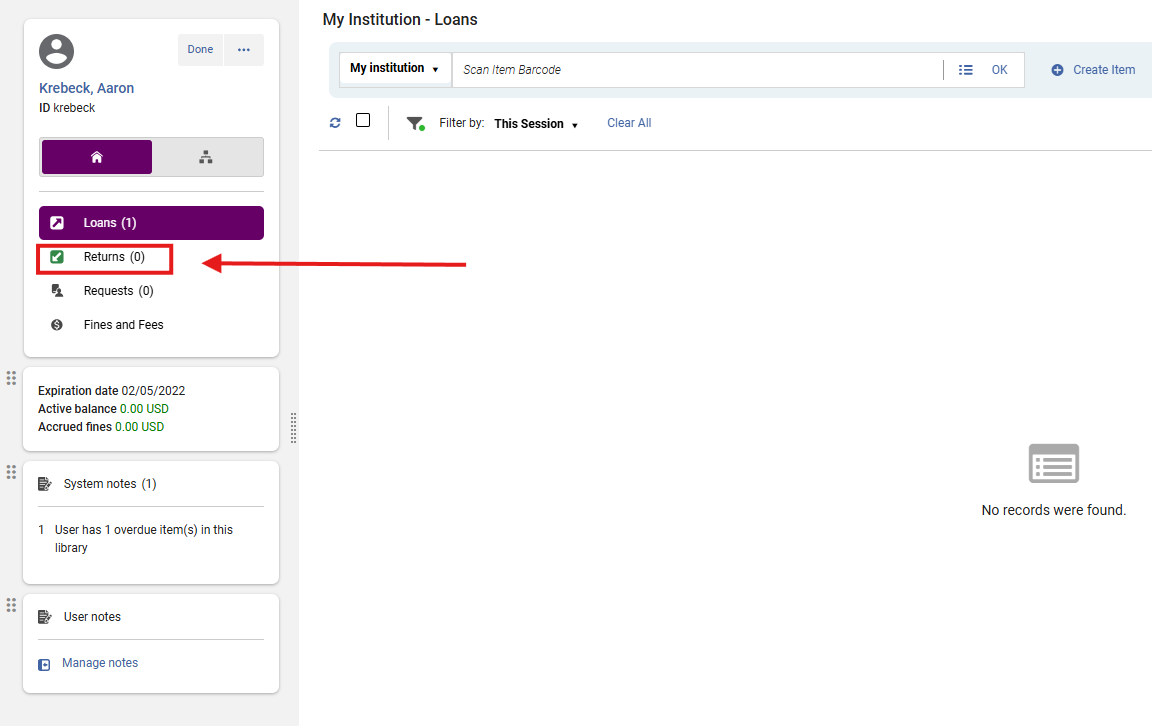](https://alma-documentation-bookstack.azurewebsites.net/uploads/images/gallery/2025-10/tlxawf-027.png)
**3: Scan or Enter the Item Barcode** Scan the item’s barcode into the <Scan item barcode> field, or manually enter it and click <OK>.
[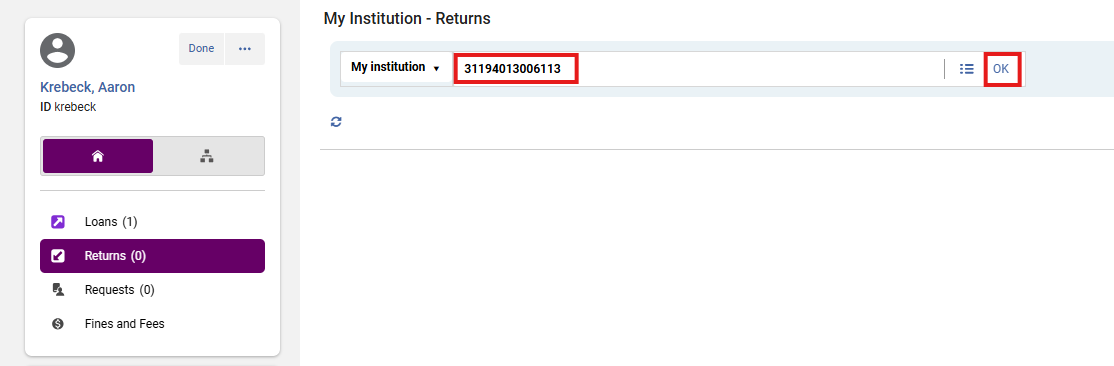](https://alma-documentation-bookstack.azurewebsites.net/uploads/images/gallery/2025-10/awf-028.png)
**4: Review Returned Items** Successfully checked-in items appear under Returns of this session. This list verifies that Alma processed each return and provides quick access for correction if an error occurred.
[](https://alma-documentation-bookstack.azurewebsites.net/uploads/images/gallery/2025-10/gucawf-029.png)
**5: Exit or Continue** When finished, either continue performing other actions in the patron record or click <Done> to exit. Closing the session prevents circulation actions from inadvertently applying to the wrong patron.
##### **Part II: Checking In Items for Multiple Patrons**
**1: Open the Check-In Screen** Navigate to Fulfillment > Checkout/Checkin> Return Items
[](https://alma-documentation-bookstack.azurewebsites.net/uploads/images/gallery/2025-10/00Vawf-030.png)
**2: Scan or Enter Item Barcodes** The Manage Return Items screen will open. In the Scan item barcode field, scan or type the barcodes of returned items.
Each scanned barcode updates the loan record for the corresponding patron, making the item immediately available for reshelving or further fulfillment.
[](https://alma-documentation-bookstack.azurewebsites.net/uploads/images/gallery/2025-10/82Lawf-01.png)
**3: Override the Return Date or Time (Optional)** Backdating returns ensures fines are correctly adjusted when items are returned during system outages or after-hours check-ins, or a holiday break when the library may be closed
- To backdate a return use the <Override return date and time> field:
- Enter the preferred date/time manually, or
- Click the calendar icon to select a date/time, then click on the check mark to <Apply>.
- Check in each item. Scan the items in one after the other.
[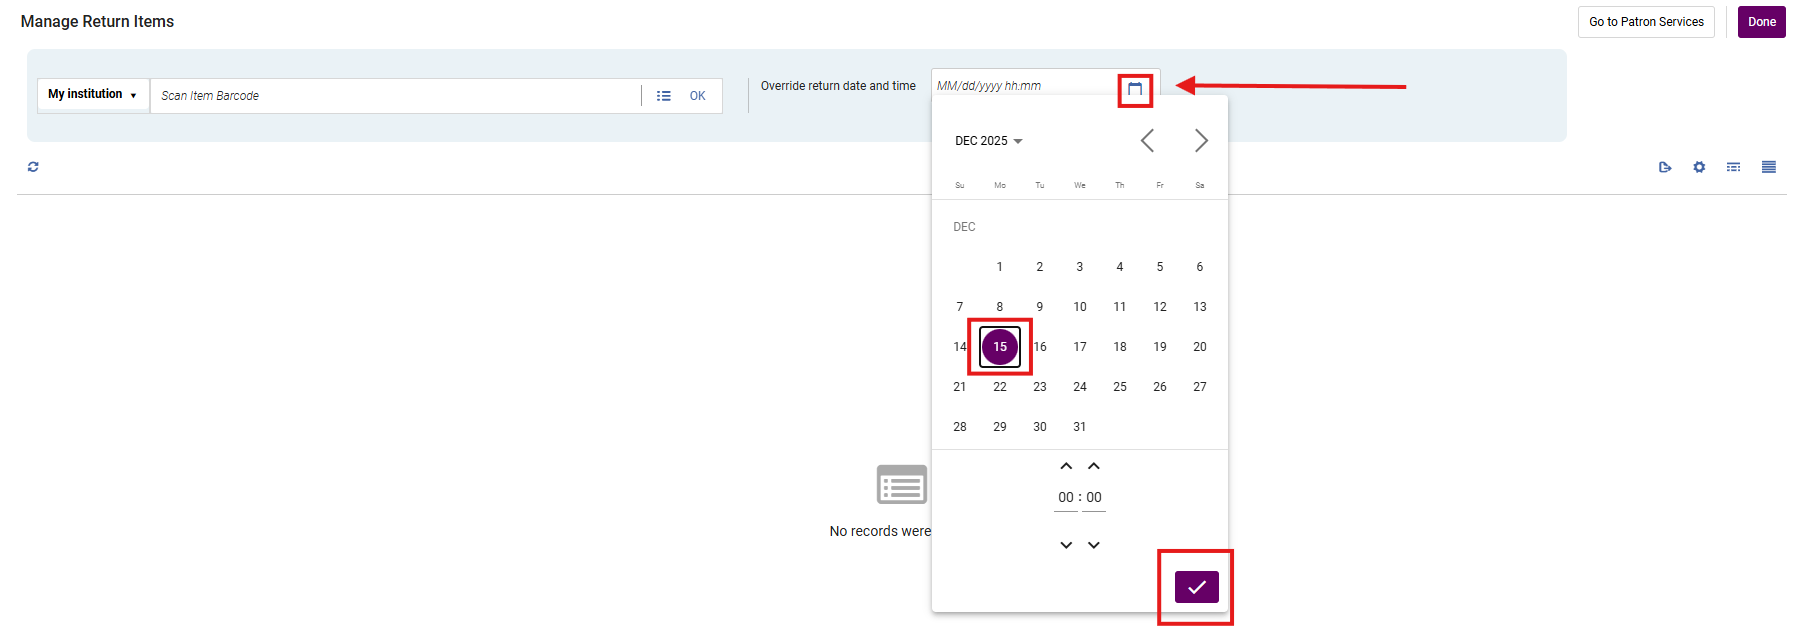](https://alma-documentation-bookstack.azurewebsites.net/uploads/images/gallery/2025-10/awf-02.png)
- The overridden date/time remains active until you click the **“X”** beside the field to revert to the current timestamp.
[](https://alma-documentation-bookstack.azurewebsites.net/uploads/images/gallery/2025-10/CUkawf-03.png)
**4: Maintain Patron Privacy** If your workstation is shared or visible to others, clear the list of displayed returned items by clicking <Clear List>. This protects patron borrowing history from accidental disclosure while keeping the check-in session active.
[](https://alma-documentation-bookstack.azurewebsites.net/uploads/images/gallery/2025-10/awf-04.png)
**5: Finish or Exit** When finished, either proceed to other Fulfillment tasks or click <Done> to close the check-in screen. Exiting finalizes the session and resets the screen for the next operator.
[](https://alma-documentation-bookstack.azurewebsites.net/uploads/images/gallery/2025-11/Pzdimage.png)
##### **How to Check In AFN Items**
**1: Open the Check-In Screen** Navigate to Fulfillment > Checkout/Checkin> Return Items
[](https://alma-documentation-bookstack.azurewebsites.net/uploads/images/gallery/2025-10/00Vawf-030.png)
**2. Select the Owning Institution** From the Item owner drop-down menu, select the institution that owns the item. Scan the items in one after another.
[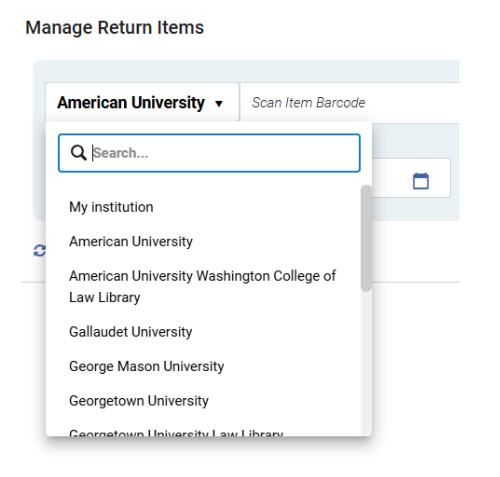](https://alma-documentation-bookstack.azurewebsites.net/uploads/images/gallery/2025-11/nEdimage.png)
**3: Scan or Enter Item Barcodes** The Manage Return Items screen will open. In the Scan item barcode field, scan or type the barcodes of returned items.
Each scanned barcode updates the loan record for the corresponding patron, making the item immediately available for reshelving or further fulfillment.
[](https://alma-documentation-bookstack.azurewebsites.net/uploads/images/gallery/2025-11/SzPimage.png)
**4: Override the Return Date or Time (Optional)** Backdating returns ensures fines are correctly adjusted when items are returned during system outages or after-hours check-ins, or a holiday break when the library may be closed
- To backdate a return use the <Override return date and time> field:
- Enter the preferred date/time manually, or
- Click the calendar icon to select a date/time, then click on the check mark to <Apply>.
- Check in each item. Scan the items in one after the other.
[](https://alma-documentation-bookstack.azurewebsites.net/uploads/images/gallery/2025-10/awf-02.png)
- The overridden date/time remains active until you click the **“X”** beside the field to revert to the current timestamp.
[](https://alma-documentation-bookstack.azurewebsites.net/uploads/images/gallery/2025-10/CUkawf-03.png)
**5. Next Steps** As you scan in each item, note the Next Steps
[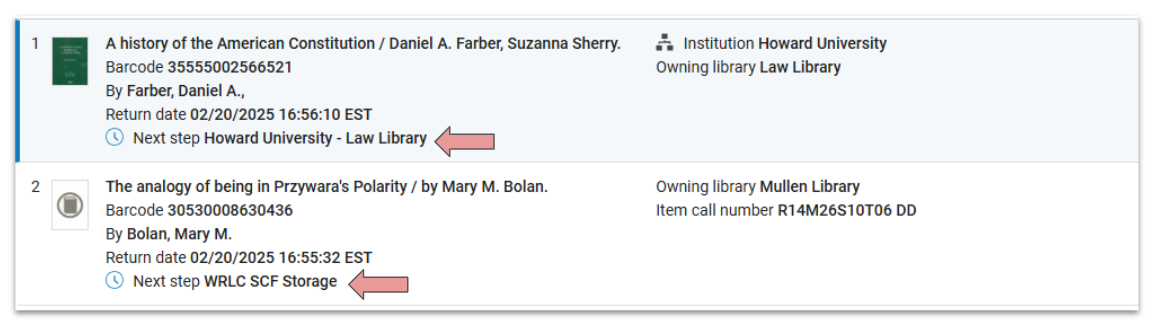](https://alma-documentation-bookstack.azurewebsites.net/uploads/images/gallery/2025-11/6IOimage.png)
**6: Maintain Patron Privacy** If your workstation is shared or visible to others, clear the list of displayed returned items by clicking <Clear List>. This protects patron borrowing history from accidental disclosure while keeping the check-in session active.
[](https://alma-documentation-bookstack.azurewebsites.net/uploads/images/gallery/2025-10/awf-04.png)
**7: Finish or Exit** When finished, either proceed to other Fulfillment tasks or click <Done> to close the check-in screen. Exiting finalizes the session and resets the screen for the next operator.
[](https://alma-documentation-bookstack.azurewebsites.net/uploads/images/gallery/2025-11/2L0image.png)
##### **Frequently Asked Questions**
- *What happens if I scan an item not checked out?*
- Alma will display an informational message stating that the item was not on loan and will not process a return.
- *Can I check in items with missing or unreadable barcodes?*
- Yes. Use <Select from a list> next to the <Scan item barcode> field to manually locate the record.
- *Why does a pop-up appear during check-in?*
- A <Fulfillment Note> is attached to that item. Review the note’s instructions before proceeding.
- *How do I confirm routing information?*
- The on-screen “Destination” column display the next stop for each checked-in item.
- *Can I return items for patrons without scanning each one?*
- No. Each item barcode must be scanned or entered individually for Alma to register the return.
- *Does Alma track the operator performing check-ins?*
- Yes. The operator’s name and workstation location are logged for every return transaction.
- *How can I verify if a return processed correctly?*
- Review the <Returns of this session> list or check Fulfillment > Loan History>. The transaction should show a returned status.
- *Can I undo a return?*
- No direct “undo” exists. You can, however, manually check the item out again to the correct patron if a return was done in error.
- *Will the <Override return date> affect all scanned items?*
- Yes. The override remains active for all items scanned until cleared manually.
# How to Manage Patron Blocks
This workflow explains how to handle item checkouts for patrons whose accounts are blocked in Alma, as well as how to apply or remove patron blocks.
**When to Reference This Document:**
- When a patron cannot borrow due to fines, expired accounts, or administrative holds.
- When Access Services staff need to apply or clear patron blocks.
- When determining whether to override a block for exceptional circumstances.
##### **Required Roles**
- Fulfillment Operator
- Circulation Desk Manager
**1: Identify a Blocked Patron During Checkout** When you enter a blocked patron’s ID or name in Fulfillment > Checkout/Checkin> Manage Patron Services, a Blocks pop-up appears displaying the patron’s restrictions.
[](https://alma-documentation-bookstack.azurewebsites.net/uploads/images/gallery/2025-11/aw-10.png)
[](https://alma-documentation-bookstack.azurewebsites.net/uploads/images/gallery/2025-11/aw-09.png)
**2: Choose an Appropriate Response** Depending on your permissions, you may see two or three options in the pop-up:
- **<Cancel>** Exit without action.
[](https://alma-documentation-bookstack.azurewebsites.net/uploads/images/gallery/2025-11/aw-12.png)
- **<OK>** View the patron’s record to review block details.
[](https://alma-documentation-bookstack.azurewebsites.net/uploads/images/gallery/2025-11/aw-11.png)
- **<Override>** (If authorized) Bypass the block and continue checkout.
[](https://alma-documentation-bookstack.azurewebsites.net/uploads/images/gallery/2025-11/aw-13.png)
**Why This Matters:** Each action determines whether the patron’s loan proceeds or remains restricted. Overriding is reserved for staff with higher-level roles and should follow institutional guidelines.
**3: Override During Loan Attempt** If you proceed to the patron’s record and attempt a checkout, Alma displays another block alert.
- Click <Override> to continue the transaction if permitted.
[](https://alma-documentation-bookstack.azurewebsites.net/uploads/images/gallery/2025-11/aw-14.png)
**Why This Matters:** This provides a secondary confirmation to ensure that block overrides are intentional and authorized.
**4: Apply a Patron Block** Fulfillment> Checkout/Checkin> Manage Patron Services> to locate the patron's record
- When you arrive at the patron's account, Click on their name to open the User Details panel
[](https://alma-documentation-bookstack.azurewebsites.net/uploads/images/gallery/2025-11/aw-15.png)
- The User Details panel will open from the right-hand side of the screen- select the <Blocks> tab.
[](https://alma-documentation-bookstack.azurewebsites.net/uploads/images/gallery/2025-11/aw-16.png)
- Click <Add Block> to open the pop-up window.
[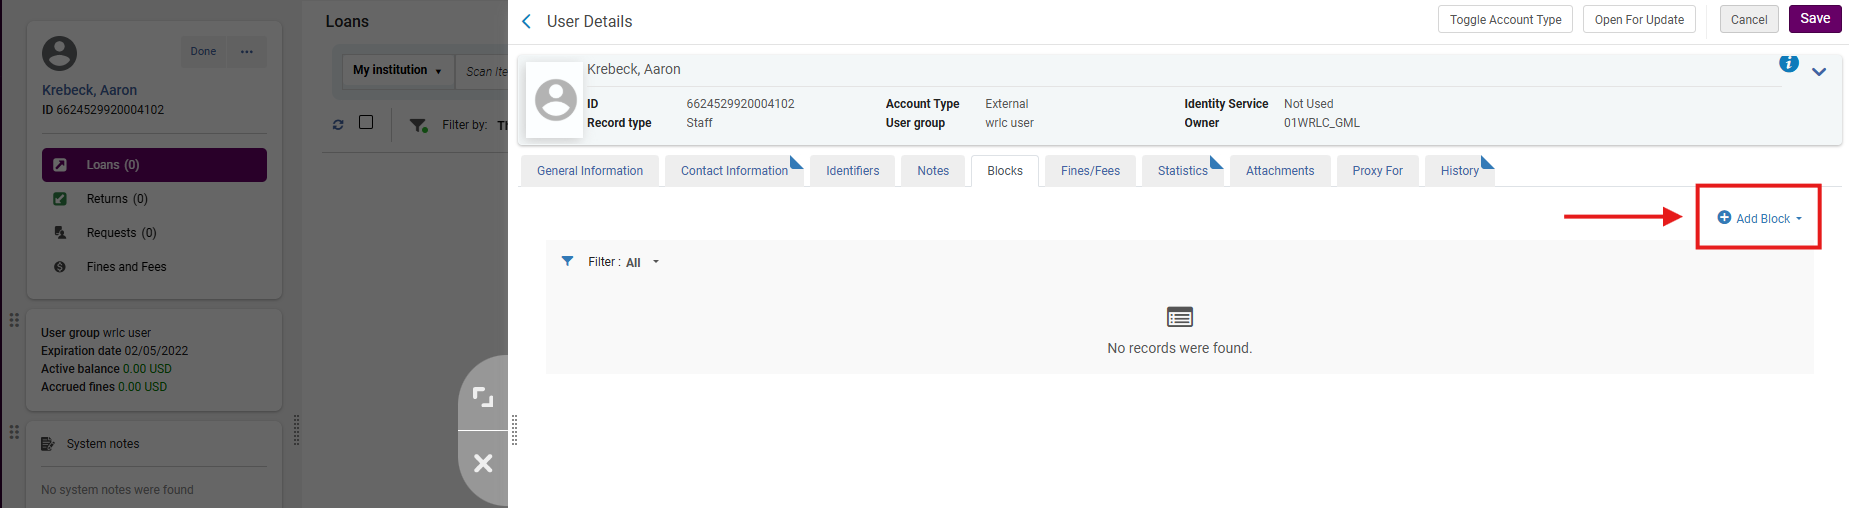](https://alma-documentation-bookstack.azurewebsites.net/uploads/images/gallery/2025-11/aw-17.png)
- Choose a value from Block description drop-down menu, and if applicable, fill in Expiry Date and Note fields.
[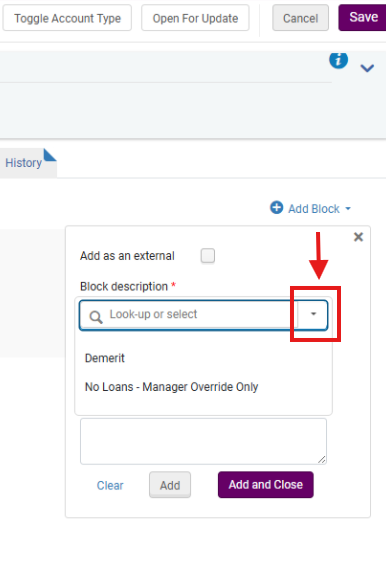](https://alma-documentation-bookstack.azurewebsites.net/uploads/images/gallery/2025-11/aw-19.png)
[](https://alma-documentation-bookstack.azurewebsites.net/uploads/images/gallery/2025-11/aw-20.png)
- Click <Add and Close> or <Add> to apply one or multiple blocks; Click <Save> to finalize.
[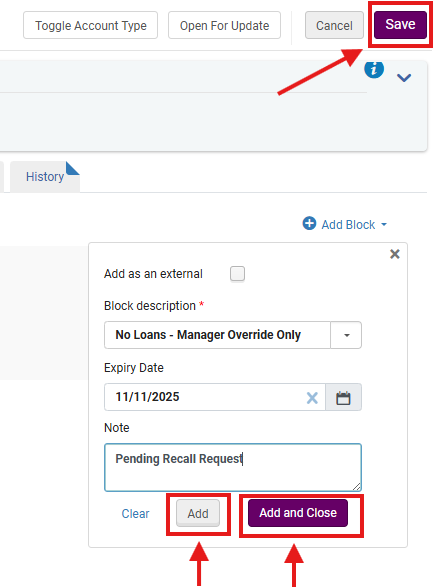](https://alma-documentation-bookstack.azurewebsites.net/uploads/images/gallery/2025-11/aw-21.png)
**Note:** Libraries are encouraged to use formalized block reasons for audit tracking and analytics accuracty
**5: Remove a Patron Block** Per previous workflow, search for the patron record and access the User Details panel
- Select the <Blocks> tab; the "dog-ear" on the tab indicates that the facet has exisiting blocks
[](https://alma-documentation-bookstack.azurewebsites.net/uploads/images/gallery/2025-11/aw-23.png)
- Toggle off any active blocks under Active that should be removed; the row action menu (....) provides additional options
[](https://alma-documentation-bookstack.azurewebsites.net/uploads/images/gallery/2025-11/aw-22.png)
- As before, when adding blocks, Click <Save> to finalize
[](https://alma-documentation-bookstack.azurewebsites.net/uploads/images/gallery/2025-11/aw-24.png)
**Why This Matters:** Removing expired or resolved blocks restores normal account functionality and prevents unnecessary patron frustration. Libraries are strongly encouraged to complete periodic block reviews to ensure records remain current and relevant.
##### **Frequently Asked Questions**
- *Why was the patron blocked?*
- Common reasons include excessive fines, expired borrowing privileges, or unresolved lost-item fees. Check the block description for specifics.
- *Can I override any block?*
- Only staff with the Circulation Desk Manager role can override most blocks.
- *Does overriding remove the block permanently?*
- No. It temporarily allows the checkout. The block remains on the record until removed manually.
- *Can multiple blocks be active on one record?*
- Yes. Alma displays each block separately under the <Blocks> tab. All active blocks are enforced during fulfillment actions.
- *Will the patron be notified of new or lifted blocks?*
- Notifications depend on configured Fulfillment letter rules. Check with your systems administrator for local settings.
- *Can I set blocks with automatic expiration?*
- Yes. Enter an <Expiry Date> when adding a block. Alma will automatically clear it after that date.
- *Should blocks be used for temporary reminders or notes?*
- No. Use <Fulfillment Notes> or <User Notes> for reminders. Blocks are intended only for loan restrictions.
- *How do I verify if a block was overridden?*
- The transaction appears in Alma Analytics under *Fulfillment > Loans > Override Events*, showing the operator and date/time.
# How to Manage Fines and Fees
This workflow describes how library staff can view, pay, apply, waive, dispute, and restore fines and fees. It also covers how to view patron-visible notifications related to fines and fees.
When to Reference This Document:
- When patrons pay outstanding fines or fees at a service desk.
- When Access Services staff apply new fines or administrative charges.
- When staff waive, dispute, or restore disputed charges based on institutional policy.
- When reviewing what notices Alma sent to patrons concerning fines and fees.
##### **Required Roles**
- Fulfillment Operator
- Circulation Desk Manager
##### **Part I: Viewing and Paying Fines from the Patron Services Screen**
**1: Access the Patron Record** Navigate to Fulfillment > Checkout/Checkin> Manage Patron Services> look up the patron’s record as though checking out items.
**2: Review the Patron’s Active Balance** The patron’s Active balance appears under their name.
[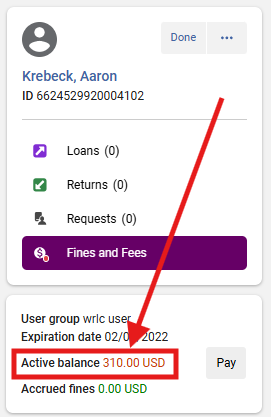](https://alma-documentation-bookstack.azurewebsites.net/uploads/images/gallery/2025-11/N9jimage.png)
**3: Send an Activity Report (Optional)** From the patron’s summary area, open the row action menu (⋯); Select <Send Activity Report> to email the patron a circulation summary, including fines and fees.
[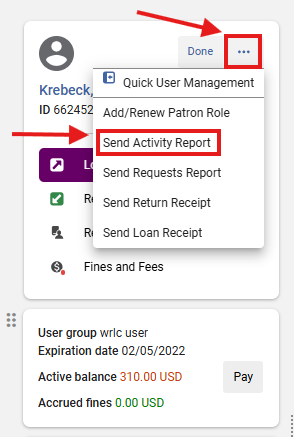](https://alma-documentation-bookstack.azurewebsites.net/uploads/images/gallery/2025-11/B4Kimage.png)
**Why This Matters:** Activity Reports provide patrons with documentation of charges, payments, and circulation activity. Library staff may consider adding this step for transparency and dispute resolution.
**4: Pay Fines/Fees** Select the <Fines and Fees> tab.
[](https://alma-documentation-bookstack.azurewebsites.net/uploads/images/gallery/2025-11/Jeeimage.png)
- To pay all selected fines, click <Pay> in the upper right.
- To pay a single fine, click <Pay> next to the specific charge.
[](https://alma-documentation-bookstack.azurewebsites.net/uploads/images/gallery/2025-11/sp7image.png)
**5: Complete the Payment** In the Payment Details screen:
- Select a Payment method from the dropdown.
- Enter the Payment amount.
- Click <Pay>.
[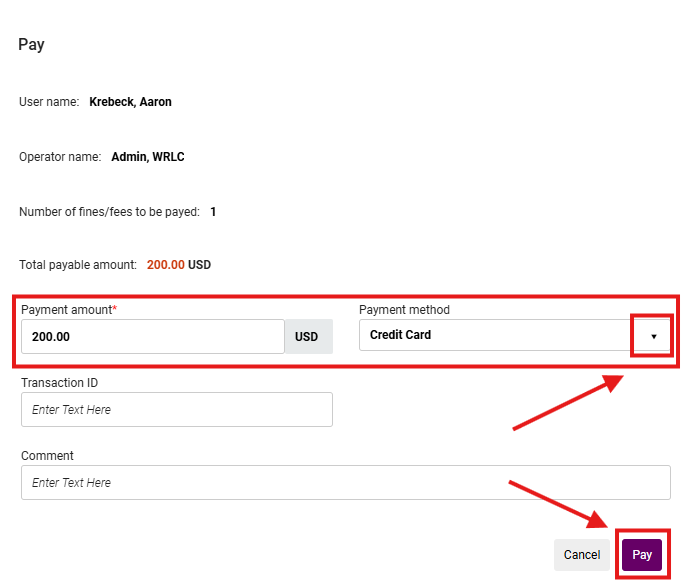](https://alma-documentation-bookstack.azurewebsites.net/uploads/images/gallery/2025-11/uJuimage.png)
**6: Confirmation Pop Up Note** Alma immediately adjusts balances and records the payment in the patron’s account history and audit trail.
[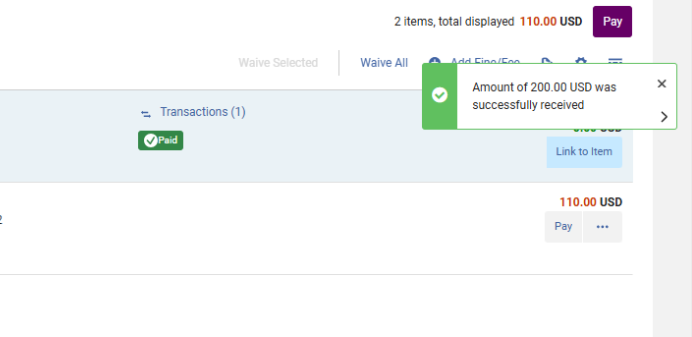](https://alma-documentation-bookstack.azurewebsites.net/uploads/images/gallery/2025-11/Bqvimage.png)
**7: Closing the Process** The fine is now recorded as having been paid. You may continue helping the patron from the Patron Services screen, or click "Done" to exit.
[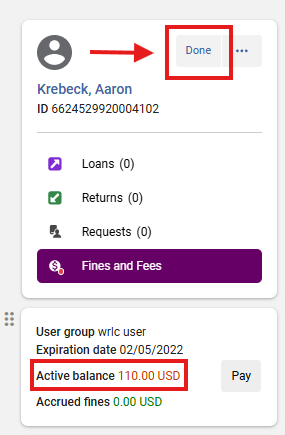](https://alma-documentation-bookstack.azurewebsites.net/uploads/images/gallery/2025-11/PRbimage.png)
##### **Part II: Applying a Fine or Fee to a Patron Account**
**1: Access the Patron Record** Navigate to Fulfillment > Checkout/Checkin> Manage Patron Services; look up the patron’s record as though checking out items.
**2. Access User Details Screen** Click on the patron's name to open the right hand side panel and access the User Details screen
[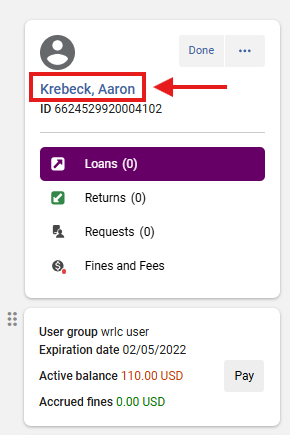](https://alma-documentation-bookstack.azurewebsites.net/uploads/images/gallery/2025-11/vTXimage.png)
- Click on the <Fines/Fees> tab
[](https://alma-documentation-bookstack.azurewebsites.net/uploads/images/gallery/2025-11/x0Kimage.png)
**3: Add a New Fine or Fee** Click <Add Fine or Fee>
- Required fields:
- Fee Type (dropdown)
- Fee Amount (manual entry)
- Add additional fields if applicable (e.g., item, note). Libraries are strongly encouraged to standardize fee types for anyalytics accuracy
[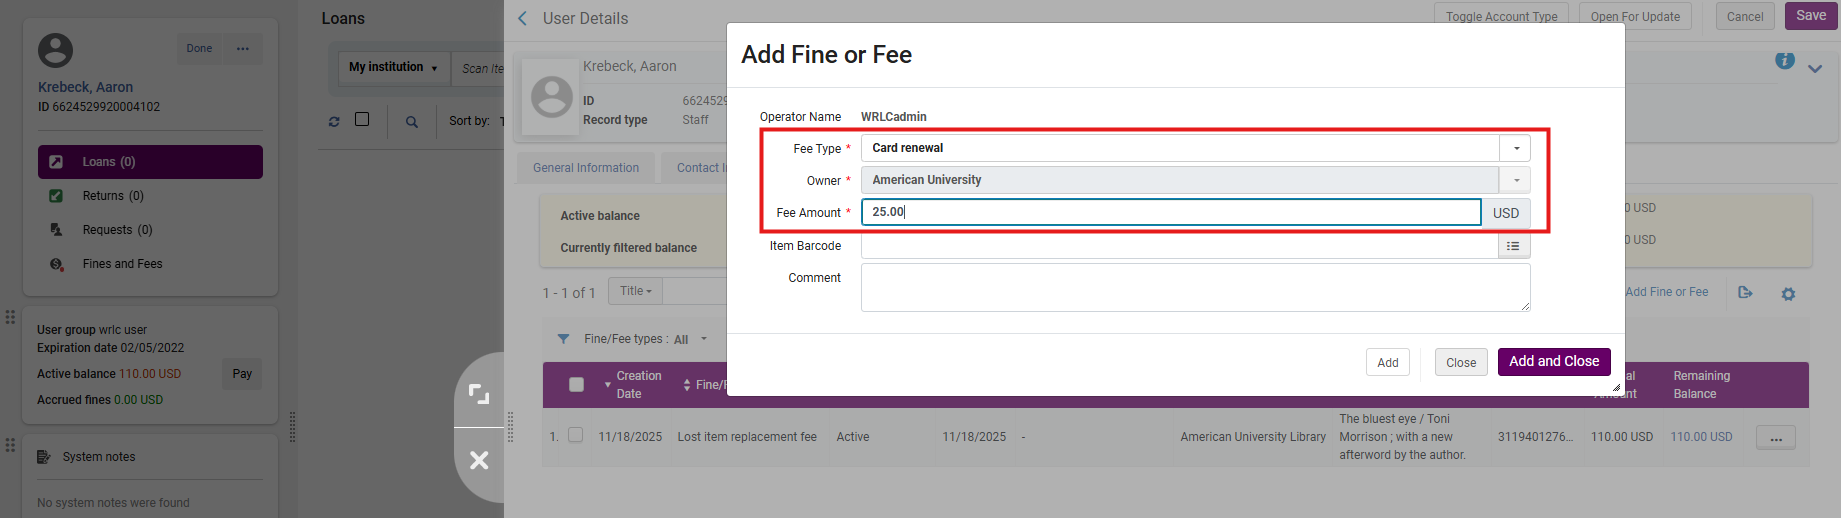](https://alma-documentation-bookstack.azurewebsites.net/uploads/images/gallery/2025-11/mkFimage.png)
**4: Save the Fee or Fine** Click <Add> to apply additional charges
[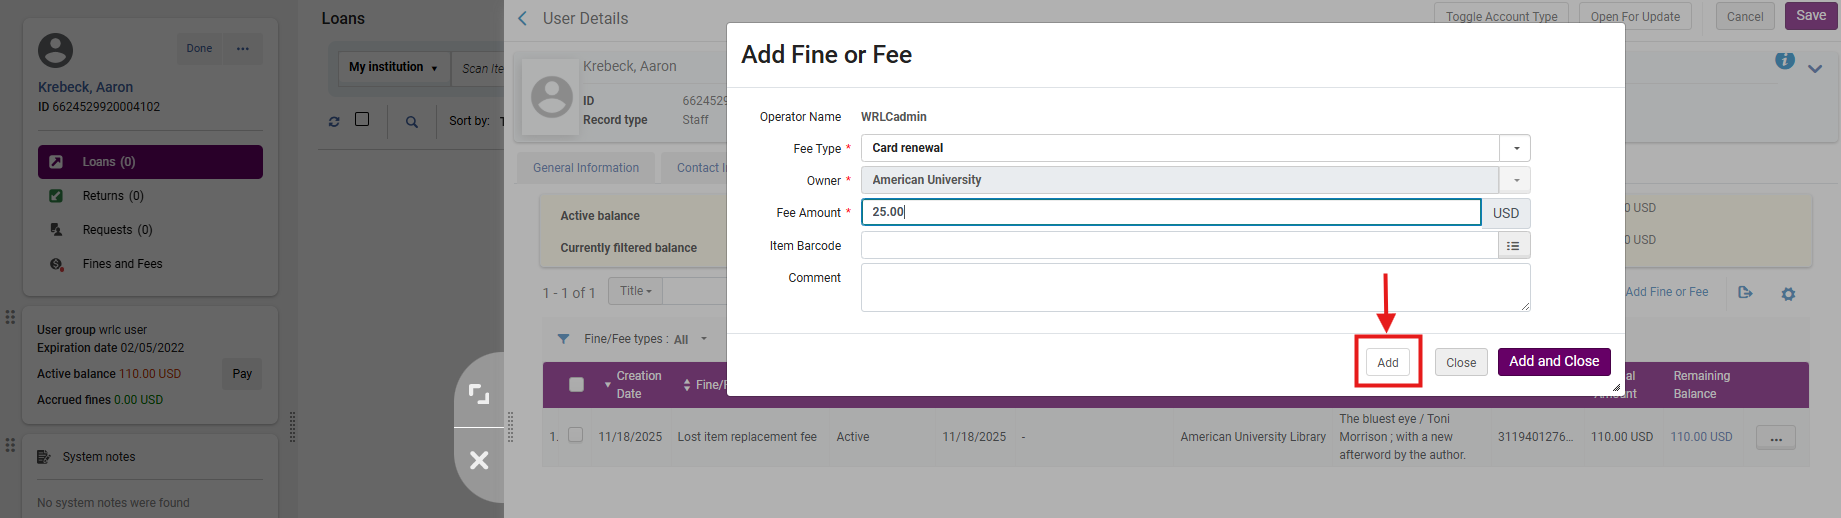](https://alma-documentation-bookstack.azurewebsites.net/uploads/images/gallery/2025-11/KoOimage.png)
- or Click <Add and Close> to finish
[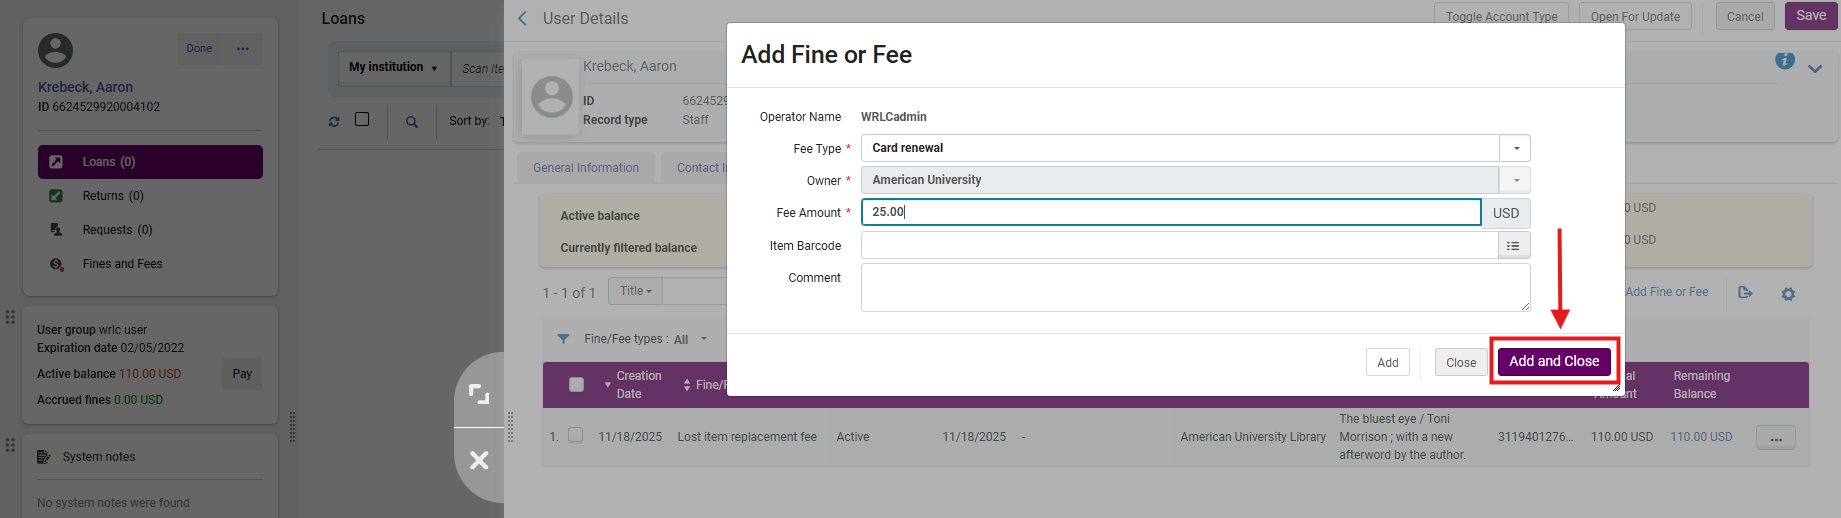](https://alma-documentation-bookstack.azurewebsites.net/uploads/images/gallery/2025-11/rtAimage.png)
- Then click <Save> on the User Details screen.
[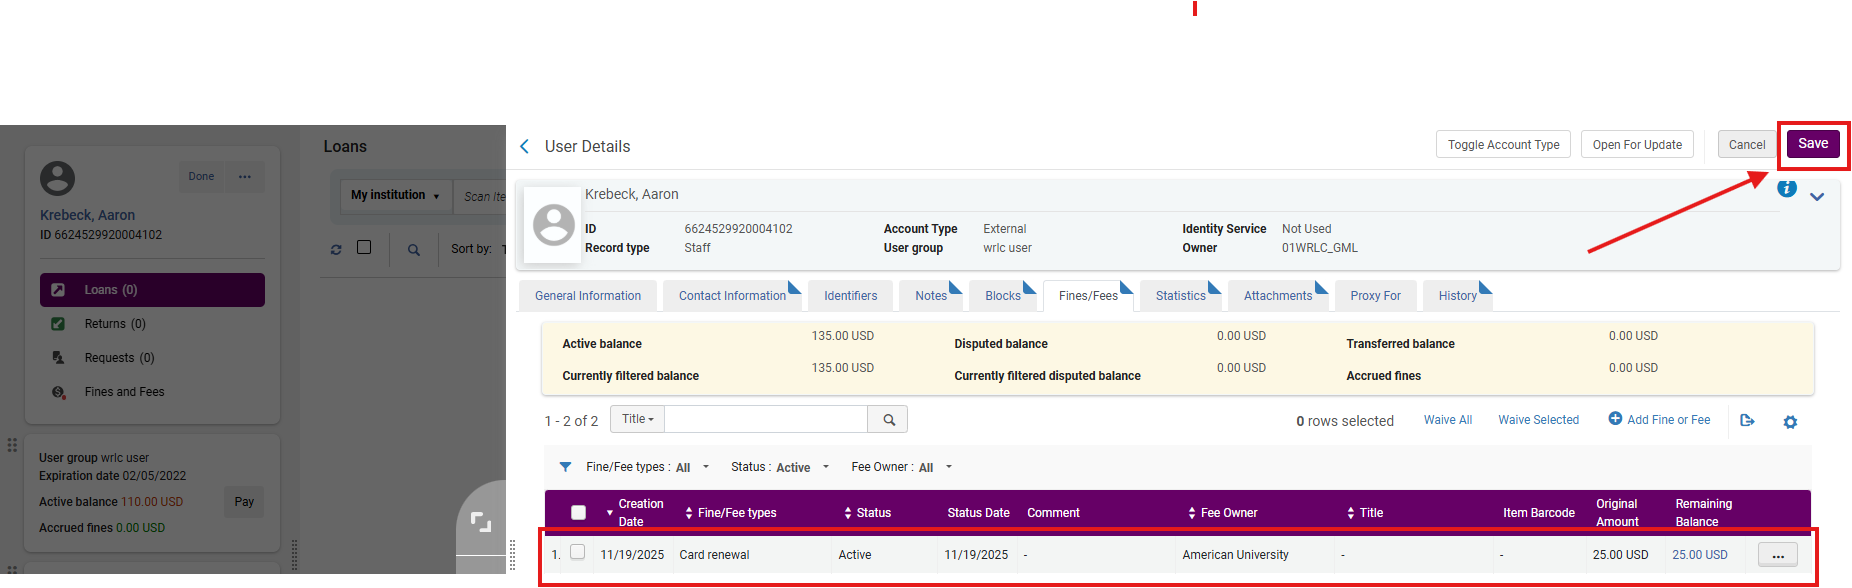](https://alma-documentation-bookstack.azurewebsites.net/uploads/images/gallery/2025-11/wA7image.png)
##### **Part III: Waiving a Fine or Fee**
**1: Select the Fine to Waive** In User Details > Fines/Fees, select the fine(s).
[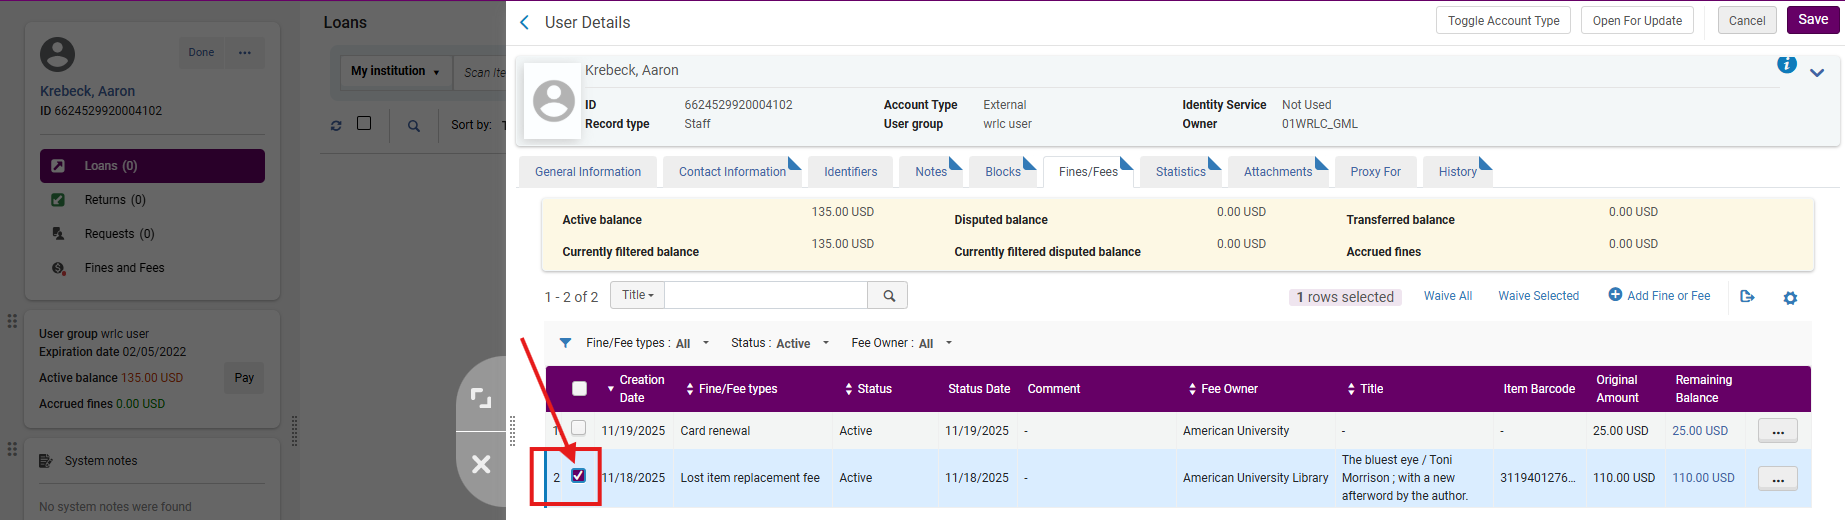](https://alma-documentation-bookstack.azurewebsites.net/uploads/images/gallery/2025-11/S1timage.png)
- Click <Waive Selected>.
[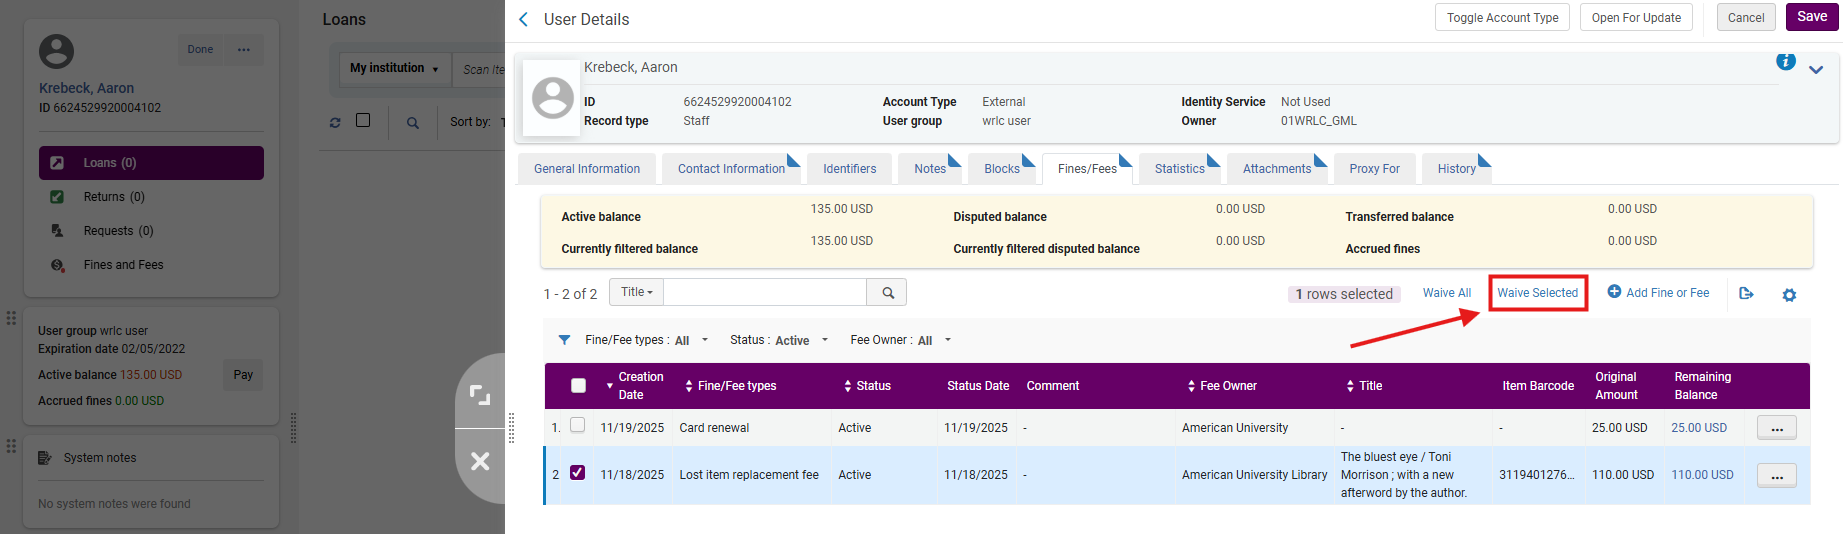](https://alma-documentation-bookstack.azurewebsites.net/uploads/images/gallery/2025-11/gJtimage.png)
- or, Click <Waive All> to waive all listed Fines/Fees
[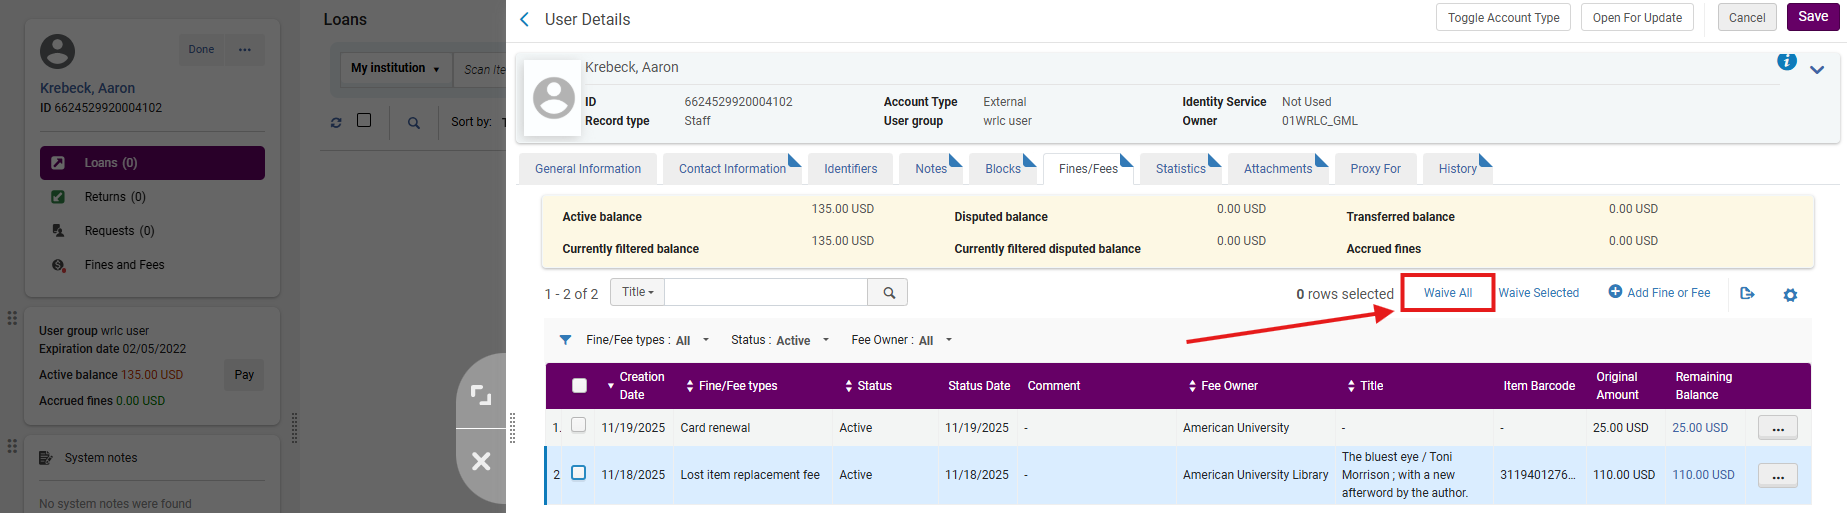](https://alma-documentation-bookstack.azurewebsites.net/uploads/images/gallery/2025-11/Ixfimage.png)
**2: Complete the Waive Action** In the waiver window:
- Use the <Waiving Reason> drop-down menu to select a Waiving Reason (required)
- Add notes if appropriate.
[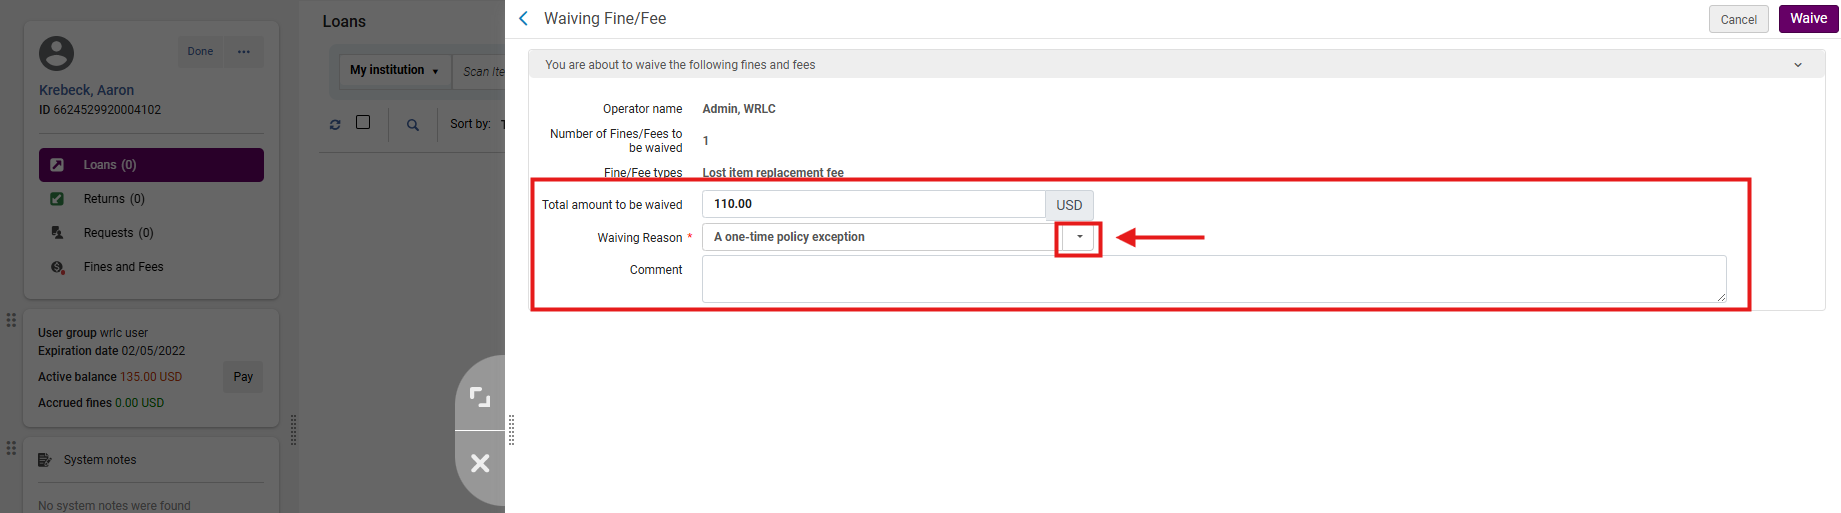](https://alma-documentation-bookstack.azurewebsites.net/uploads/images/gallery/2025-11/aUqimage.png)
**Note:** Waiver reasons support institutional policy and are essential for audit purposes. Libraries are encourged to standardize and document reasons for financial adjustments.
- Click <Waive>
[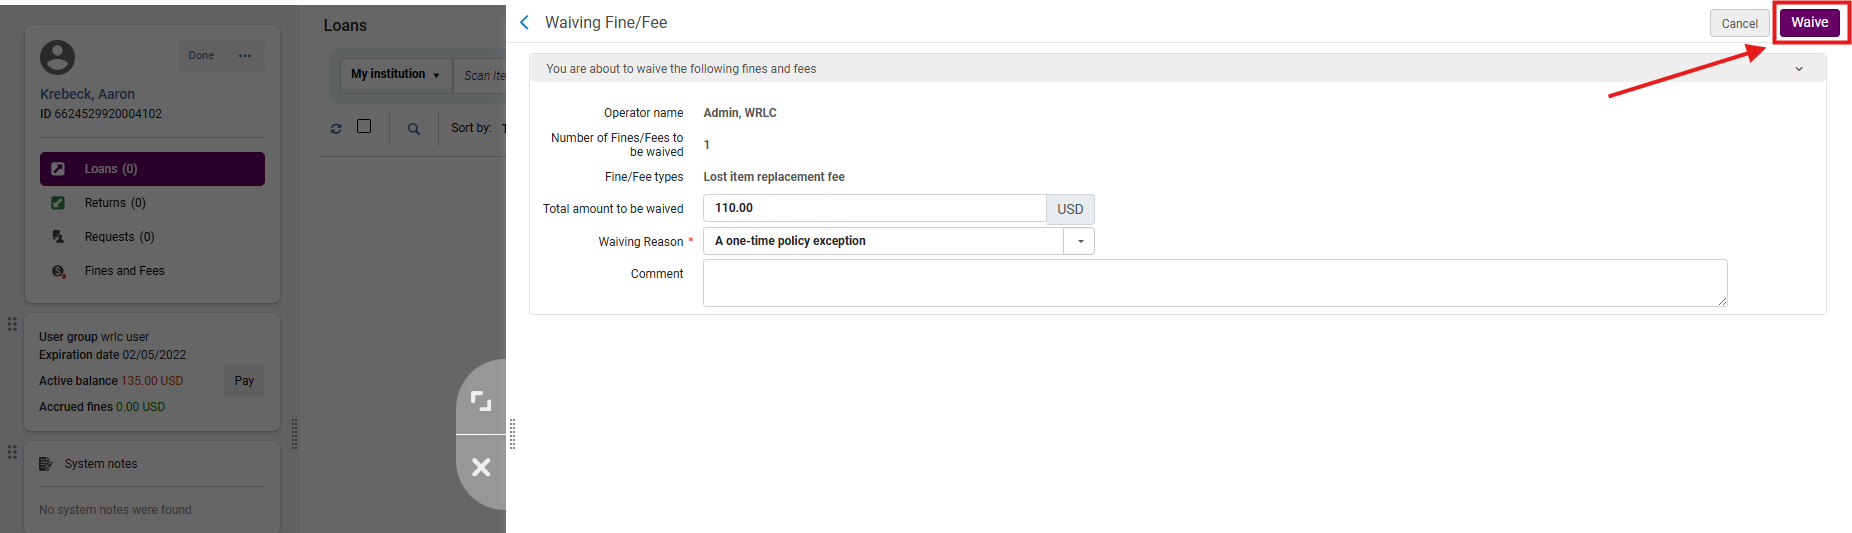](https://alma-documentation-bookstack.azurewebsites.net/uploads/images/gallery/2025-11/fYOimage.png)
- On the confirmation screen, click <Confirm>.
[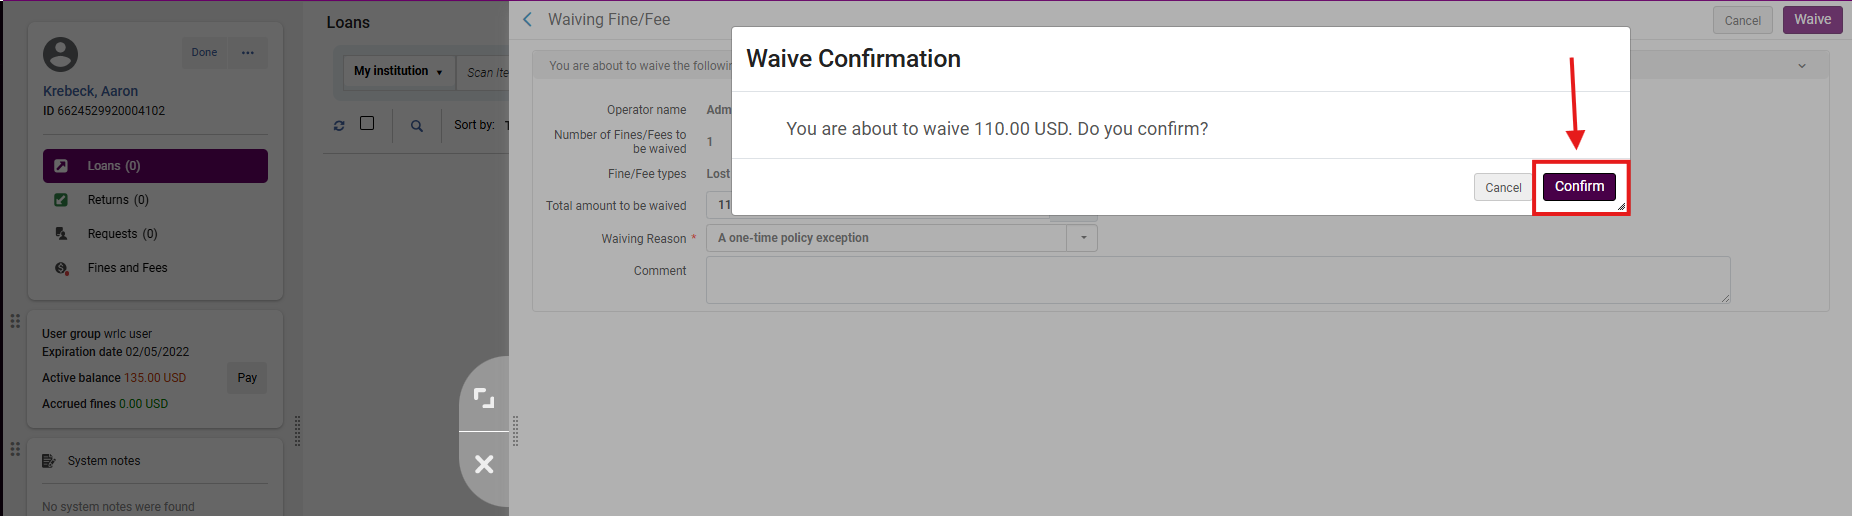](https://alma-documentation-bookstack.azurewebsites.net/uploads/images/gallery/2025-11/39bimage.png)
- Click <Save>.
[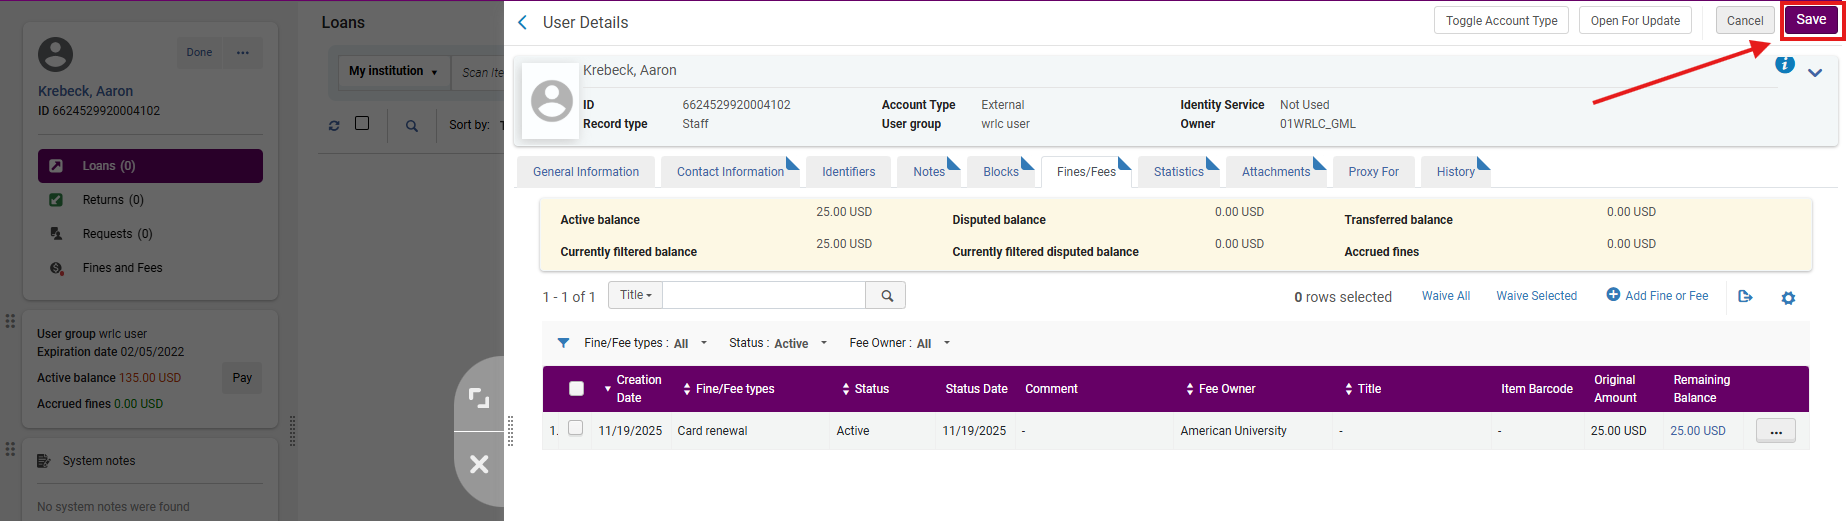](https://alma-documentation-bookstack.azurewebsites.net/uploads/images/gallery/2025-11/z3Cimage.png)
##### **Part IV: Disputing a Fine**
**1: Mark a Fine as Disputed** In User Details > Fines/Fees, open the row action menu (⋯) next to the fine; select <Dispute>
[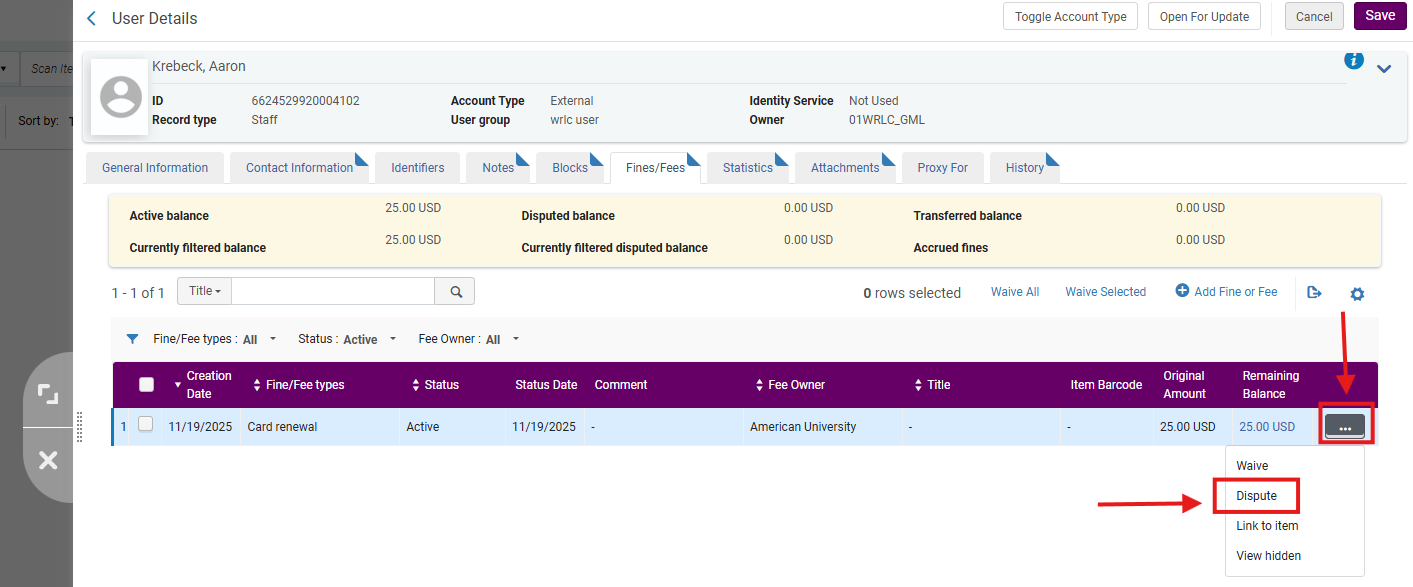](https://alma-documentation-bookstack.azurewebsites.net/uploads/images/gallery/2025-11/O1Limage.png)
- In the Dispute screen, add comments if needed; Click <Dispute>
[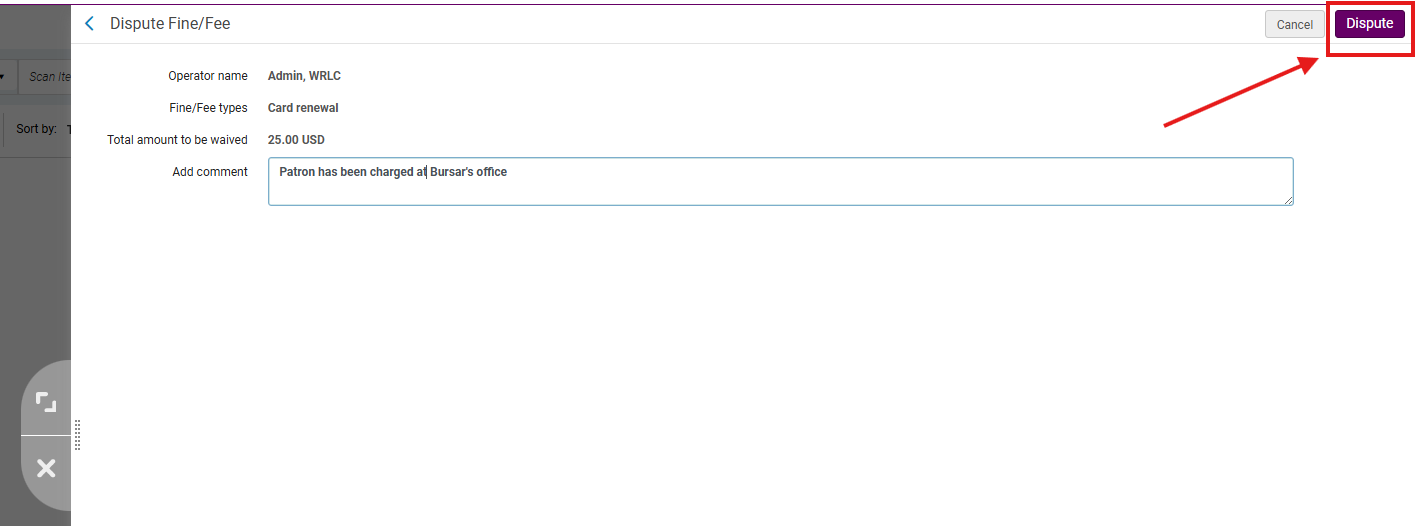](https://alma-documentation-bookstack.azurewebsites.net/uploads/images/gallery/2025-11/k6Limage.png)
- Then <Confirm>
[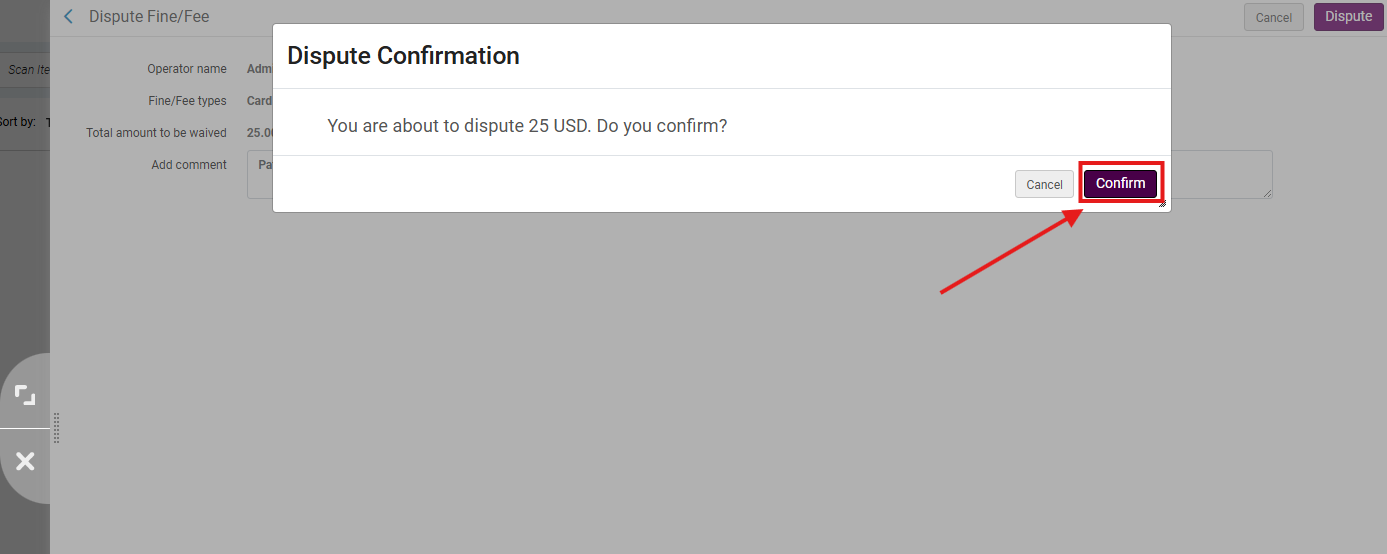](https://alma-documentation-bookstack.azurewebsites.net/uploads/images/gallery/2025-11/C87image.png)
- Then <Save>
[](https://alma-documentation-bookstack.azurewebsites.net/uploads/images/gallery/2025-11/b1Wimage.png)
Note: Disputed fines remain frozen until staff waive or restore them. This prevents premature payment or overdue penalties.
##### **Part V: Restoring a Disputed Fine**
**1: Access the Patron Record** Navigate to Fulfillment > Checkout/Checkin> Manage Patron Services; look up the patron’s record as though checking out items.
- Click on <Fines and Fees>
Note: The Active Balance does not reflect an amount because the fine is in Dispute
[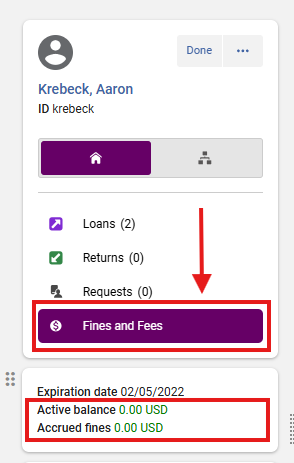](https://alma-documentation-bookstack.azurewebsites.net/uploads/images/gallery/2025-11/wQTimage.png)
**2: Filter for In-Dispute Fines** In the Fines/Fees ribbon menu, open the Status dropdown menu; Select <In Dispute>
[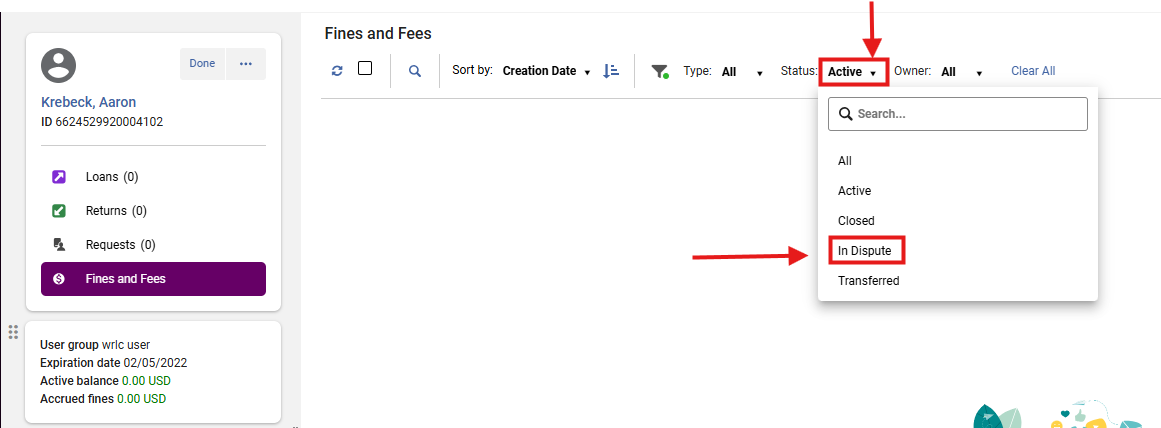](https://alma-documentation-bookstack.azurewebsites.net/uploads/images/gallery/2025-11/VWvimage.png)
**3: Restore the Fine** Open the row action menu (⋯) for the fine; Select <Restore>
[](https://alma-documentation-bookstack.azurewebsites.net/uploads/images/gallery/2025-11/kN1image.png)
- Add comments if needed; Click <Restore>
[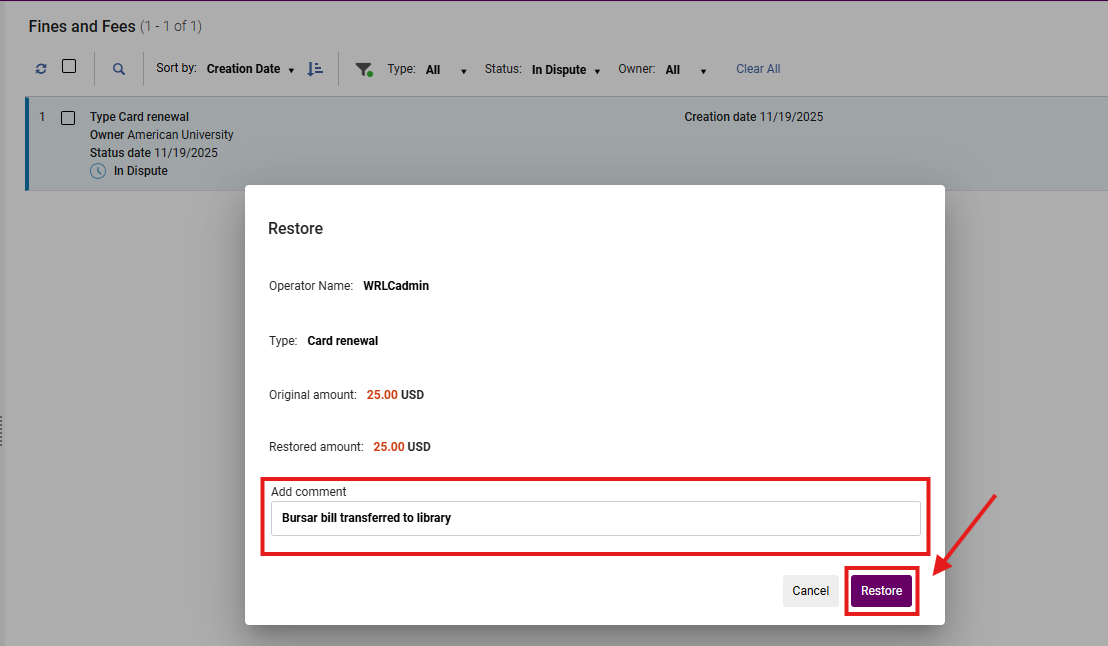](https://alma-documentation-bookstack.azurewebsites.net/uploads/images/gallery/2025-11/iLeimage.png)
- Restored fines become active again and may resume accruing or require payment; added Comments are displayed
[](https://alma-documentation-bookstack.azurewebsites.net/uploads/images/gallery/2025-11/L8Gimage.png)
##### **Part VI: Reviewing Patron Notifications**
**1: View Attachments** In User Details, select the <Attachments> tab; Review any notification letters (fines, overdue notices, receipts) sent to the patron.
[](https://alma-documentation-bookstack.azurewebsites.net/uploads/images/gallery/2025-11/2z5image.png)
**Note:** This is the authoritative log of all Alma-generated patron communications
# How to Add a Pop Up Note to a Patron's Account
A pop-up note is used to alert library staff to important information about a patron when their record is accessed in Alma.
Use a pop-up note when staff need to see time-sensitive or high-importance information before completing circulation actions such as checkout, renewal, or fines processing.
Examples include:
- “Verify photo ID before checkout”
- “Account under review- contact supervisor”
- “Special borrowing permissions apply”
Note:
- Pop-up notes are staff-facing alerts, not enforcement tools.
- They do not block borrowing and do not replace patron blocks.
- Notes should be clear, factual, and professional, as they may be visible to patrons if marked user viewable.
##### **Required Roles**
- Fulfillment Operator
- Circulation Desk Manager
**1: Locate the Patron Record** Navigate to Fulfillment > Checkout/Checkin> Manage Patron Services>. Search for and select the patron’s record
[](https://alma-documentation-bookstack.azurewebsites.net/uploads/images/gallery/2026-02/sqbimage.png)
**2. Click on the Patron's Name** to open the User Details side panel
[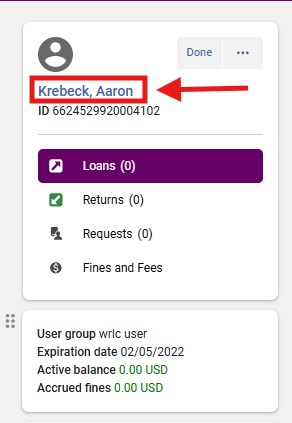](https://alma-documentation-bookstack.azurewebsites.net/uploads/images/gallery/2026-02/imOimage.png)
**3. Click on the <Notes> tab**
[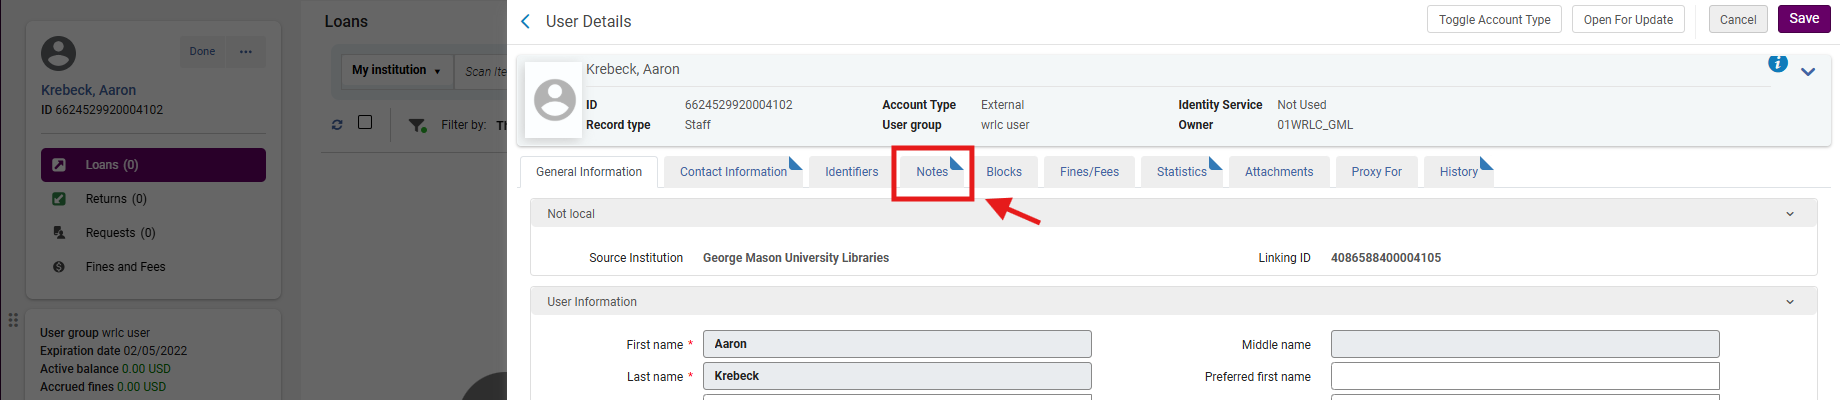](https://alma-documentation-bookstack.azurewebsites.net/uploads/images/gallery/2026-02/zlnimage.png)
Note: The dog ear on the User Details tab indicates pre-existing information. In this example, the patron already has at least one Note attached to their account. A patron account can include several Notes.
**4. Configure the Note Settings**
- Select <Add Note>
[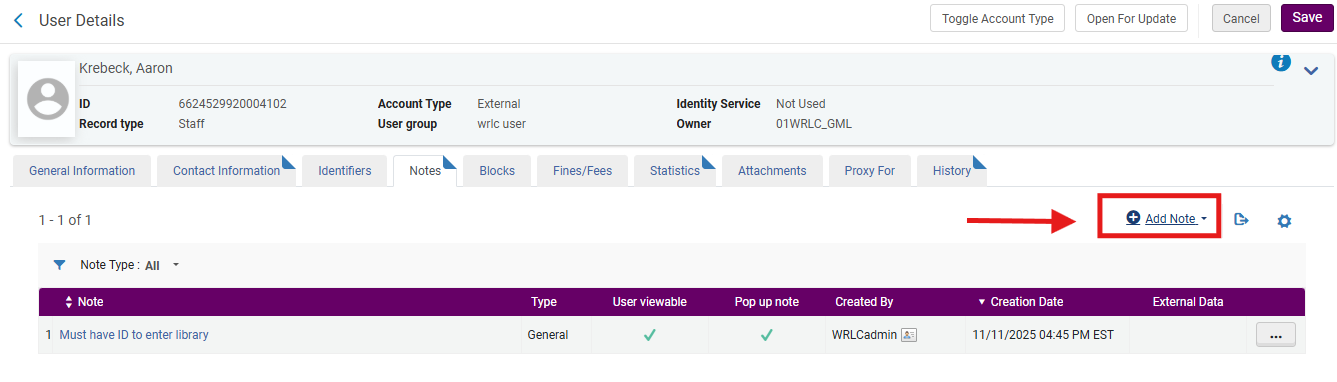](https://alma-documentation-bookstack.azurewebsites.net/uploads/images/gallery/2026-02/PH2image.png)
- Enter the desired information in the <Note> and use the <Type> drop-down menu to select a locally approved option that will help identify the nature of the note.
[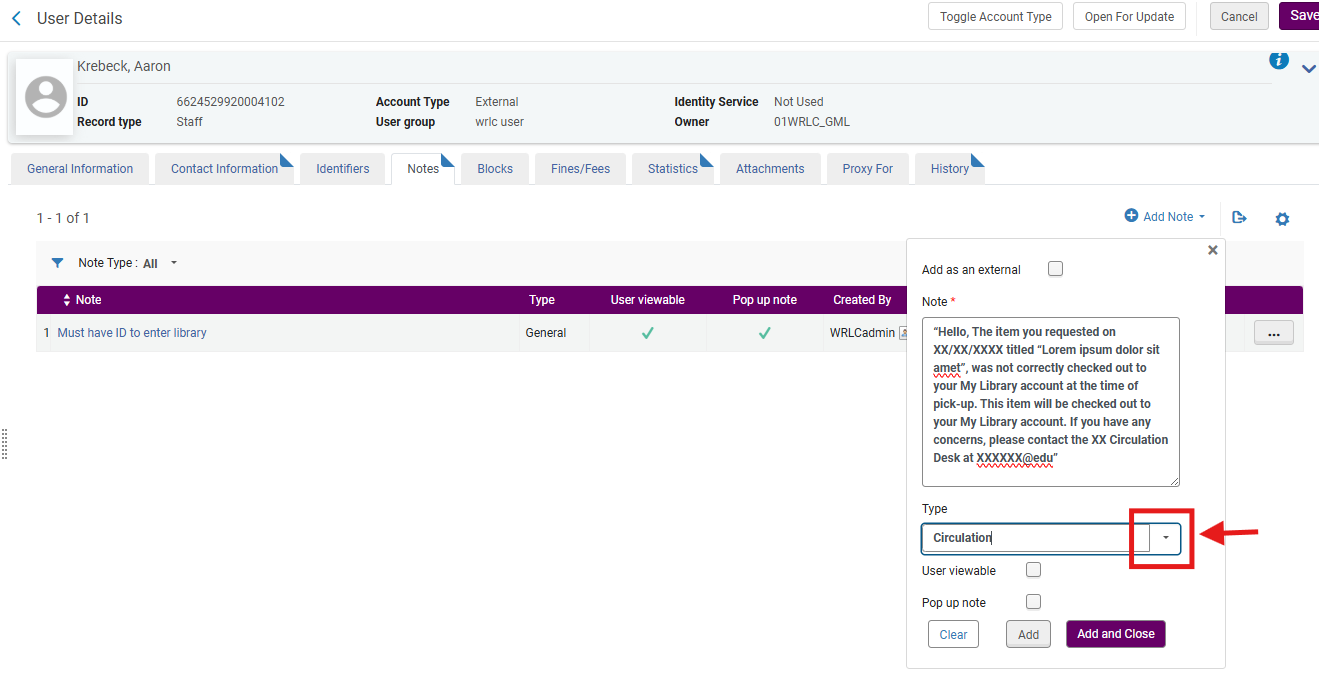](https://alma-documentation-bookstack.azurewebsites.net/uploads/images/gallery/2026-02/JCDimage.png)
- Check <Pop up note> This ensures the note appears when the patron record is accessed
- Optional: Check <User viewable> Only select this if the patron should see the note in Primo VE
- Most university libraries reserve User viewable pop-up notes for informational messages, not internal staff guidance
[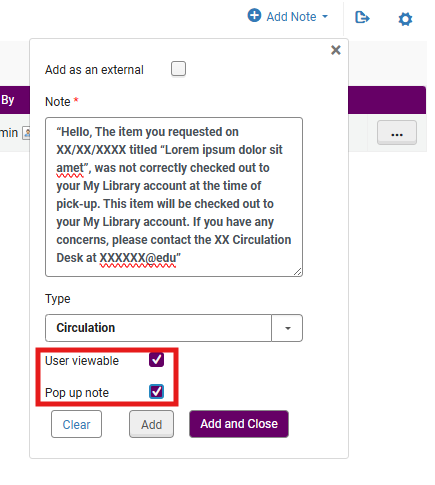](https://alma-documentation-bookstack.azurewebsites.net/uploads/images/gallery/2026-02/kq2image.png)
**5: Save the Note**
- Click <Add and Close>
- Click <Save> on the User Details screen
- The pop-up note is now active.
[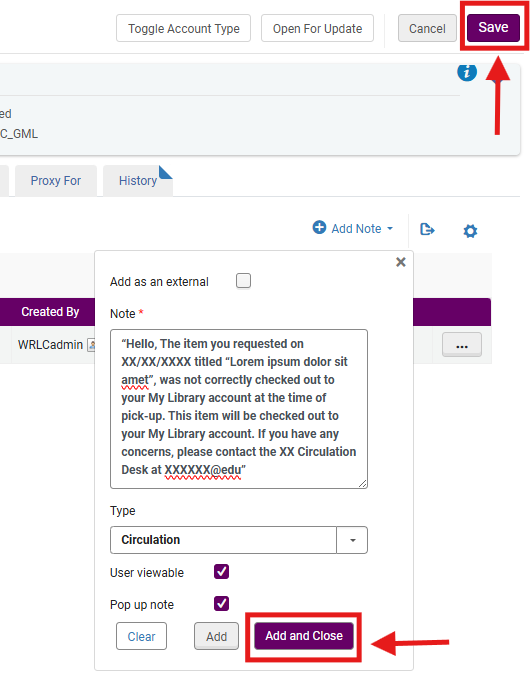](https://alma-documentation-bookstack.azurewebsites.net/uploads/images/gallery/2026-02/ipGimage.png)
**6. What Staff Will See**
- When the patron’s record is accessed in Alma, the pop-up note appears automatically
- Staff must acknowledge the note before continuing
**What Does the External Option Mean in a Patron Pop-Up Note?**
- When you add a note to a patron record in Alma, the External checkbox controls who the note is intended for, not how Alma enforces it.
- In simple terms: External = the note is meant for people outside your library staff. Most pop-up notes are internal
##### **Frequently Asked Questions**
*Does a pop-up note stop checkout?*
- No. It only alerts staff. Use a patron block to prevent borrowing.
*Can multiple pop-up notes exist on one patron record?*
- Yes. All active pop-up notes will display.
*Can pop-up notes expire automatically?*
- No. They must be edited or deleted manually.
*Can I edit or remove a pop-up note later?*
- Yes. Use the row action menu (⋯) next to the note and select <Edit> or <Delete>, then <Save>.
*Will the note appear in Primo VE within the patron's My Library Account?*
- Only if <User viewable> is selected.
# AFN Digitization Workflow
This workflow defines the WRLC-wide, institution-neutral procedure for submitting, processing, and fulfilling digitization requests for materials housed at the Shared Collections Facility (SCF) using:
- ILLiad as the staff-facing request management system
- The WRLC Digitization Add-on within ILLiad
- Ex Libris Alma as the fulfillment and digitization platform
This workflow applies **only** to digitization requests for materials confirmed to be located at the SCF and intentionally routes requests through Alma to support AFN/remote storage operations.
##### **How the Request Moves Between ILLiad and Alma Systems**
- ILLiad is the primary working interface for library staff
- The WRLC Digitization add-on/tab inside ILLiad is used to submit the digitization request.
- The submission creates an Alma request in the library’s IZ (institution zone).
- Through WRLC remote storage publishing jobs), the request is copied to SCF’s IZ on a schedule (noon and midnight).
- SCF staff scans and uploads the PDF in Alma, which triggers Alma to email the “requester” (generic library ILL email address). The requester is library ILL staff, not the patron.
- Once received from the generic library ILL email address, library staff then uploads the PDF into ILLiad to fulfill the request for outside borrowing institutions
- For requests from a library's home patrons, follow in-house fulfillment procedures
Use this workflow only when a patron needs a digitized portion of an item that you already know is stored at the Shared Collections Facility (SCF).
##### **Required Roles**
- ILL Staff
- Fulfillment Operator
##### **Part 1: Submitting the Digitization Request (ILLiad → Alma)**
The AFN Digitization workflow is used specifically when library staff know/confirm the item is in SCF
**1: Open the request in ILLiad** and Locate Requested Item (Borrowing or Lending request)
The simplest way to locate these numbers is to use the Persistent Search Bar in Alma, conducting a “Physical Items” search. If you are searching for a periodical volume, it is helpful to put the year in the search bar to ensure the correct item is retrieved.
- You will require two critical pieces of information from the item's record
- MMS ID
- Item ID
[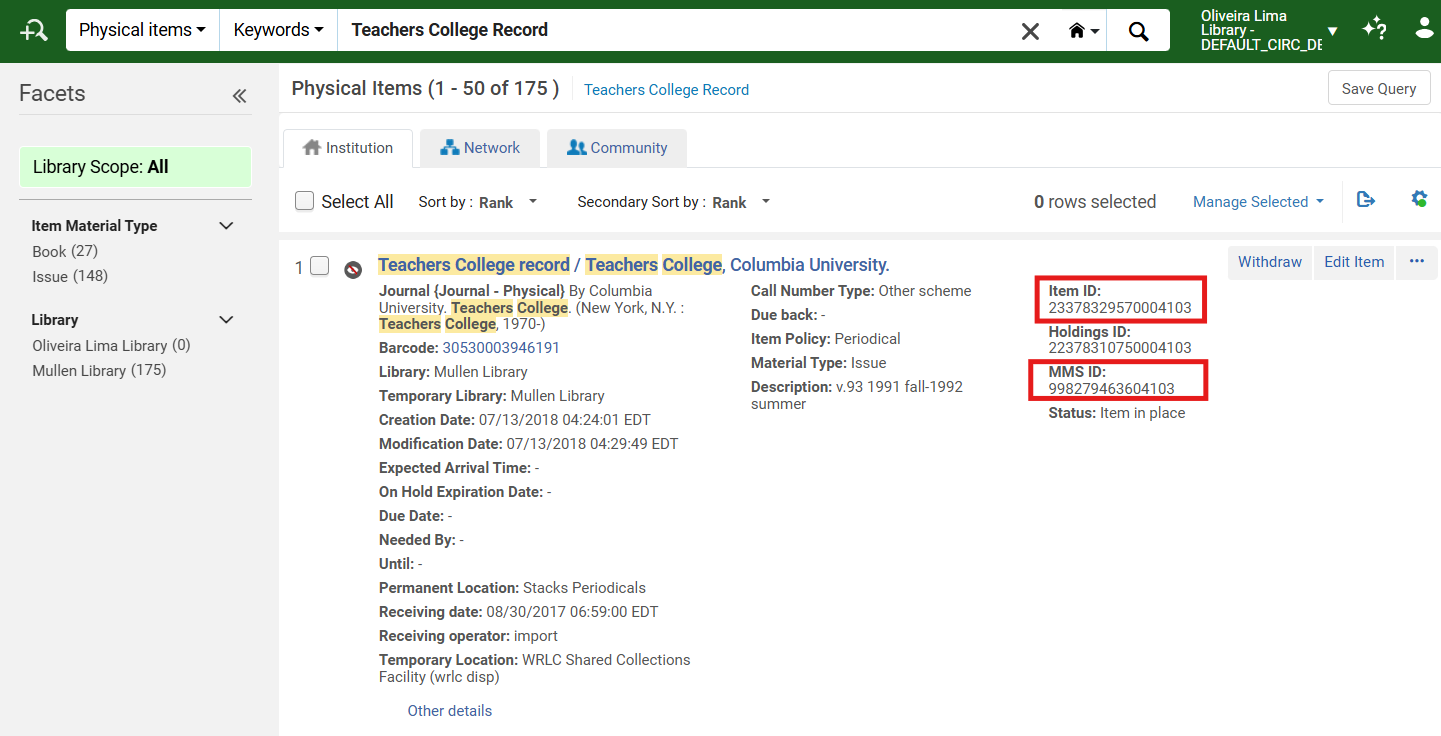](https://alma-documentation-bookstack.azurewebsites.net/uploads/images/gallery/2026-02/rbVimage.png)
- Within the ILLiad Request page, enter the Item Id and MMS ID into the following fields:
- Item ID → **Reference Number**
- MMS ID → **Call Number**
[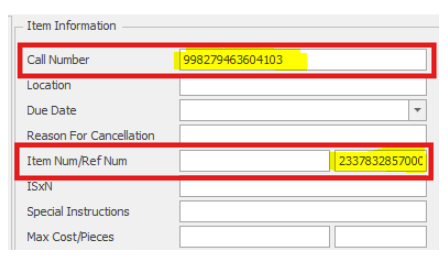](https://alma-documentation-bookstack.azurewebsites.net/uploads/images/gallery/2026-02/Y7yimage.png)
*Why This Matters: ILLiad sends these numbers to Alma so SCF staff knows exactly which item to scan.*
**2: Open WRLC Digitization Form in ILLiad and Load Request** Click the <WRLC Digitization> tab within the ILLiad request; the tab will initially appear blank
[](https://alma-documentation-bookstack.azurewebsites.net/uploads/images/gallery/2026-02/w3Rimage.png)
- Click <Load Request Page> to load the application
[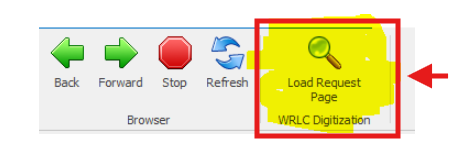](https://alma-documentation-bookstack.azurewebsites.net/uploads/images/gallery/2026-02/ug8image.png)
- This will bring up a web form that will be populated from ILLiad; confirm the ILLiad Request Form is auto-populated with available data from the ILLiad request details
- If MMSID/Item ID were already entered into the ILLiad request fields, they should now auto fill in the form fields
- If not, they can be entered manually in the form (but they are required either way)
- MMS ID → **Call Number**
- Item ID → **Reference Number**
- Page Range (Required): Enter Start Page and End Page; if the page range is unknown: use 1–1
- Do not enter 0–0. Alma will reject the request
[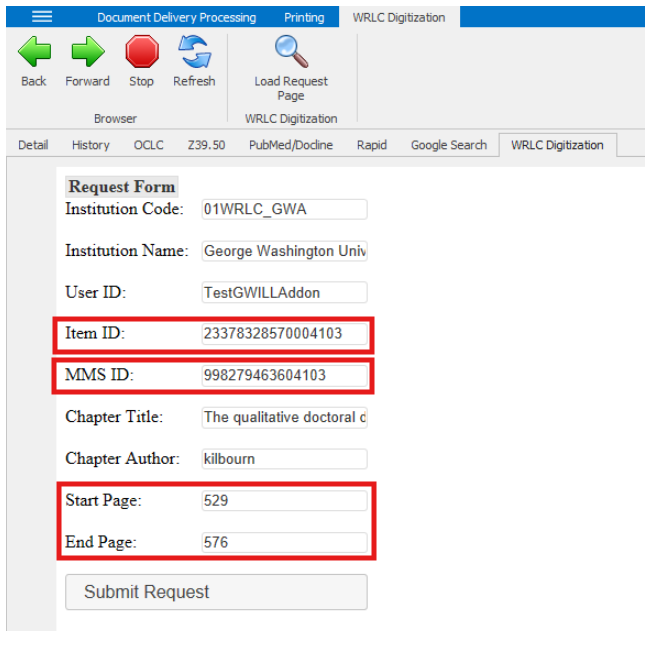](https://alma-documentation-bookstack.azurewebsites.net/uploads/images/gallery/2026-02/fwUimage.png)
**3: Submit the Request Click <Submit Request>** When the confirmation screen appears, note the Alma Request ID
[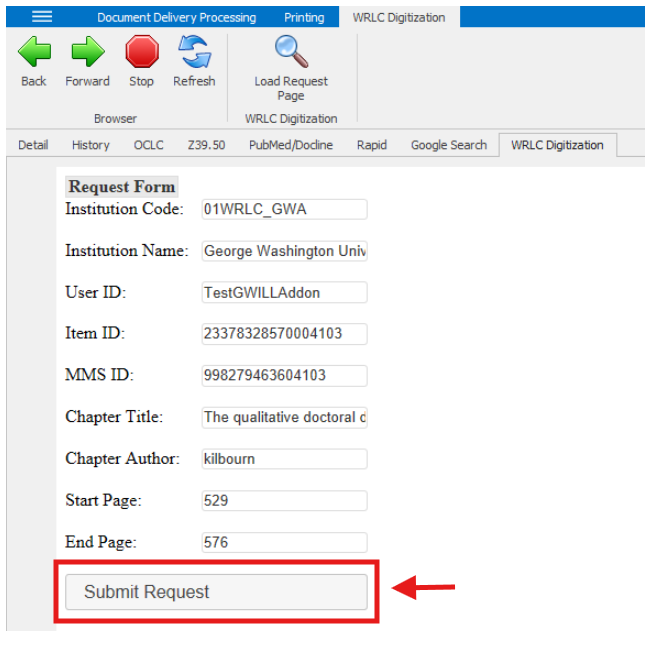](https://alma-documentation-bookstack.azurewebsites.net/uploads/images/gallery/2026-02/vhZimage.png)
**4: Recordkeeping in ILLiad** Return to the ILLiad request details page and add a note such as “Sent to SCF” and enter the returned Request ID
*Why This Matters: This creates a local breadcrumb for tracking*
**5: Route the Request Correctly in ILLiad**
- **For library’s own home patron (local chapter/article from SCF)** Convert the ILLiad request to a Document Delivery Request
- Place into Document Delivery Stacks Searching (status used while waiting for PDF)
- Leave in that status until the scan arrives.
- **Library lending request (Library scanning for an institution)**
- Keep the ending workflow active in ILLiad
- Manually route the ILLiad request to whichever queue is appropriate in your libraries' ILLiad instance, i.e. “Awaiting Return from WRLC" or "Lending Stacks" searching queue
*Note: You are now waiting for the scan.*
##### **Part 2: What Happens Next (SCF and Alma)**
You do not need to take action in this section. This information is included to help understand the process:
After ILLiad submission migrates, an Alma request exists in the library’s IZ (often identifiable by the Request ID pattern). The request is copied into SCF’s IZ via the remote storage publishing process (often referred to as the scf app) on a schedule (noon and midnight); [Simplified Digitization Workflow ](https://alma-documentation-bookstack.azurewebsites.net/books/scf/page/simplified-digitization-workflow)
- Alma sends the request to SCF automatically.
- SCF staff accesses request from the <Pull from Shelf queue>; Pull Slip documents are similar to non CLS/AFN requests but will include notes such as ILL TN#
- SCF staff will locate requested item in the SCF, and then scan and upload the PDF in Alma.
- Alma emails the PDF attachment to the requester In this model, the requester is the library’s ILL staff, so the PDF goes to the library’s generic ILL email inbox.
##### **Part 3: Receiving the Scan and Completing the Request**
**1: Monitor the ILL Email Inbox** Watch for an email from (the SCF staff) with a PDF attachment.
- The cover page includes key transaction information to help the library staff match the attachment to the open request
- Alma Request ID
- ILLiad Transaction Number
**2: Deliver the Scan**
- **For library’s own patron (local chapter/article from SCF)** Library staff downloads the PDF and uploads/imports the PDF into ILLiad to fulfill the request
- Fulfillment> Resource Requests> Deliver Digital Documents> Deliver Digital Documents>Document Delivery
[](https://alma-documentation-bookstack.azurewebsites.net/uploads/images/gallery/2026-02/image.png)
- **Library lending request (Library scanning for another institution)** Library staff upload it into ILLiad and send it via Odyssey or Article Exchange
##### **Exceptions and Error Handling**
**No Scan Received** If no scan is received after several business days:
- Confirm the Alma request exists and note its current status
- Verify the request was successfully published to SCF’s IZ
- Contact SCF staff for status confirmation
**Alma Error or Update Notifications** Monitor for Alma-generated emails indicating issues such as:
- Invalid page range
- Item not found
# Lost Processes in Alma
# Overview
All WRLC libraries are responsible for returning (aka "discharging") undamaged items from the user's record in Alma before re-shelving the items or sending them on to their next destination, whether that next destination is within the same institution (that is, from one library branch to another) at another WRLC lending library or the Shared Collections Facility (SCF).
Once the item is returned from the user's account in Alma, you break the link between the item and patron.
##### **Glossary of Terms for Lost Loans**
| Lost | The item has been declared lost, based on the configured Lost Loan profiles (see [Overdue and Lost Loan Profiles](https://knowledge.exlibrisgroup.com/Alma/Training/AlmaAdministrationCertification/Alma_Administration_Certification_-_English/C_Fulfillment/E_Overdue_and_Lost_Loan_Profiles)) or was manually set to lost |
| Lost with Overdue Charge | An overdue fine was incurred before the item was declared lost. This will occur for only special types of collections |
| Lost and Paid | The item has been declared lost, and the patron has paid for it. |
| Claimed returned | The user claims to have returned the item. |
| Claimed returned with overdue charge | An overdue fine was incurred before the item was claimed returned. This will occur for only special types of collections such as reserves or technology, or for special types of user groups such as community patrons. |
| Item was found | An item declared Lost or Claimed returned has been found |
##### **Required Roles**
- Circulation Desk Manager
- Circulation Desk Operator
- Circulation Desk Operator - Limited
# Item's Home Institution: Alma Automatically Applies Lost Item Status
Alma automatically changes items to Lost status based on the configured Lost Loan Profiles (*see* Configuring Overdue and Lost Loan Profiles). For Consortium Loan Services transactions, that happens at 39 days Overdue. For non-CLS items, that depends on how your library has configured the profiles.
The Overdue and Lost Loan job runs every night at 10 PM, changes the statuses, and sends the *Ful Overdue and Lost Loan Letter* to the patrons.
Most edits to the profiles are made after the associated job runs at 10pm; then often, the Status Update is run after making the changes.
If you have questions regarding your library's profiles, or would like to request configuration assistance, please contact the WRLC's Service Desk to submit a ticket.
# Item's Home Institution: Library Staff Manually Applying Lost Item Status
This workflow explains how library staff manually mark an item as Lost from a patron’s active loan record in Alma.
**When to Reference This Document:**
Use this procedure when:
- A patron reports an item as Lost
- An item is significantly overdue and meets local lost-item policy
- Staff determine that recovery is unlikely and financial resolution must begin
- Reconciliation or billing processes require formal lost status
When an item is marked Lost:
- The loan status changes to Lost
- Replacement fees (if configured) are applied
- The patron’s Active Balance updates
- Alma automatically sends the *Ful Lost Loan letter*
This workflow aligns with standard Alma fulfillment configuration and common consortium policy practice.
##### **Required Roles**
- Fulfillment Operator
- Circulation Desk Manager
**1: Locate the Patron Record** Navigate to Fulfillment > Checkout/Checkin > Manage Patron Services> Search for and open the patron record
Note: The Lost status must be applied to the active loan itself. This step ensures fees and notifications are correctly tied to the borrowing patron.
**2: Open the Loans Tab** Select the <Loans> tab
[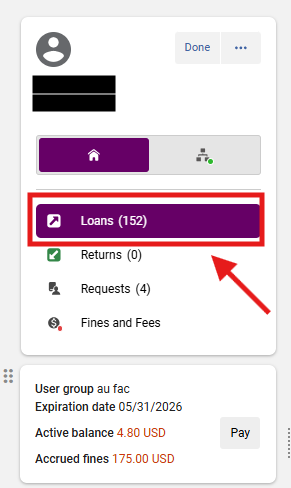](https://alma-documentation-bookstack.azurewebsites.net/uploads/images/gallery/2026-03/image.png)
**3: Display All Loans** In the Loan Display dropdown, select <All>; Locate the item that should be marked Lost
Note: Some items may not appear under “This Session.” Always switch to All Loans to avoid marking the wrong item.
[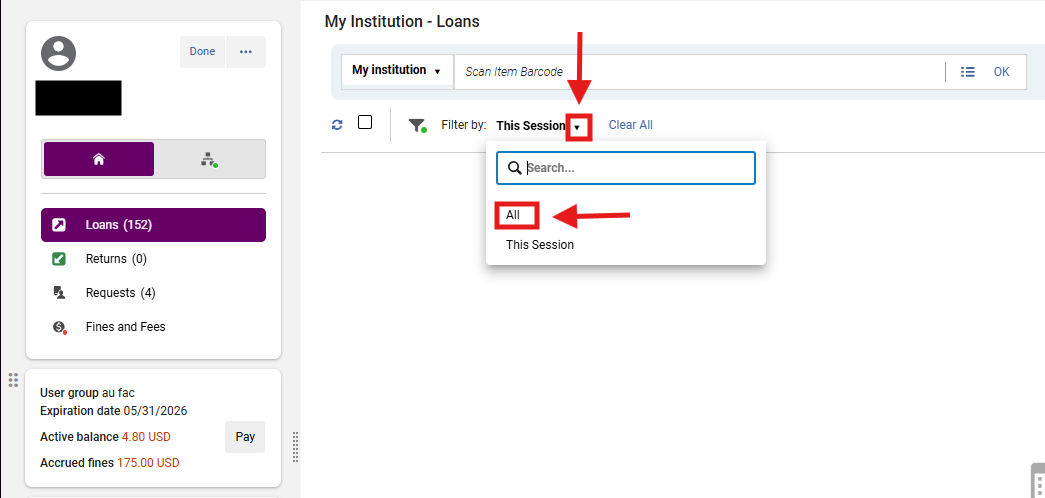](https://alma-documentation-bookstack.azurewebsites.net/uploads/images/gallery/2026-03/Tcpimage.png)
**4: Apply Lost Status** In the loan row, open the row action menu (⋯); Select <Lost>
[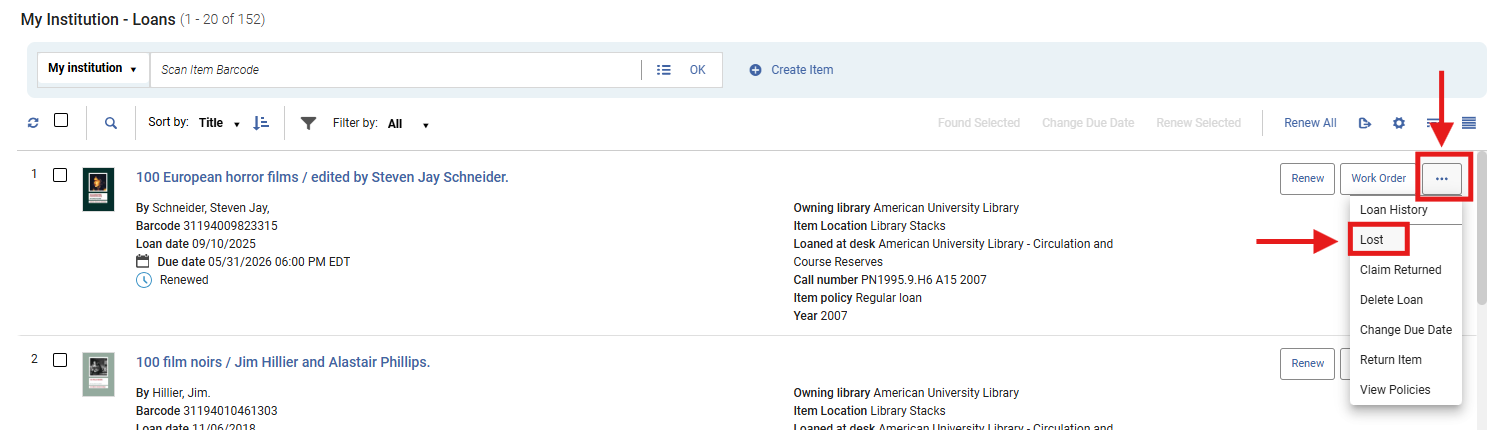](https://alma-documentation-bookstack.azurewebsites.net/uploads/images/gallery/2026-03/HuBimage.png)
**5: Confirm the Lost Status** The Lost Item dialog box will open and indicate the item's new Lost status and the Lost Item Replacement fee (if configured); Review the fee information and Select <OK>
[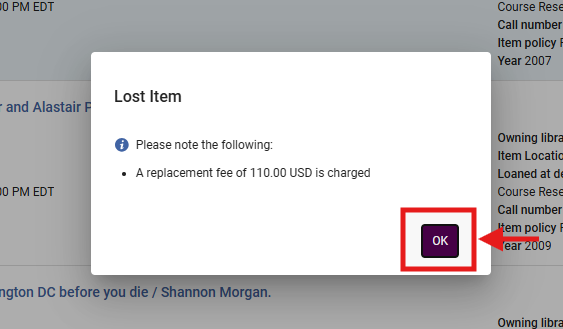](https://alma-documentation-bookstack.azurewebsites.net/uploads/images/gallery/2026-03/jYKimage.png)
- A green dialog box will also appear from the right hand side of the screen indicating that the item's status has been updated to Lost.
- The Loan record will then update to reflect the associated fines and Lost status:
[](https://alma-documentation-bookstack.azurewebsites.net/uploads/images/gallery/2026-03/RqDimage.png)
- The system will:
- Change the loan status to Lost
- Update the patron’s Active Balance
- Trigger the *Ful Lost Loan letter*
##### **What Happens Automatically**
When Lost status is applied:
- The item remains attached to the patron
- Replacement charges are applied (based on local configuration)
- The patron receives notification
- The item is no longer renewable
- The item is removed from standard circulation until resolved
##### **Frequently Asked Questions**
- *Does marking an item Lost block the patron?*
- Not automatically. Blocks depend on your Terms of Use configuration and balance thresholds.
- *Can staff override the replacement fee?*
- Yes. Fees can be adjusted or waived under the Fines/Fees tab if local policy permits.
- *Does Alma always send a notice?*
- Yes, if the Ful Lost Loan letter is enabled in configuration.
- *What if the wrong item is marked Lost?*
- Select <Return> to Discharge the item if returned, or select <Found> to restore the loan manually; Adjust fees as needed.
[](https://alma-documentation-bookstack.azurewebsites.net/uploads/images/gallery/2026-03/BP8image.png)
- *Should I use Lost or Claims Returned?*
- Use Lost when the patron acknowledges the item is lost or recovery is unlikely.
- Use Claims Returned when the patron states they already returned the item.
# Item's Home Institution: Marking Items Claimed Return
This workflow explains how to mark an item as **Claimed Returned** in Alma when a patron states they have already returned an item, but the system still shows it as on loan.
##### **When to Use this Workflow**
- A patron disputes responsibility for an item
- An item is believed to have been returned but is not accounted for
- Staff need to pause billing or escalation while investigating
- The item cannot be immediately located
When an item is marked as **Claimed Returned**:
- The loan remains attached to the patron
- The item status changes to **Claimed Returned**
- Investigation can begin without immediately applying Lost status or replacement fees
Note: This status prevents premature billing and supports fair investigation before determining financial responsibility.
##### **Required Roles**
- Fulfillment Operator
- Circulation Desk Manager
**1: Locate the Patron Record** Navigate to Fulfillment > Checkout/Checkin > Manage Patron Services> Search for and open the patron record
Note: The Lost status must be applied to the active loan itself. This step ensures fees and notifications are correctly tied to the borrowing patron.
**2: Open the Loans Tab** Select the <Loans> tab
[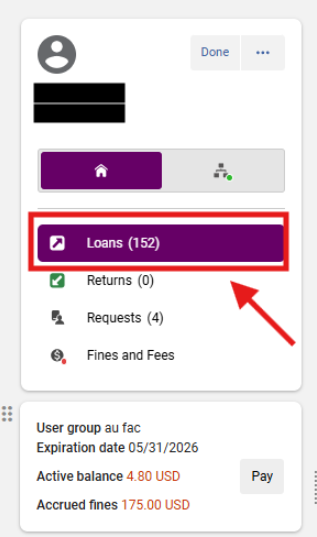](https://alma-documentation-bookstack.azurewebsites.net/uploads/images/gallery/2026-03/MRwimage.png)
**3: Display All Loans** In the Loan Display dropdown, select <All>; Locate the item that should be marked Lost
Note: Some items may not appear under <This Session>. Always verify using the full Loan list.

**4: Apply Claimed Returned Status** Open the row action menu (⋯) for the item; Select <Claimed Return>
[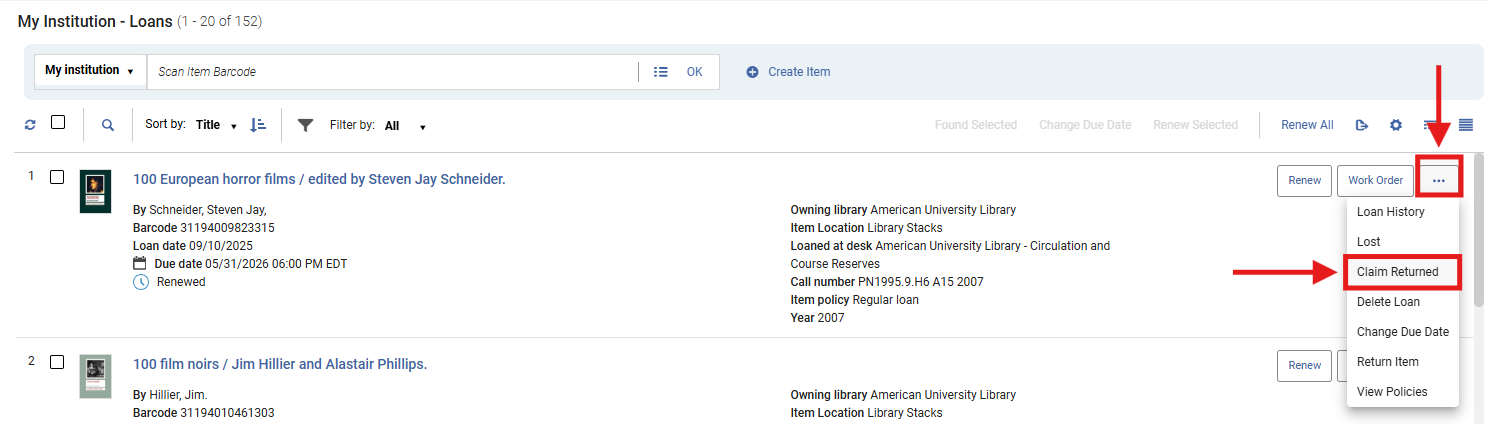](https://alma-documentation-bookstack.azurewebsites.net/uploads/images/gallery/2026-03/9h5image.png)
- Optionally, enter a note documenting:
- Patron statement
- Date of claim
- Any relevant context
- Select <Claimed Return>
[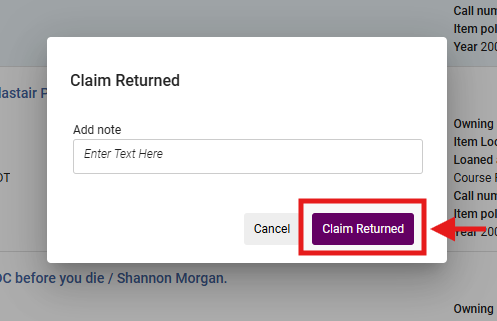](https://alma-documentation-bookstack.azurewebsites.net/uploads/images/gallery/2026-03/HNwimage.png)
- A dialog box will appear from the right-hand side of the menu stating, *"Loan was successfully declared as claimed returned"*
- The item status will update to Claimed Returned
[](https://alma-documentation-bookstack.azurewebsites.net/uploads/images/gallery/2026-03/U3eimage.png)
#####
##### **If the Item Is Currently Marked Lost**
**1: Remove Lost Status** First Open the row action menu (⋯); Select <Found Item>
Note: Alma does not allow an item to be both Lost and Claimed Returned. The Lost status must be cleared before applying Claimed Returned.
[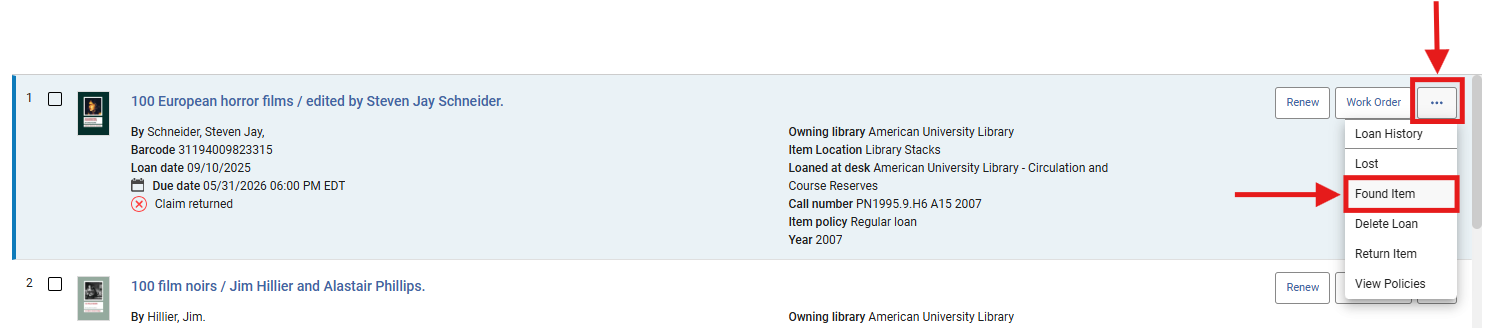](https://alma-documentation-bookstack.azurewebsites.net/uploads/images/gallery/2026-03/Gaeimage.png)
**2: Apply Claimed Returned Status** Open the row action menu (⋯) again; Select <Claimed Return>
[](https://alma-documentation-bookstack.azurewebsites.net/uploads/images/gallery/2026-03/9h5image.png)
#####
##### **What Happens After Applying Claimed Returned**
- The item remains on the patron’s account
- The loan is flagged for investigation
- Automatic lost billing is typically paused (configuration dependent)
- Staff are expected to perform a physical search per their library's in-house policies
##### **Frequently Asked Questions**
- *What is the difference between Claimed Returned and Lost?*
- Claimed Returned = investigation stage
- Lost = final determination with billing
- *Does this remove the loan from the patron?*
- No. The loan remains active until resolved
- *What should I include in the note?*
- Date of claim, patron explanation, and any relevant staff observations
- *What if the item is later found?*
- Simply discharge it using <Return Items>
- *What if the item belongs to another consortium library?*
- Coordinate with CLS or resource sharing workflows; CLS items can only be marked as Lost within its home IZ
- *Can I skip Claimed Returned and mark the item Lost?*
- Yes, but be sure to review your library's Claimed Return policies
# Returning Lost Items
When you receive a Lost item, the best practice is to use Fulfillment> Return Items to return the item.
Alma removes the loan from the patron’s account and deletes the replacement fee for the item. If you delete the loan (as seen in the below image), Alma will change its status to missing, which is not desirable, and will change its status in Alma Analytics to Inactive.
[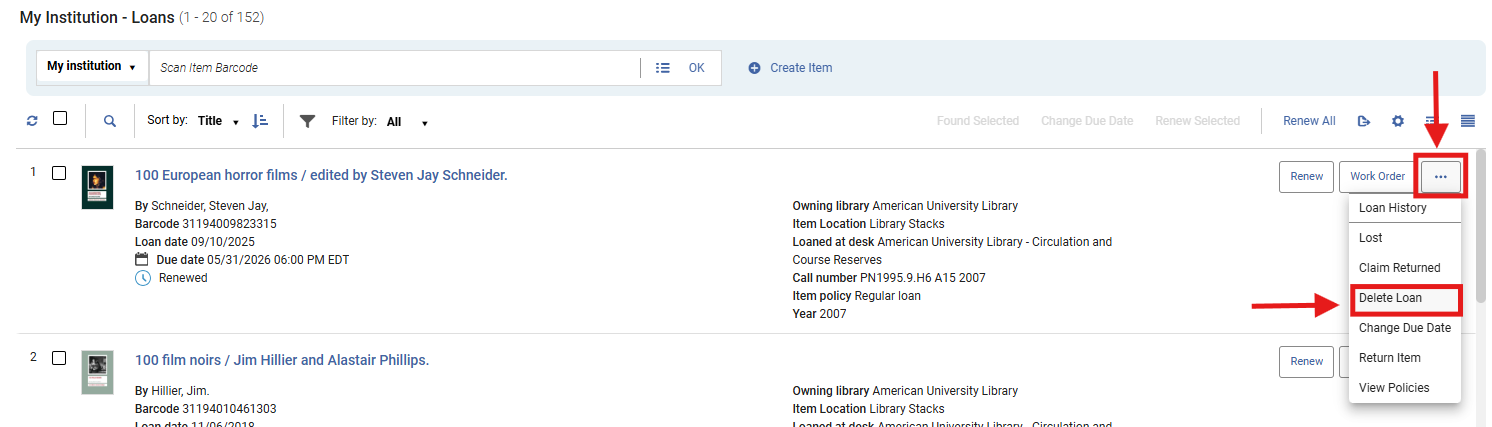](https://alma-documentation-bookstack.azurewebsites.net/uploads/images/gallery/2026-03/kdkimage.png)
# Renewing Lost Items
This workflow explains how to renew an item that is currently in Lost status on a patron’s account in Alma.
Use this workflow when:
- A patron still has the item and needs more time
- Staff determine the item should remain on loan instead of being billed as lost
- The item was manually or automatically changed to Lost, but the loan should continue
Note: In Alma, a loan in Lost status cannot simply be renewed as-is. Staff must first change the item from Lost back to Normal using <Found Item>, and only then renew the loan or change the due date. Ex Libris documents Found Item as the action used to remove Lost status from an active loan in Manage Patron Services.
##### Required Roles
- Fulfillment Operator
- Circulation Desk Manager
**1: Locate the Patron Record** Navigate to Fulfillment > Checkout/Checkin > Manage Patron Services> Search for and open the patron record
Note: The Lost status must be applied to the active loan itself. This step ensures fees and notifications are correctly tied to the borrowing patron.
**2: Open the Loans Tab** Select the <Loans> tab
[](https://alma-documentation-bookstack.azurewebsites.net/uploads/images/gallery/2026-03/image.png)
**3: Display All Loans** In the Loan Display dropdown, select <All>; Locate the item that should be marked Lost
Note: The item may not appear under a filtered session view. Switching to All ensures you are working with the correct active loan.
[](https://alma-documentation-bookstack.azurewebsites.net/uploads/images/gallery/2026-03/Tcpimage.png)
**4: Remove the Lost Status** In the loan row, open the row action menu (⋯); Select <Found Item>
- This changes the item’s loan status from Lost back to Normal.
Note: A lost item cannot be renewed until Lost status is removed. In Alma, Found Item is the correct action for reversing Lost status on an active loan.
[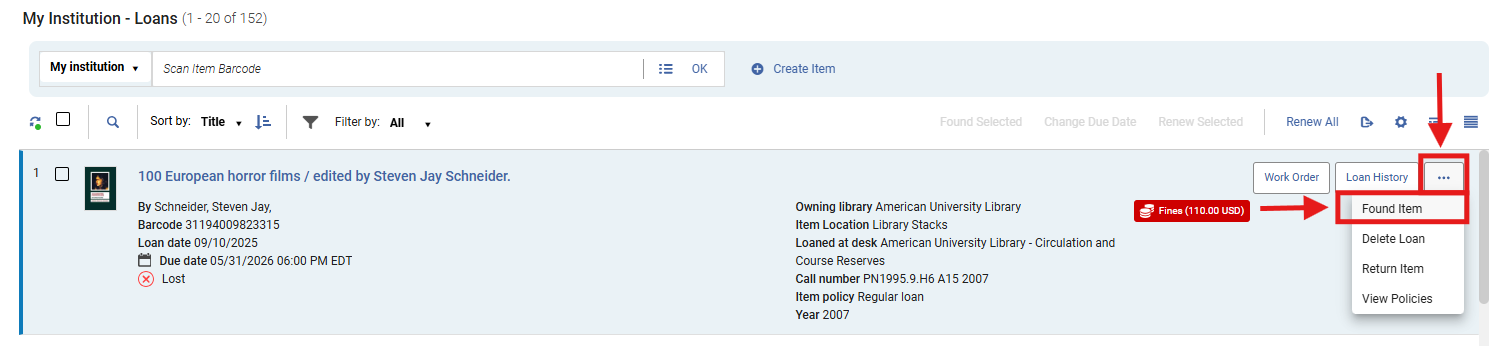](https://alma-documentation-bookstack.azurewebsites.net/uploads/images/gallery/2026-03/EEcimage.png)
**5: System Confirmation Messages** After selecting <Found Item>, Alma displays confirmation notifications on the right-hand side of the screen.
- Green (success notification): Loan was successfully declared as found
- Type: Success confirmation
- Meaning: The action completed successfully
- In this case:
- Lost status → successfully removed
- Loan updated
- Blue (informational notification): Lost item check in: 100.0% of 110.00 USD replacement fee will be refunded
- Type: Informational financial notification
- Meaning: A system process occurred (not just status change)
- In this case:
- Refund logic triggered
- Fee adjustment applied
Note: The replacement fees are determined per the Terms of Use configurations
**6: Review the Patron’s Charges** After using <Found Item>, review the patron’s Active Balance and Fines/Fees tab
If the item became lost in Alma, the replacement charges are typically reversed automatically when the item is marked Found, depending on local configuration. Ex Libris notes that lost-loan refund behavior is configuration-based, including refund ratios and related fee settings.
**7: Renew the Loan or Change the Due Date** After Lost status is removed: Open the row action menu (⋯) again for the same item
- Choose one of the following:
- <Renew> to apply the normal renewal rules
- <Change due date> to manually set a future due date
Note: Use <Renew> when the loan should follow standard policy. Use <Change due date> when staff need to set a specific exception date.
**6: Confirm the Updated Loan Status**
- Verify that:
- The item is no longer marked Lost
- The due date has updated correctly
- Any associated fines or fees have been reviewed
##### **Frequently Asked Questions**
- *Why can’t I renew the item while it is still marked Lost?*
- Alma treats Lost as a separate loan status. You must first use <Found Item> to return the loan to normal status before renewing. Ex Libris documents Indicating an Item as Found and Renewing Loans as separate actions within Manage Patron Services.
- *What is the difference between <Found Item> and <Return Item>?*
- <Found Item> removes the Lost status but keeps the loan active. <Return Item> ends the loan entirely.
- *Will Alma always remove the patron’s replacement fee automatically?*
- Not always. Lost-loan refund behavior depends on Fulfillment configuration.
- *Should I use <Renew> or <Change due date>?*
- Use <Renew> when standard renewal rules should apply. Use <Change due date> when staff need to set a specific exception date.
- *What if the patron still has blocks or other restrictions?*
- Renewal may still fail if Alma detects a patron block or another policy restriction; Renewal behavior is governed by loan rules and blocking preferences.
- *Does this apply to automatically lost items too?*
- Yes. Alma changes overdue items to Lost through configured Lost-Loan profiles, and those loans still need to be returned to normal status before ordinary loan actions continue.
# Item's Home Institution: Lost and Paid Status
This workflow explains how to process a Lost item as Lost and Paid in Alma when a patron has paid the replacement fee, allowing the system to:
- Remove the item from the patron’s Active Loans
- Mark the item’s process type as Lost and Paid
- Resolve the loan without requiring the item to be returned
Use this workflow when:
- A patron pays for a Lost item and will not be returning it
- Staff need to finalize the loan and remove it from the patron’s account
- Replacement costs have been collected and the item is considered permanently lost
Note: Without using the Lost and Paid functionality, items may remain on the patron’s account in Lost status even after payment, leading to confusion and inaccurate loan records.
##### **Required Roles**
- Fulfillment Operator
- Circulation Desk Manager
**1: Locate the Patron Record** Navigate to Fulfillment > Checkout/Checkin > Manage Patron Services> Search for and open the patron record
**2: Access the Payment Screen** Select the <Pay> button next to the Active Balance
[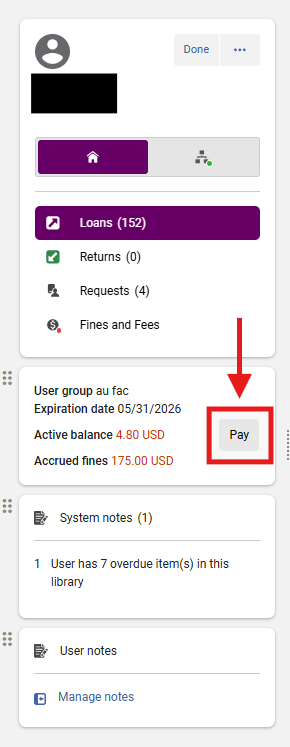](https://alma-documentation-bookstack.azurewebsites.net/uploads/images/gallery/2026-03/3wsimage.png)
**5: Select <View Fines and fees full list>** Selecting specific fines ensures that only the intended lost item charge is processed and that other fines are not accidentally paid or altered
[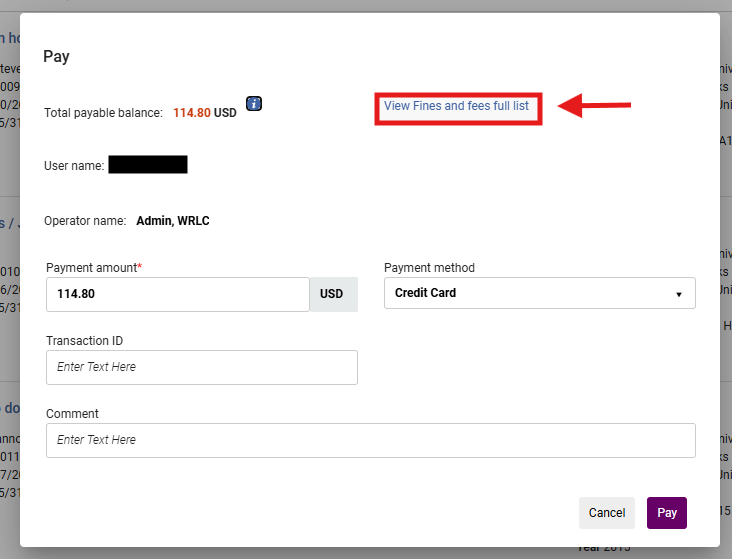](https://alma-documentation-bookstack.azurewebsites.net/uploads/images/gallery/2026-03/ZT1image.png)
**6. My Institution - Fines and Fees** Locate the Lost item from the resulting list Fines and Fee full list; Select Pay for the specific item you wish to resolve
[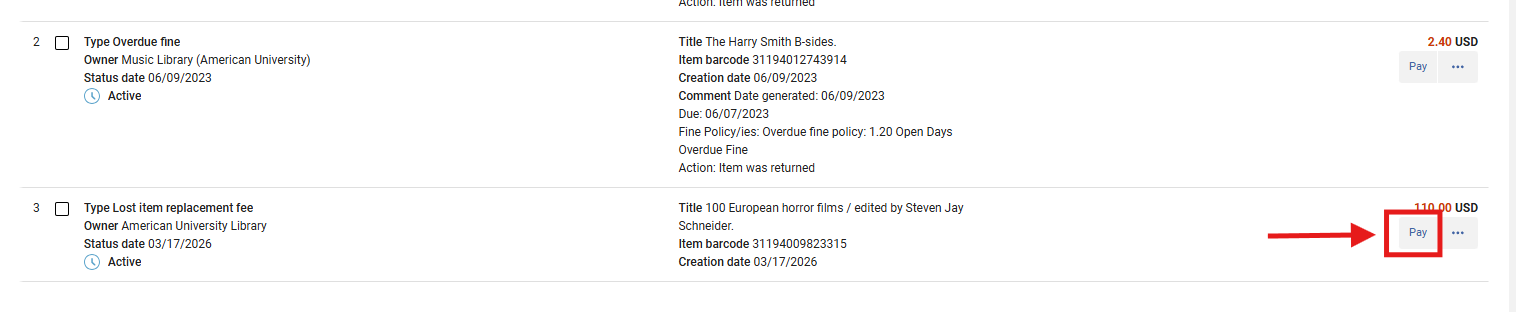](https://alma-documentation-bookstack.azurewebsites.net/uploads/images/gallery/2026-03/At7image.png)
**7: Process the Payment**
1. Confirm that the Lost Replacement Fee is reflecting as expected
2. Use the <Payment Method> drop-down menu to select the desired form of payment
3. Select the desired form of payment from the available options
4. Per your library's policy standards, if required, enter a Transaction ID
5. Per your library's policy standards, if required, enter a Comment
6. Select <Pay>
[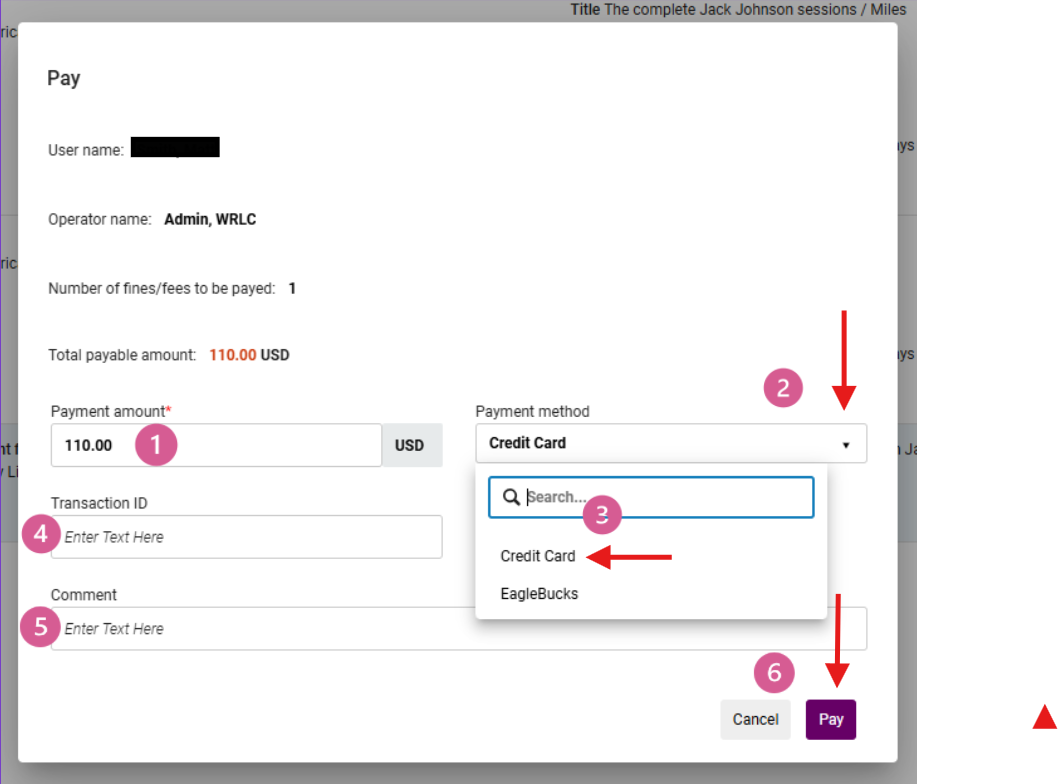](https://alma-documentation-bookstack.azurewebsites.net/uploads/images/gallery/2026-03/i3wimage.png)
**8: Confirm Loan Closure** After payment:
- A display confirmation notification will publish on the right-hand side of the screen with a confirmation note indicating the item has been successfully paid
- The Loan record will update to Paid and the fine amount will reflect a zero balance
- The item is removed from the patron’s active loans list
- The item’s process type changes to: Lost and Paid[](https://alma-documentation-bookstack.azurewebsites.net/uploads/images/gallery/2026-03/cAaimage.png)
##### **What Happens Automatically**
When configured correctly and applied to Alma-native lost loans:
- The loan is closed
- The item is no longer associated with the patron
- The replacement fee is recorded as paid
- The item remains in a non-circulating lost status
##### **Frequently Asked Questions**
- *Why didn’t the item disappear from the patron’s account after payment?*
- The **close\_paid\_lost\_loan** parameter may not be enabled, or the item may be a migrated lost loan.
- *What does “Lost and Paid” mean?*
- The patron has paid for the item, and the loan is closed without requiring return.
- *Can the item still be returned later?*
- Yes. If returned, staff may need to:
- Adjust or refund fees
- Update item status manually
---
##### **0% Lost Item Replacement Fee Refund Ratio**
**NOTE: To maintain compliance with WRLC Alma Fulfillment Network (AFN) Lending agreed practices, the WRLC FN Lending Terms of Use (TOU) Lost Item Replacement Fee Refund Ratio policy must be configured to 0%.**
**Configuring this policy to 0% ensures that replacement fees paid for lost items are not automatically converted into patron account credits if the item is later returned in Alma.**
**Because credits generated from returned Lost and Paid items are treated differently from standard fines and fees in Alma, they cannot always be removed or waived through normal staff workflows. For WRLC FN Lending TOUs, the Lost Item Replacement Fee Refund Ratio policy must therefore remain configured to 0%.**
1. Item ages into Lost status or is manually updated to Lost by library staff
2. Patron pays the replacement fee
3. Loan status changes to Lost and Paid
4. Patron later returns the item
5. Alma evaluates the return against the configured Lost Item Replacement Fee Refund Ratio policy
6. Item status changes to Item in Place
7. Alma automatically posts a credit/refund to the patron account based on the configured refund ratio policy
If a library has configured the <Lost Item Replacement Fee Refund Ratio> to 100%, then the full Lost Item Replacement Fee Refund will appear as a credit on the patron's account if the item is paid then returned at a later date.
[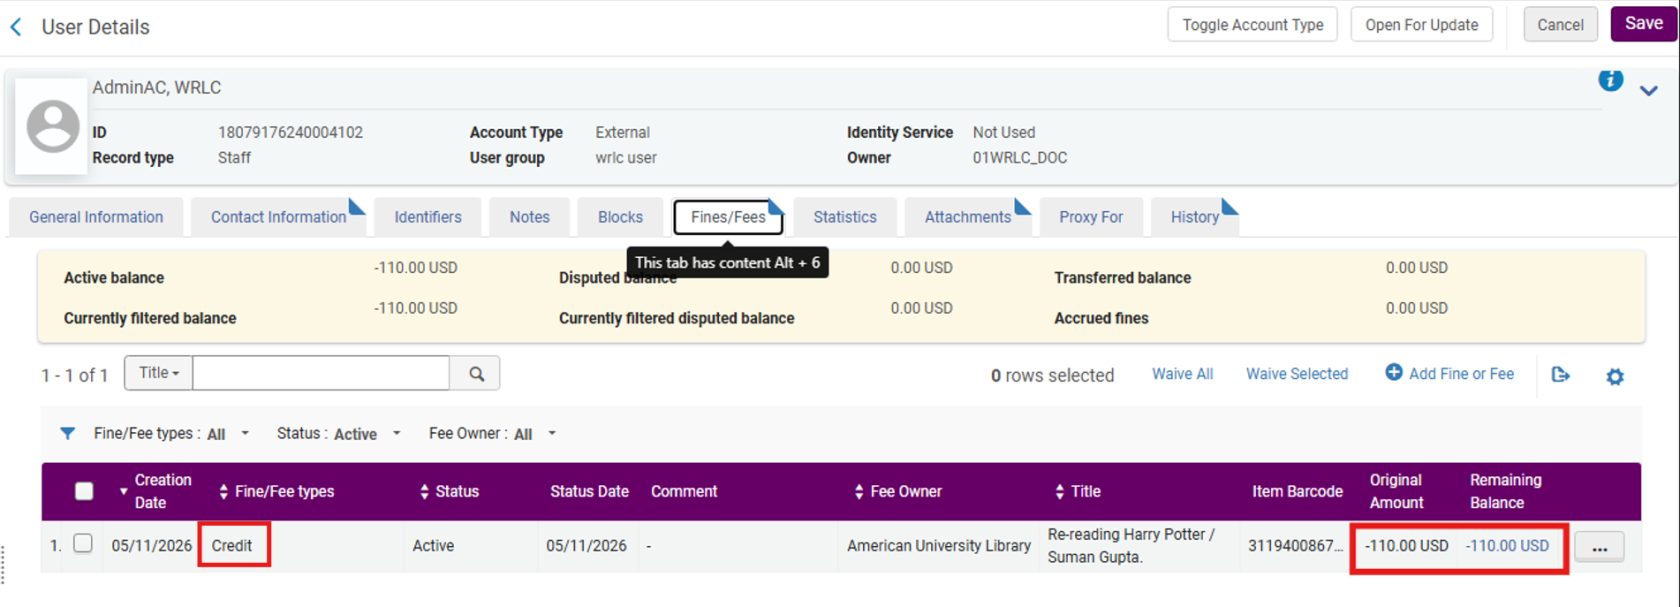](https://alma-documentation-bookstack.azurewebsites.net/uploads/images/gallery/2026-05/jBeimage.png)
If this is not the desired configuration, then the <Lost Item Replacement Fee Refund Ratio> should be configured to a zero amount.
**Configure Refund Ratio from 100% to 0%**
**1. Navigate to:** Configuration> Fulfillment> Physical Fulfillment> Terms of Use and Policies
- Set <Terms of Use Type> to Loan
- Locate the desired TOU (for example: WRLC FN Lending)
- From the row action menu, select Edit
[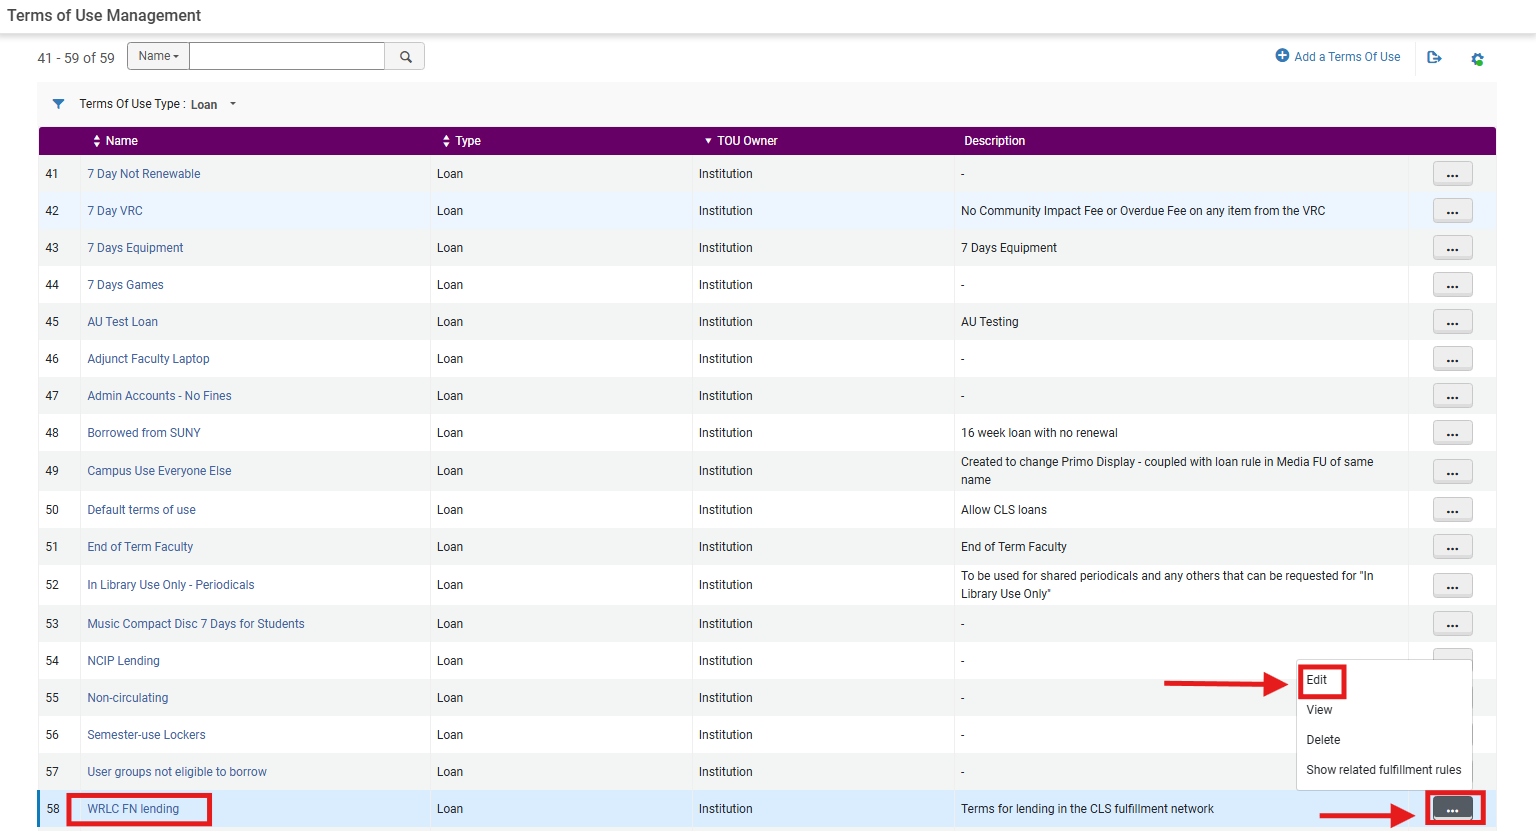](https://alma-documentation-bookstack.azurewebsites.net/uploads/images/gallery/2026-05/FgYimage.png)
**2. Add a new Lost Item Replacement Fee Refund Ratio policy,** from the <Terms of Use Policies> menu:
- Locate Policy Type: <Lost Item Replacement Fee Refund Ratio>
- From the action row drop-down menu, select Add Policy
[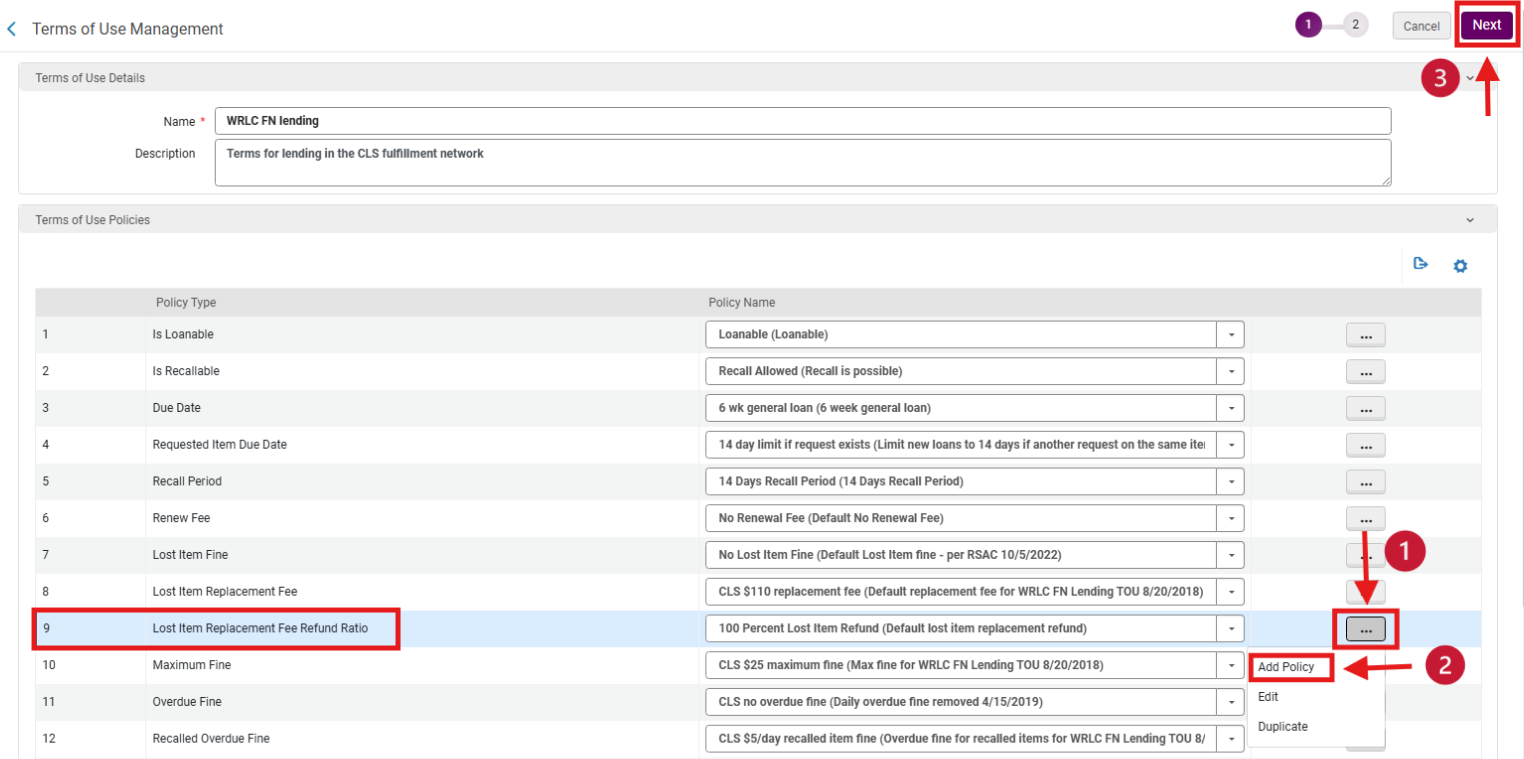](https://alma-documentation-bookstack.azurewebsites.net/uploads/images/gallery/2026-05/jhKimage.png)
**3. Configure the new policy,** on the <Policy Details> page:
- Enter new Policy Name <0% Lost Item Replacement Fee Refund Ratio>
- Enter a Policy Description if desired
- In the <Value (between 0-100%)> field enter 0
- If appropriate to library policy, set <Default Policy> = True
- Select Save
[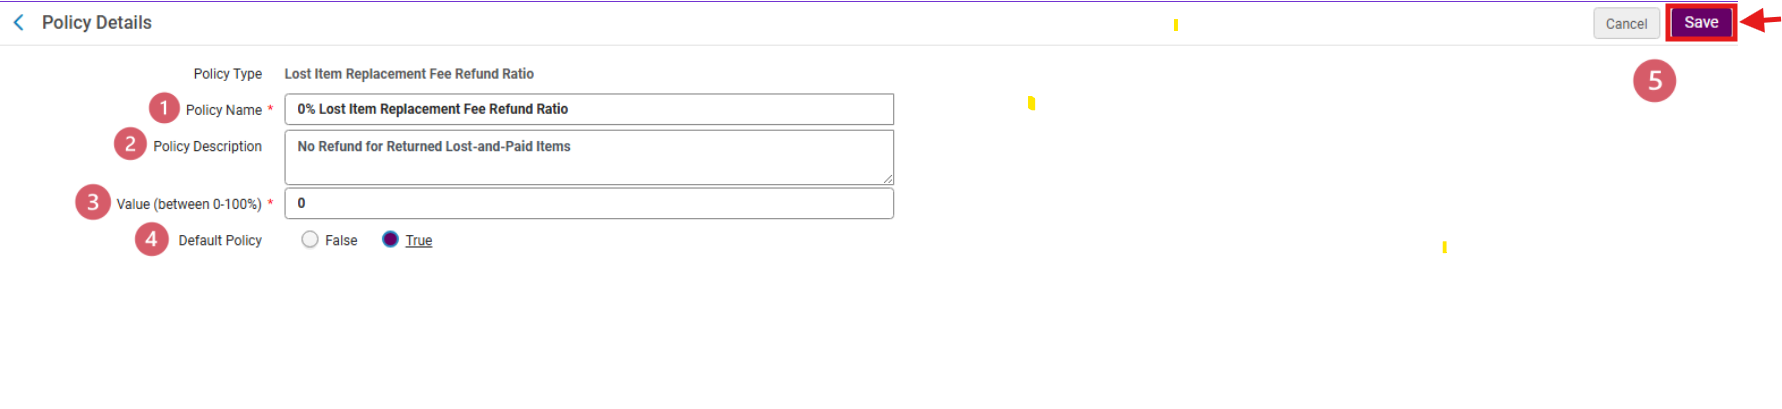](https://alma-documentation-bookstack.azurewebsites.net/uploads/images/gallery/2026-05/cTHimage.png)
**4. Apply the new policy** using the Policy Name drop-down menu, select the newly configured<0% Lost Item Replacement Fee Refund Ratio>; select Next
[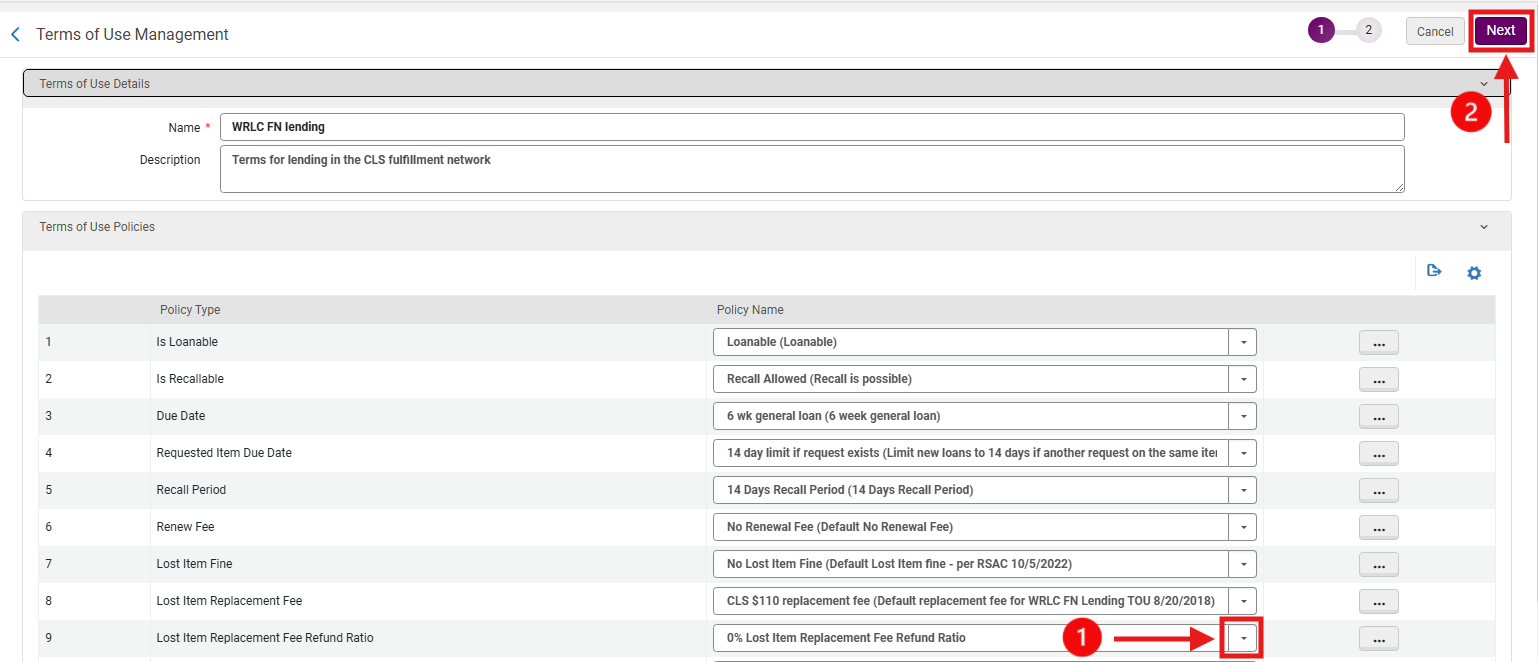](https://alma-documentation-bookstack.azurewebsites.net/uploads/images/gallery/2026-05/673image.png)
**5. Save the updated Terms of Use** on the Terms of Use Confirmation page, confirm that the <Lost Item Replacement Fee Refund Ratio> policy has been updated; select Save
[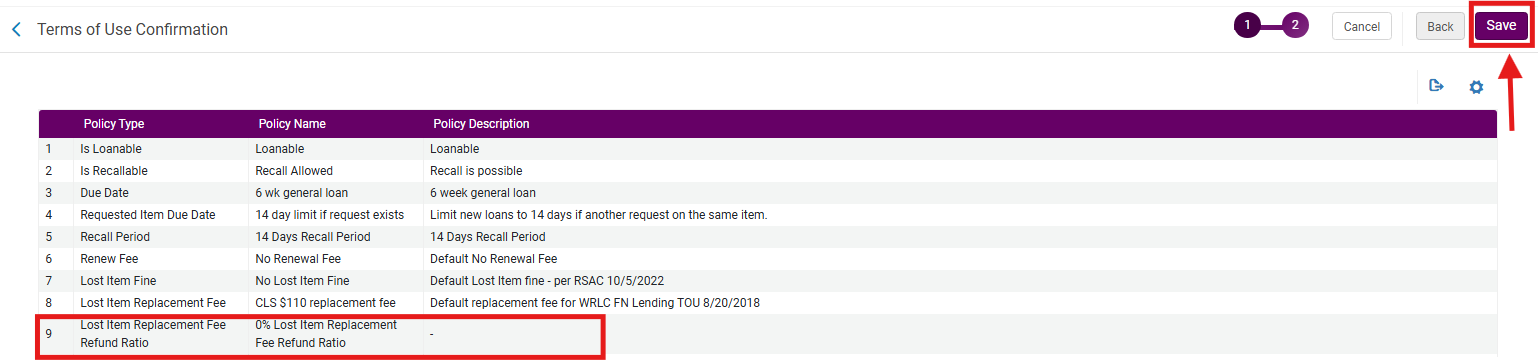](https://alma-documentation-bookstack.azurewebsites.net/uploads/images/gallery/2026-05/Vefimage.png)
# Item's Home Institution: Reporting on Lost Items
This workflow explains how to:
- Search for items in Alma that are currently marked as <Lost>
- Review the Found Lost Items Report to identify items that have been returned and had their associated fees automatically adjusted
Use this workflow when:
- Monitoring lost materials in your local collection
- Supporting billing, reconciliation, or audit processes
- Identifying items that have been returned after being declared lost
- Coordinating with bursar or financial systems to ensure accurate fee removal
##### **Required Roles**
- Fulfillment Operator
- Circulation Desk Manager
- Access Services Manager
##### **PART A: Searching for Items Marked as <Lost>**
**1: Open Advanced Search** Select the <Advanced Search> link in Alma
[](https://alma-documentation-bookstack.azurewebsites.net/uploads/images/gallery/2026-03/ibGimage.png)
**3: Apply Process Type Filter**
- In the search criteria:
- Select <Physical Item: Process Type>
- Set the operator to <Equals>
- Select <Lost>
**4: Run the Search** Click <Search>
[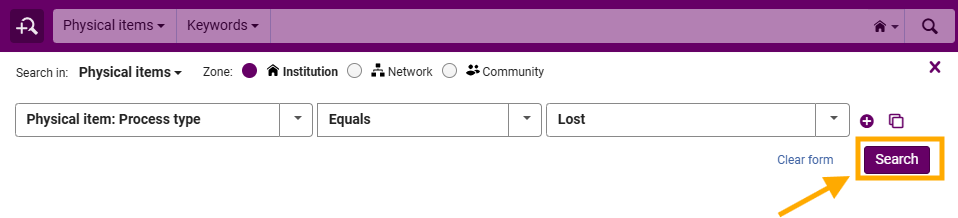](https://alma-documentation-bookstack.azurewebsites.net/uploads/images/gallery/2026-03/HDfimage.png)
**5: Review Results** The results list will display all items currently marked as Lost
- Review item details as needed, including:
- Location
- Barcode
- Associated patron (via loan record)
- You can also use the Export icon drop-down menu to download an Excel spreadsheet of the report; Alma provides two options when exporting results to Excel. These options determine how much data is included and how it is structured in the exported file:
- <Excel Current View> Exports only the fields that are currently visible on the screen.
- What this includes:
- Columns displayed in your current results view
- Any column customizations you have applied (for example, reordered or hidden fields)
- A simplified dataset focused on what staff are actively viewing
- When to use this option:
- Quick review or sharing of visible results
- Basic reporting or troubleshooting
- Situations where only key fields are needed
- <Excel All Fields> Exports a complete dataset for each record, including fields that are not visible in the current view.
- What this includes:
- All available metadata for the record
- Additional system fields not displayed in the UI
- More detailed and comprehensive information
- When to use this option:
- Detailed analysis or auditing
- Situations where hidden or backend data may be needed
[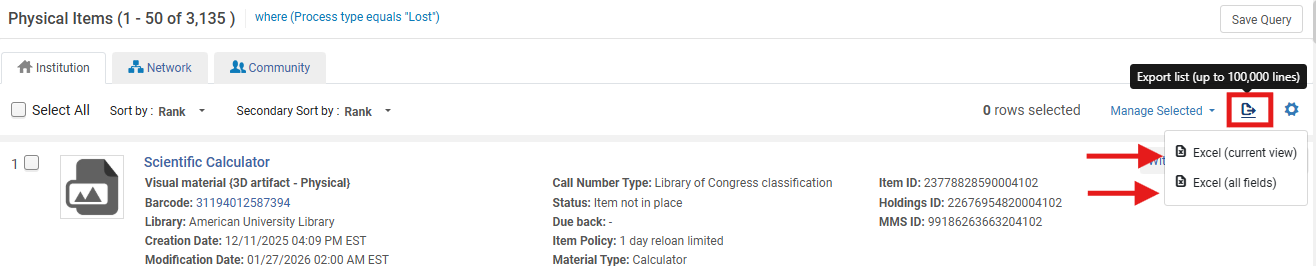](https://alma-documentation-bookstack.azurewebsites.net/uploads/images/gallery/2026-03/LPfimage.png)
#####
##### **What Happens Automatically in Alma: When a Lost item is returned:**
- Alma removes or adjusts the lost item fee (based on configuration)
- The loan is updated or closed
- The item is no longer in Lost status
- The transaction is recorded in the Found Lost Items Report
##### **Frequently Asked Questions**
- *Why should I search for lost items regularly?*
- To monitor outstanding materials and support reconciliation, billing, and collection management.
- *Do I need to remove fees manually in Alma?*
- Usually no. Alma handles this automatically based on configuration, but external systems may still require action.
- *What if an item still appears as lost after being returned?*
- Verify that the item was properly discharged and that the loan status updated correctly.
- *How often should the report be reviewed?*
- Follow your library's in-house policies for guidance
- *Does this report include CLS Lost items?*
- *No. CLS Lost items can only be provided from the Network Zone. However, you can always submit a [WRLC Service Desk](https://aladin-sp.wrlc.org/login?service=service_desk) ticket to make a request for a CLS NZ Loan Report of your library's patrons.*